Android Developer Verification — Package Name Registration
How to register an Android package name for developer verification: provide the package details, register your signing key, prove ownership by uploading a signed APK containing the adi-registration.properties file, and track the result.
The process differs slightly depending on whether your package name is new (never seen on Android) or existing (already has installs). This guide covers both.
Prerequisites
- The release signing key and keystore credentials (store password, key alias, key password)
- JDK installed (
keytoolis included) - Google Play Console access with identity verification already completed
- Your app's SHA-256 certificate fingerprint (how to obtain it)
Step 1 — Provide package name details
Common to both new and existing package names.
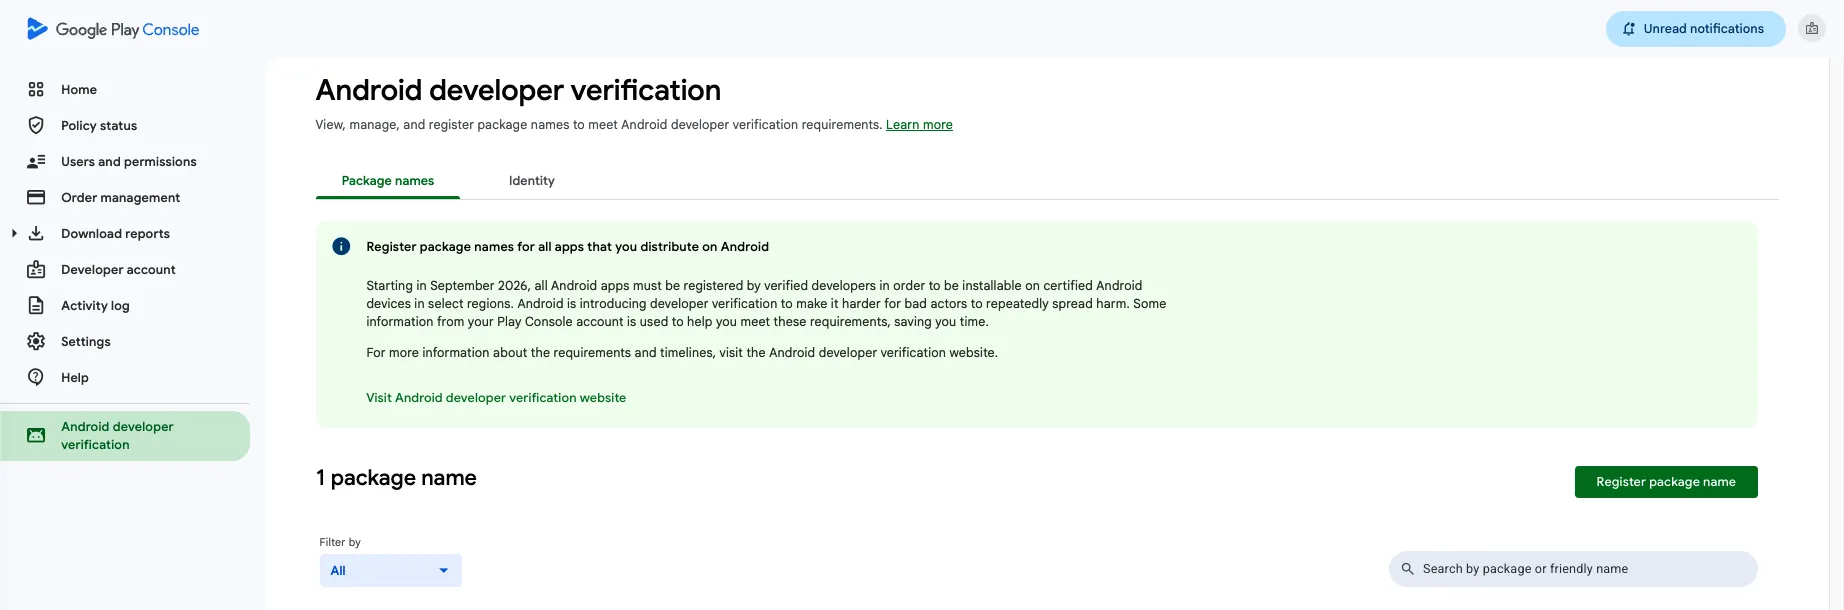
- Open Google Play Console and go to the Android developer verification page.
- On the Package names tab, select Register package name.
- Enter the package name you want to register.
- Provide a friendly name for easy identification within Play Console.
- Select Next to proceed.

Step 2 — Register your signing key
The next step depends on whether the package name is new or existing.
A. New package name
For a package name never seen on Android, you only need to provide the public certificate.
- Select Add key.
- Provide the public key certificate from your app's signing key pair.
- Enter your key and select Add key.
B. Existing package name
For a package name that already has installs, you select your key from a list of eligible fingerprints.
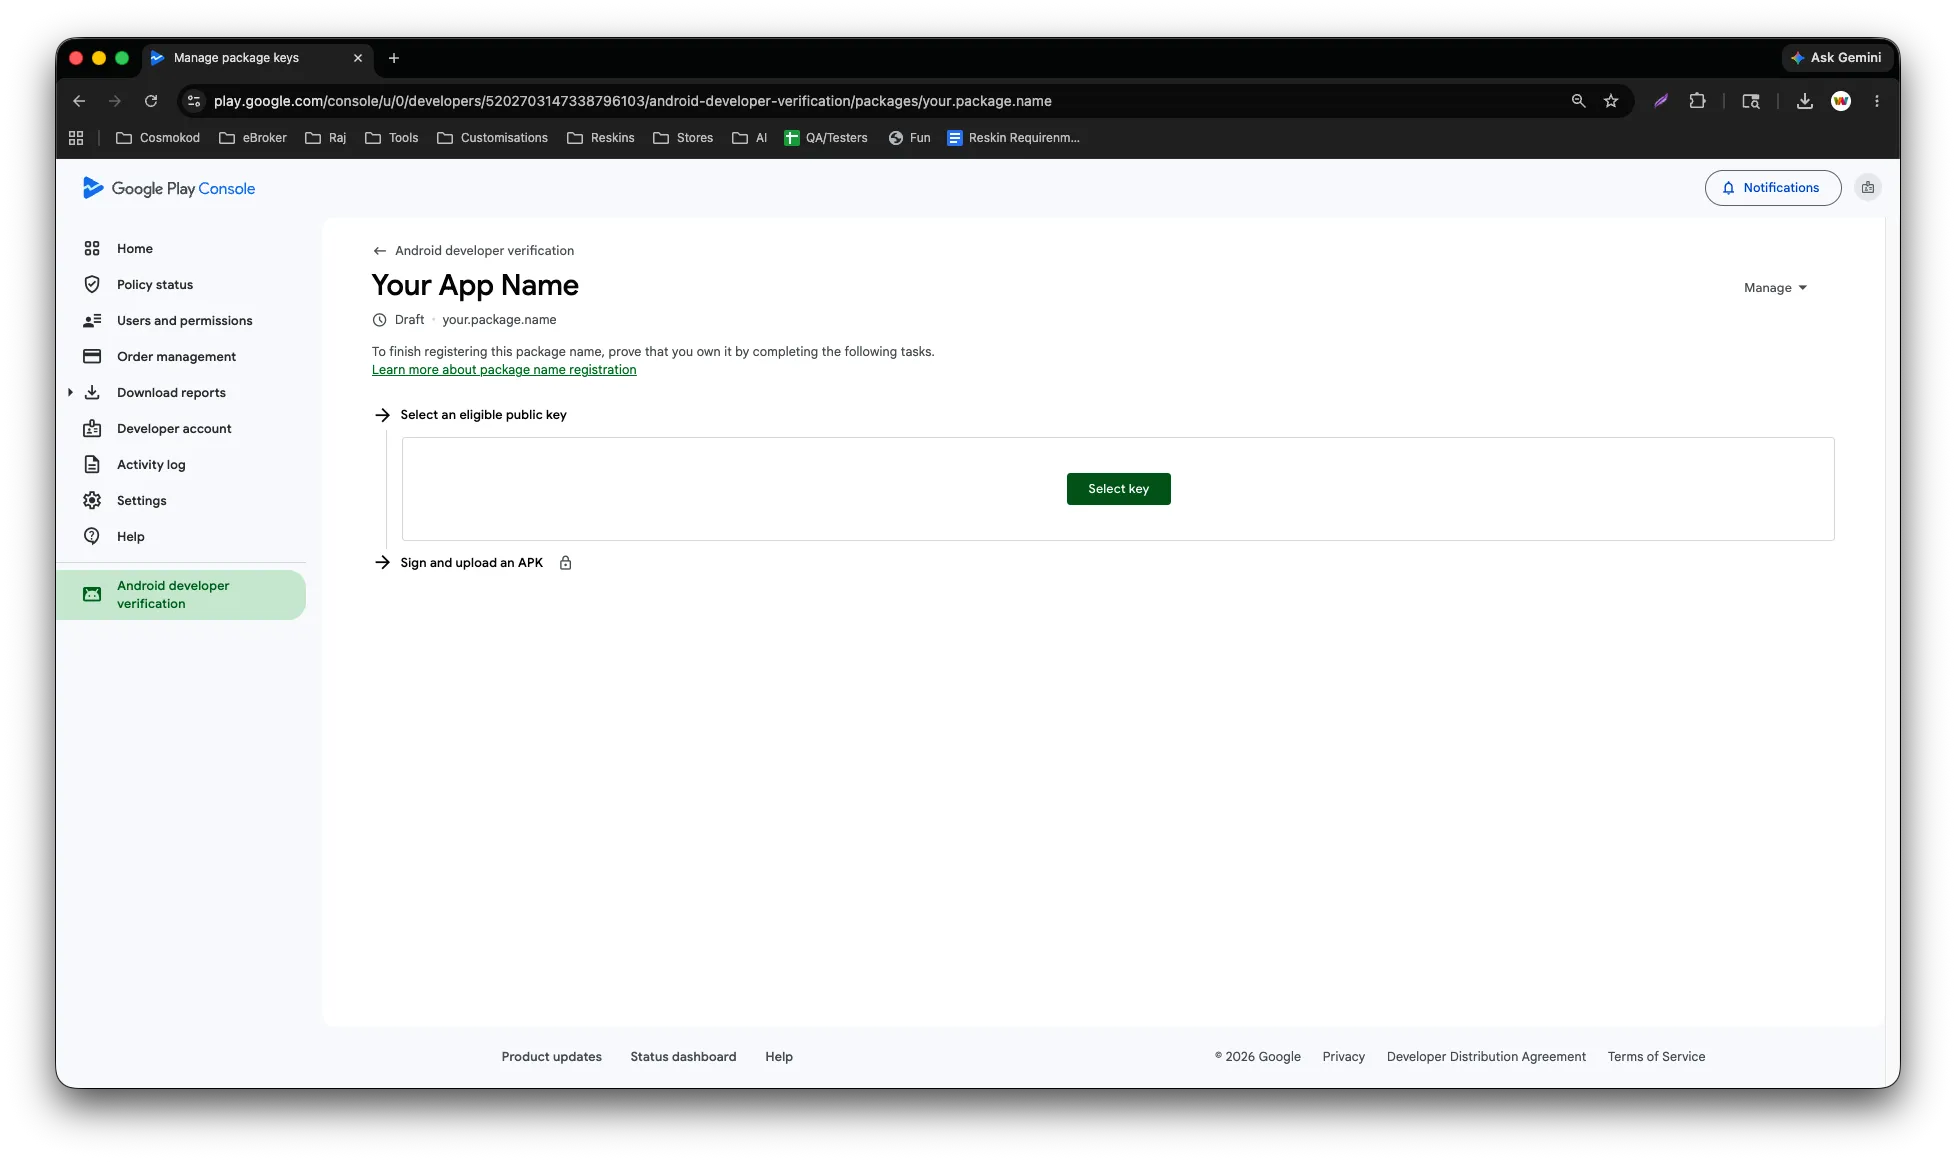
- Select Select key.
- A list of eligible public certificate fingerprints is shown — these can be used for direct registration.
- Scan or search the list for your certificate fingerprint.
- Select your key and select Add key.
- You return to the registration page, confirming the key has been added.
Eligibility follows Google's package-sharing rules (majority key holder, 50+ installs, or first-come-first-served). If your fingerprint is not listed, you can expand the other keys list and request to use the package name — but this requires submitting a rationale to Google and may be rejected.
Step 3 — Prove private key ownership (existing packages)
Existing package names require an APK signed with the private key as proof of ownership.
3.1 Copy the snippet
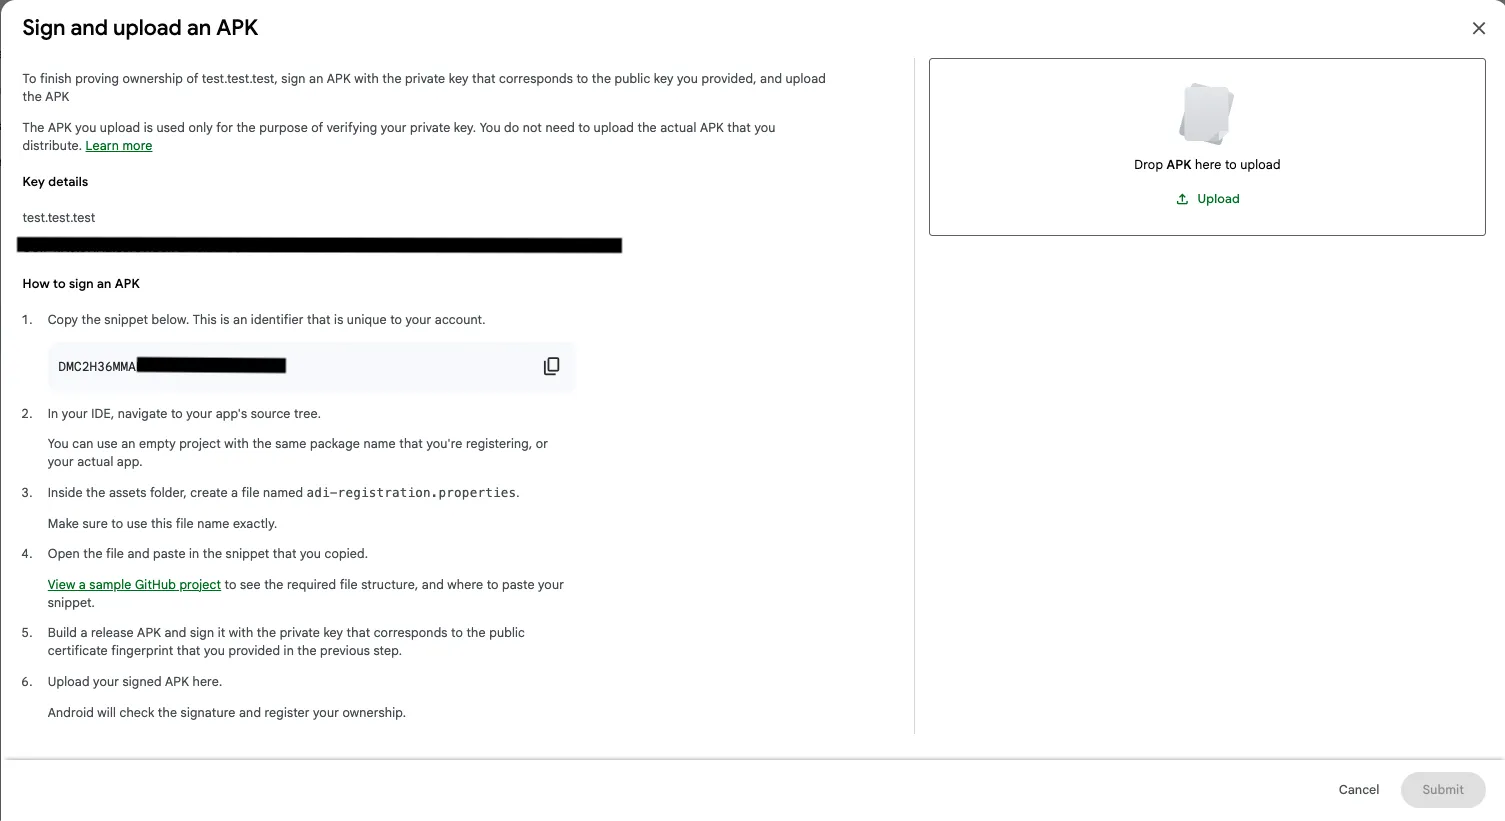
- Select Upload APK to open the ownership verification flow.
- The screen shows the package name, the selected SHA-256 certificate, and signing guidance.
- Copy the snippet — a unique identifier tied to your developer account.
3.2 Create the adi-registration.properties file
In your project's source tree, create the file at this exact path:
android/app/src/main/assets/adi-registration.properties
- Create the
assetsfolder if it does not already exist. - The filename must be exactly
adi-registration.properties— no.txtextension.
Paste the snippet into the file and save. Refer to Google's sample project on GitHub to confirm the correct structure.
The path must be exact. If the file is in the project root or any other folder, verification will fail.
3.3 Build and sign the release APK
flutter build apk
Output: ../build/app/outputs/flutter-apk
Build a release APK signed with the private key that corresponds to the registered certificate. The signature — via jarsigner or Gradle's signingConfigs — serves as the proof of ownership.
If the app's private signing key is delegated to a third-party platform (e.g. Samsung Galaxy Store): build and upload your APK/AAB to that platform, download the final signed APK from it, and upload that downloaded APK to Play Console in Step 3.4.
3.4 Upload the APK to Play Console
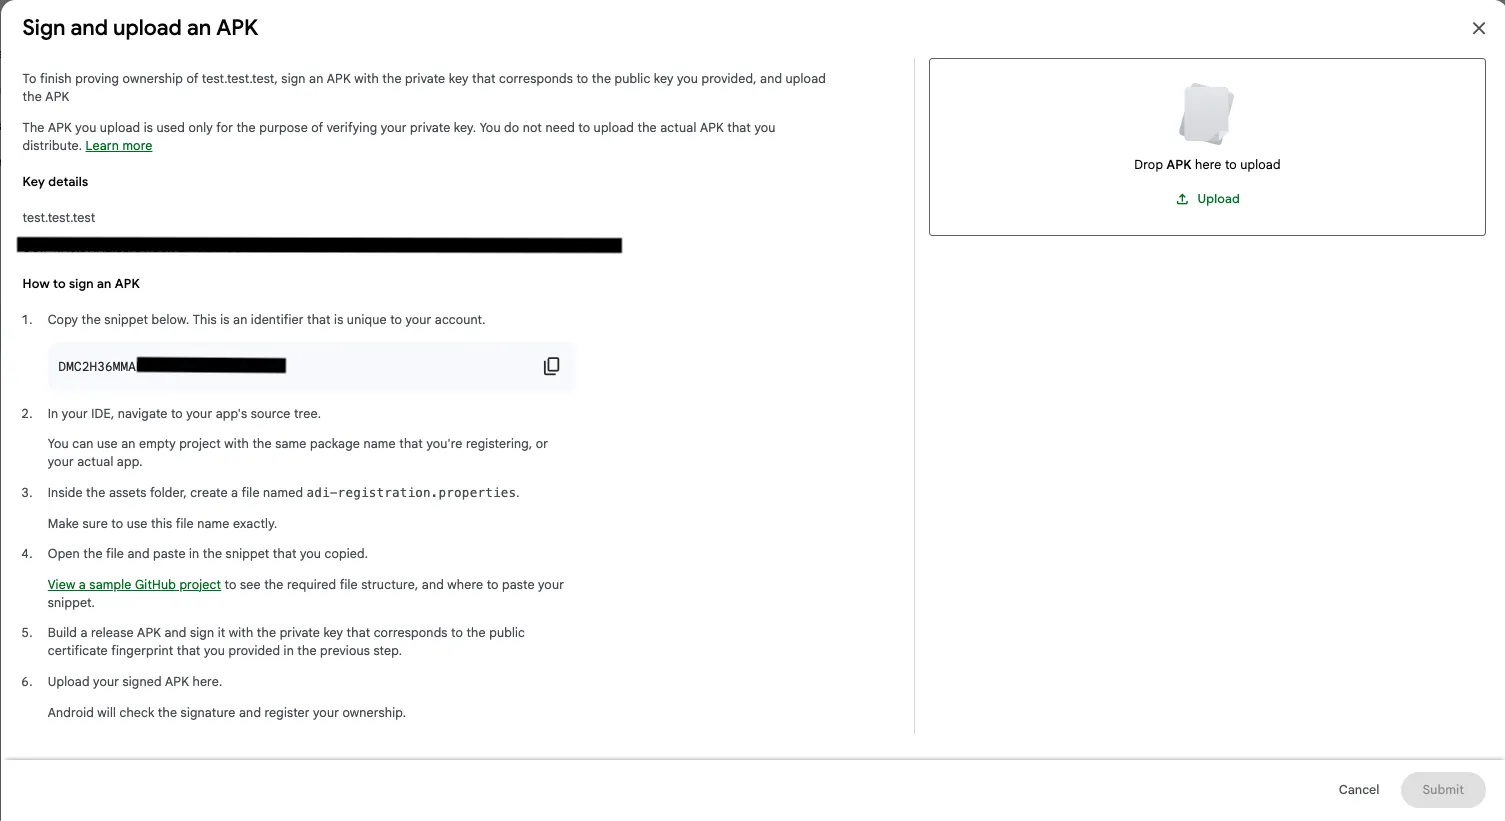
Return to the verification screen, select Upload, locate your signed release APK, and upload it. Android checks the signature and confirms the file contents.
Step 4 — Track the registration
Android formally registers the package name and links it to your verified developer identity.
- You receive an email notification on successful completion.
- You can monitor key and registration status on the Android developer verification page.
Troubleshooting
| Issue | Cause | Fix |
|---|---|---|
| File not found | File placed in project root, not the assets folder | Move it to android/app/src/main/assets/ |
| Signature mismatch | APK signed with the wrong / debug key | Sign with the private key matching the registered certificate |
| Wrong filename | File saved with a .txt extension | Rename to exactly adi-registration.properties |
| Key not eligible | Fingerprint not in the eligible list | Expand other keys and submit a request with a rationale |
For Expo / managed workflow projects, the standard JS bundler does not copy files into the native assets folder. Use a config plugin or prebuild so the file lands in android/app/src/main/assets/ inside the final APK.