iOS App Deployment
Prerequisites
Before starting the iOS deployment process, ensure you have:
- Apple Developer Account ($99/year)
- Your Flutter app ready for release
- Mac computer with Xcode installed
- Required assets:
- App icon (1024x1024 px)
- Screenshots for different devices (iPhone, iPad)
- Privacy policy URL
- App description
- Keywords
- Support URL
- Marketing URL (optional)
- App Store Connect account setup
Step-by-Step Guide
1. Developer Account Setup
- Visit Apple Developer Program
- Enroll in the program:
- Pay $99 annual fee
- Complete organization verification
- Set up payment profile
- Provide contact information
- Configure App Store Connect:
- Create app record
- Set up basic information
- Configure app capabilities
2. App Configuration
Before building your app, update these files:
Update pubspec.yaml
version: 1.0.0+1 # Format: version_name+version_code
Important Version Note:
- The version format is
version_name+version_code(e.g.,1.0.0+1)version_name(1.0.0): Represents the public version number shown to usersversion_code(1): Internal version number used by App Store- For every new release, you MUST increment the
version_codeby at least 1
3. Generate App Signing Certificate
- Open Xcode
- Go to Xcode → Settings → Accounts
- Add your Apple ID
- Create certificates:
- Development certificate
- Distribution certificate
- Create provisioning profiles:
- Development profile
- App Store profile
4. Build Your App
- Open terminal in project directory
- Run command:
flutter build ipa --release
- Optional flags:
--obfuscate- To protect your code--split-debug-info- For crash reporting
- Wait for build completion
- Find IPA file at:
build/ios/ipa/YourApp.ipa
5. App Store Connect Setup
Create App Record
- Log in to App Store Connect
- Click "My Apps"
- Click "+" to create new app
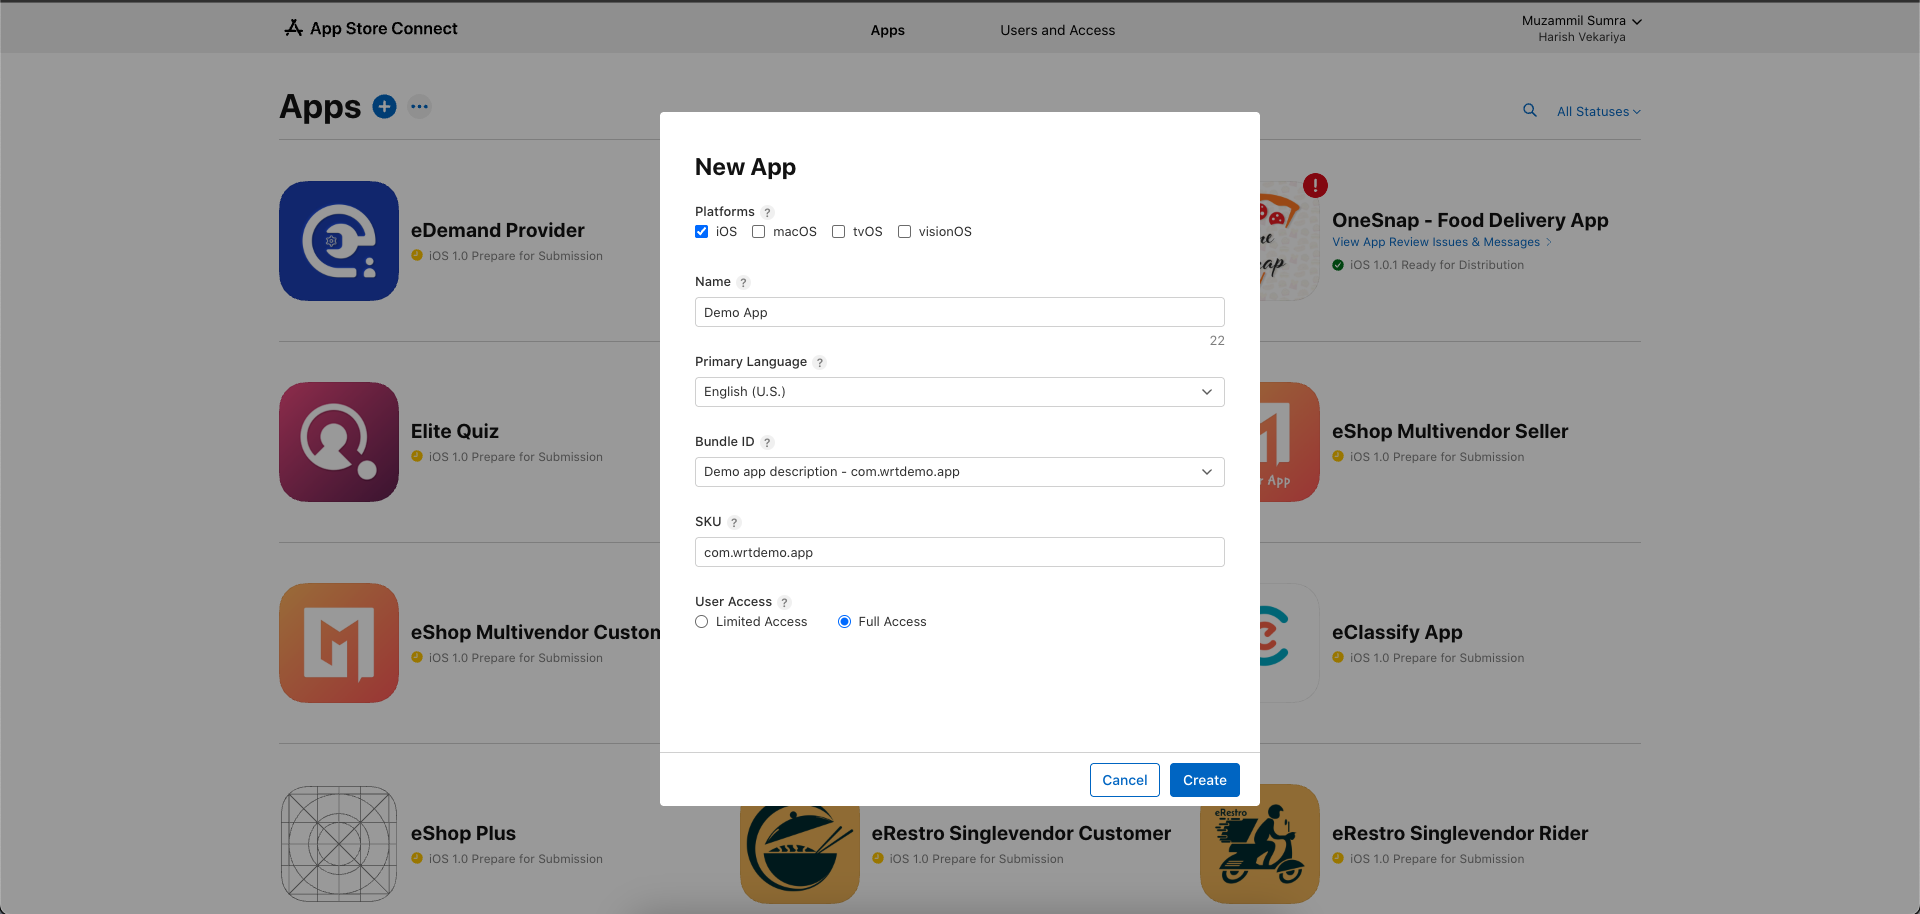
- Fill basic information:
- App name
- Bundle ID
- SKU
- User Access
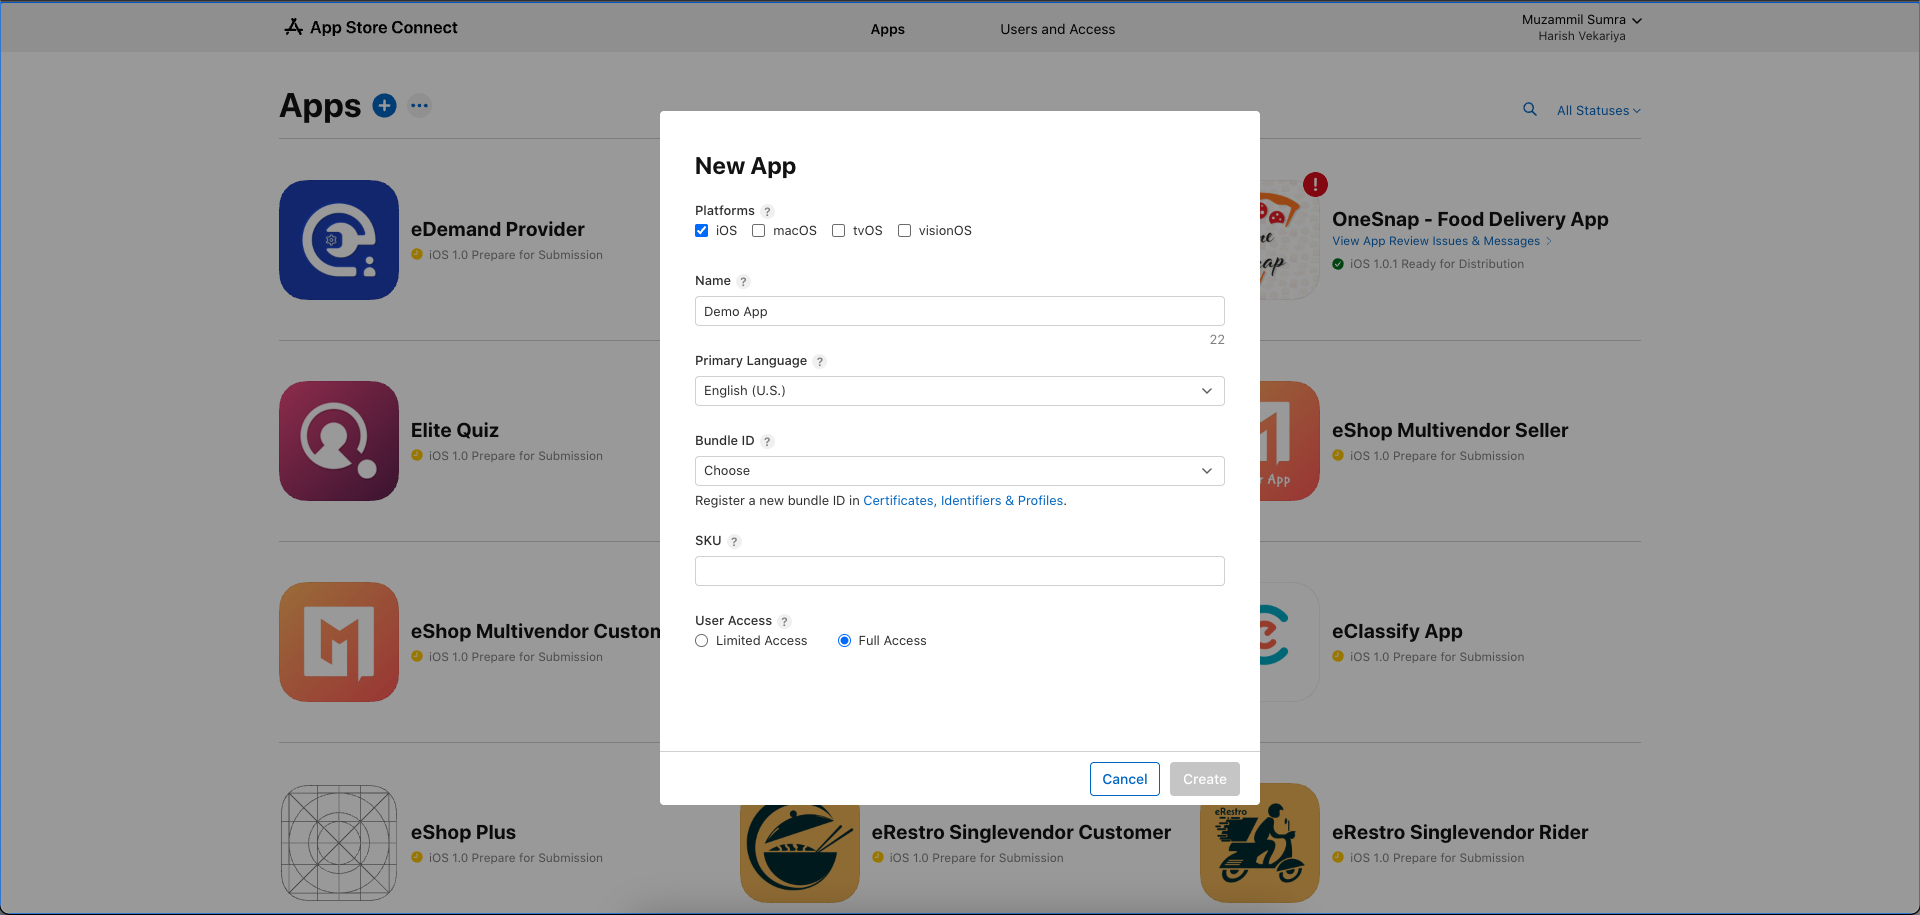
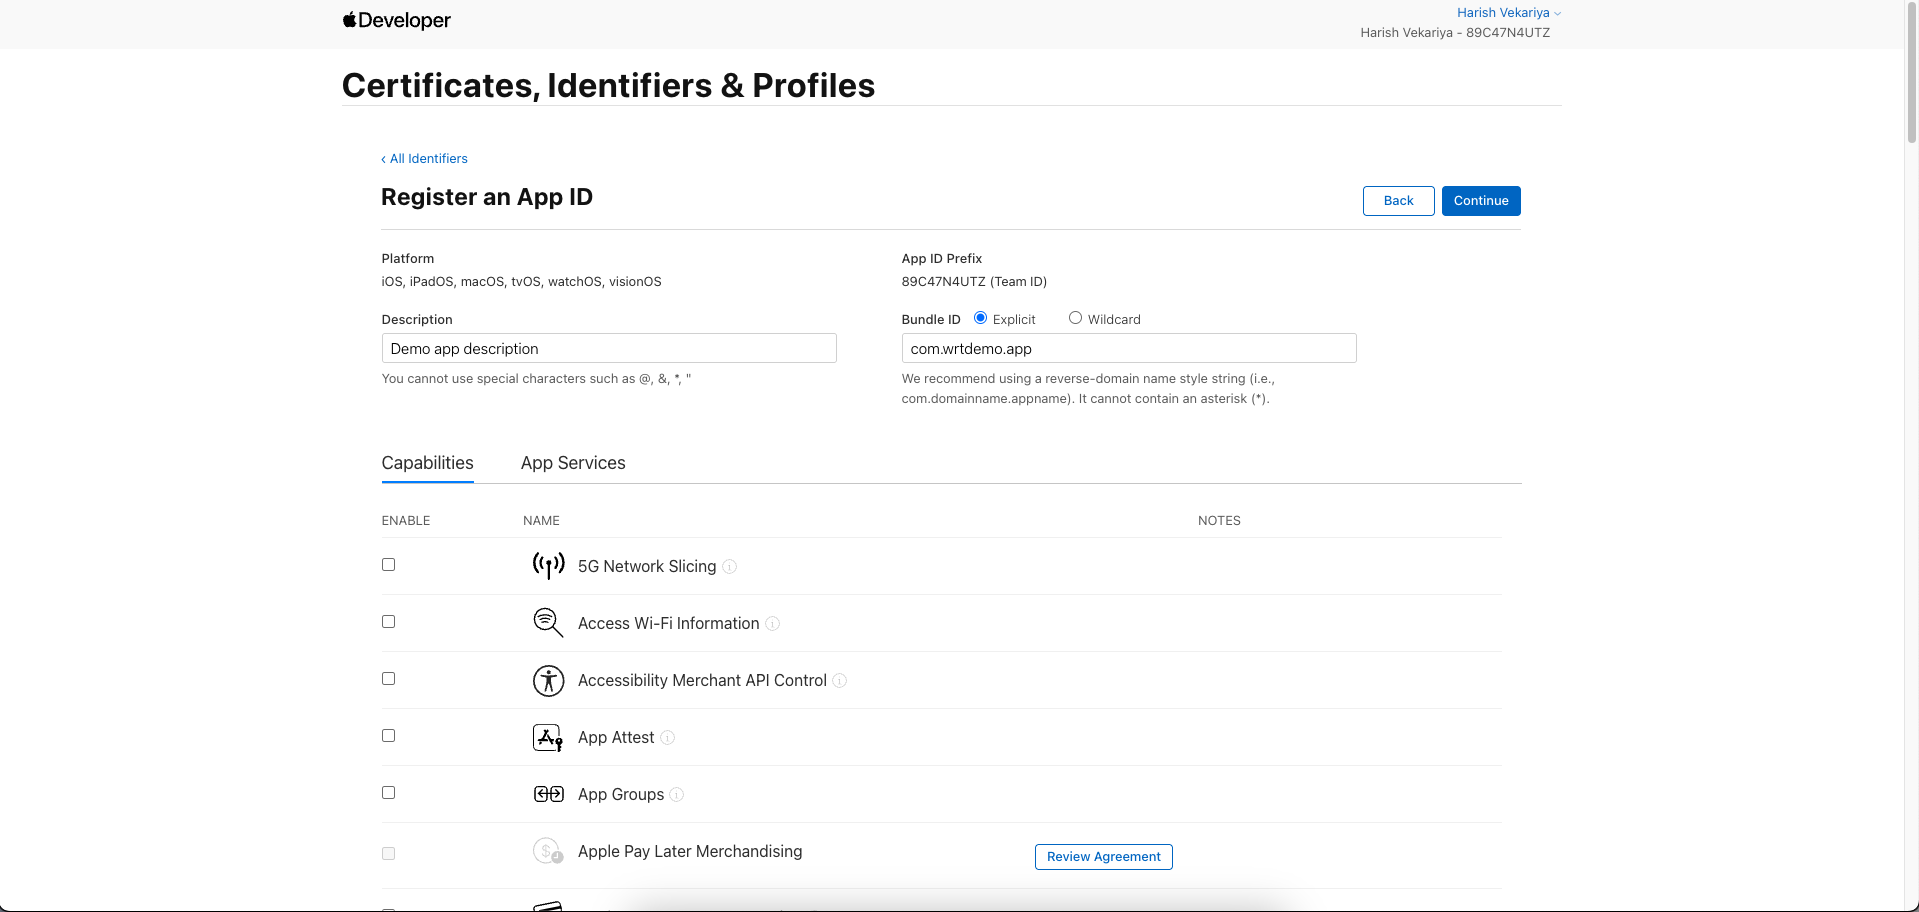
- Choose or create Bundle ID:
Bundle ID Creation can also be done automatically via Xcode if you enable automatic signing in your project settings.
- Click "Certificates, Identifiers & Profiles" in Apple Developer portal
- Go to "Identifiers" section
- Click "+" to register new Bundle ID if needed
- Format: com.companyname.appname (e.g., com.example.myapp)
- Select capabilities required for your app
- Register the Bundle ID
- Use this Bundle ID in both Xcode and App Store Connect
Complete App Information
- App Information:
- Privacy Policy URL
- Support URL
- Marketing URL (optional)
- App Store category
- Age rating
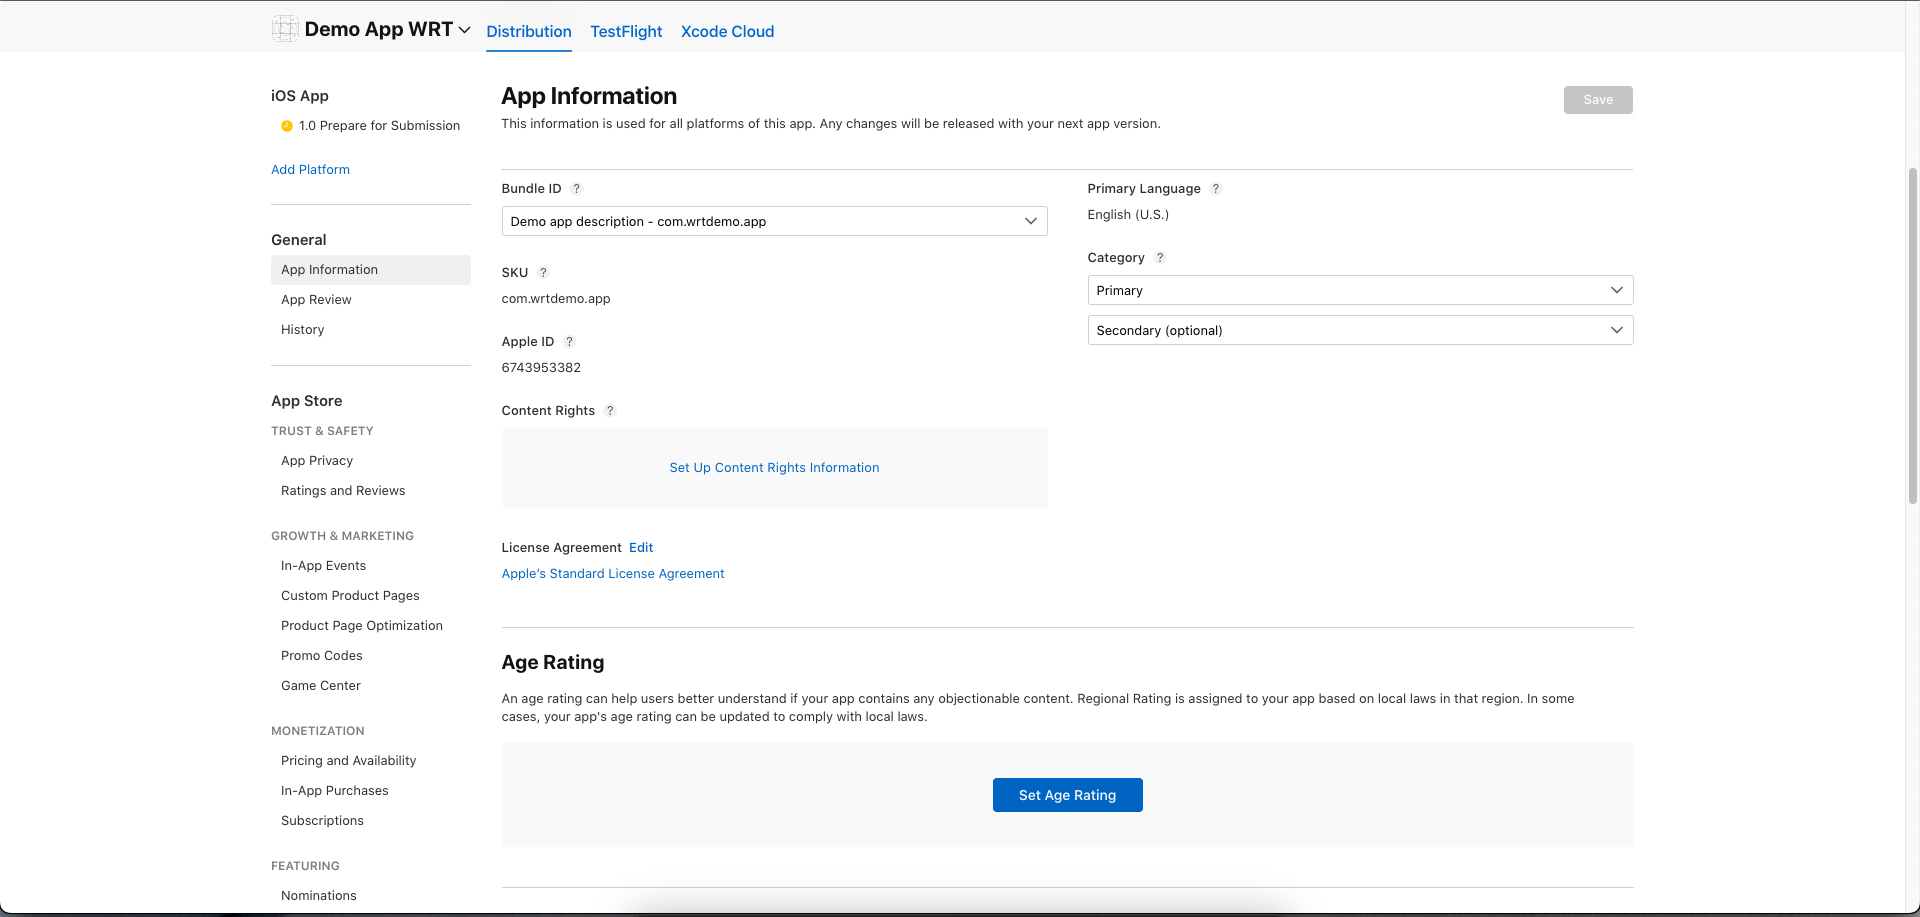
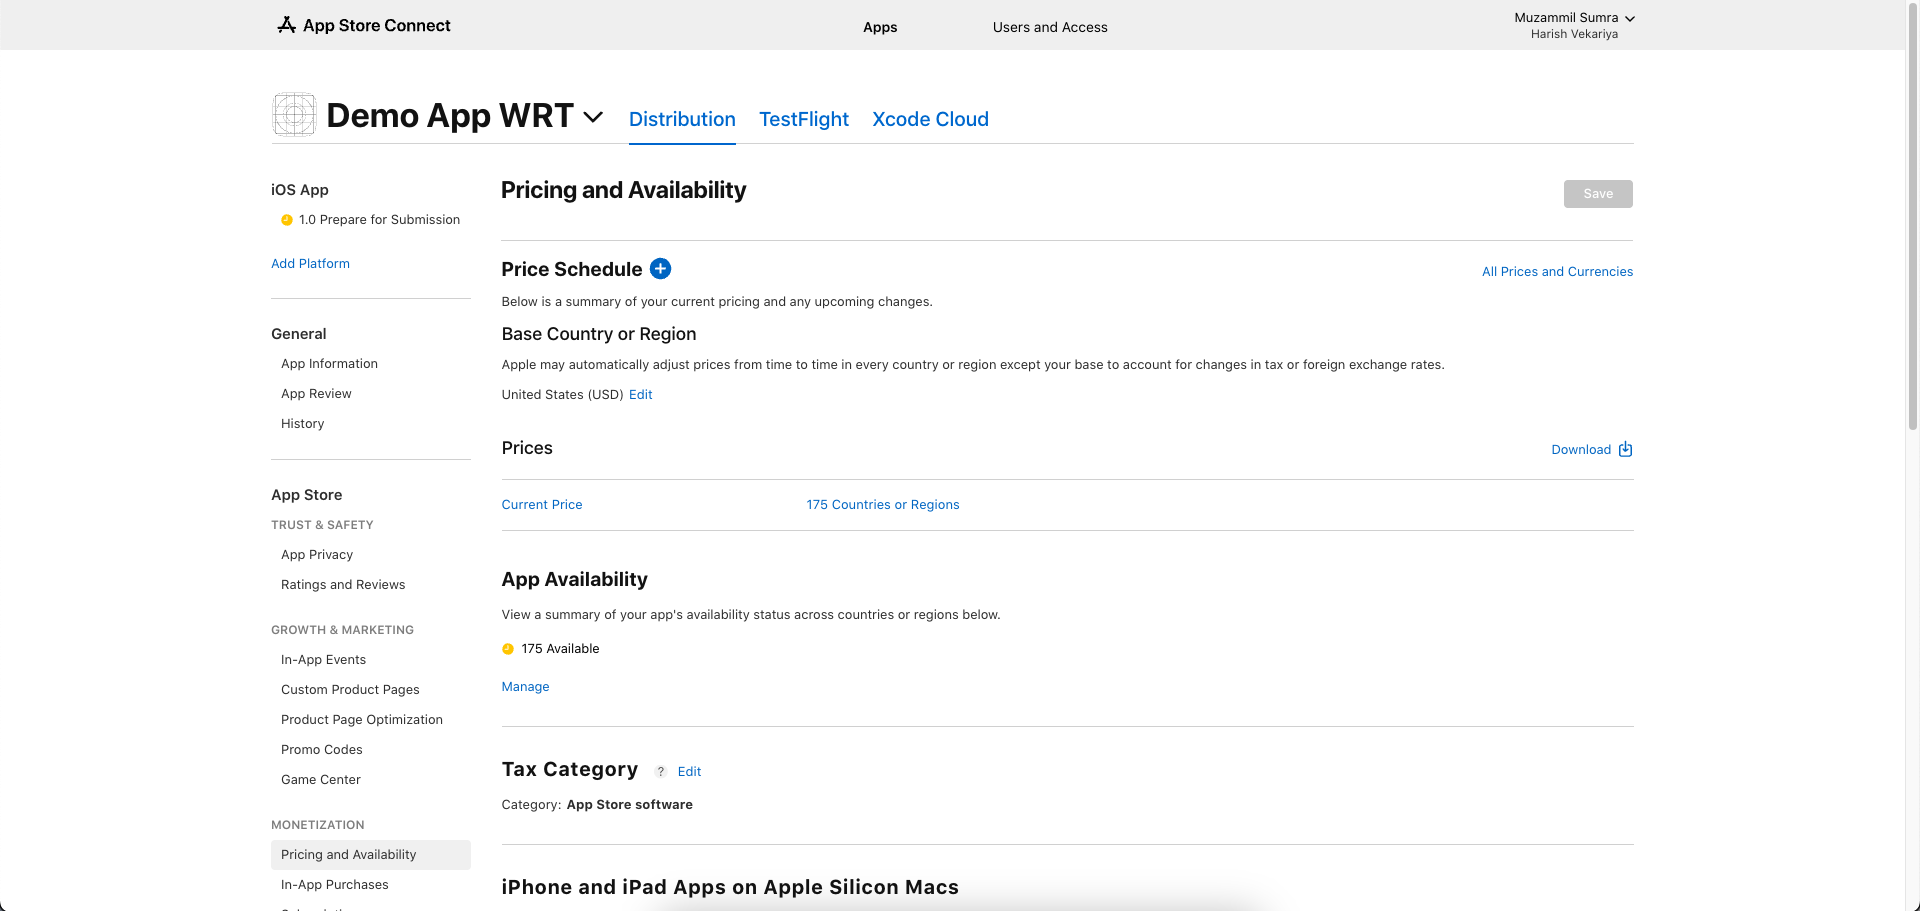
- Pricing and Availability:
- Price tier
- Available territories
- Release date
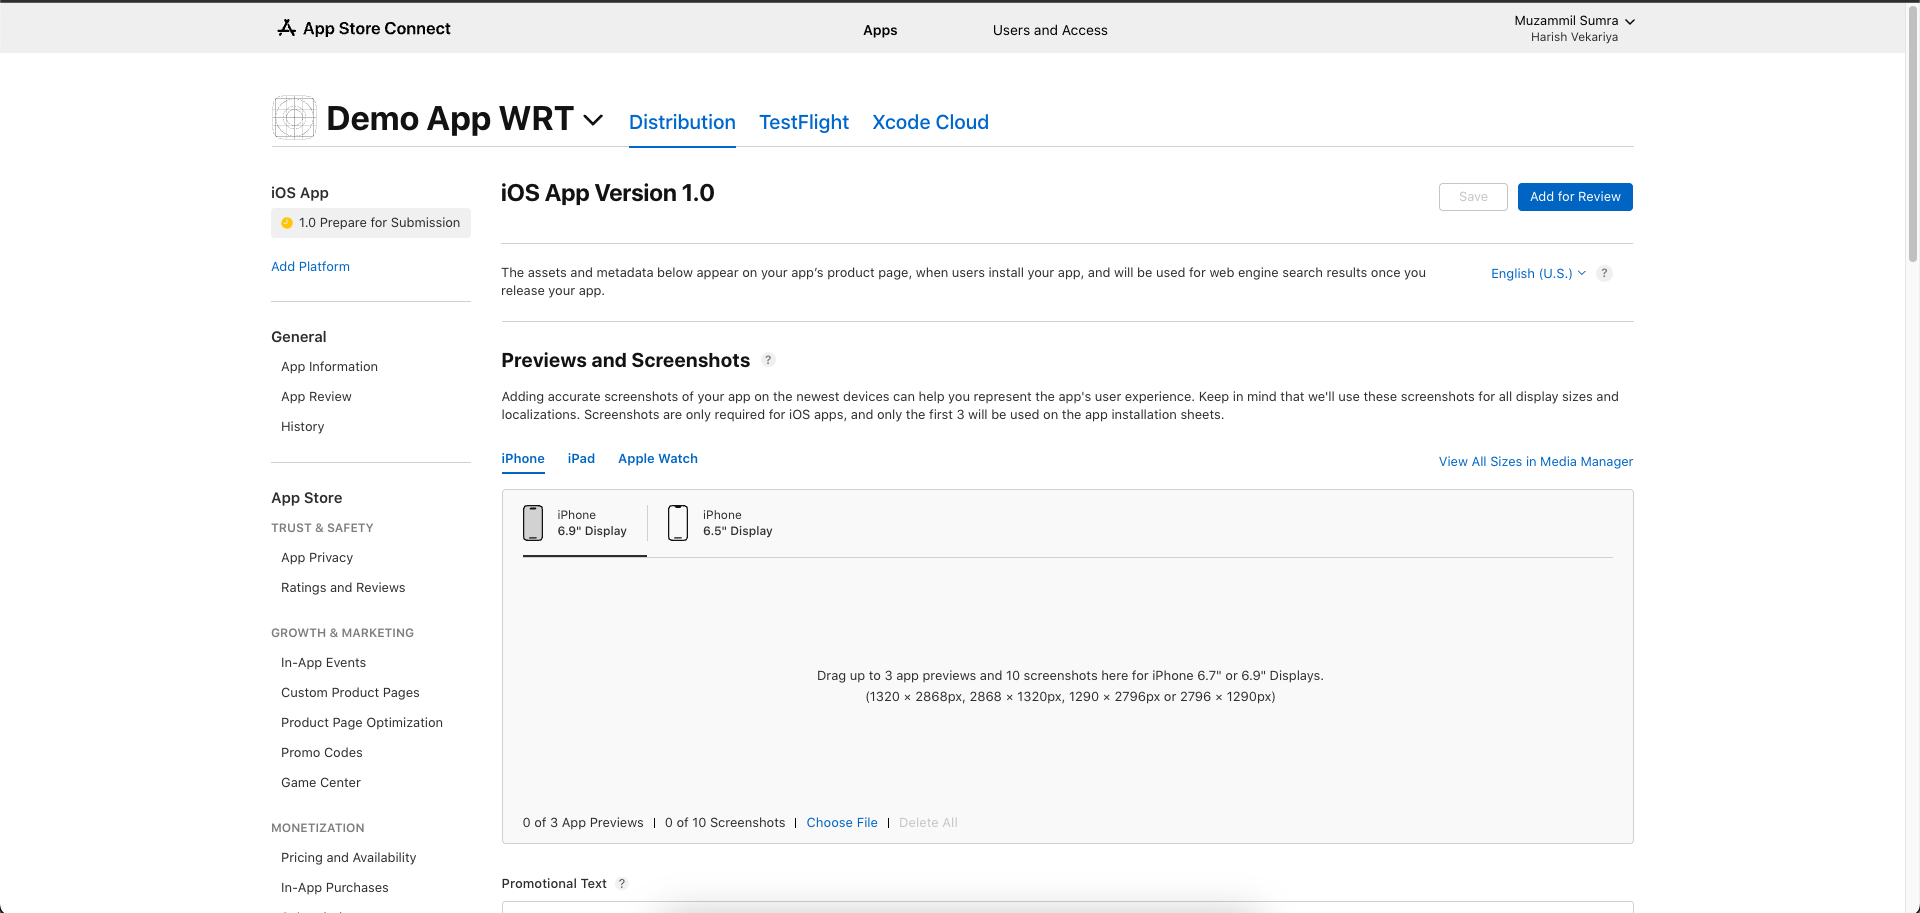
- App Store Screenshots:
- iPhone screenshots (6.5" Display)
- iPad screenshots (if supported)
- App Preview videos (optional)
-
App Description:
- Name (30 characters max)
- Subtitle (30 characters max)
- Keywords (100 characters max)
- Description (4000 characters max)
- What's New in This Version
-
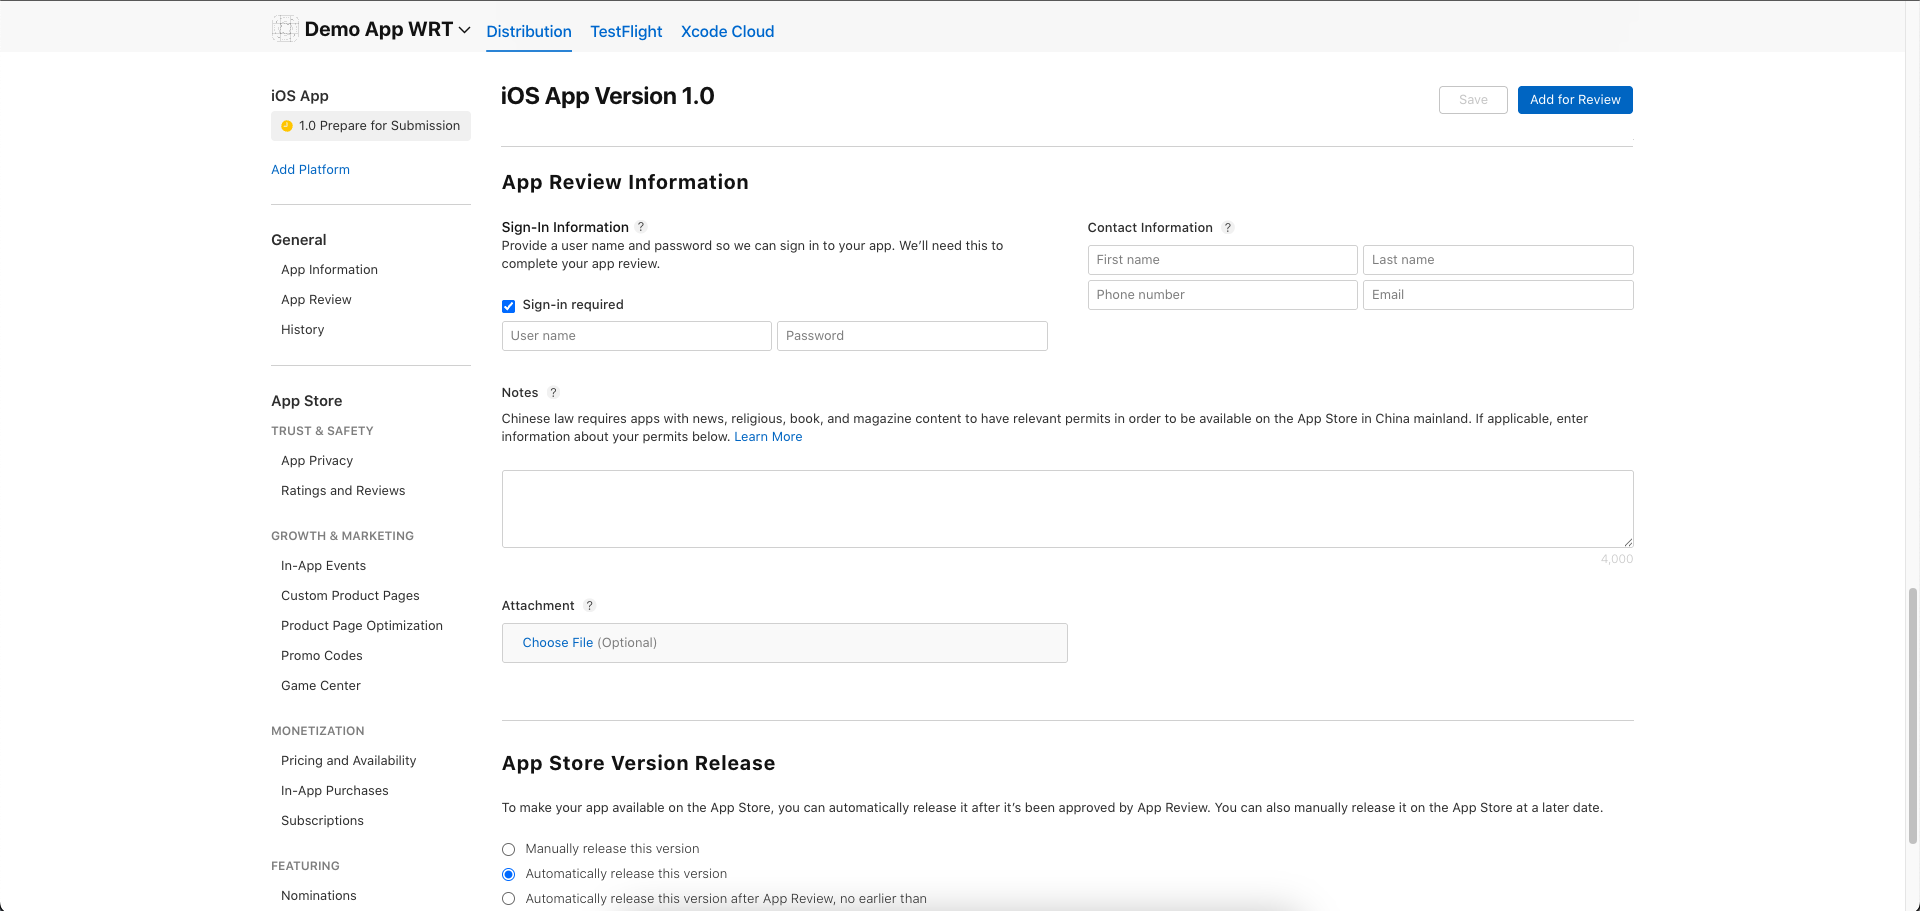
App Review Information
i. Contact Information:
- First name
- Last name
- Phone number
- Email address
ii. Demo Account (if login required):
- Username/email
- Password
- Any special instructions
iii. Notes for Review Team:
- App functionality description
- Special setup instructions
- Test account details
- Known issues or clarifications
- Beta/sandbox environment details
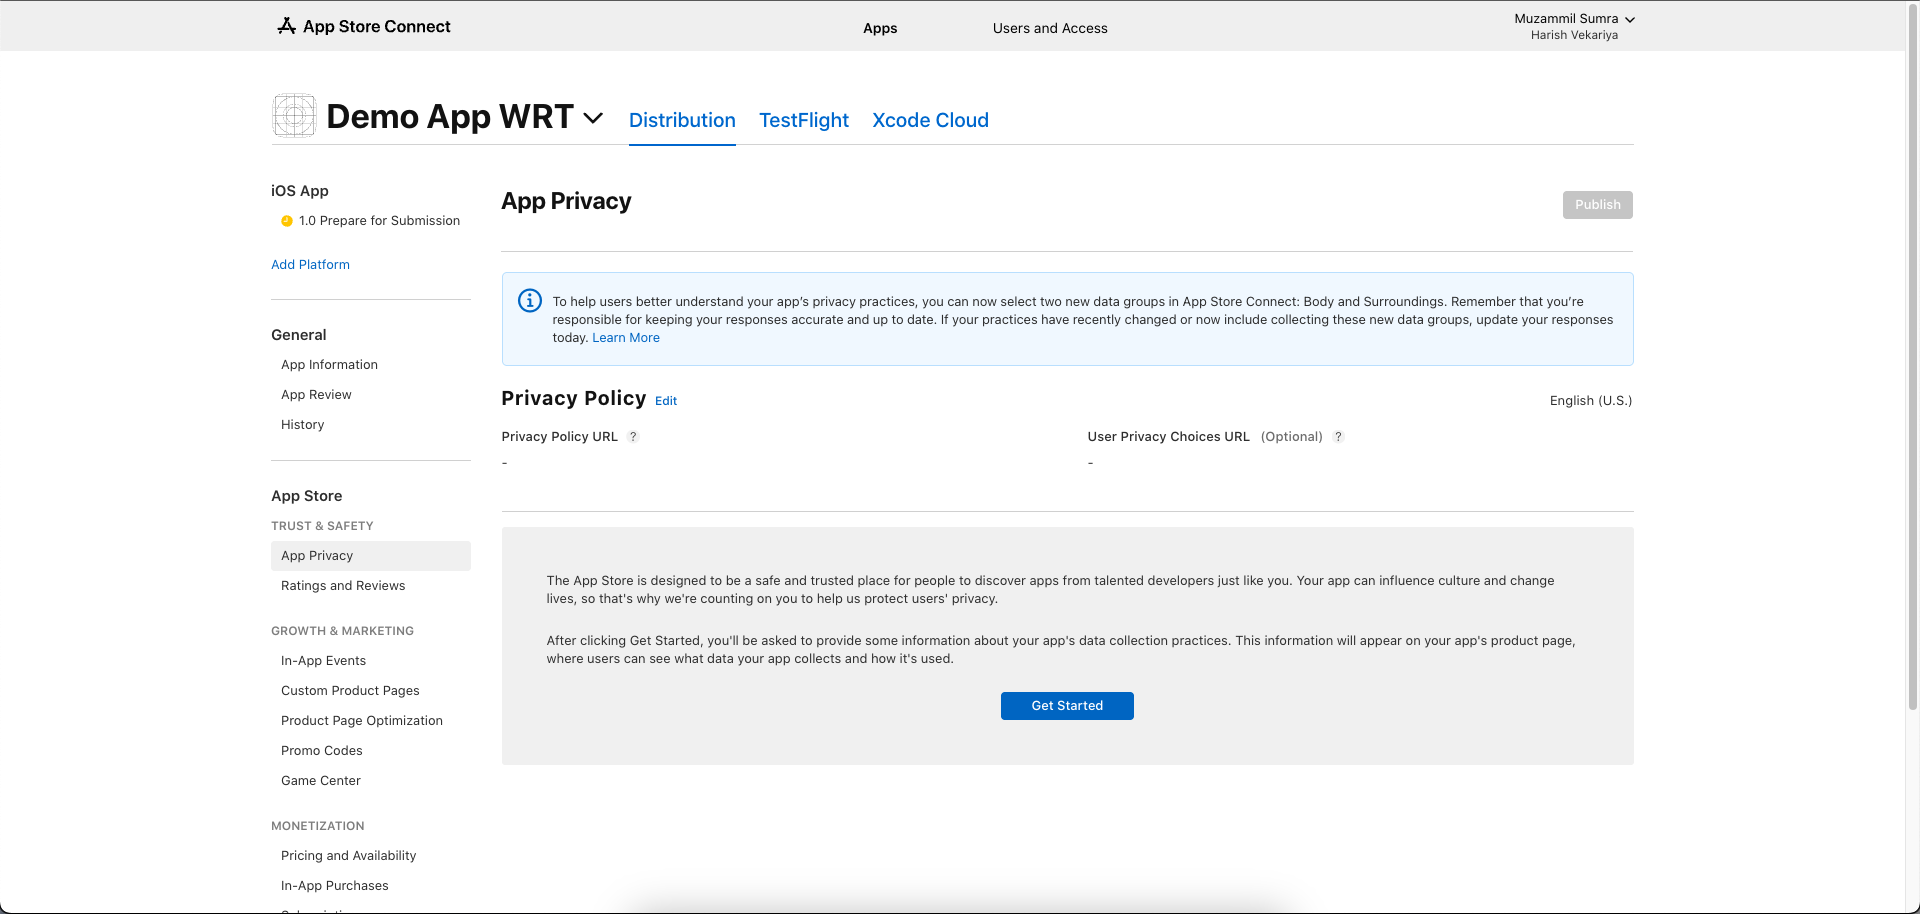
- App Privacy
- Enter privacy policy URL
- You need to complete data collection process. If your app requires any data collection then you will need to select respective options.
7. Production Release
-
Open the iOS folder in Xcode.
-
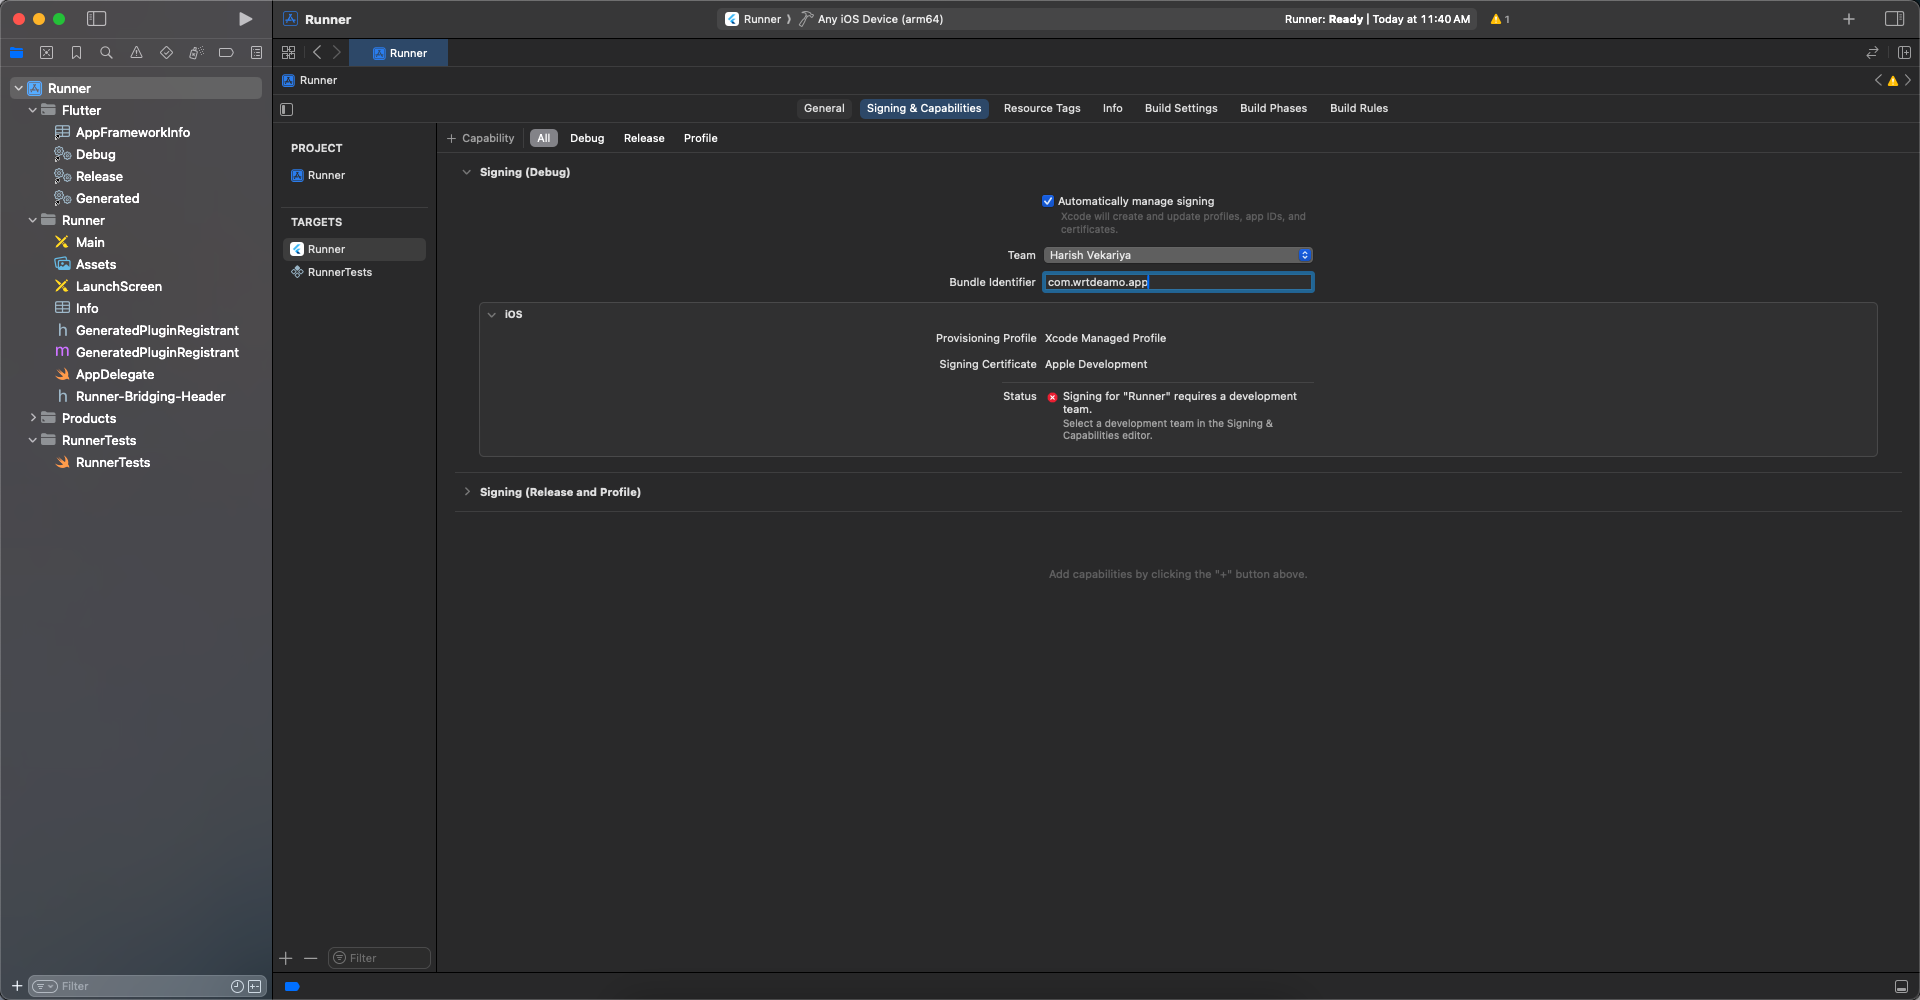
In the project navigator, select Runner under Targets, then go to the Signing & Capabilities tab. Sign in with your Apple Developer account.
- Update the version and build number.
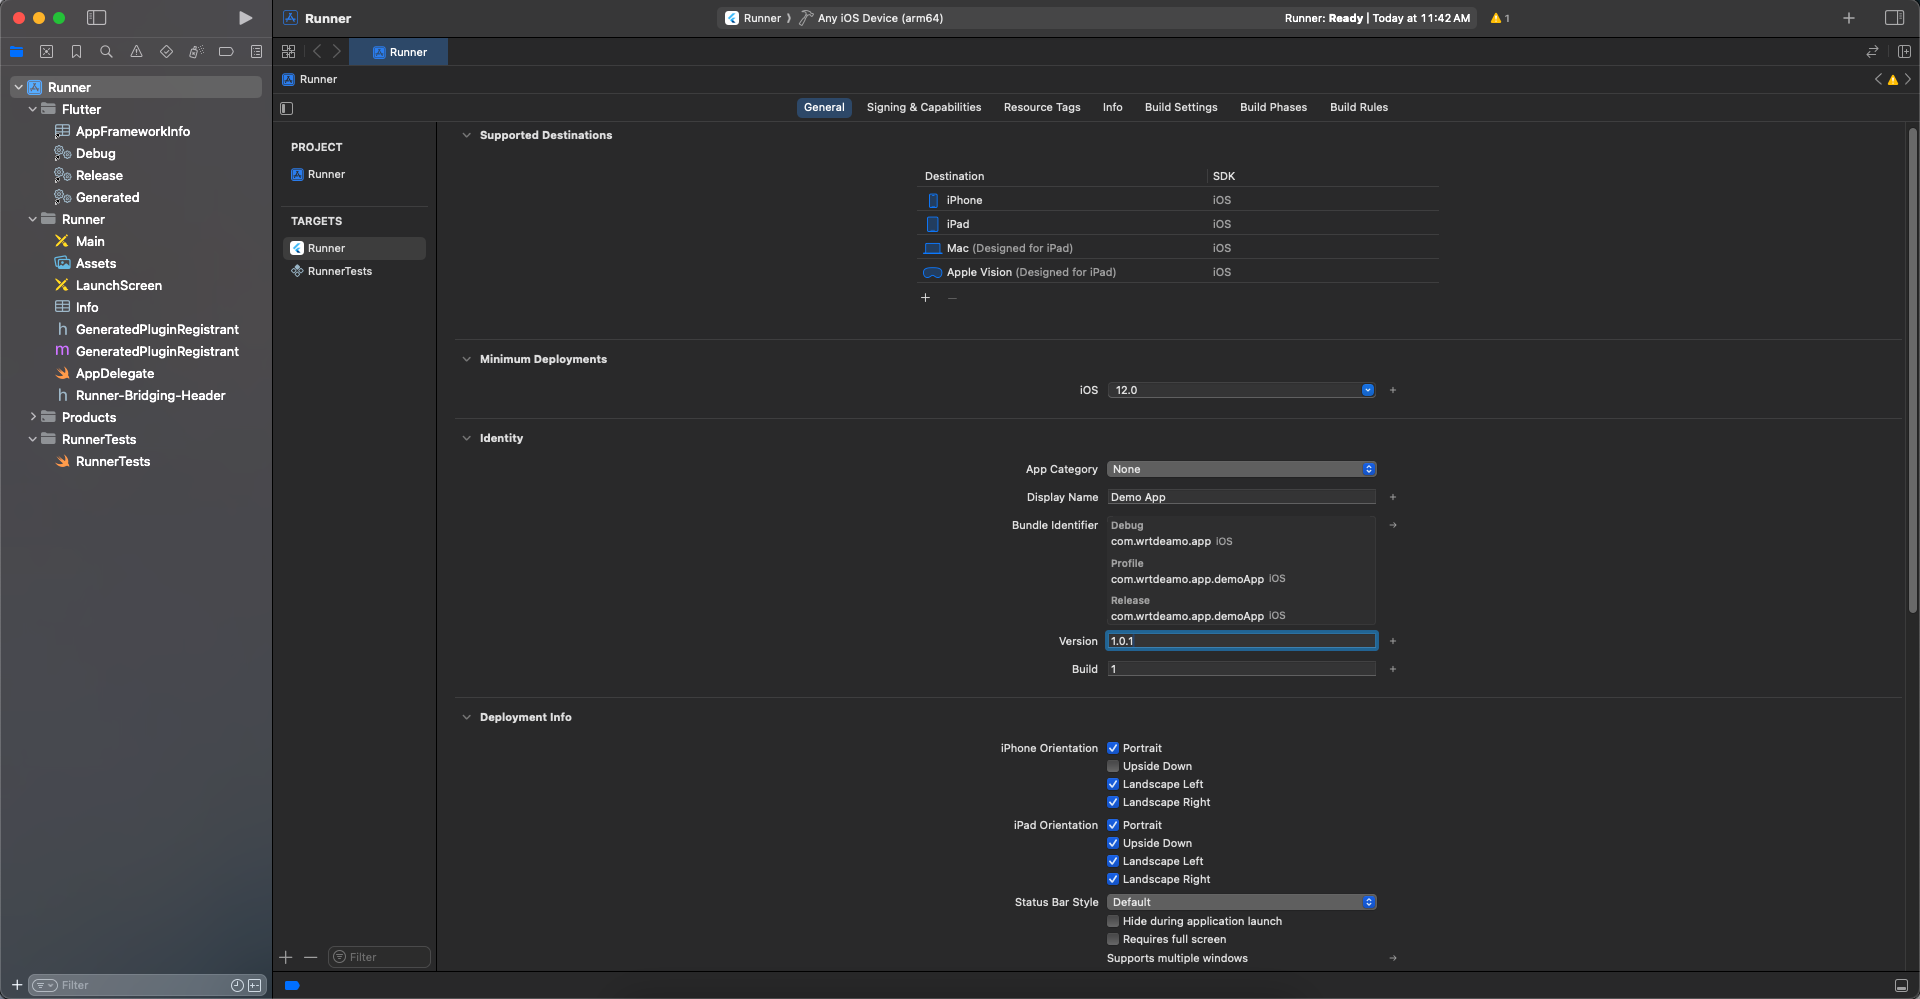
Then, go to the Build Settings tab, scroll down, and update the values for FLUTTER_BUILD_NAME and FLUTTER_BUILD_NUMBER.

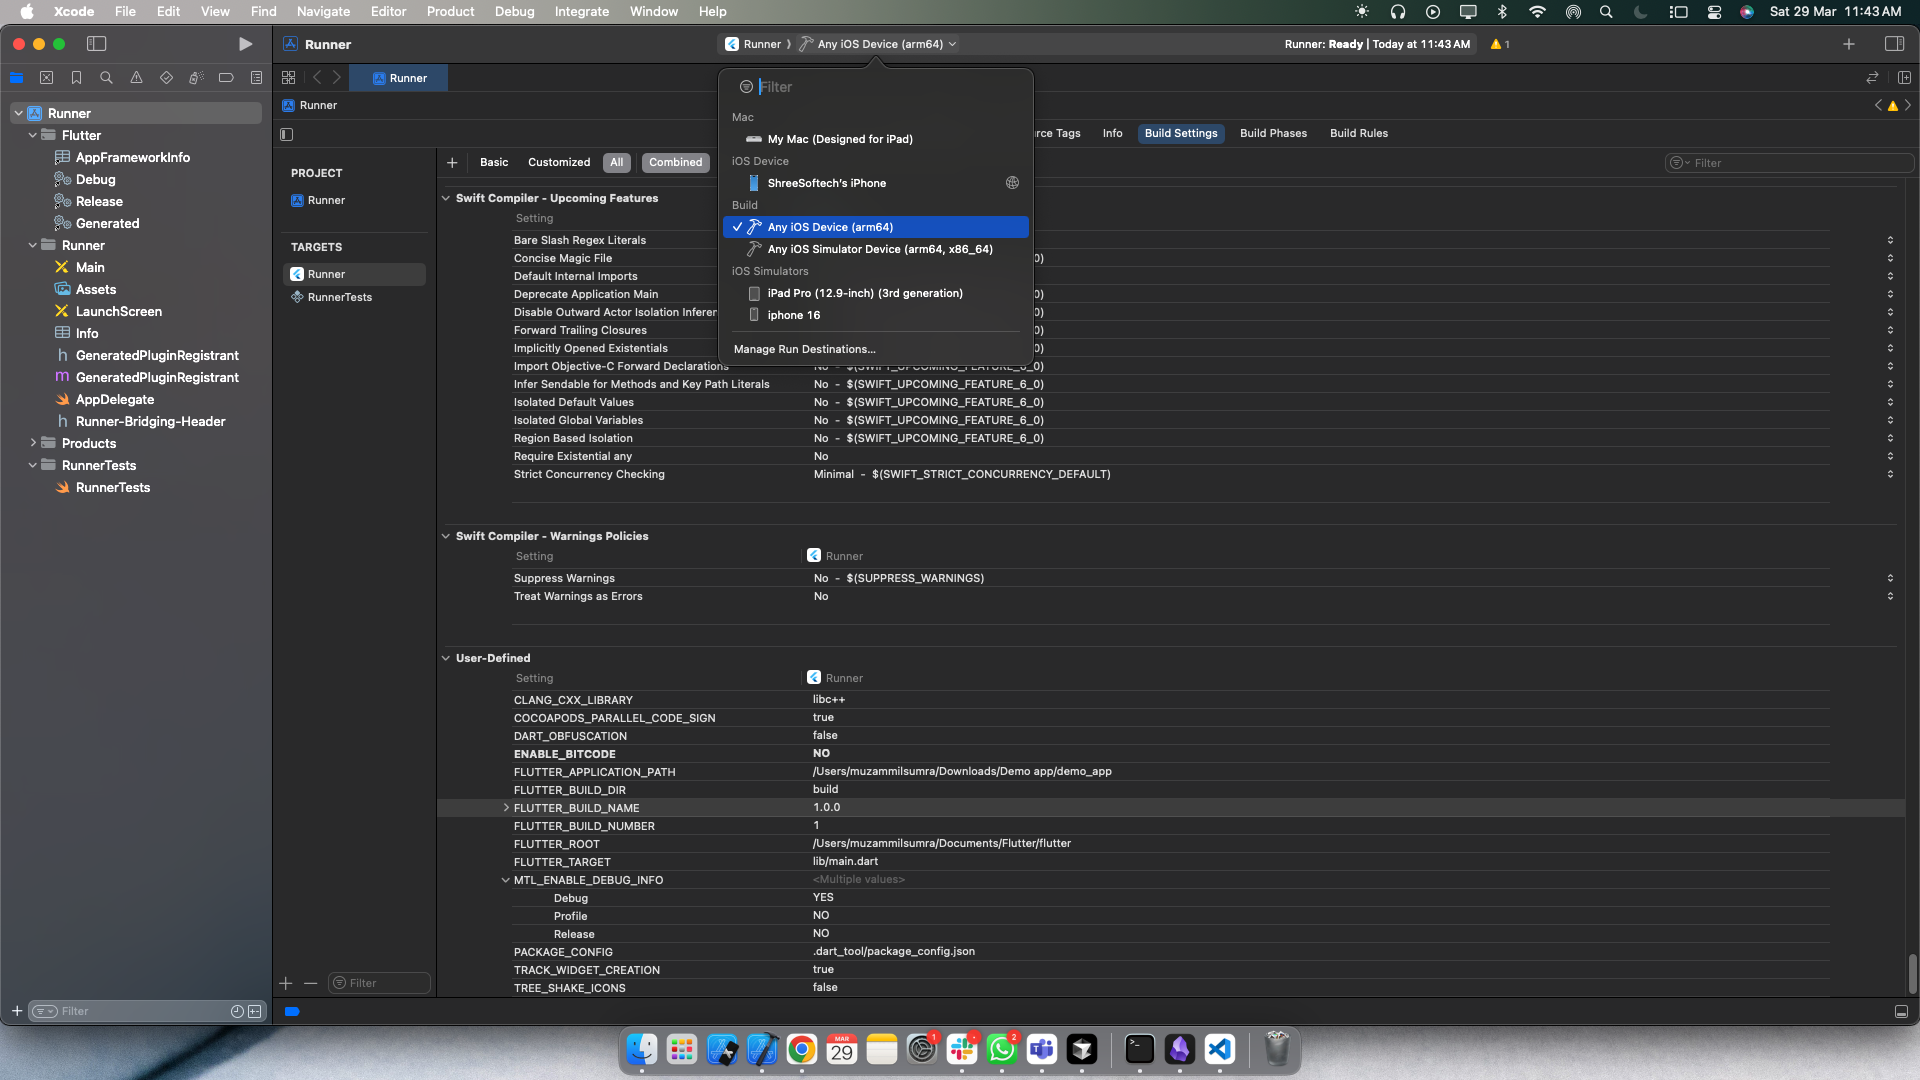
- Select Any iOS Device as the target.
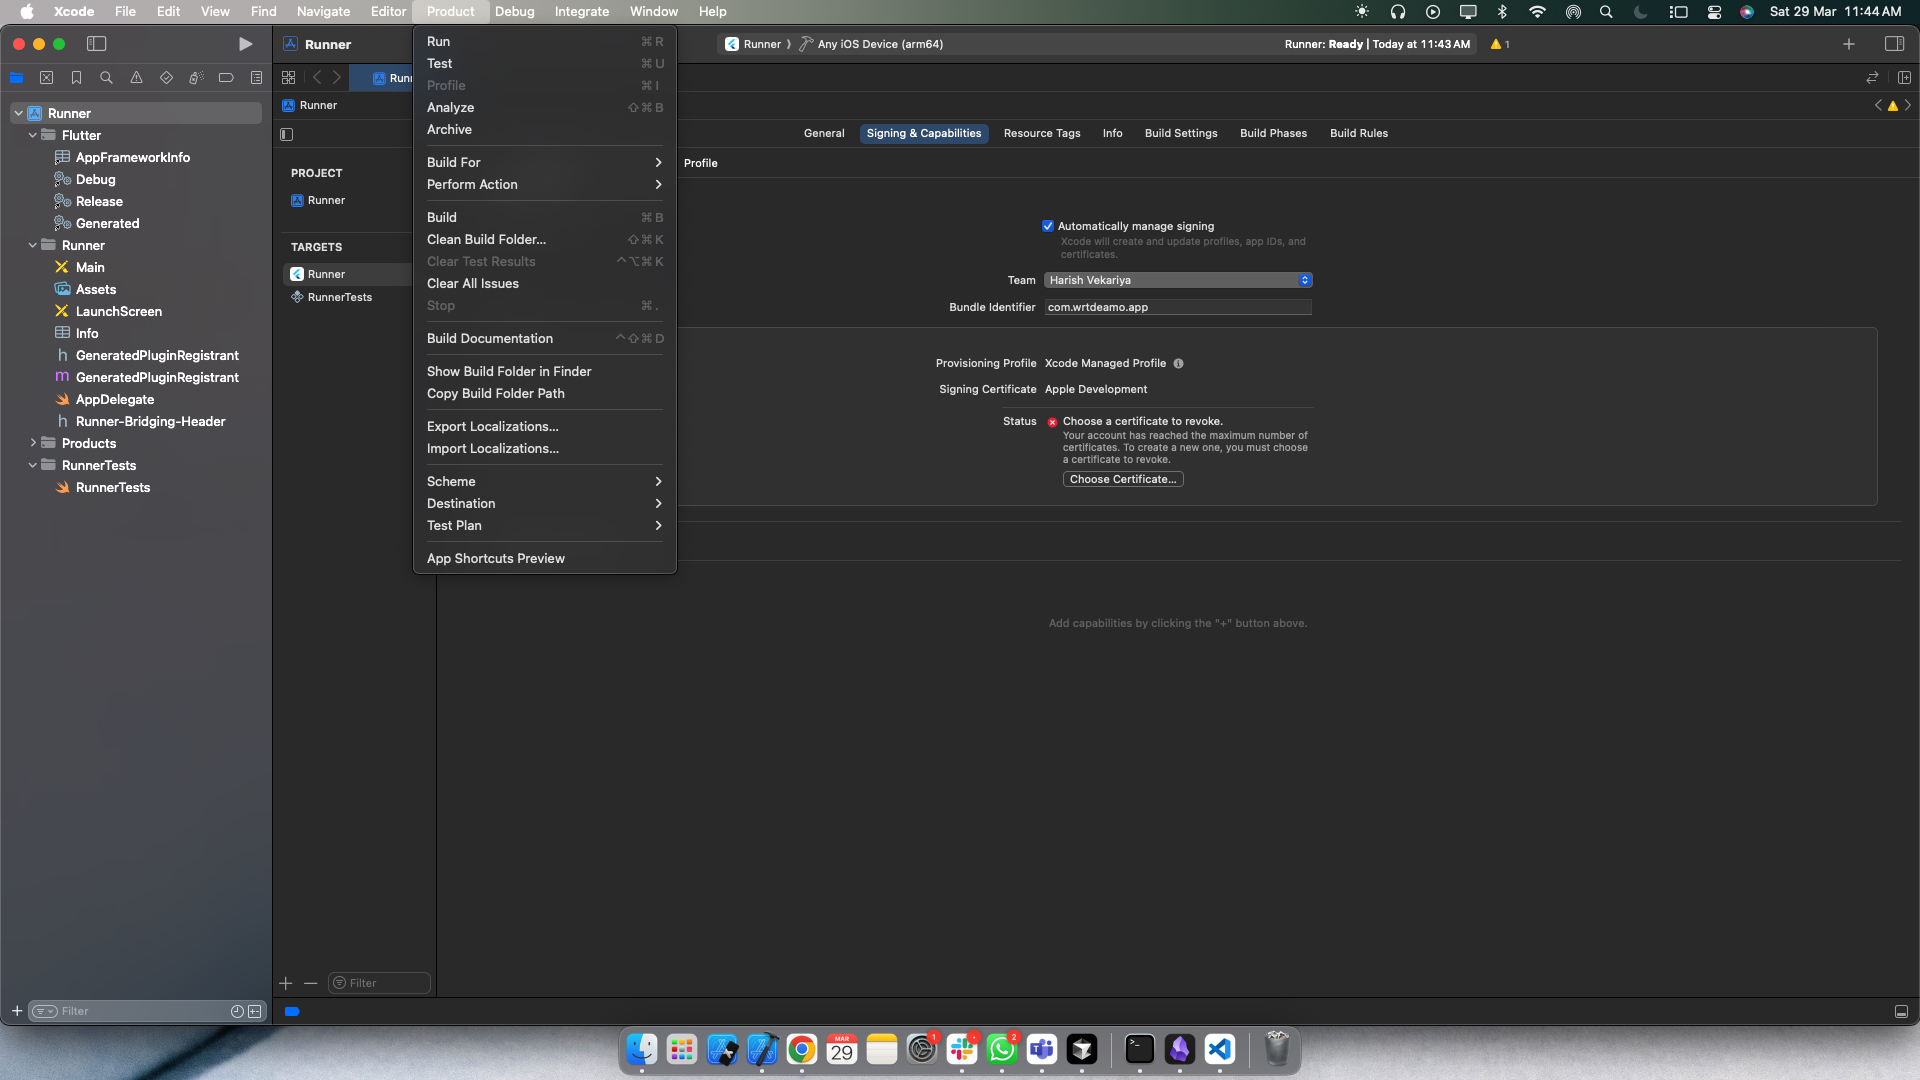
- To upload the app to the App Store, go to Product > Archive. Once the archive is complete, you can proceed with the upload.
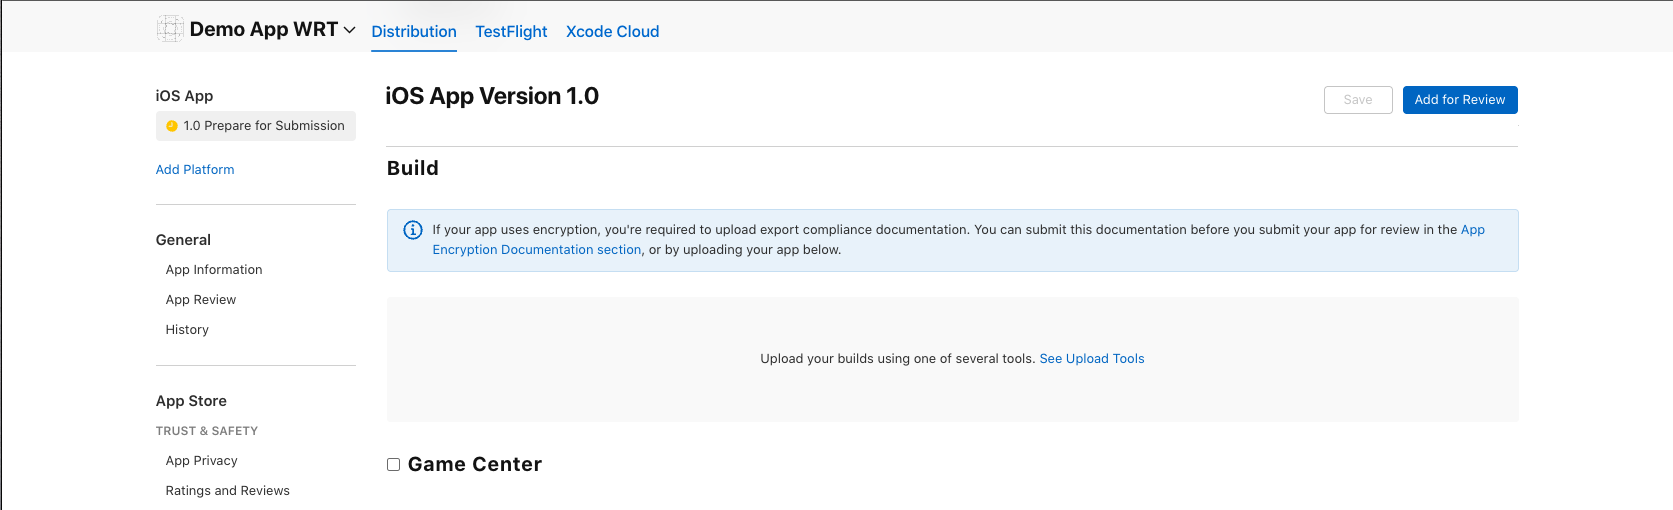
- Log in to App Store Connect, select the build you uploaded from Xcode, and click "Add for Review" to submit it for review.
8. Post-Release Tasks
- Monitor app performance
- Track user feedback
- Address bug reports
- Plan updates
- Maintain compliance
Important Notes
- Keep certificates and provisioning profiles safe
- Ensure app complies with App Store guidelines
- Test thoroughly before submission
- Keep version numbers updated
- Monitor review status
- Back up all signing certificates
Troubleshooting
Common issues and solutions:
-
Build Fails
- Check Flutter version
- Update dependencies
- Verify Xcode version
- Check signing configuration
- Validate bundle identifier
-
Upload Issues
- Verify certificates
- Check version number
- Validate assets
- Confirm bundle size
- Check API compatibility
-
Review Rejection
- Read rejection reasons
- Make necessary changes
- Update compliance
- Resubmit with updates
Need Help?
If you encounter issues:
- Check Flutter Documentation
- Visit Apple Developer Documentation
- Consult Flutter community
- Review App Store Guidelines
- Contact Apple Developer Support
Remember: First deployment may take longer. Subsequent updates will be faster.