PlayStore deployment
Overview
This guide provides a comprehensive walkthrough for deploying your Flutter app to the Google Play Store and App Store. We'll cover everything from account setup to app submission, making it easy for non-technical users to follow.
Prerequisites
Before starting the deployment process, ensure you have:
- A Google Play Developer Account ($25 one-time fee)
- Your Flutter app ready for release
- Basic understanding of using command line/terminal
- Required assets:
- App icon (512x512 px)
- Feature graphic (1024x500 px)
- Screenshots for different devices (Phone, Tablet)
- Privacy policy URL
- Short description (up to 80 characters)
- Full description (up to 4000 characters)
- Promotional video (optional)
Step-by-Step Guide
1. Developer Account Setup
- Visit Google Play Console
- Choose your account type:
- Individual developer (additional testing requirements)
- Organization (requires D-U-N-S Number)
- Complete registration:
- Pay $25 registration fee
- Verify your identity
- Set up payment profile
- Provide contact information
- Accept developer agreement
- For Organization accounts:
- Obtain D-U-N-S Number (takes 1-30 business days)
- Submit business verification documents
- Provide organization details
2. App Configuration
Before building your app, update these files:
Update pubspec.yaml
version: 1.0.0+1 # Format: version_name+version_code
Important Version Note:
- The version format is
version_name+version_code(e.g.,1.0.0+1)version_name(1.0.0): Represents the public version number shown to usersversion_code(1): Internal version number used by Play Store- For every new release, you MUST increment the
version_codeby at least 1- Example sequence:
- First release:
1.0.0+1- Bug fix update:
1.0.1+2- Feature update:
1.1.0+3- Major update:
2.0.0+4
Configure Android Manifest
Navigate to android/app/src/main/AndroidManifest.xml:
<manifest xmlns:android="http://schemas.android.com/apk/res/android">
    <application
        android:label="Your App Name"
        android:icon="@mipmap/ic_launcher">
        <!-- Your app configuration -->
    </application>
</manifest>
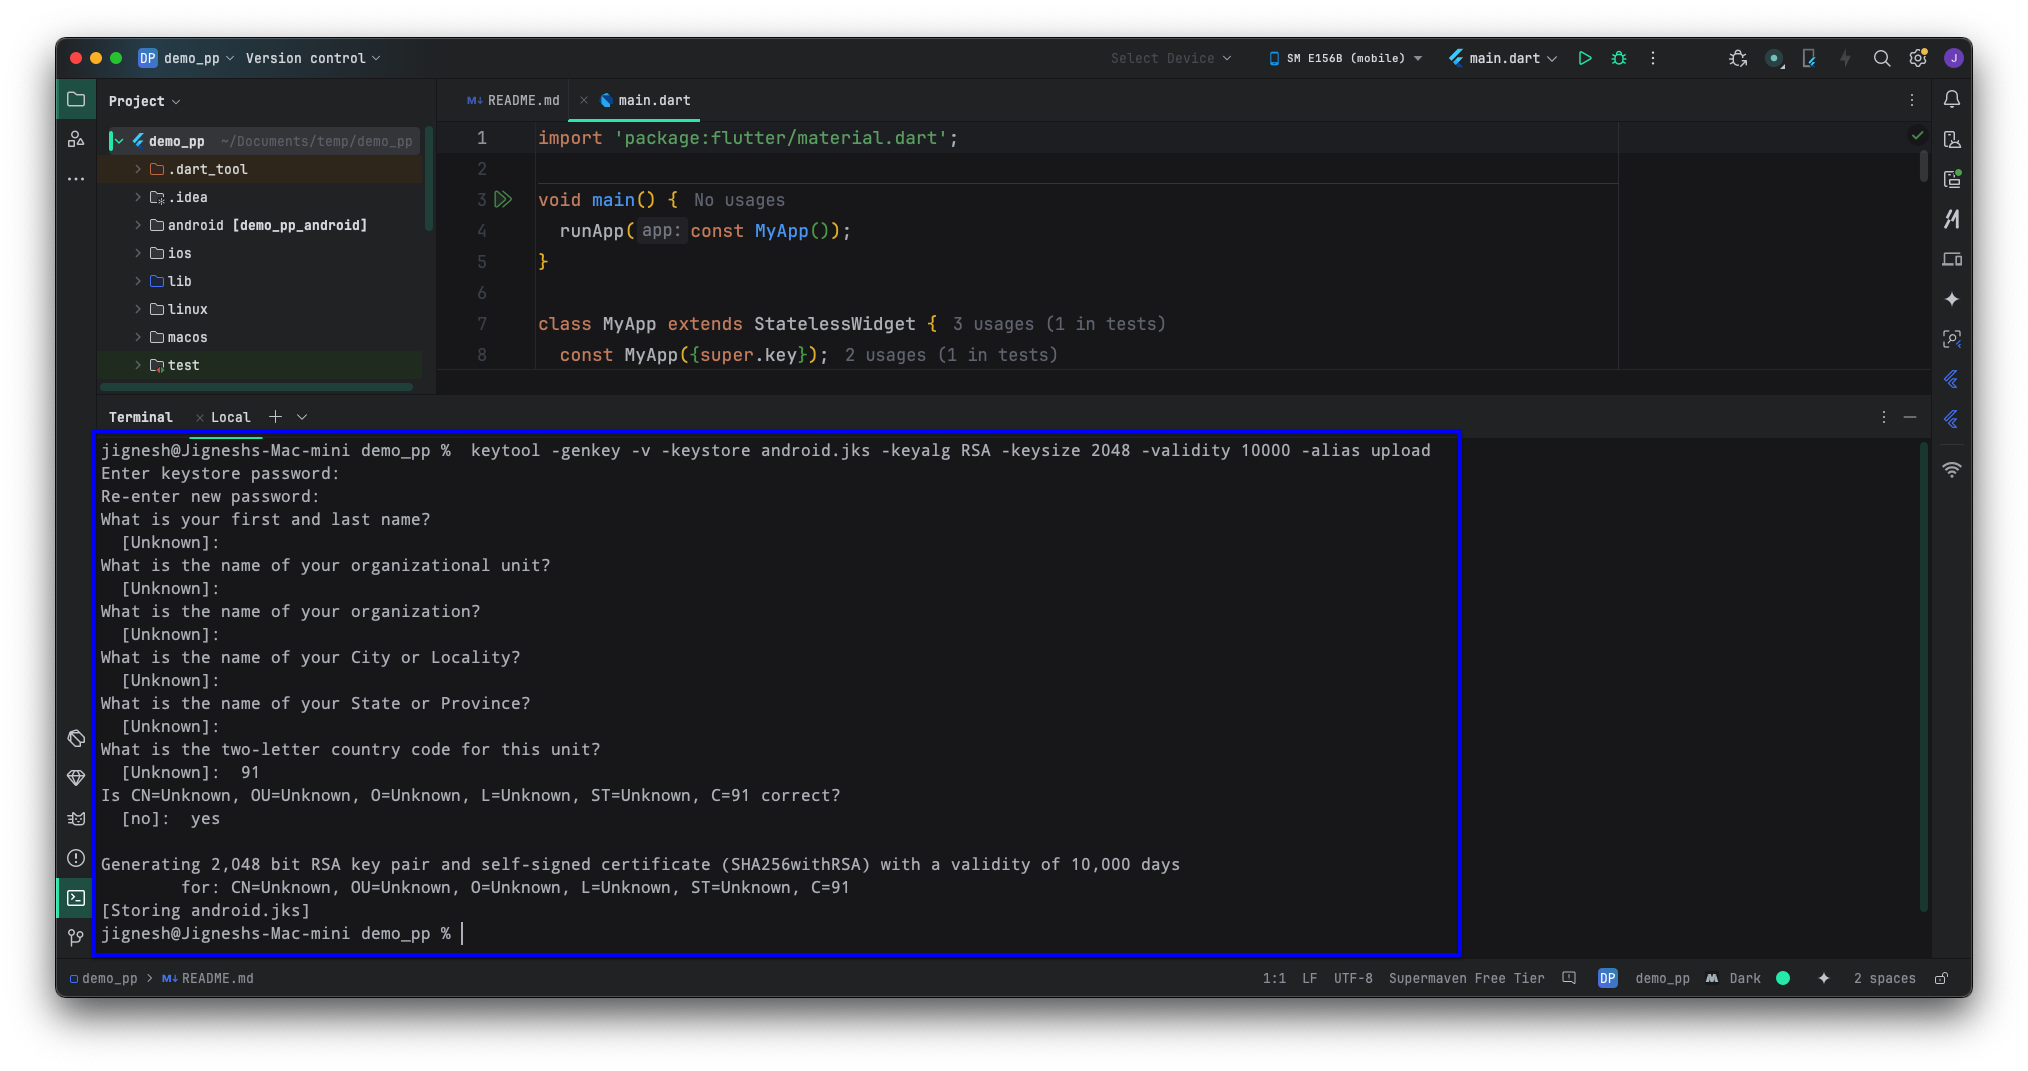
3. Generate App Signing Key
- Open terminal in project directory
- Run command:
For Mac/Linux
keytool -genkey -v -keystore YOUR-KEYSTORE-FILE.jks -keyalg RSA -keysize 2048 -validity 10000 -alias YOUR-ALIAS
For Windows
keytool -genkey -v -keystore YOUR-KEYSTORE-FILE.jks -storetype JKS -keyalg RSA -keysize 2048 -validity 10000 -alias YOUR-ALIAS
- Follow prompts to create keystore:
- Enter password
- Provide your details
- Confirm information
- Store keystore file securely
- Make backup copies of the keystore
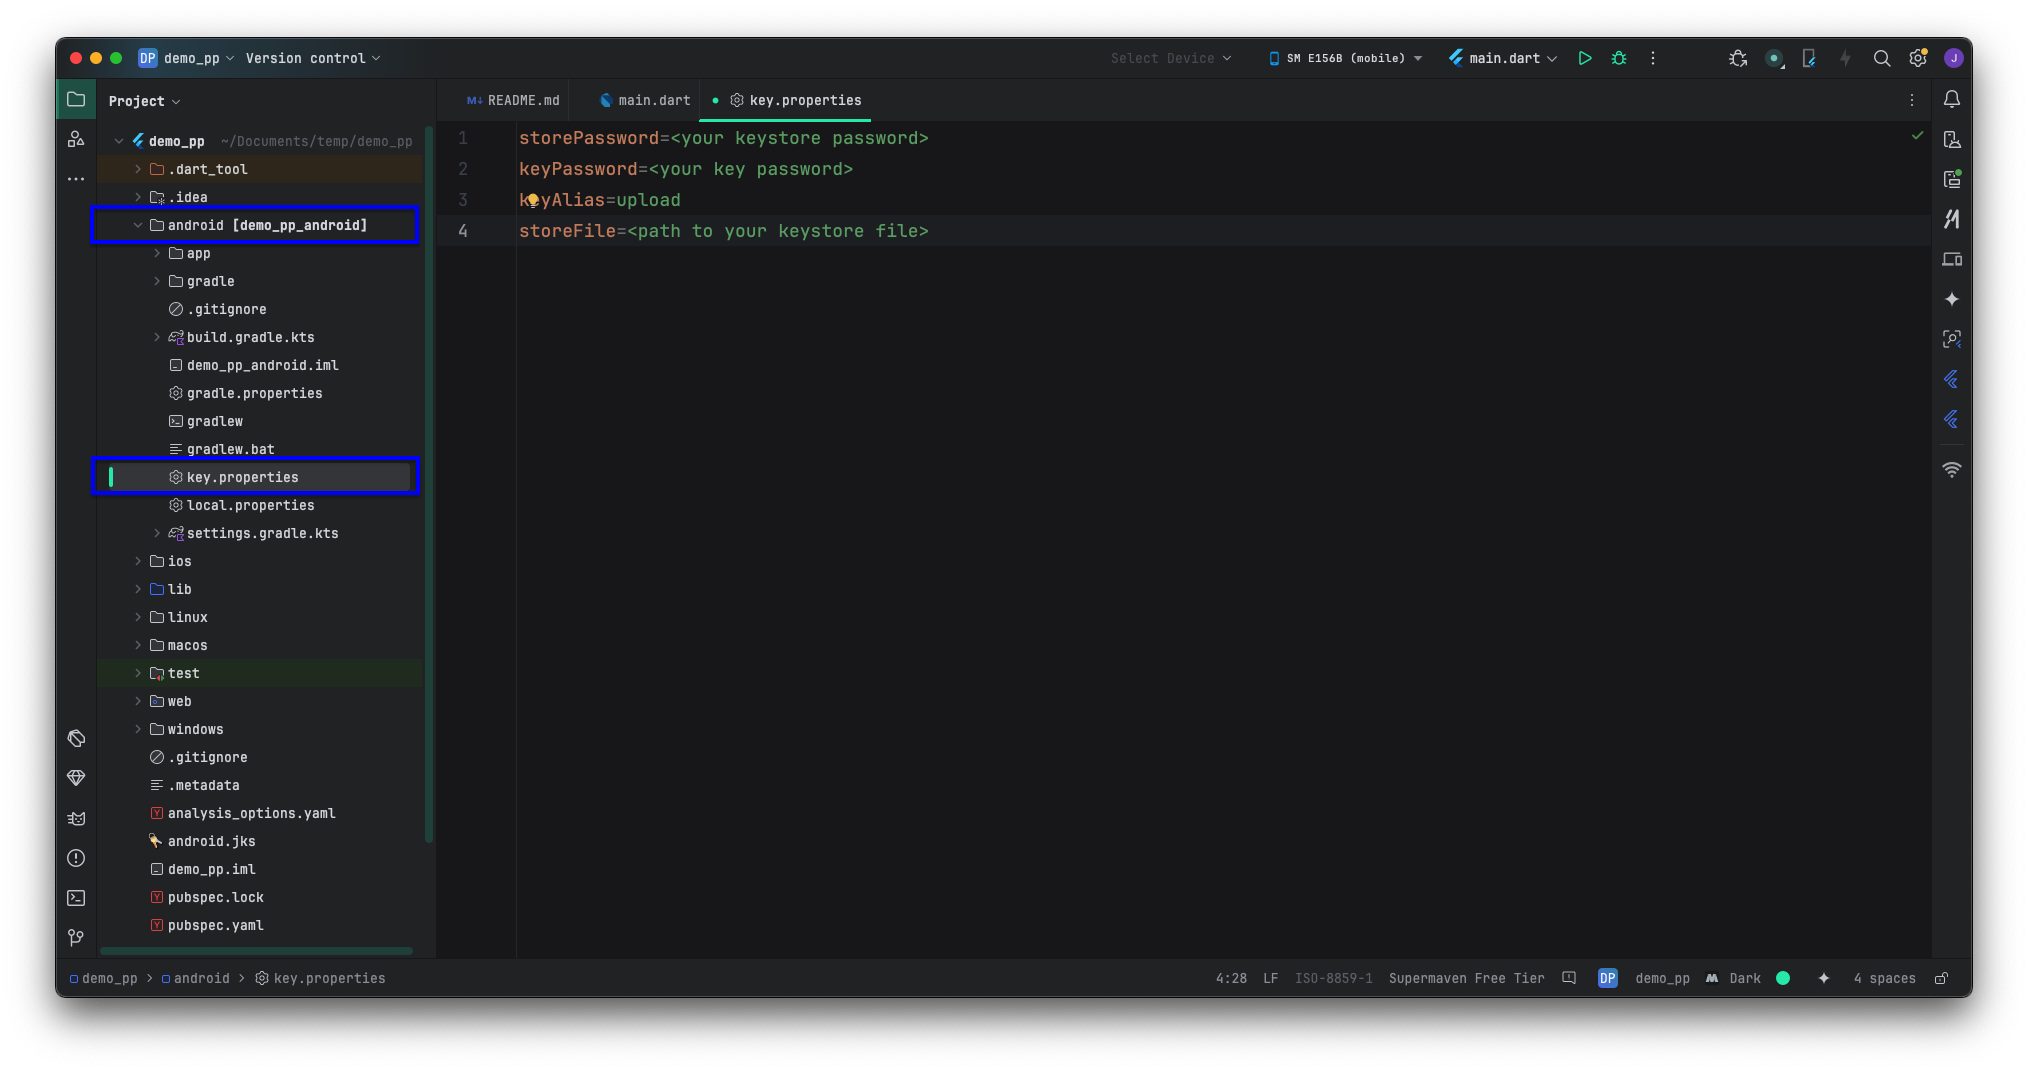
4. Configure Key Properties
Create key.properties in android folder:
storePassword=<your keystore password>
keyPassword=<your key password>
keyAlias=upload
storeFile=<path to your keystore file>
Once your signing key is generated, you'll need to register your package name and signing key with Google for developer verification. See Android Developer Verification — Package Name Registration for the full process.
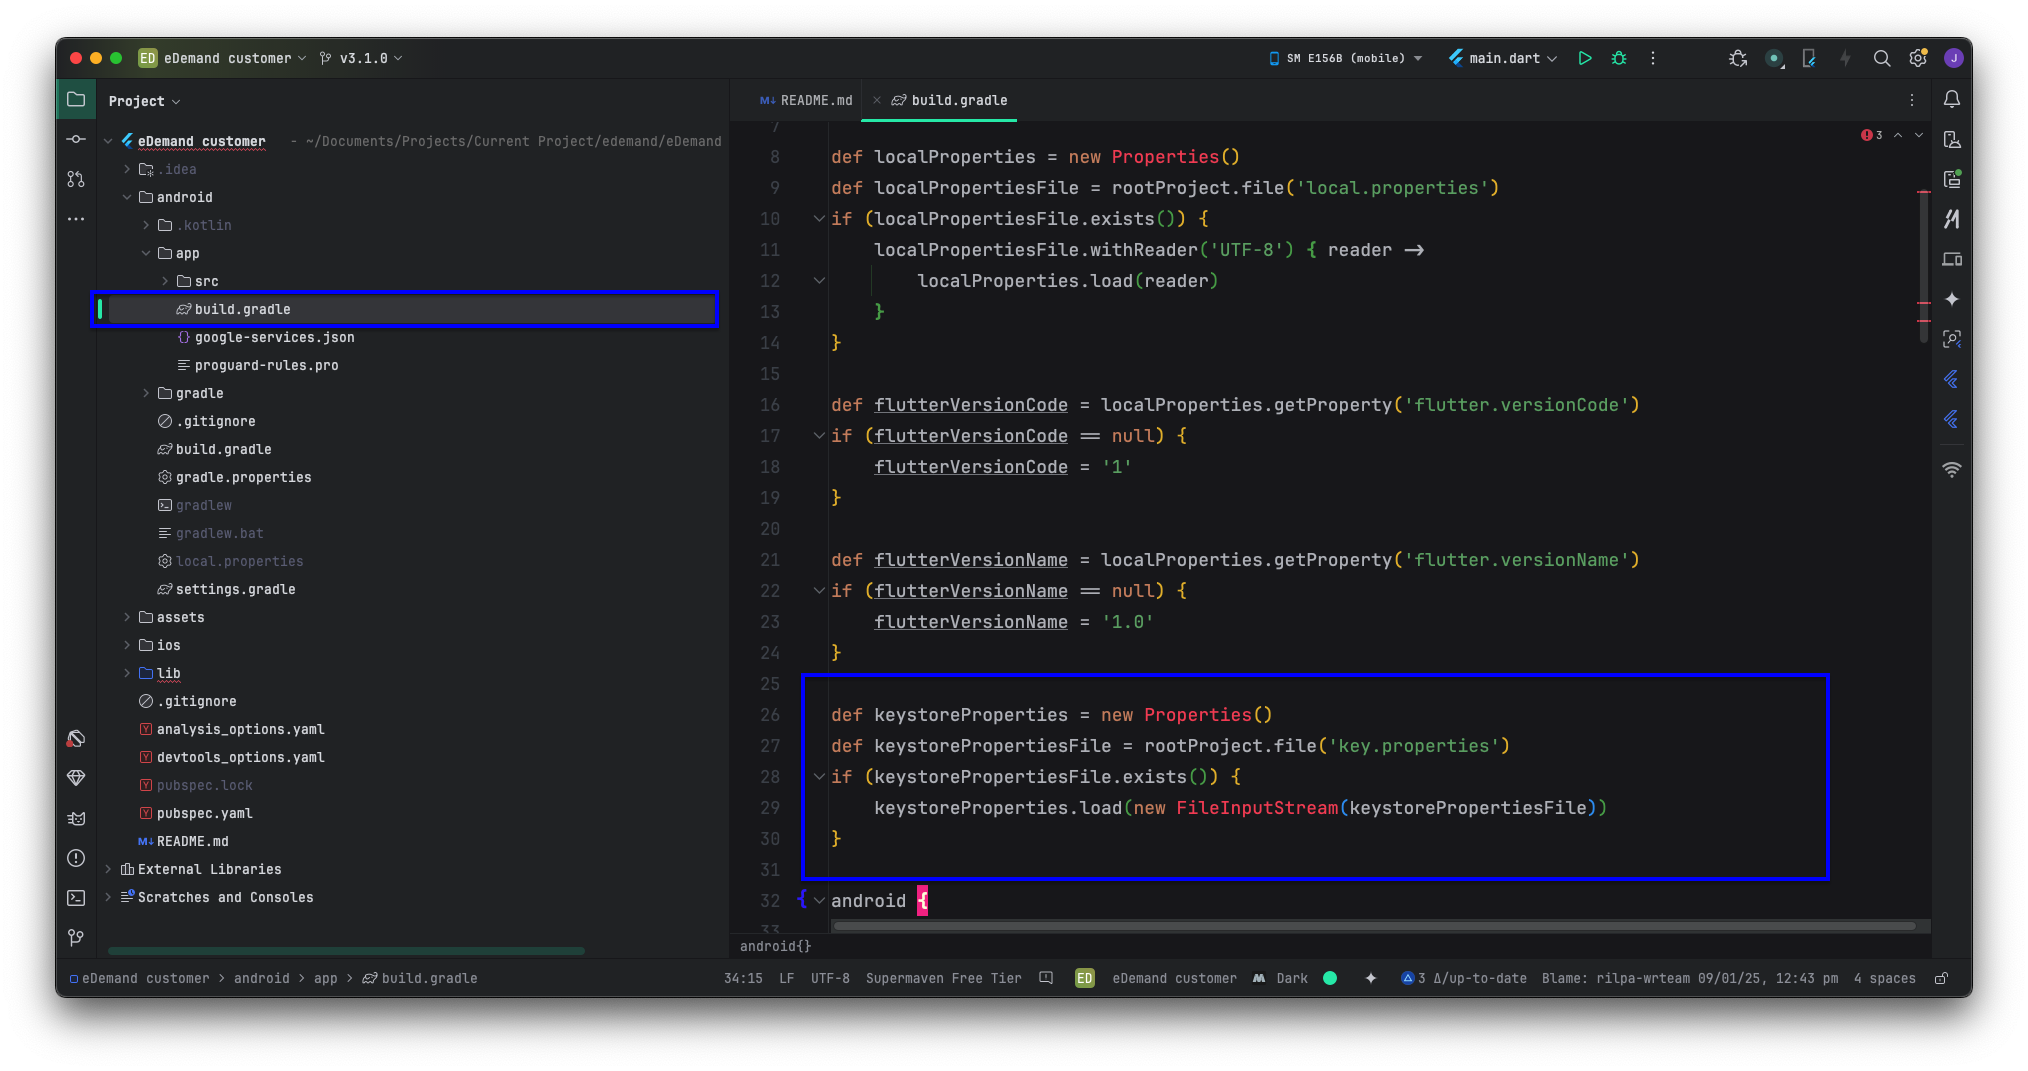
Update android/app/build.gradle:
- Open your
build.gradlefile. - Look for the required code blocks:
- ✅ If present: No changes needed.
- ❌ If missing: Add the required code blocks manually.
def keystoreProperties = new Properties()
def keystorePropertiesFile = rootProject.file('key.properties')
if (keystorePropertiesFile.exists()) {
    keystoreProperties.load(new FileInputStream(keystorePropertiesFile))
}
signingConfigs {
        release {
            keyAlias keystoreProperties['keyAlias']
            keyPassword keystoreProperties['keyPassword']
            storeFile keystoreProperties['storeFile'] ? file(keystoreProperties['storeFile']) : null
            storePassword keystoreProperties['storePassword']
        }
    }
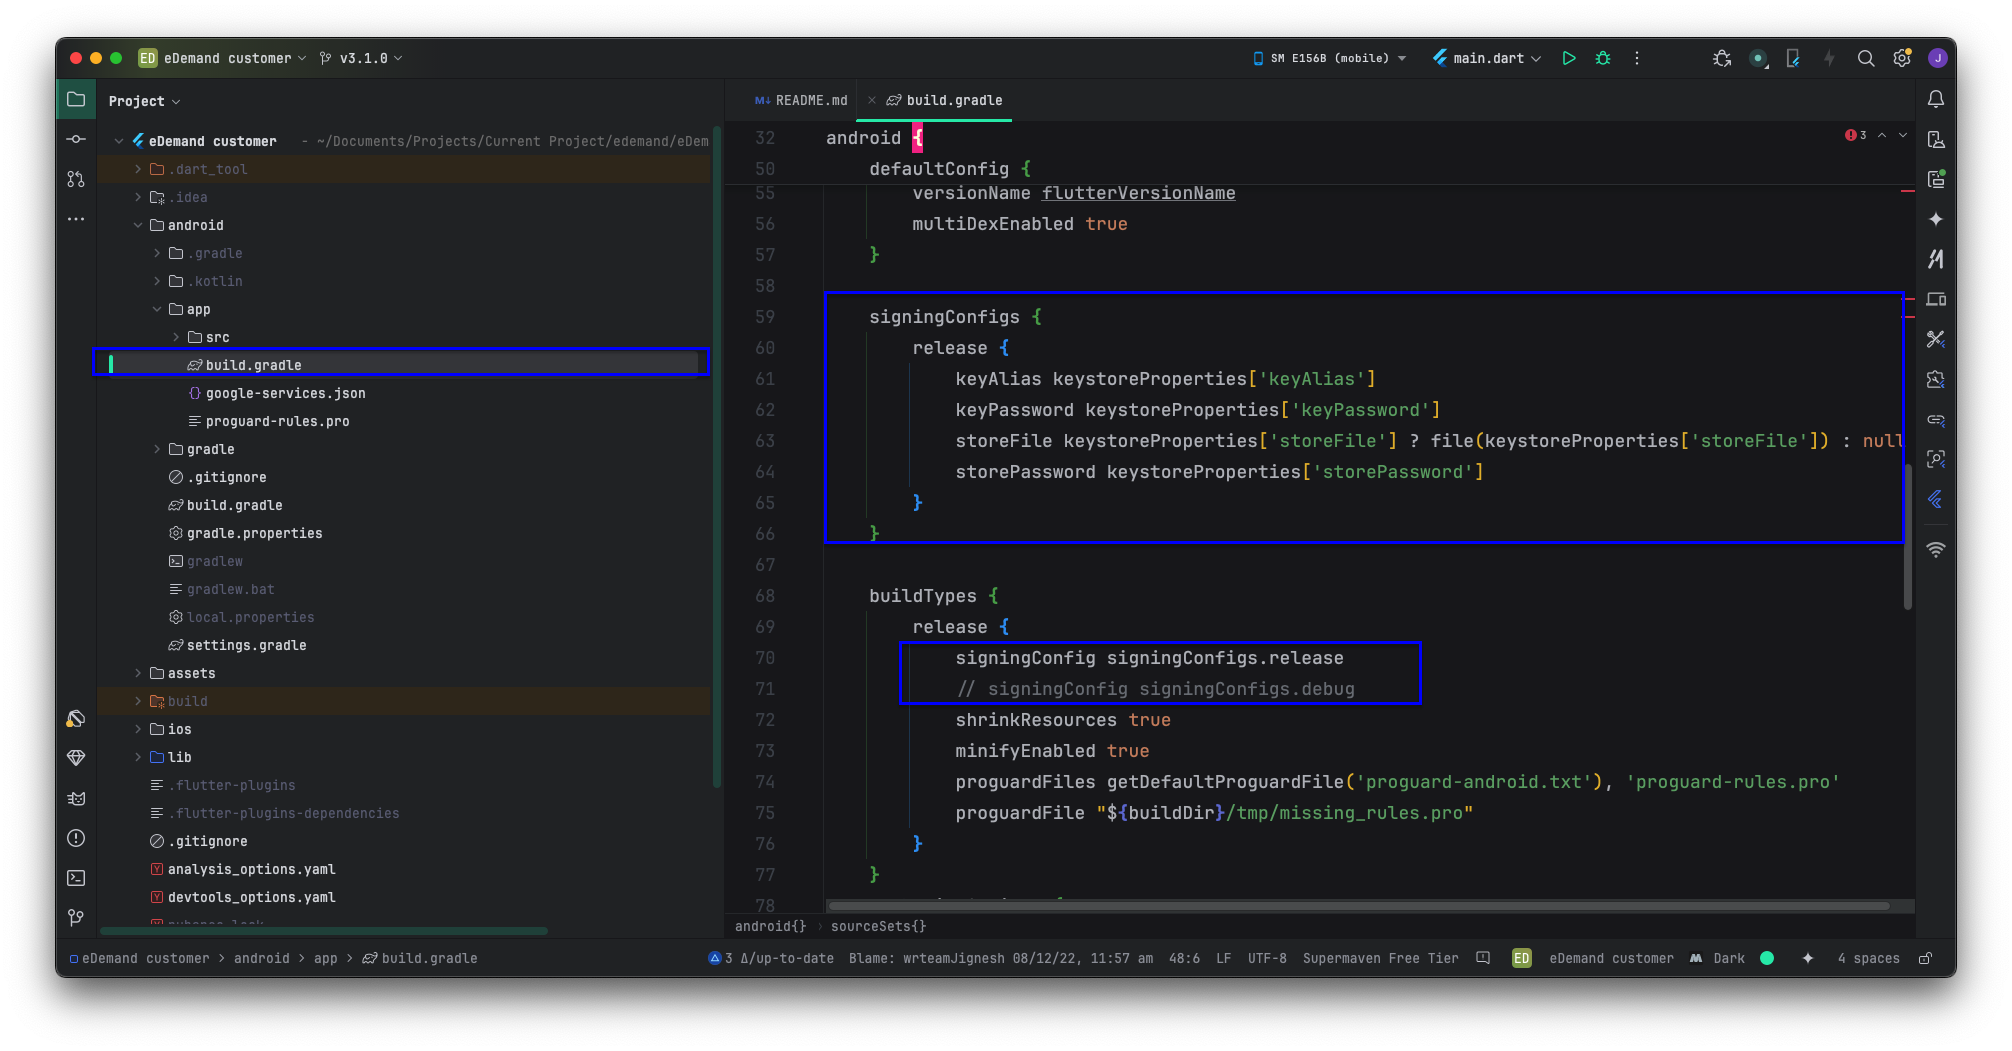
signingConfig signingConfigs.release
- Save the file.
- Sync your project to apply the changes.
5. Build Your App
- Open terminal in project directory
- Run command:
flutter build appbundle --release
- Optional flags:
--obfuscate- To protect your code--split-debug-info- For crash reporting
- Wait for build completion
- Find app bundle at:
build/app/outputs/bundle/release/app.aab
6. App Setup
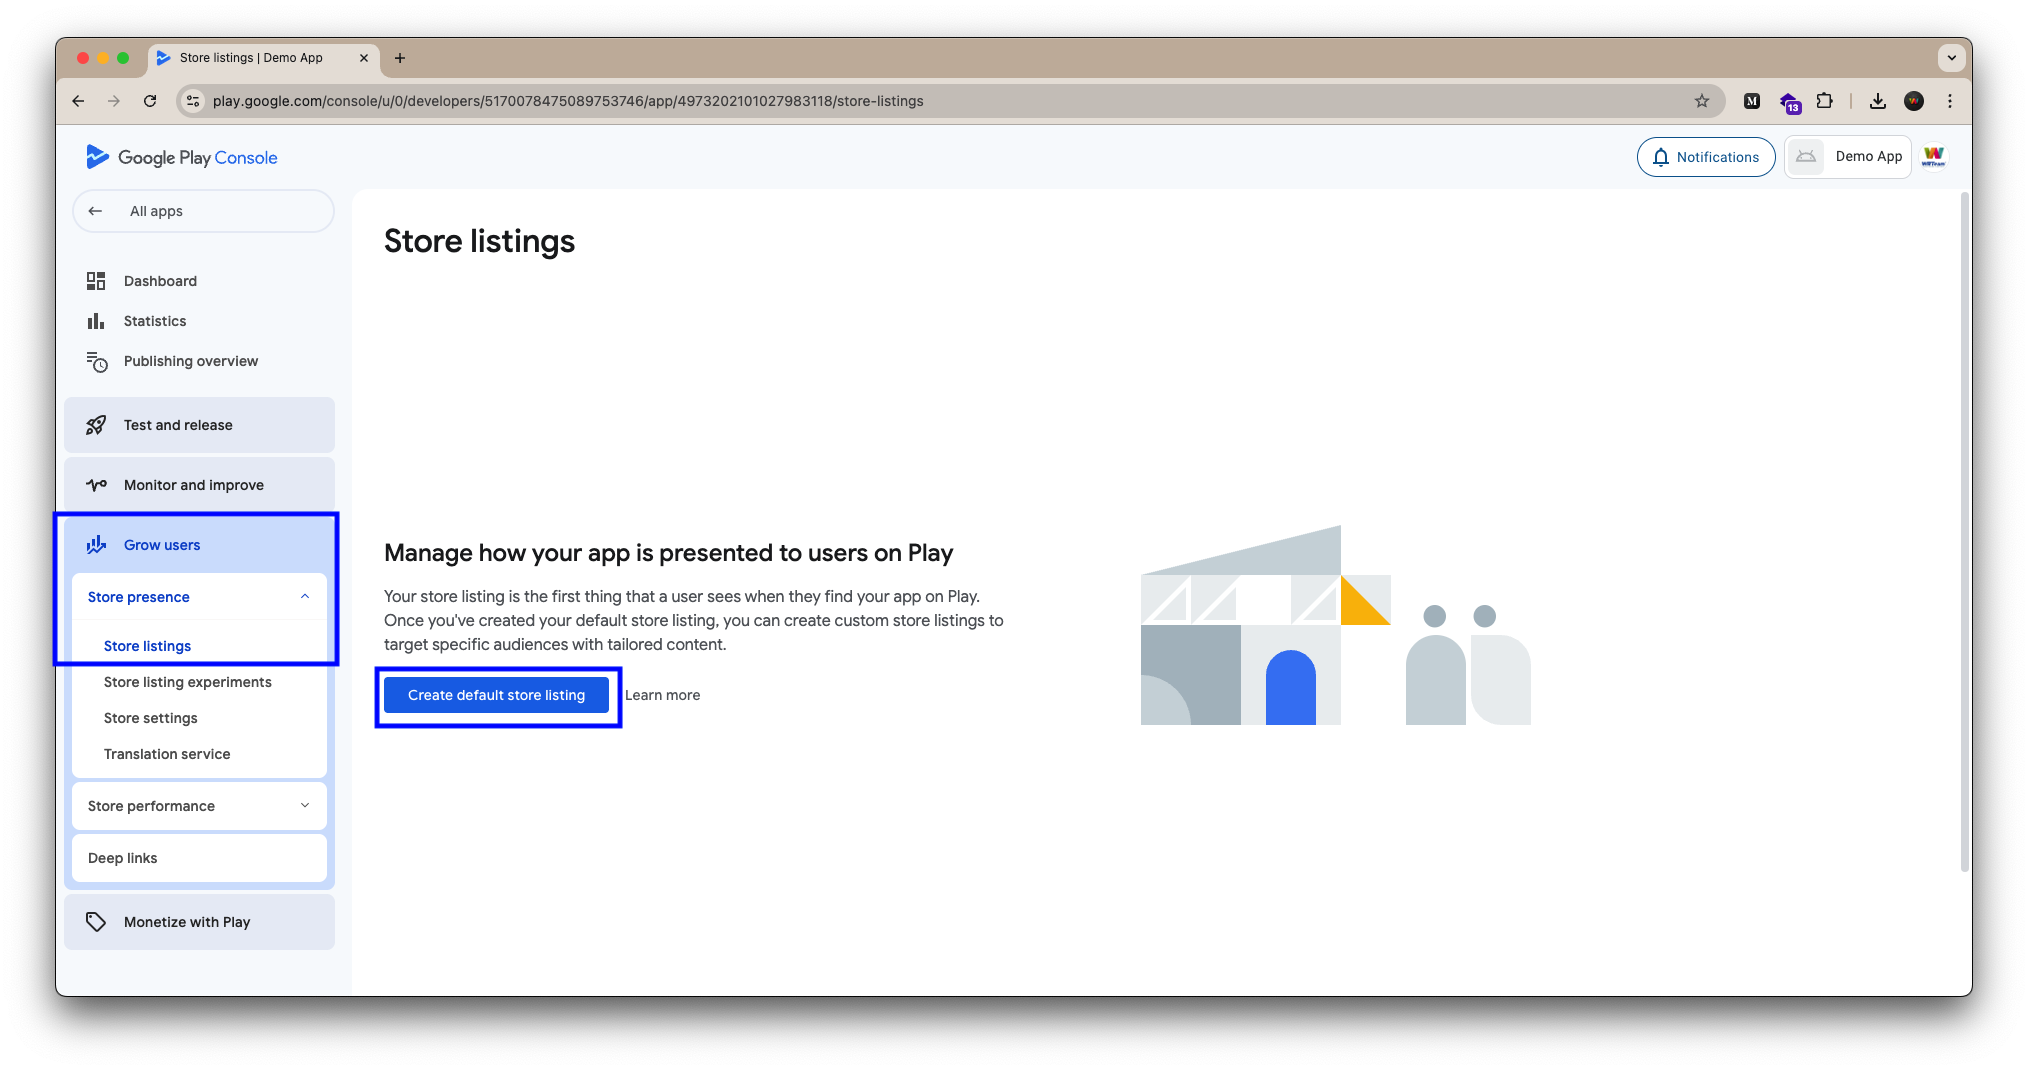
Create App Listing
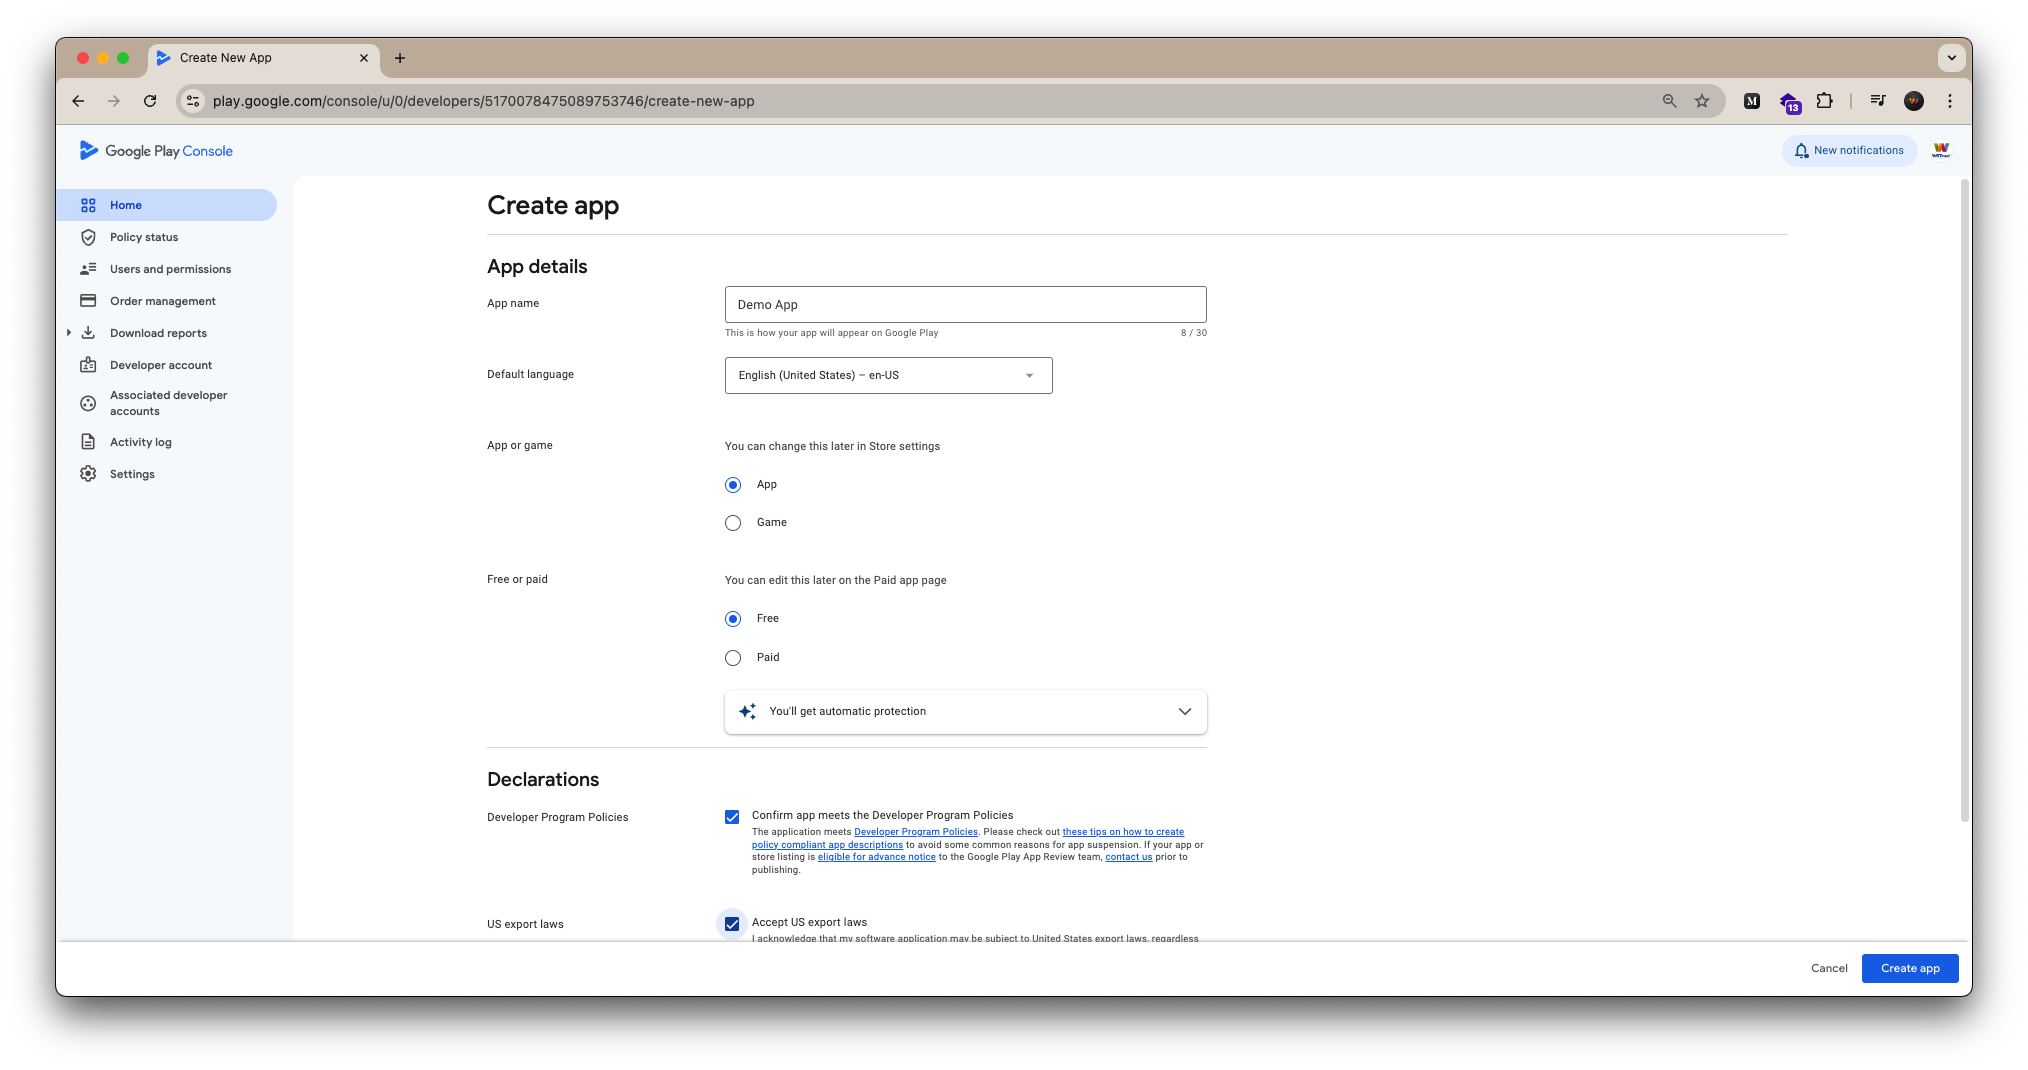
- Go to Play Console
- Click "Create app"
- Fill basic information:
- App name
- Default language
- App/game category
- Free/paid status
- Declaration of app content
Complete Store Listing
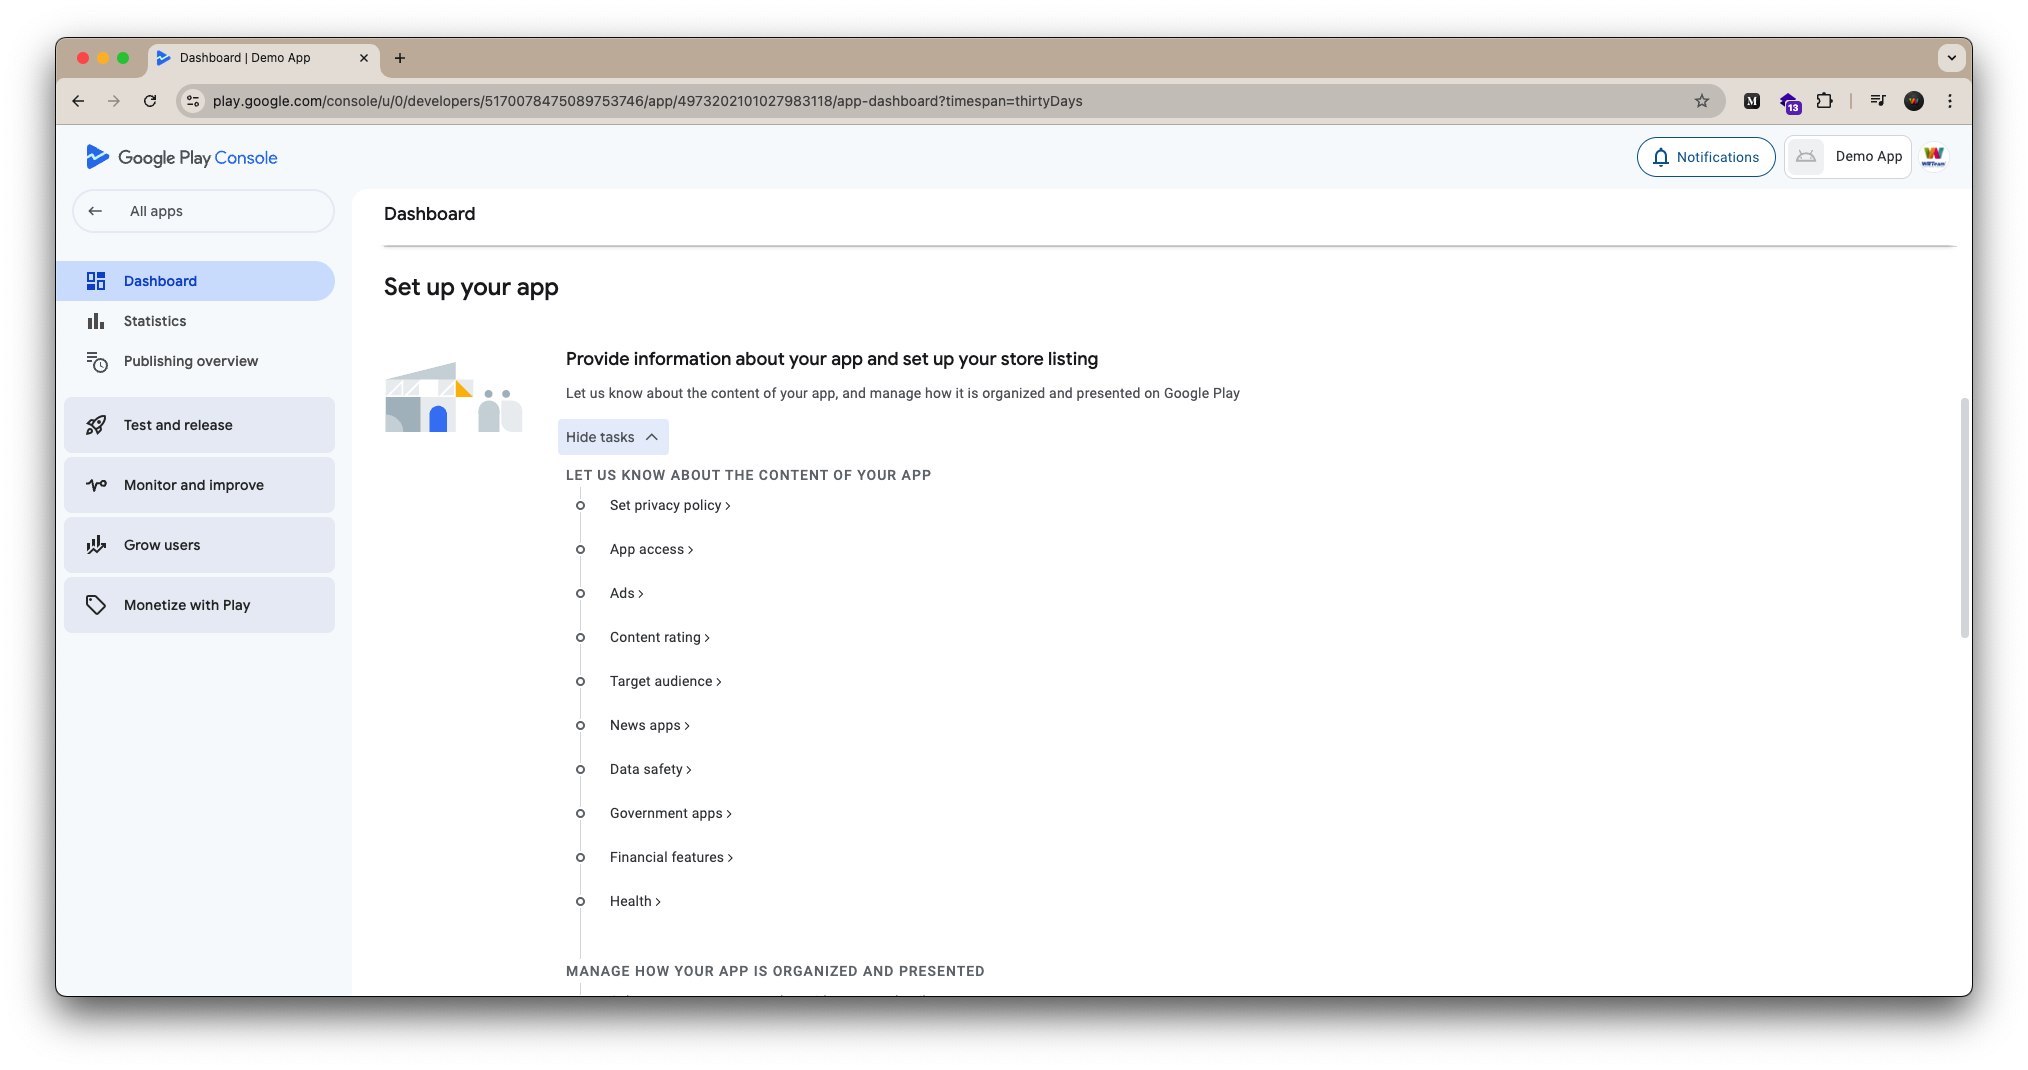
Let Us Know About The Content Of Your App
1. Set Privacy Policy
- Required for all apps
- Must be accessible without requiring a login
- Include:
- Data collection and usage
- Security practices
- Data deletion policies
- Contact information
2. App Access
- Specify if app requires login
- Provide test account credentials if needed
- List any special access requirements
- Detail any region restrictions
3. Ads Declaration
- Indicate if your app contains ads
- Specify types of ads used:
- Banner ads
- Interstitial ads
- Rewarded ads
- Native ads
- Declare ad networks used
4. Content Rating
- Complete questionnaire about:
- Violence
- Sexual content
- Language
- Controlled substances
- Miscellaneous
- Rating affects app visibility and target audience
5. Target Audience
- Select target age groups
- Specify if app is designed for children
6. News Apps (if applicable)
- Declare if app provides news content
- Provide publisher information
- Detail editorial policies
- Verify news sources
7. Data Safety
- Declare all data collection:
- Location
- Personal information
- Files and media
- Device information
- Explain data usage:
- App functionality
- Analytics
- Personalization
- Advertising
- Detail data security measures
- Specify data sharing practices
8. Government Apps (if applicable)
- Verify government association
- Provide official documentation
- Detail security measures
- Specify jurisdiction
9. Financial Apps (if applicable)
- Declare financial services offered
- Provide licensing information
- Detail security measures
- Specify supported regions
10. Health Apps (if applicable)
- Declare health-related features
- Provide medical disclaimers
- Detail data protection measures
- List any certifications
11. Categorization
- Primary category selection
- Tags and keywords
- Contact details
- Email address
- Phone number
- Website
- Physical address
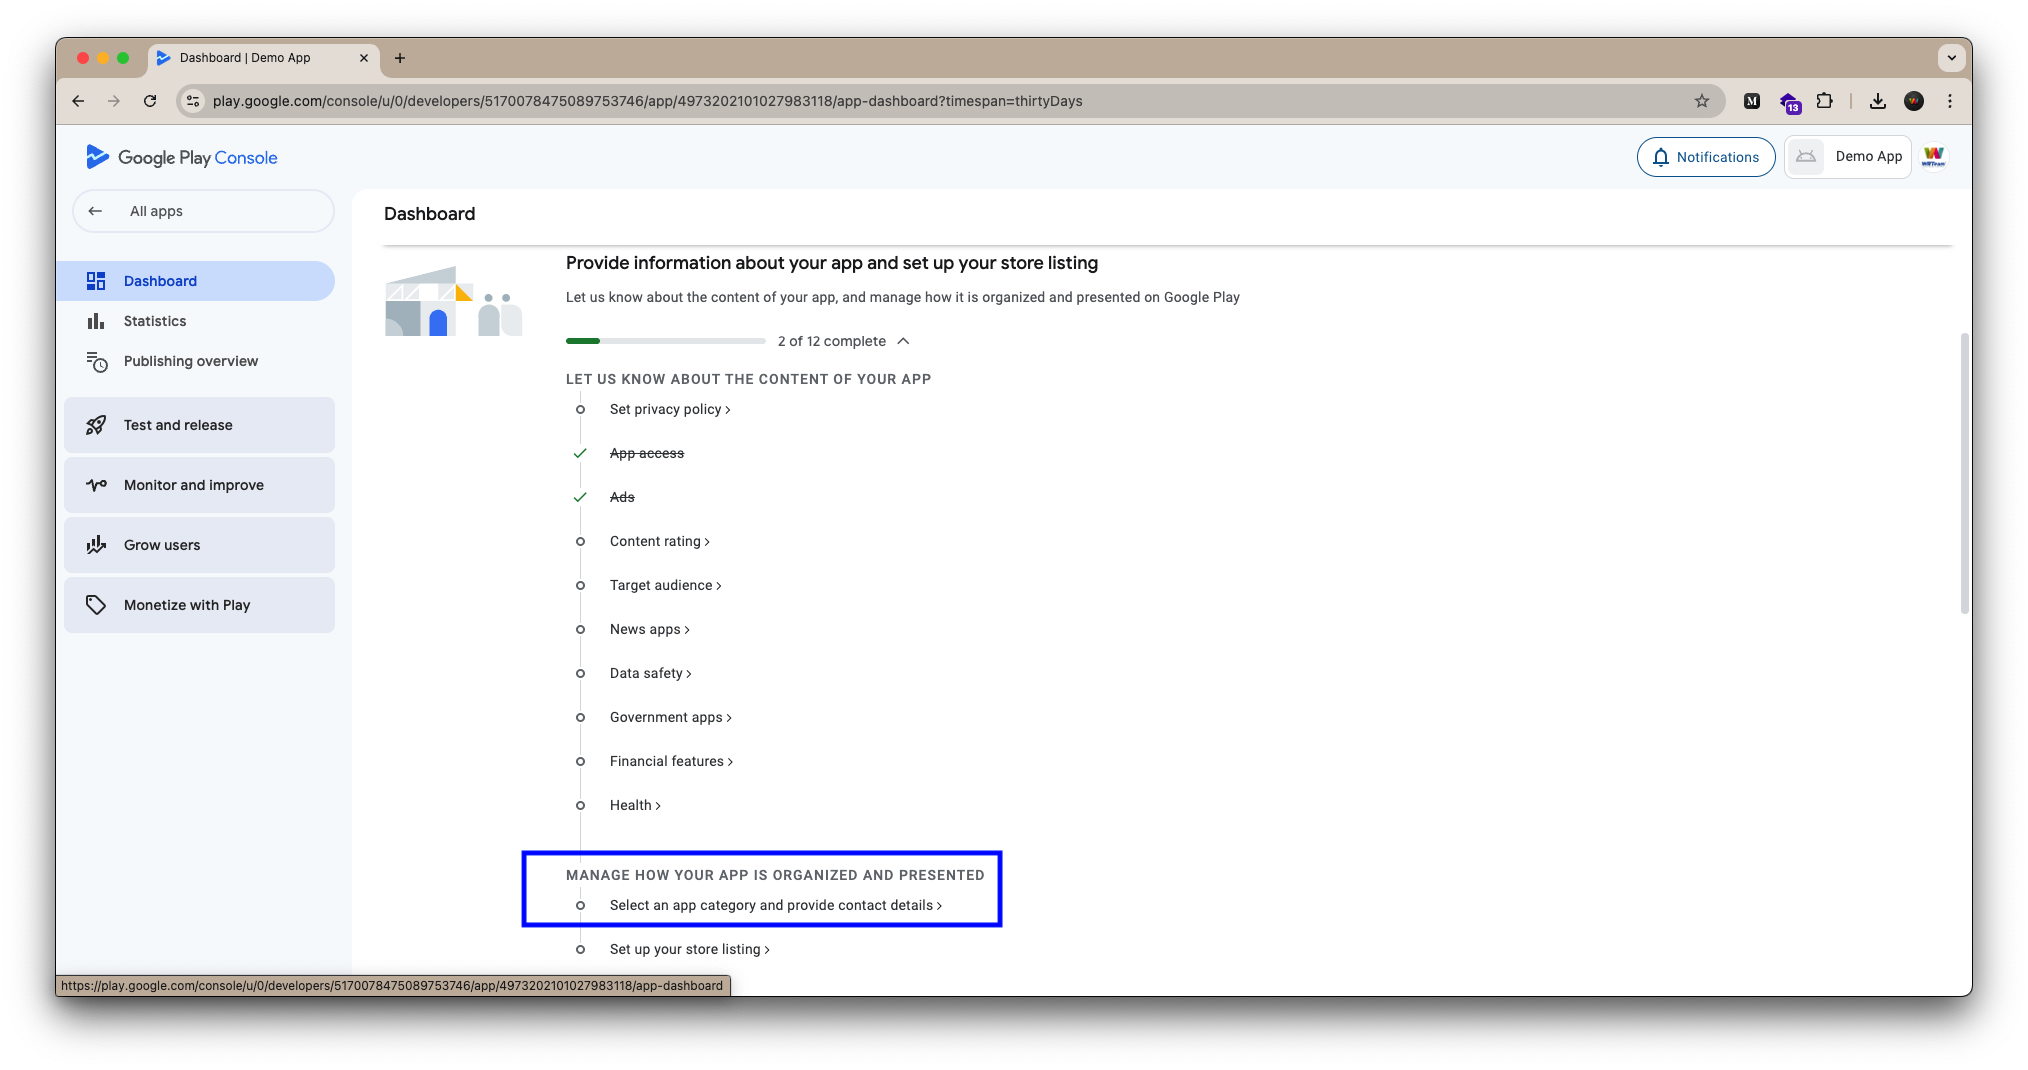

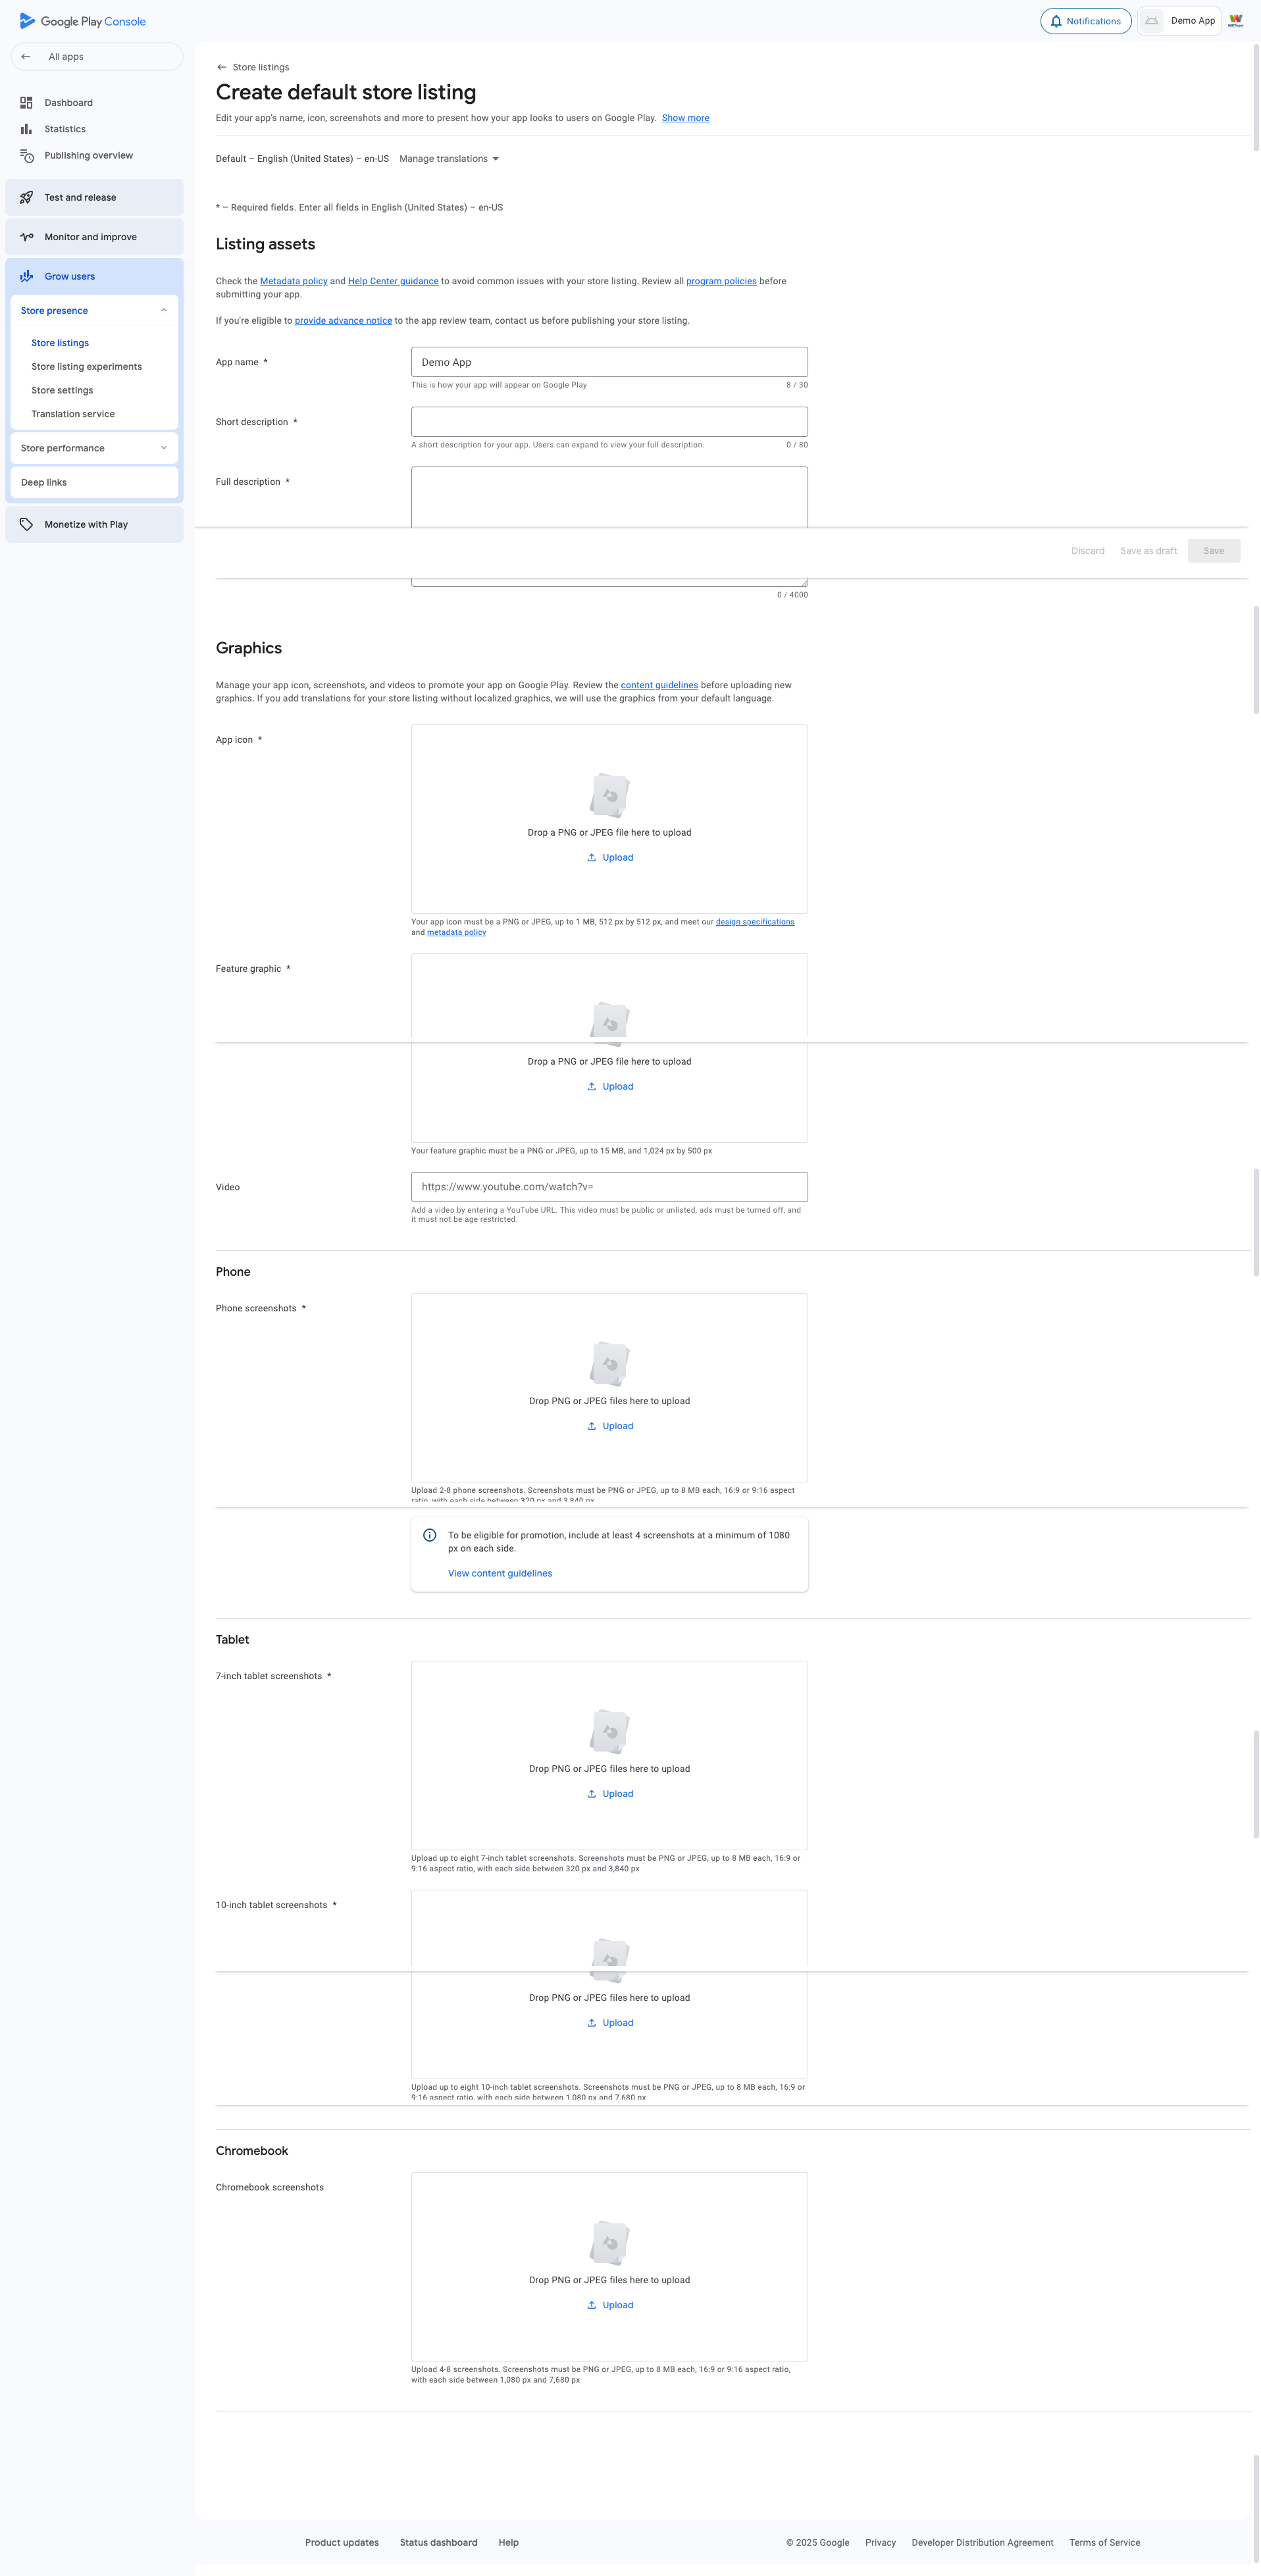
12. Store Listing Details
- App name (30 characters max)
- Short description (80 characters max)
- Full description (4000 characters max)
- What's new in this release
1. Visual Assets
-
App icon requirements:
- 512x512 px PNG
- Maximum file size: 1MB
-
Feature graphic:
- 1024x500 px
- JPG or PNG
- Maximum file size: 15MB
-
Screenshots:
- Phone screenshots (minimum 2)
- 16:9 aspect ratio
- Minimum 1920x1080 px
- Tablet screenshots (if supported)
- 16:9 aspect ratio
- Minimum 2048x1536 px
- Phone screenshots (minimum 2)
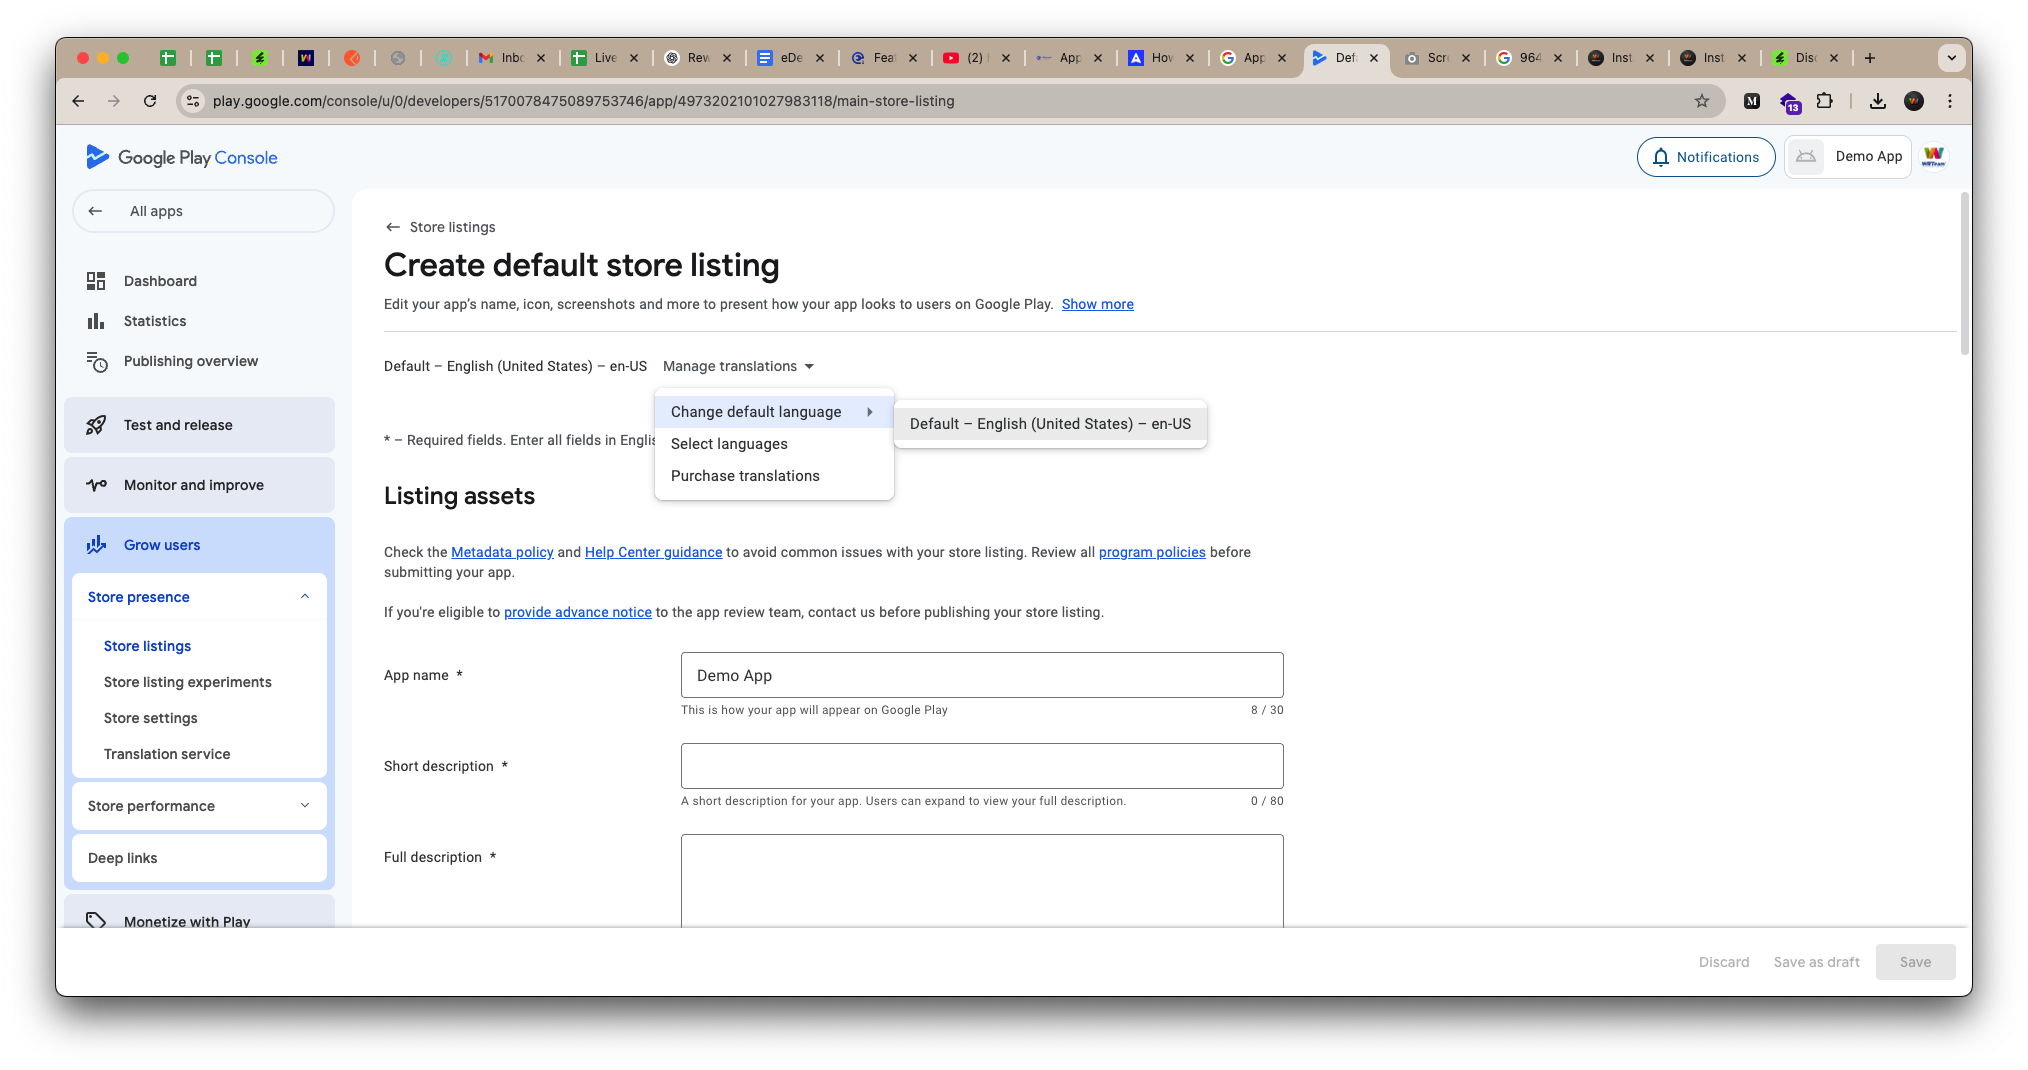
2. Languages and Translations
- Default language selection
- Additional language support
- Localized store listings
- Translations of descriptions
- Language-specific screenshots
8. Testing Setup
Understanding Testing Requirements
For personal developer accounts created after November 13, 2023, you must meet specific testing requirements before publishing your app on Google Play:
- Run a closed test with minimum 12 testers
- Testers must be opted-in for at least 14 consecutive days
- Complete an application process for production access
Testing Tracks Overview
-
Internal Testing
- Purpose: Quick distribution to trusted testers
- Features:
- Available before app setup completion
- Builds available within seconds
- Small group of trusted testers
- Optional but recommended first step
- No specific requirements to access
-
Closed Testing
- Purpose: Testing with controlled user group
- Requirements:
- Must complete app setup
- Minimum 12 opted-in testers
- 14 consecutive days of testing
- Features:
- Policy compliance verification
- Bug fixing
- User feedback collection
-
Open Testing
- Purpose: Public testing on Google Play
- Requirements:
- Must have production access
- App visible on Google Play
- Features:
- Anyone can join testing
- Private feedback collection
- Public visibility
-
Production
- Purpose: Full public release
- Requirements:
- Successful closed testing
- 12+ testers for 14 days
- Approved application for production access
- Features:
- Full Play Store distribution
- Access to all Play Console features
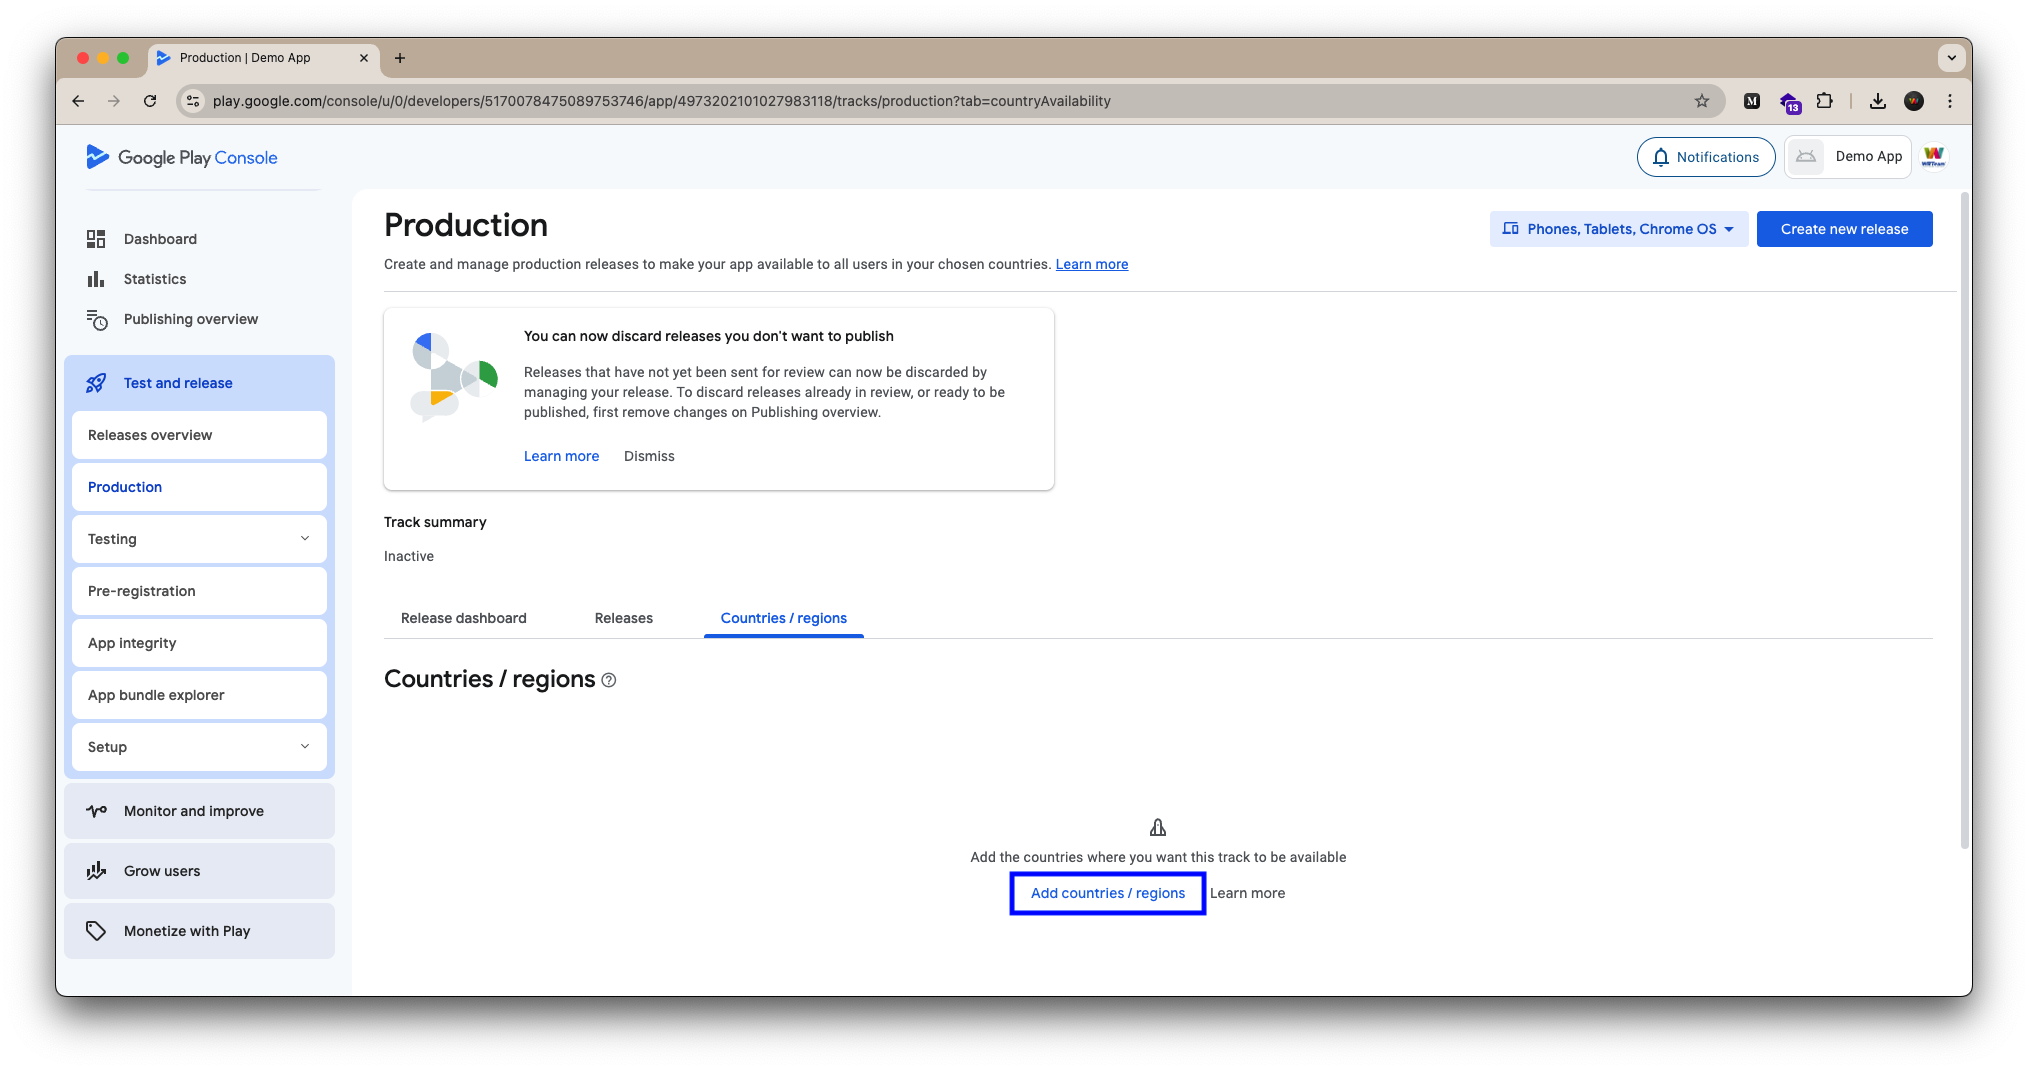
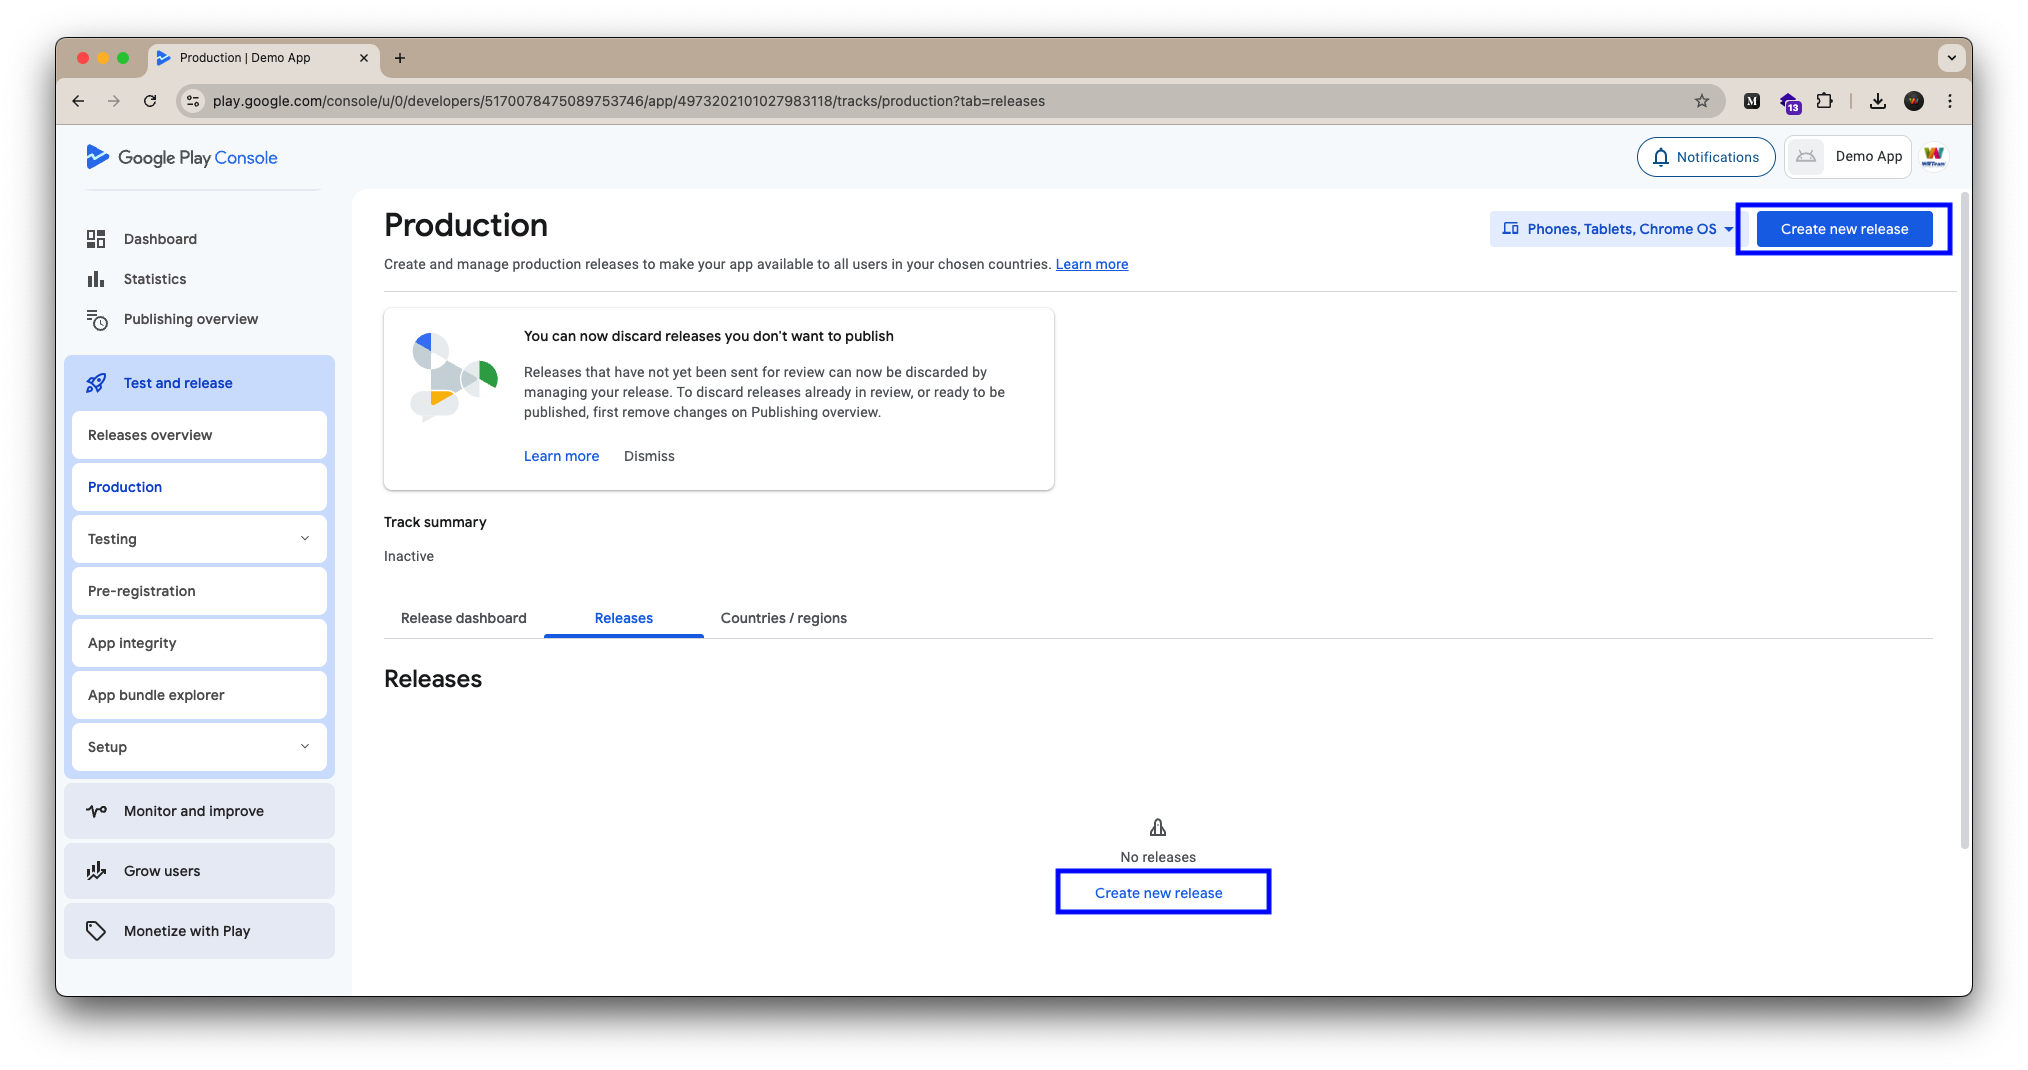
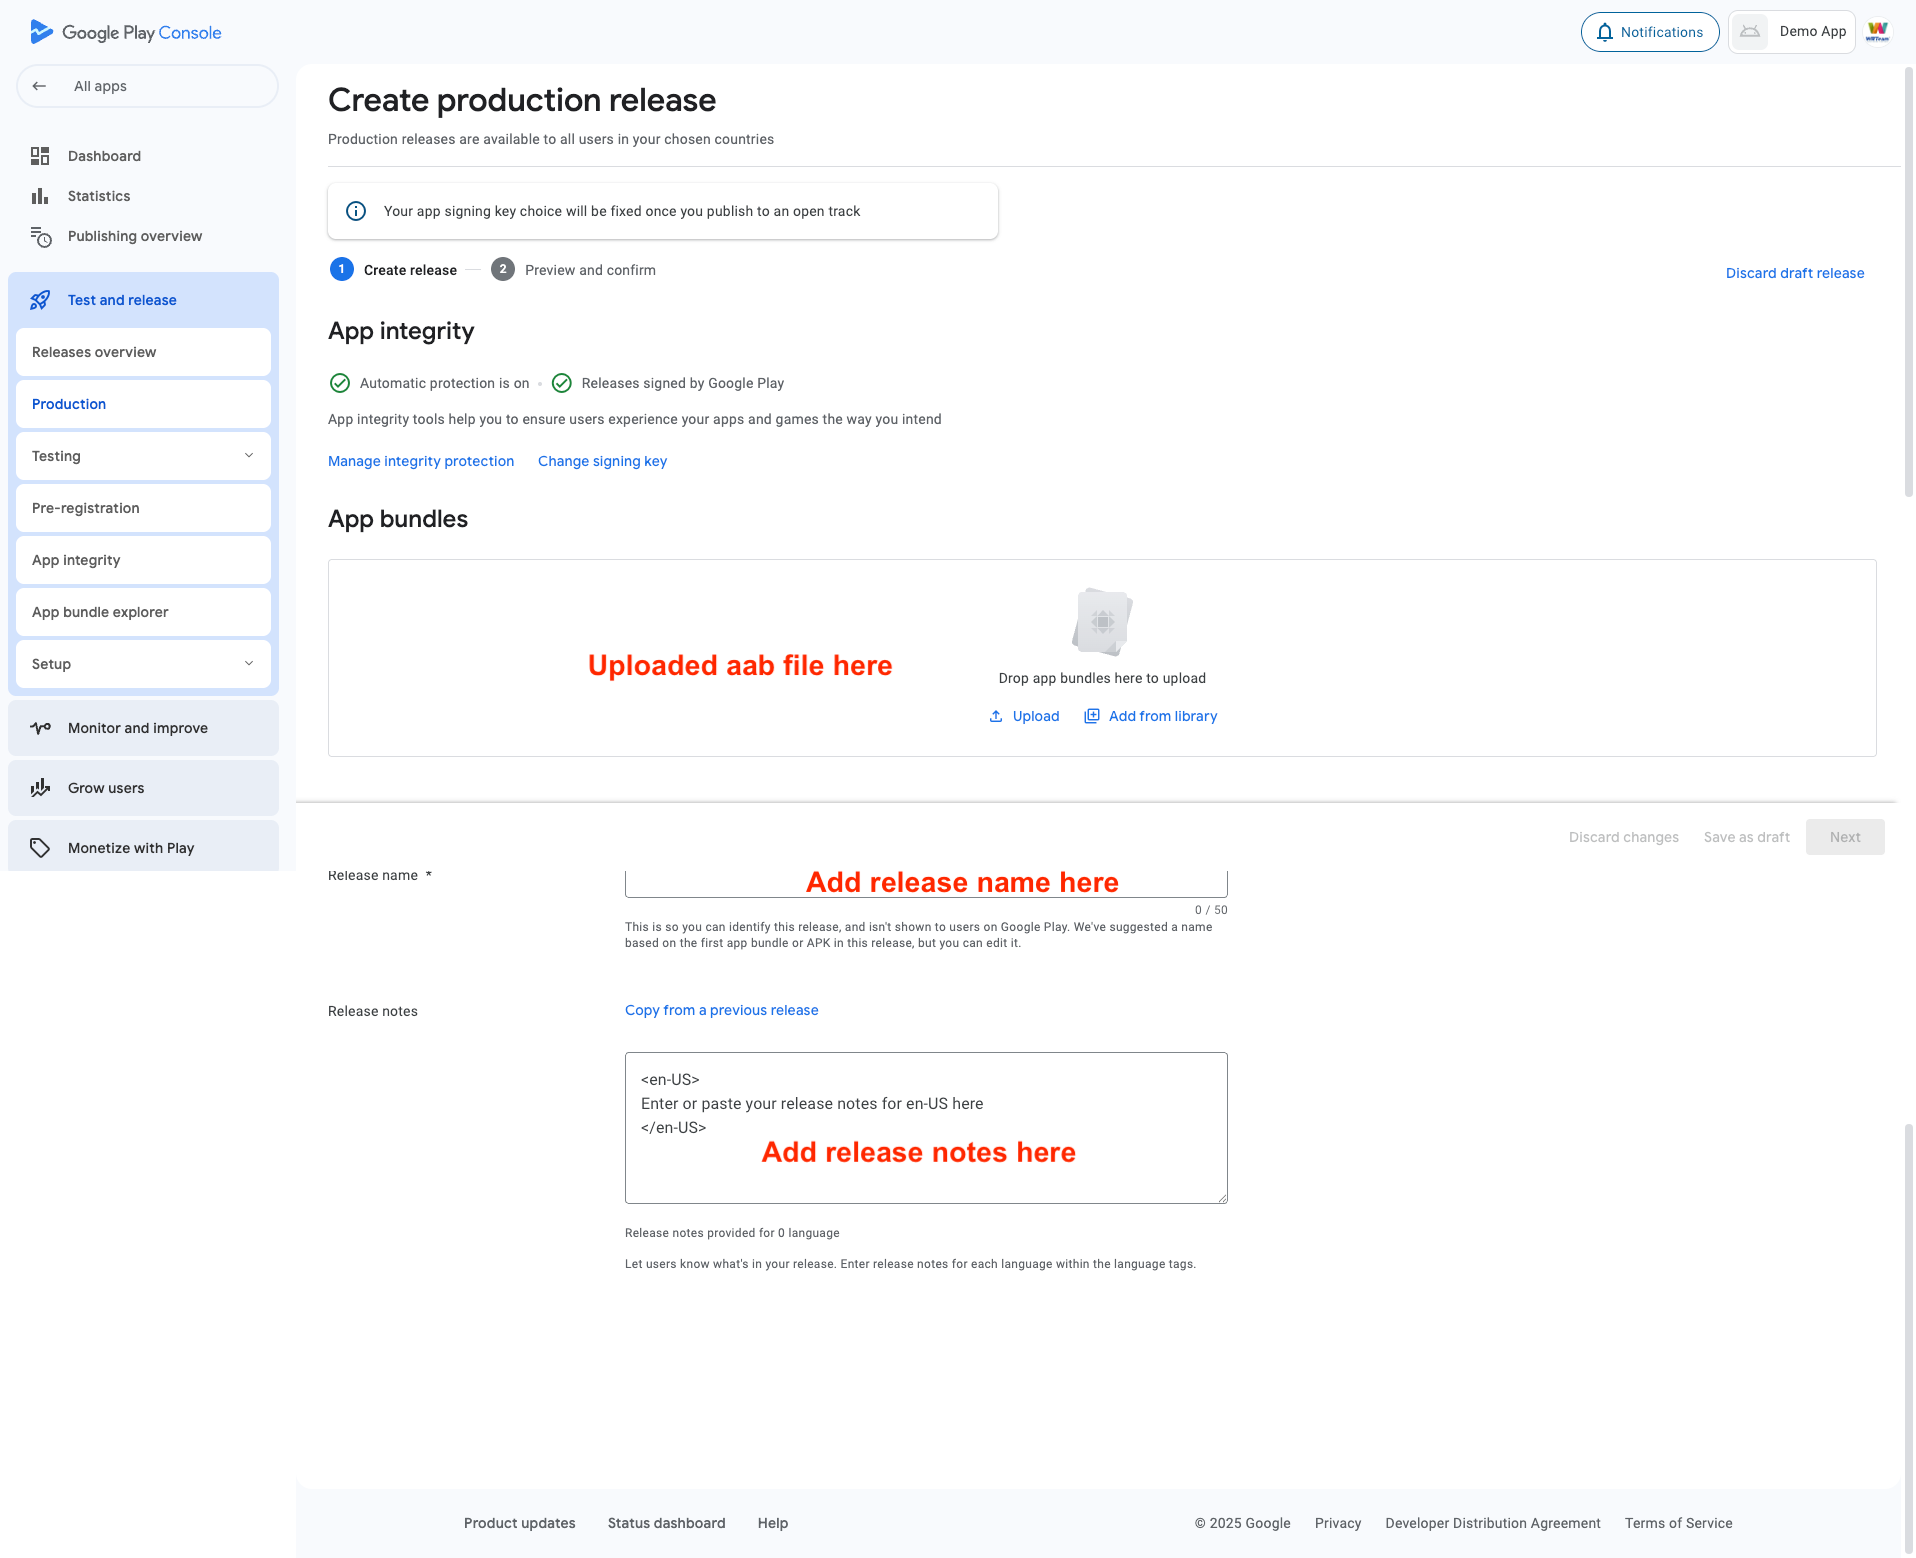
9. Production Release
- Create production track
- Select Countries
- Upload app bundle
- Add release notes:
- What's new
- Bug fixes
- Improvements
- Configure rollout percentage
- Review all sections:
- Store listing
- Content rating
- Data safety
- App content
- Submit for review
10. Post-Release Tasks
- Monitor app performance
- Track user feedback
- Address bug reports
- Plan updates
- Maintain compliance