IAP (In App Purchase)
Overview
This guide walks you through the steps to create and setup IAP for App Store and Play Console.
IAP Types with Examples
Consumable IAP
Consumable IAPs are one-time use items that can be purchased repeatedly:
| Example | Description | Use Case |
|---|---|---|
| In-game currency | Coins, gems, or tokens | Players can buy 100 coins multiple times |
| Power-ups | Temporary boosts or abilities | Energy refills that are consumed when used |
| Extra lives | Additional attempts in a game | Players can purchase 5 extra lives when they run out |
Non-Consumable IAP
Non-consumable IAPs are permanent features or content that users purchase once:
| Example | Description | Use Case |
|---|---|---|
| Premium features | Unlock advanced functionality | Remove ads permanently |
| Content unlock | Access to additional content | Unlock a new game level or chapter |
| Premium themes | Visual customizations | Purchase a dark mode theme |
First we will start with App Store.
App Store
Check Your Agreements
Before creating IAP and offering them in your app, you must do two things:
- Sign the Paid Applications Agreement and set up your banking and tax information in App Store Connect.
- Make sure you have accepted the latest Apple Development Program License Agreement on developer.apple.com.
If you have not done this, usually App Store Connect gives you a warning like the following:

If you see something like the above, follow the steps to accept the appropriate agreements.
It’s also good to double-check the Agreements, Tax, and Banking section in App Store Connect:
If you see a section entitled Request Contracts containing a row for Paid Applications, then click the Request button. Fill out all the necessary information and submit it. It may take some time for your request to be approved.
Otherwise, if you see Paid Applications listed under Contracts In Effect, it looks like you've already done this step! Good job!
Apple can take a few days to approve these IAP-related agreements after you submit them. During this time, you won't be able to display IAP products in your apps even if you implement everything correctly in the code. It is a common source of frustration for folks implementing IAP for the first time.
Create IAP Products in App Store Connect
We'll create the IAP that your app will offer.
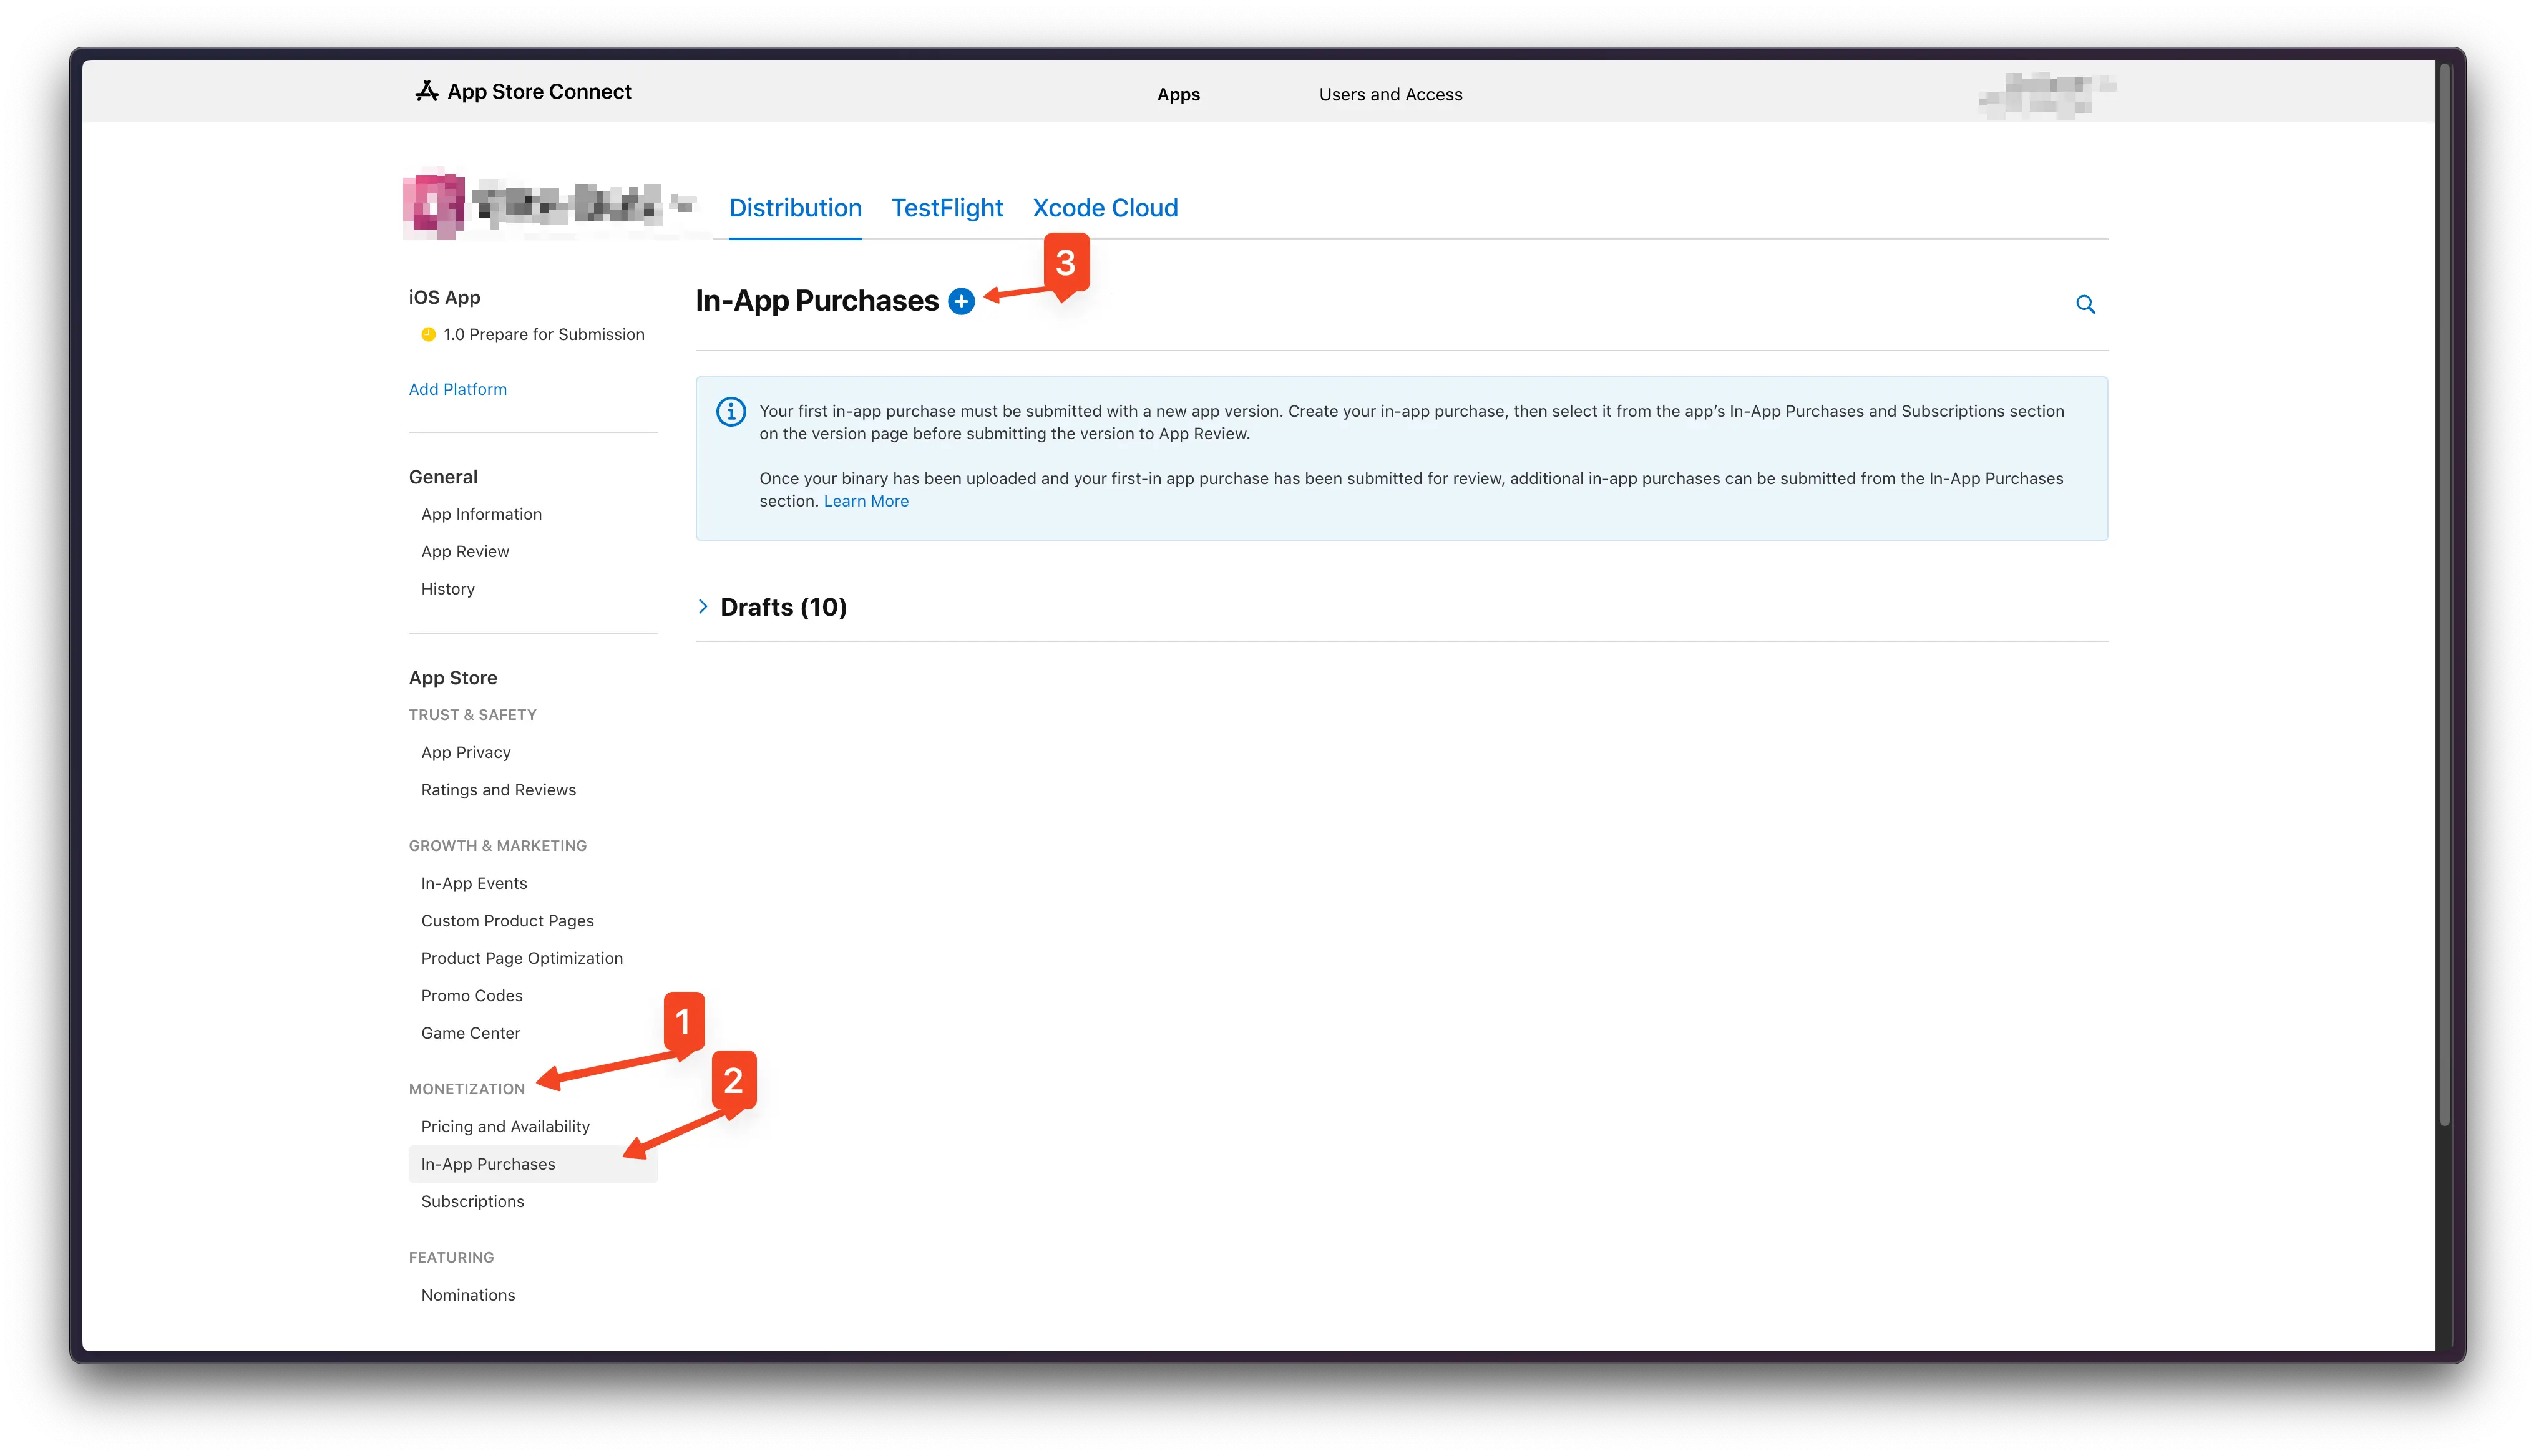
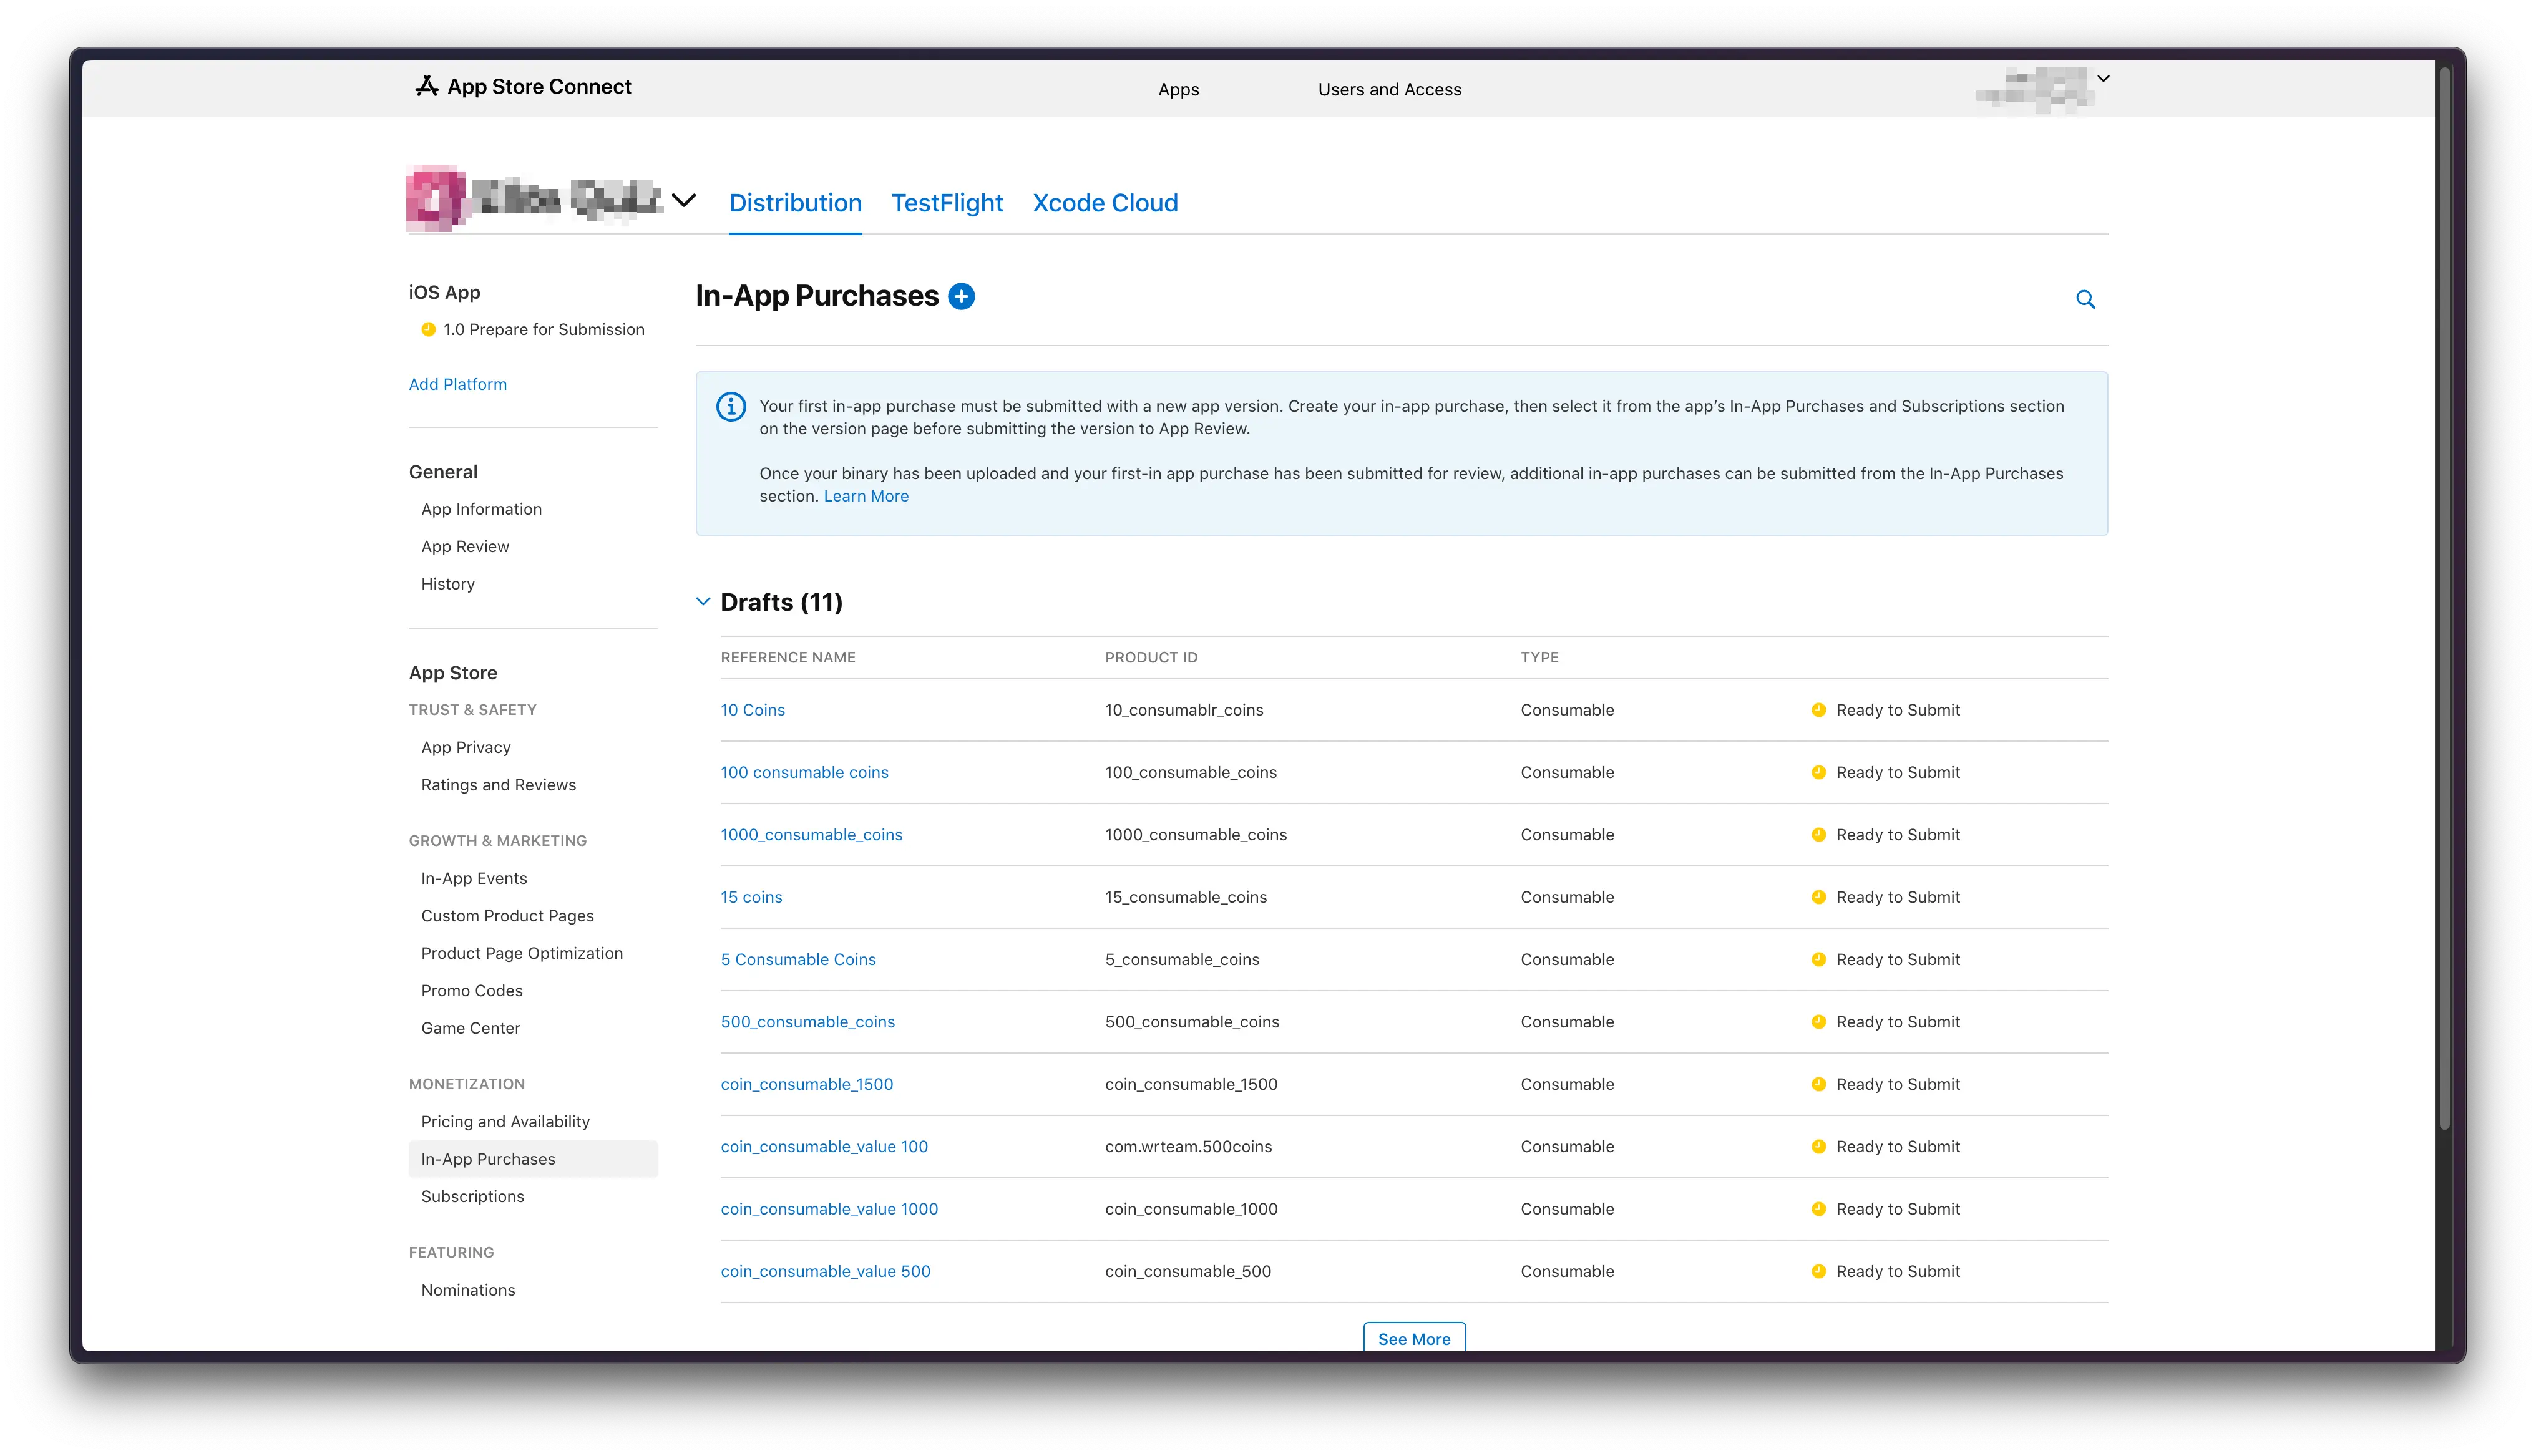
Go to In app purchases section in App Store Connect and click on Add new product or + (plus) button in the top as shown in the image.
For Type select Consumable or Non-Consumable as shown in the image.
For Reference Name enter a unique name for your IAP.
For Product ID enter a unique alphanumeric identifier. This identifier must be unique across all IAP products in your app as well as across all your apps in the App Store.
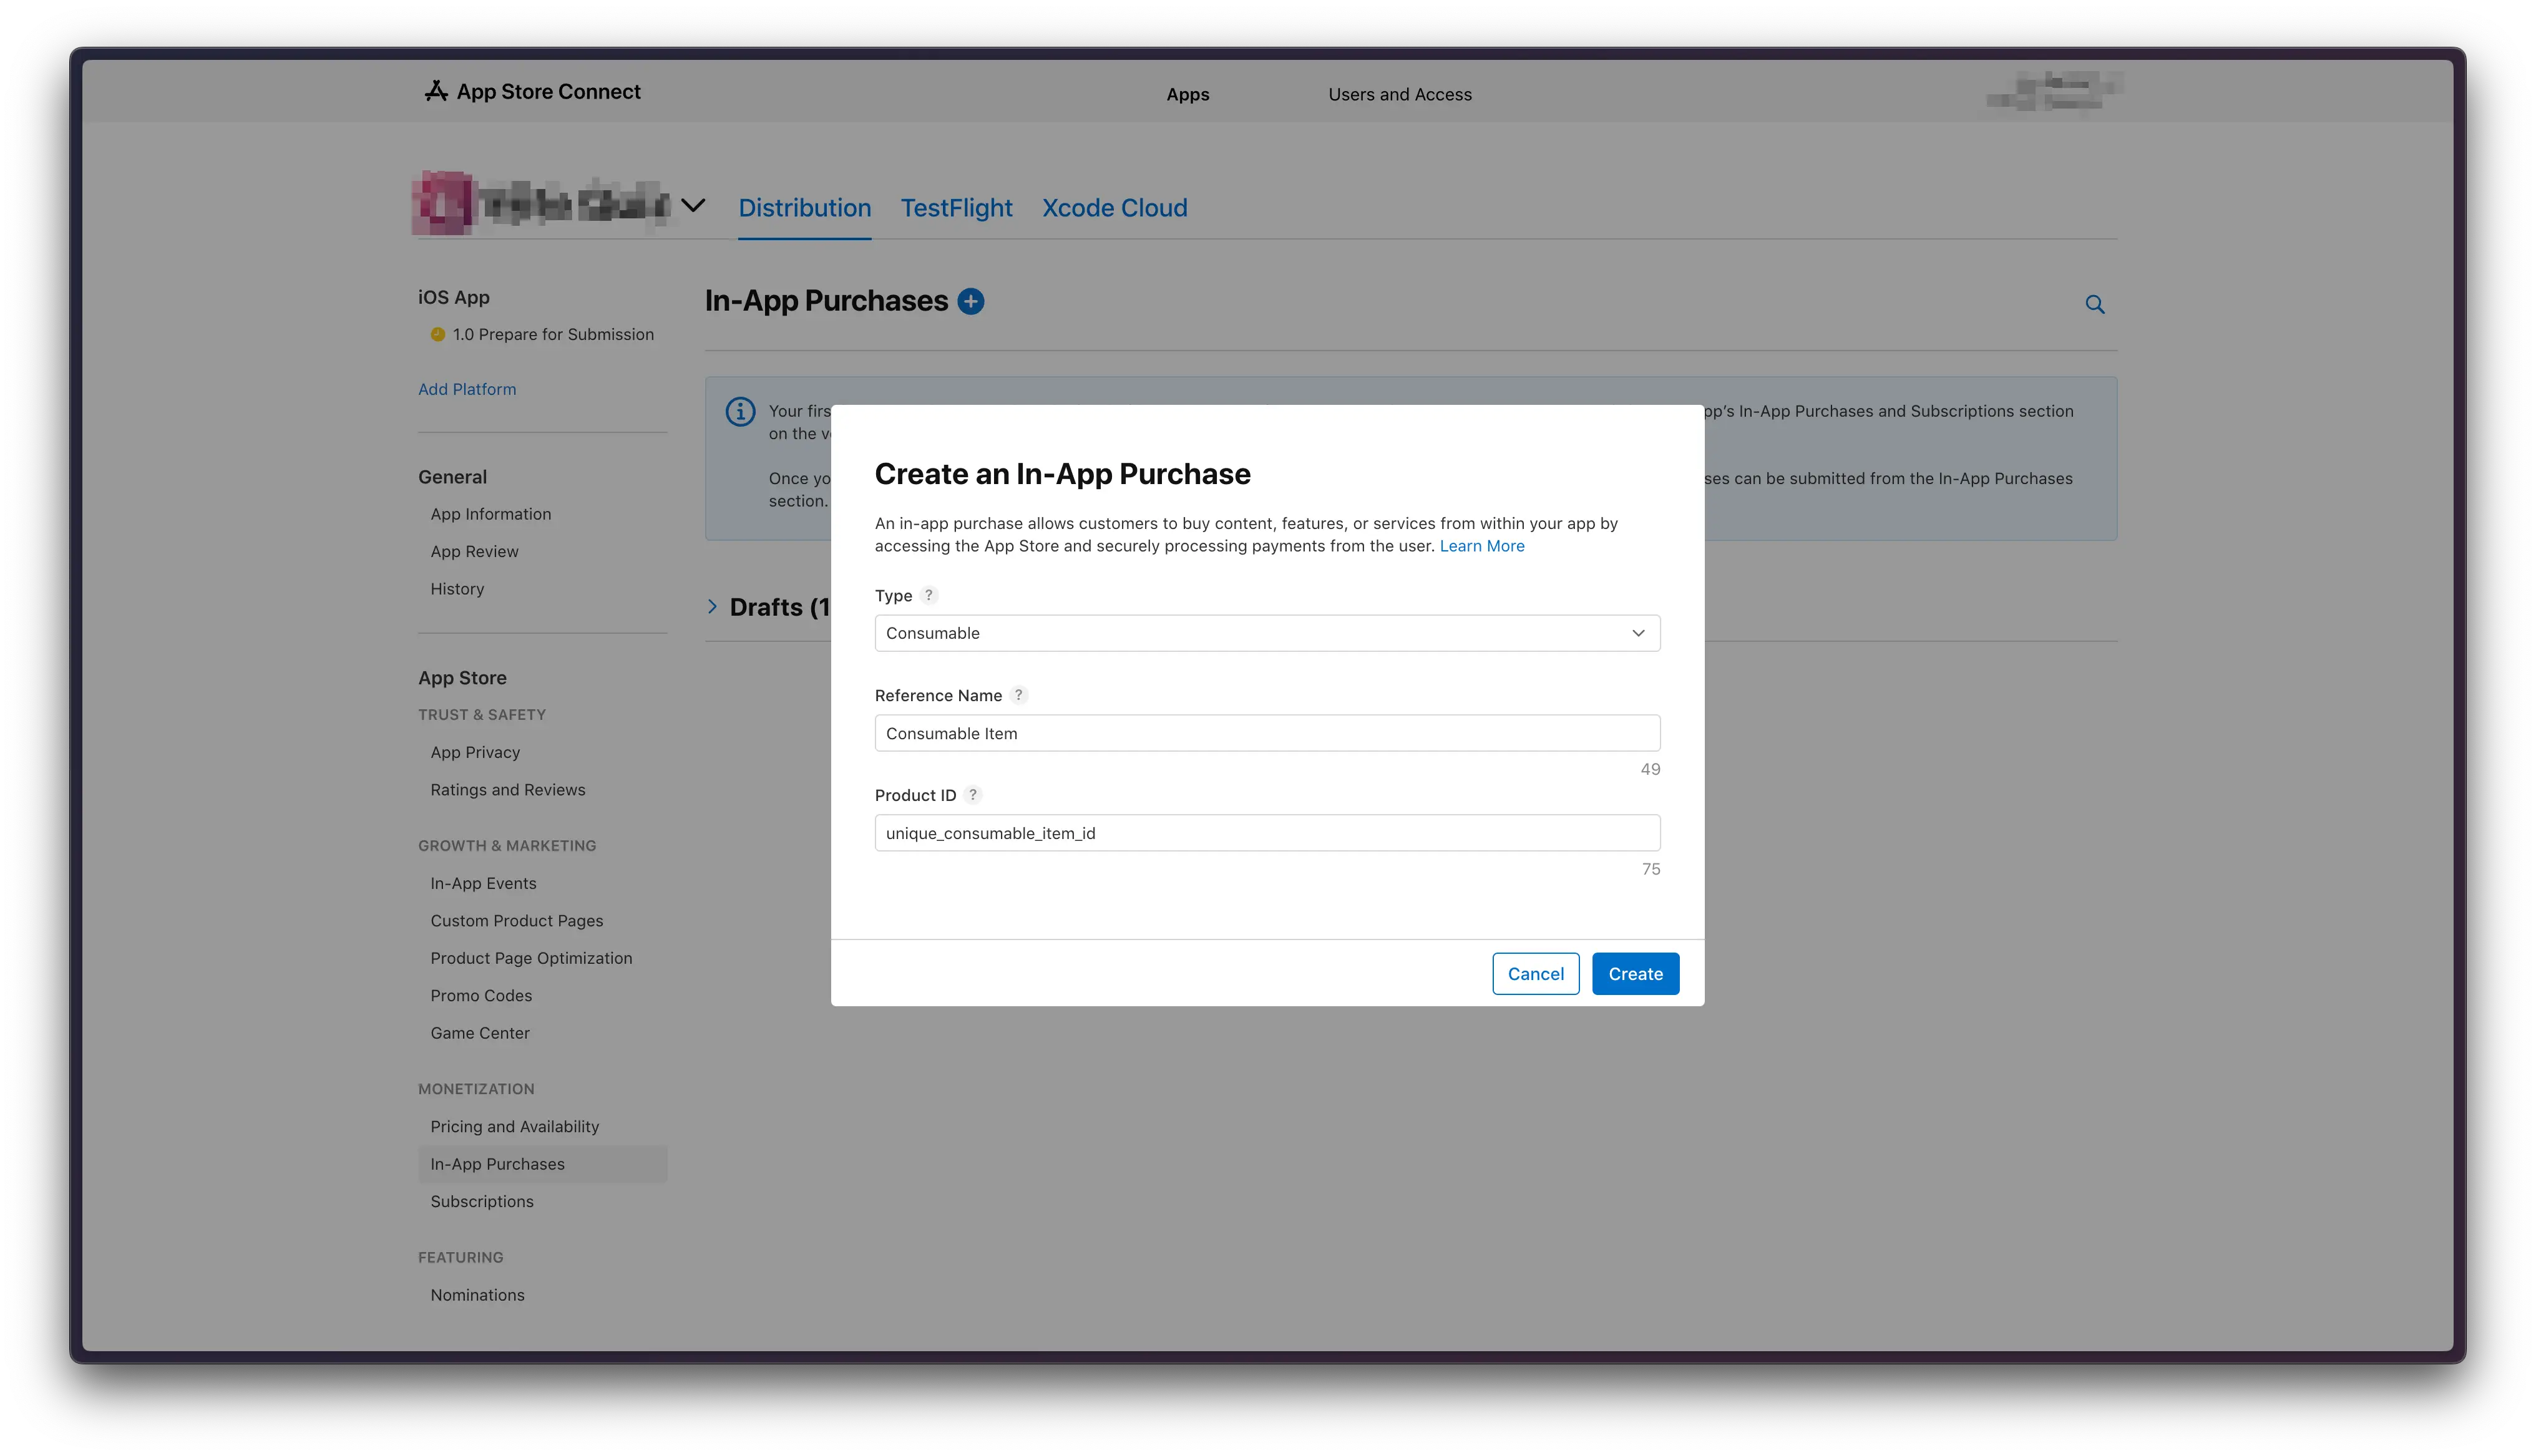
Then click on Create.
Fill in Availability, Price Schedule
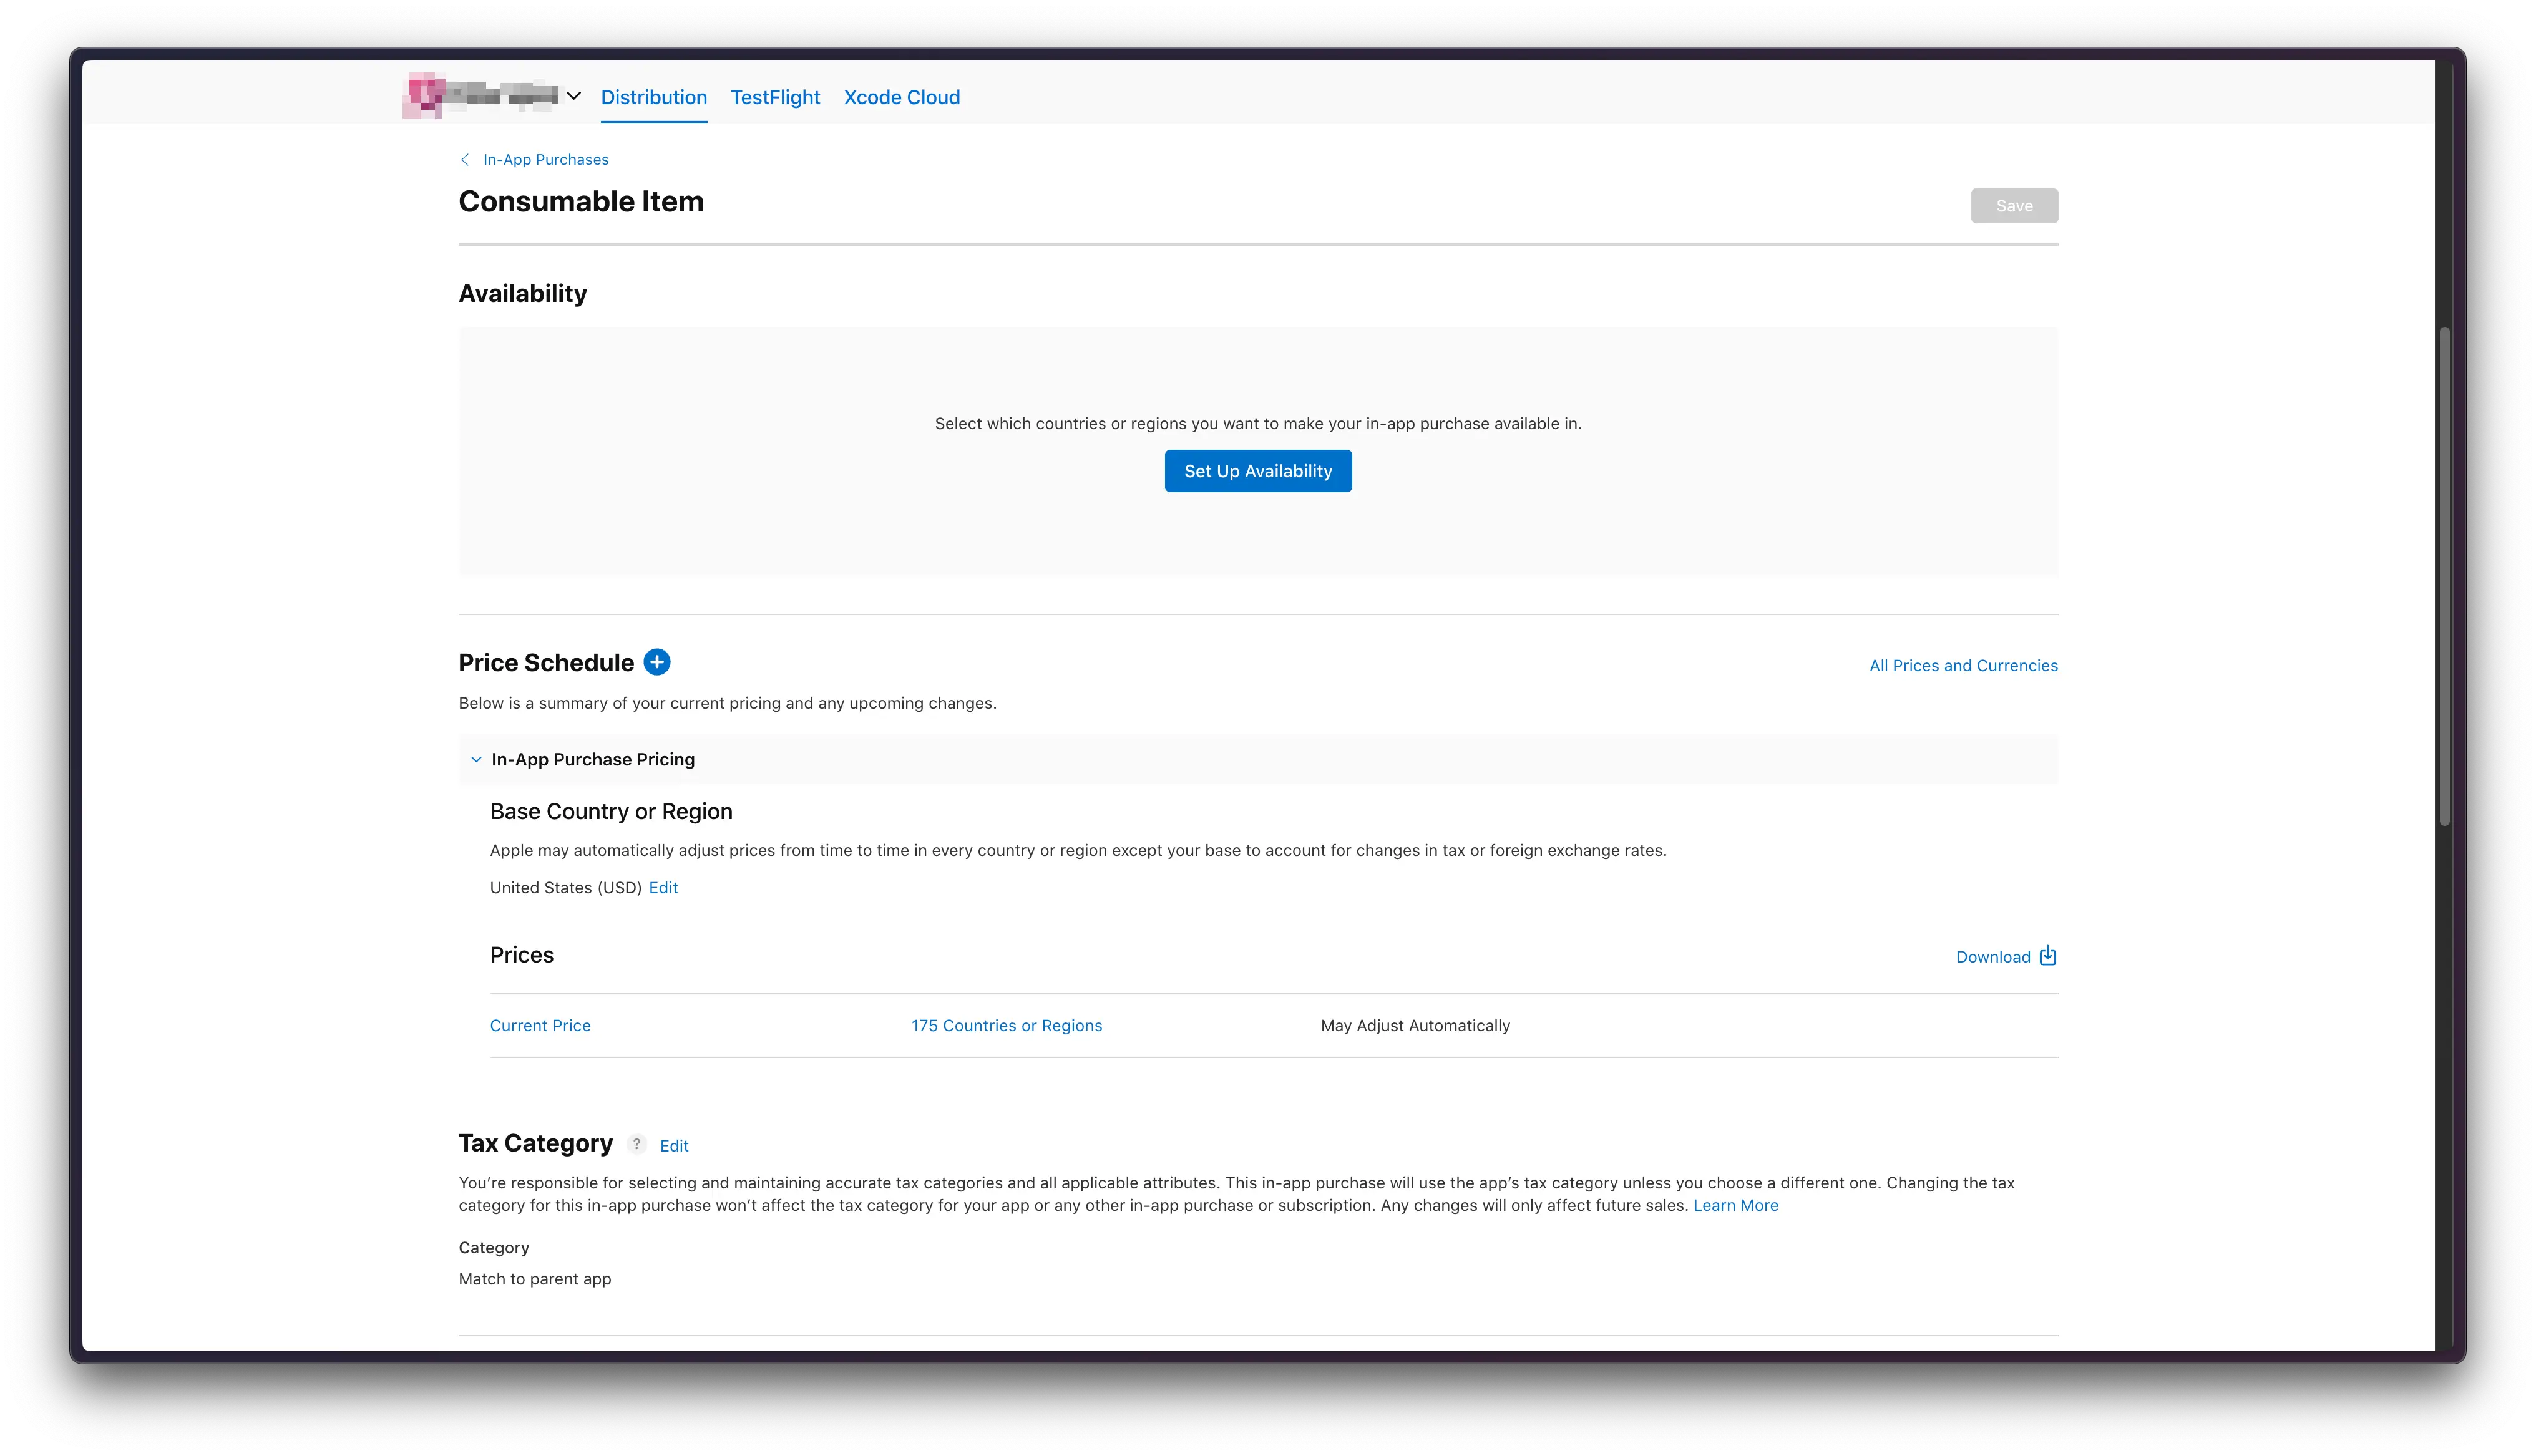
App Store Localization and Review Information
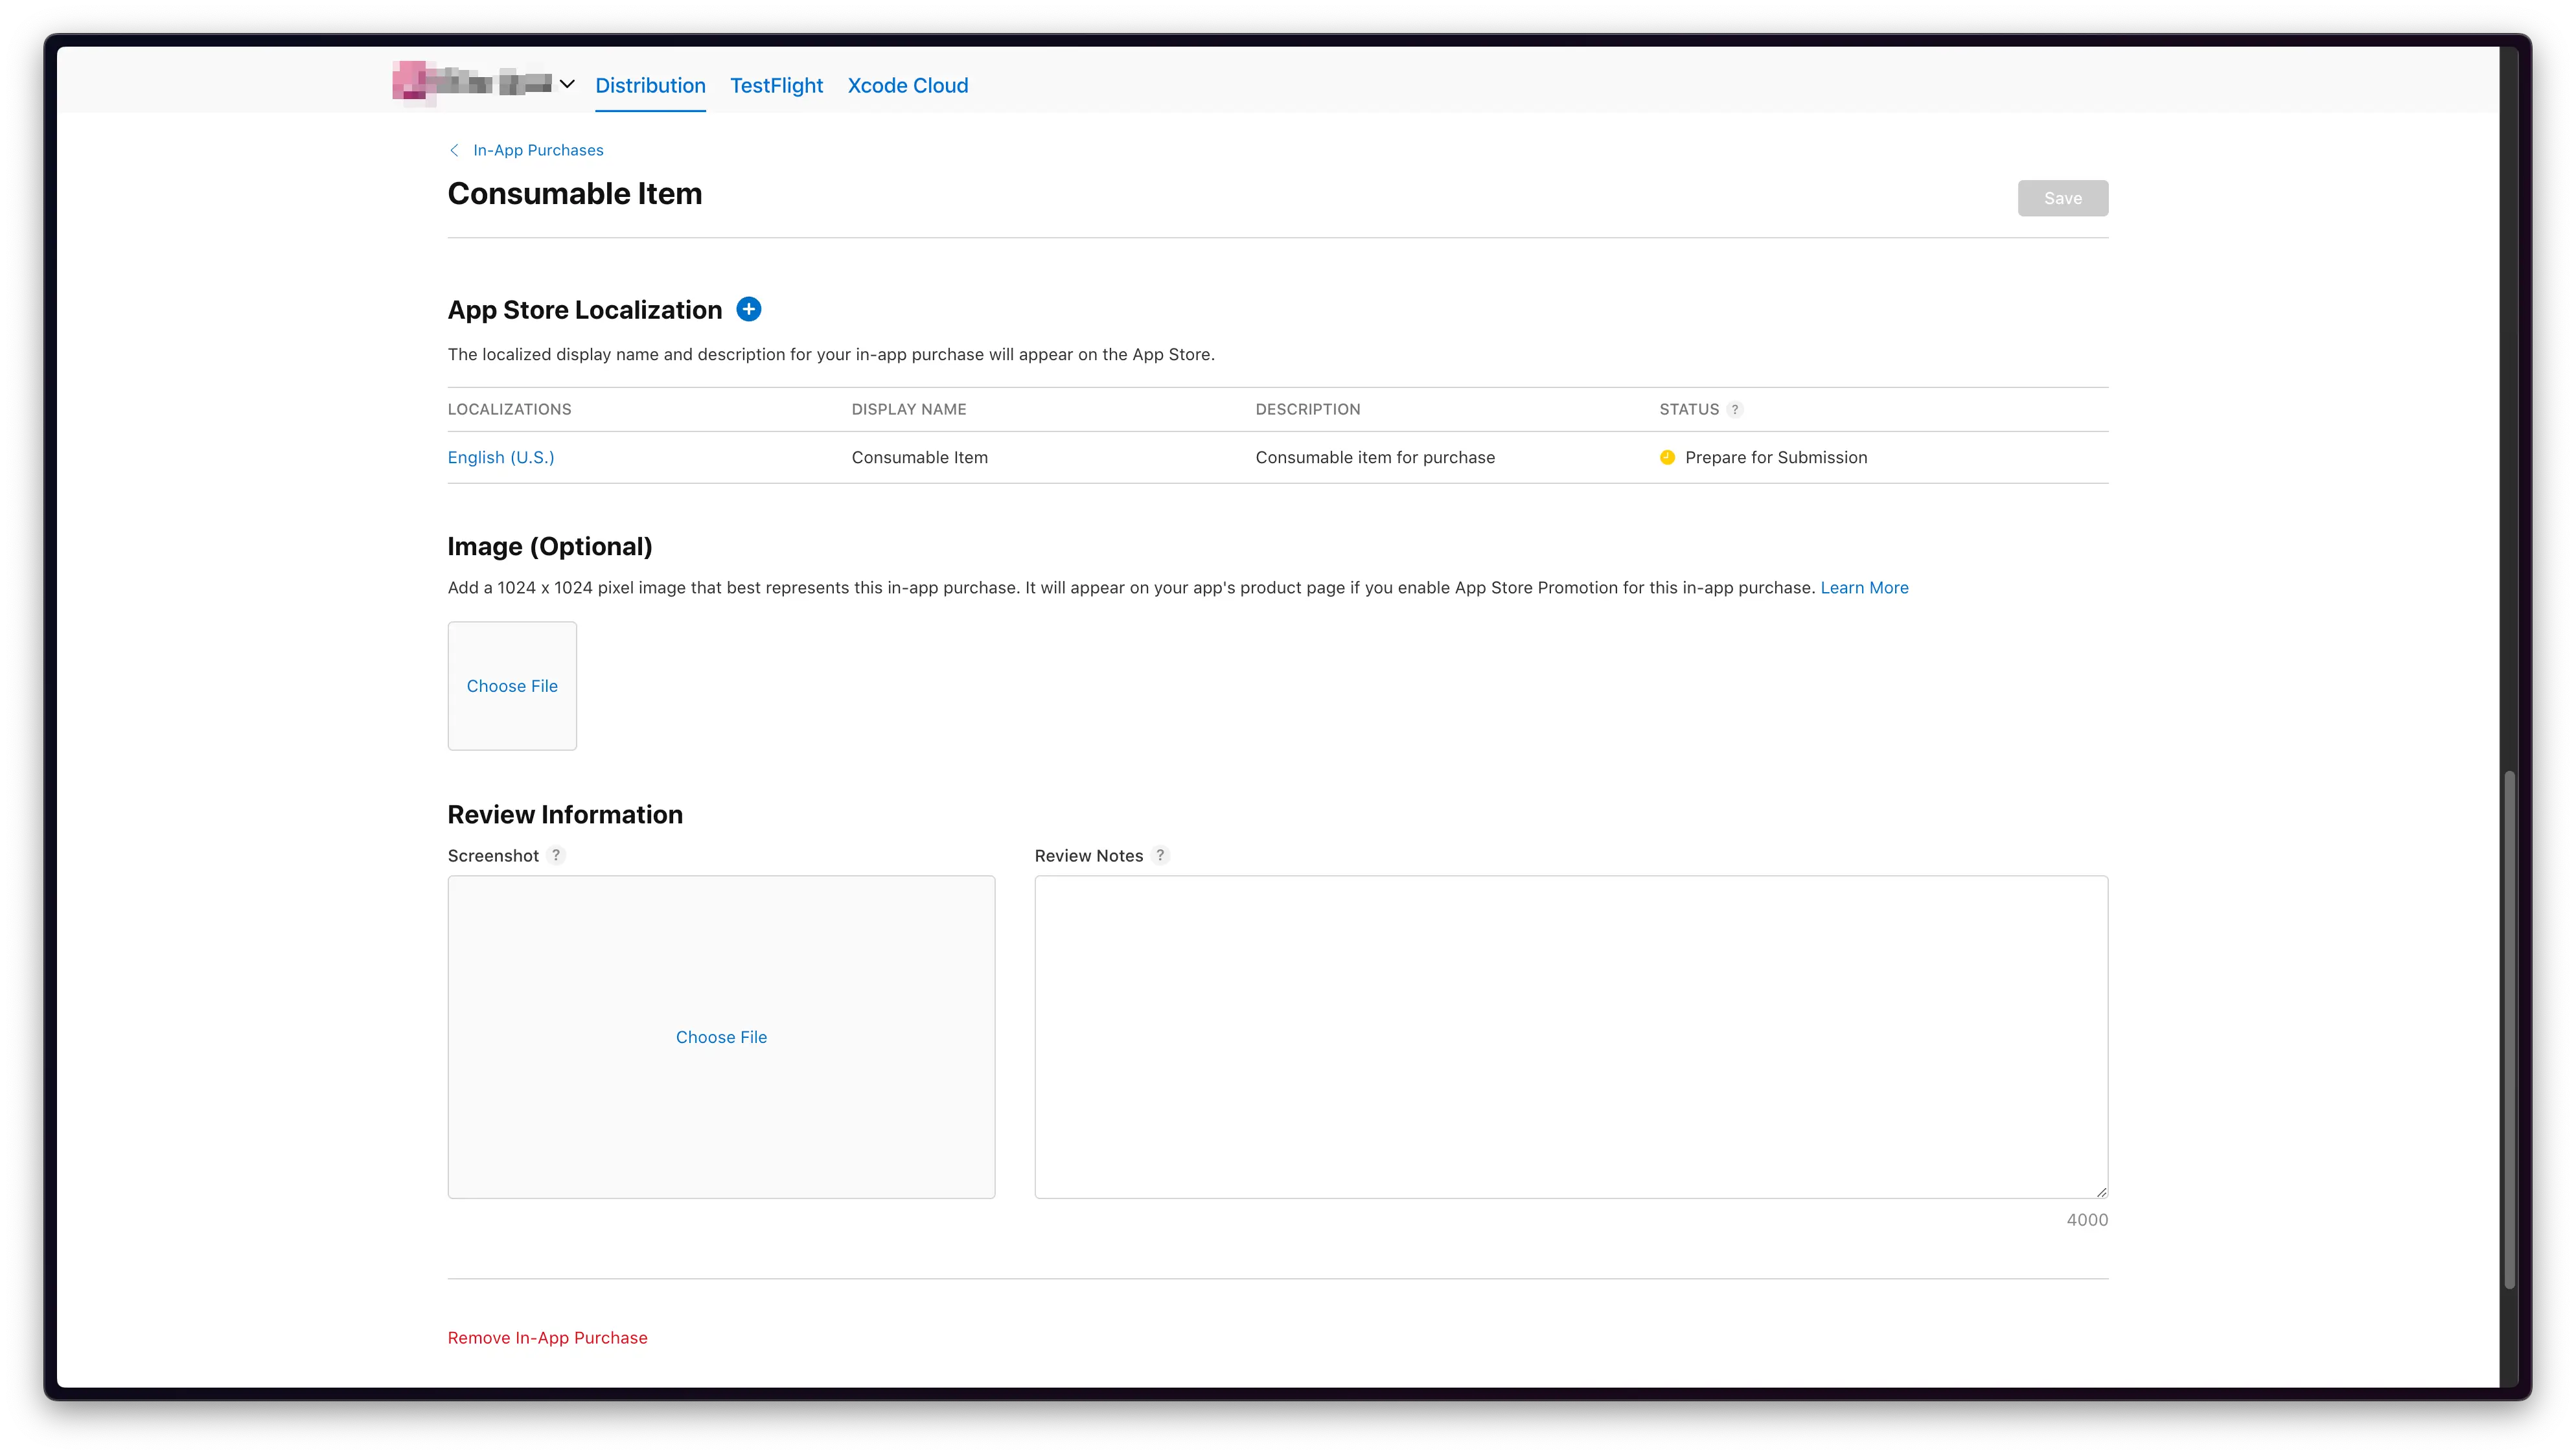
Click on Save once done.
Going back to the In App Purchases page, you should see your IAP listed with Ready to Submit status.
After that go to App Submission page and scroll down to In-App Purchases and Subscriptions section.
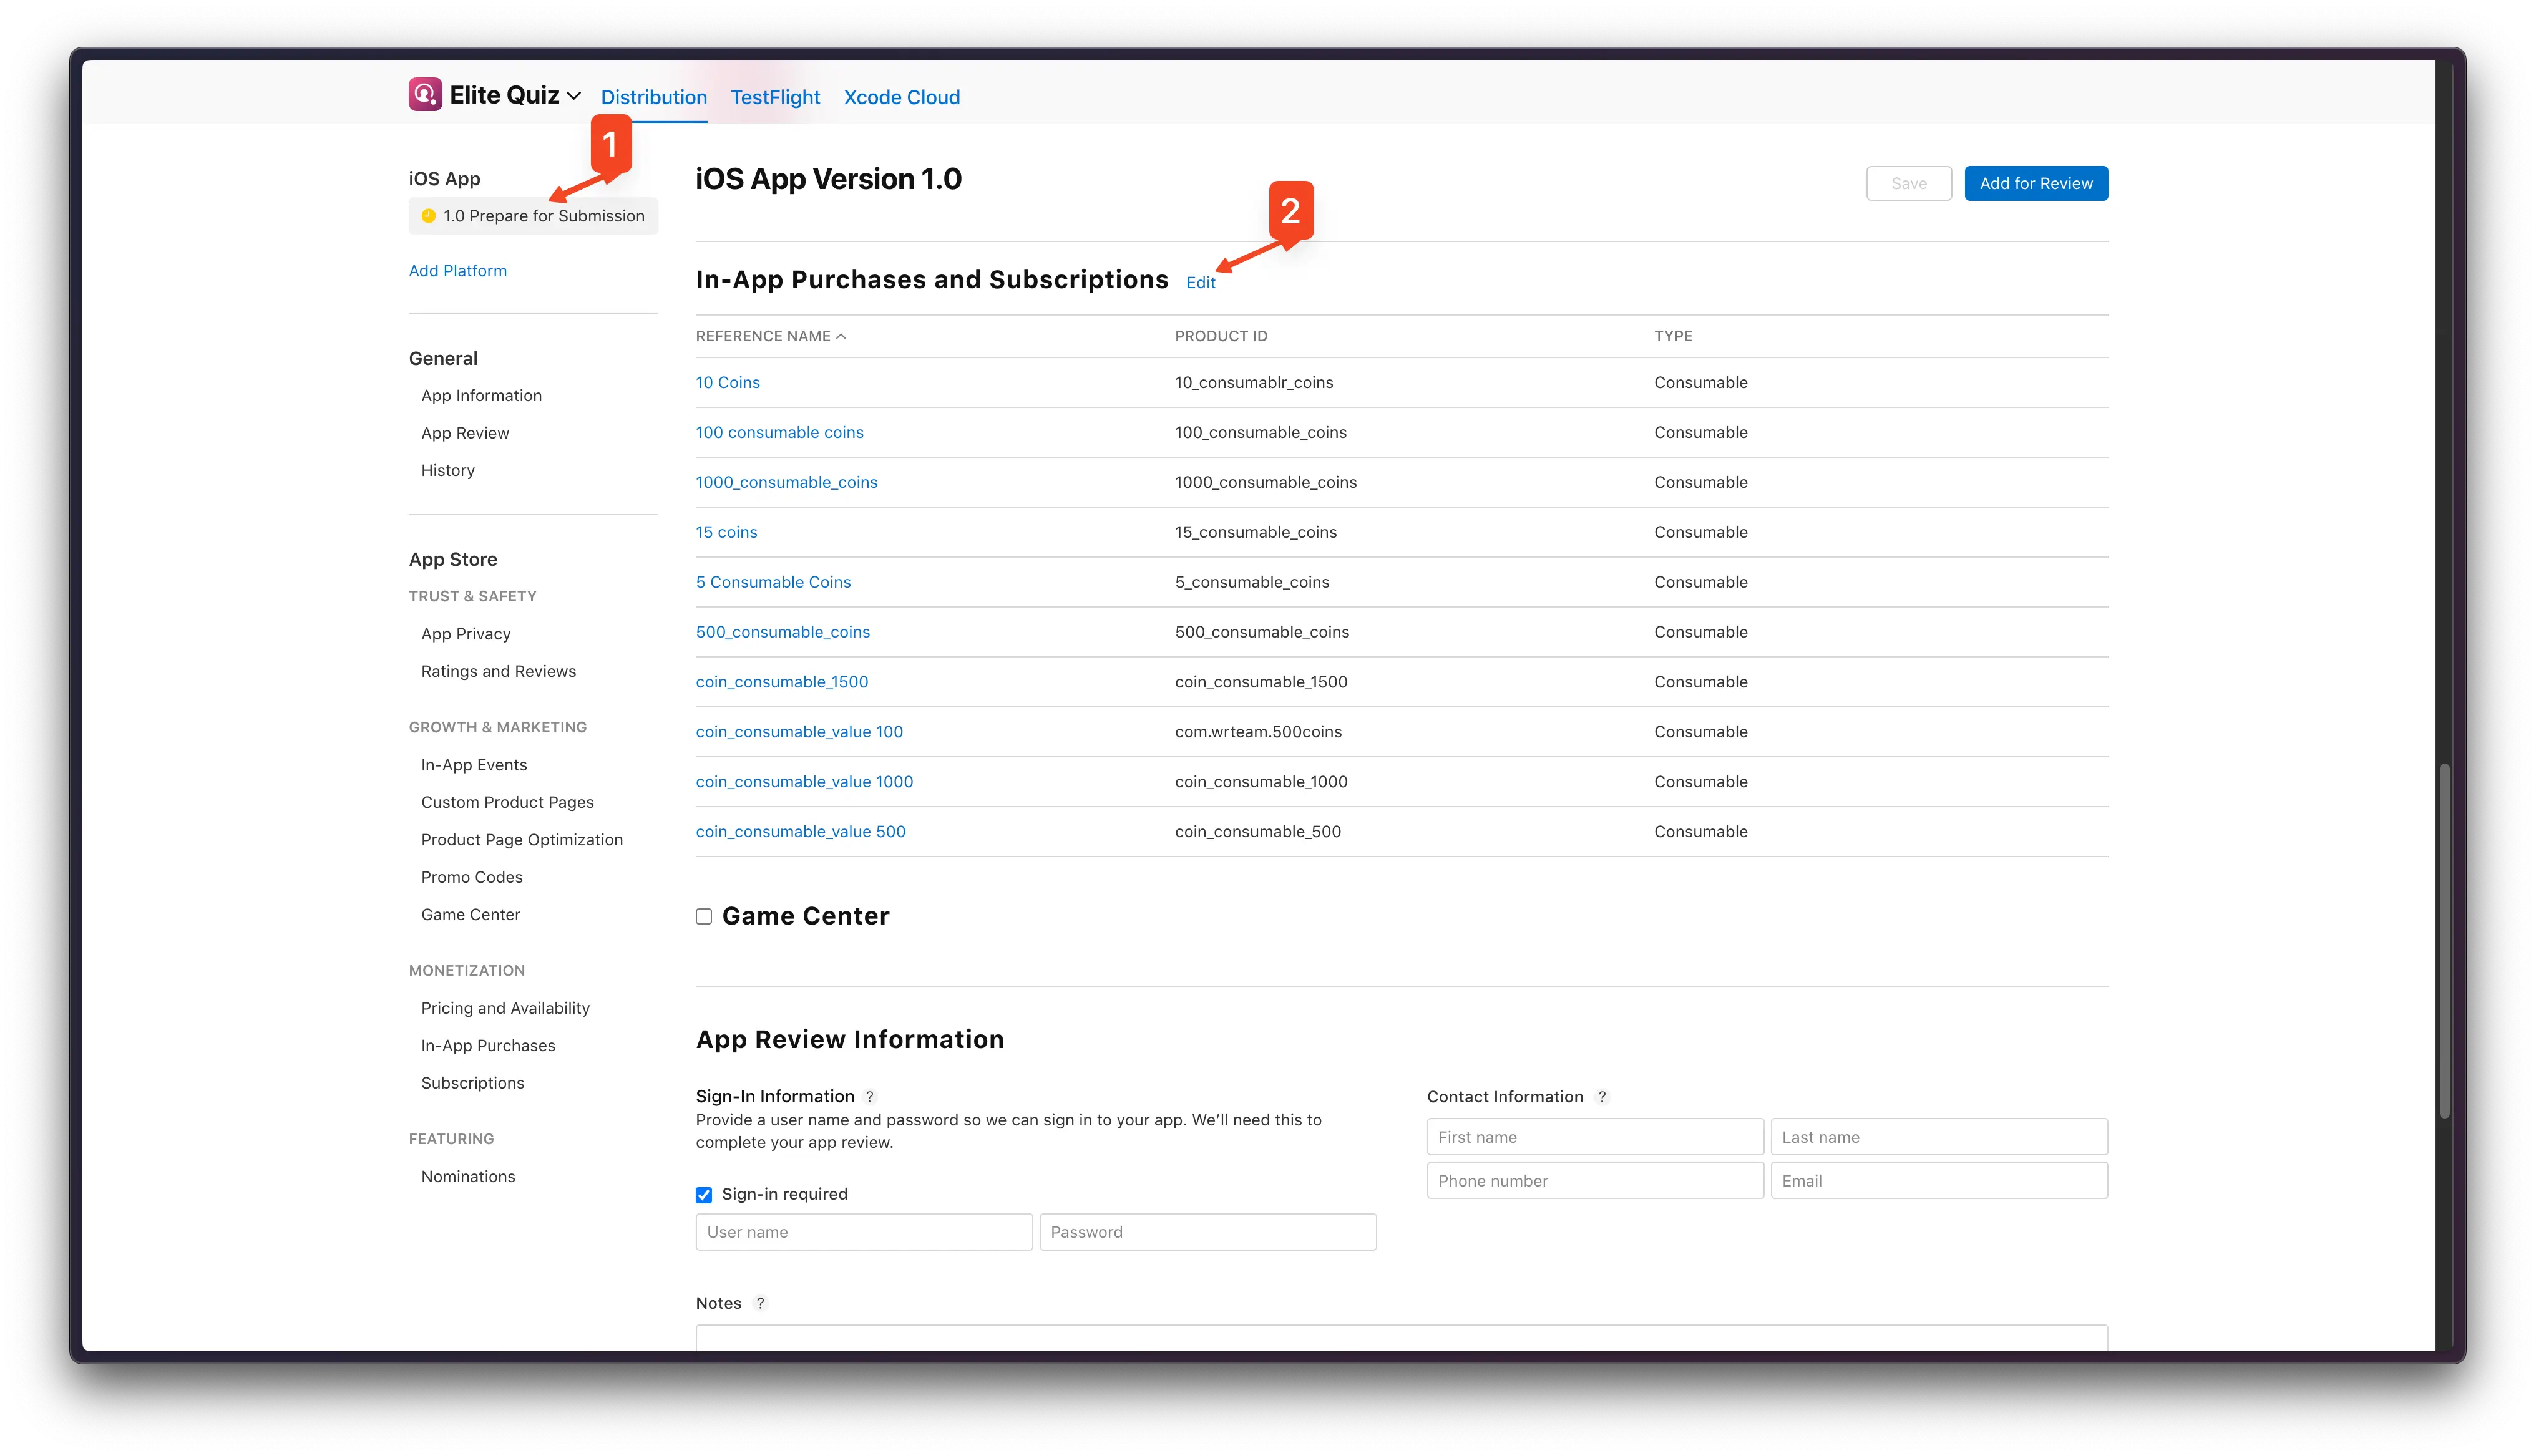
And click Edit, then select the IAP you just created. Click Done.
That's it! 🎊 You have successfully created IAP in App Store Connect. You can check and test the IAP with TestFlight, and make sure it works as expected. Then submit the app for review.
Google Play Console
Check Availability
Make sure your region is supported location for merchant registration, if it is then you can use Google Play's billing system.
Next Setup the payments profile in Google Play Console.
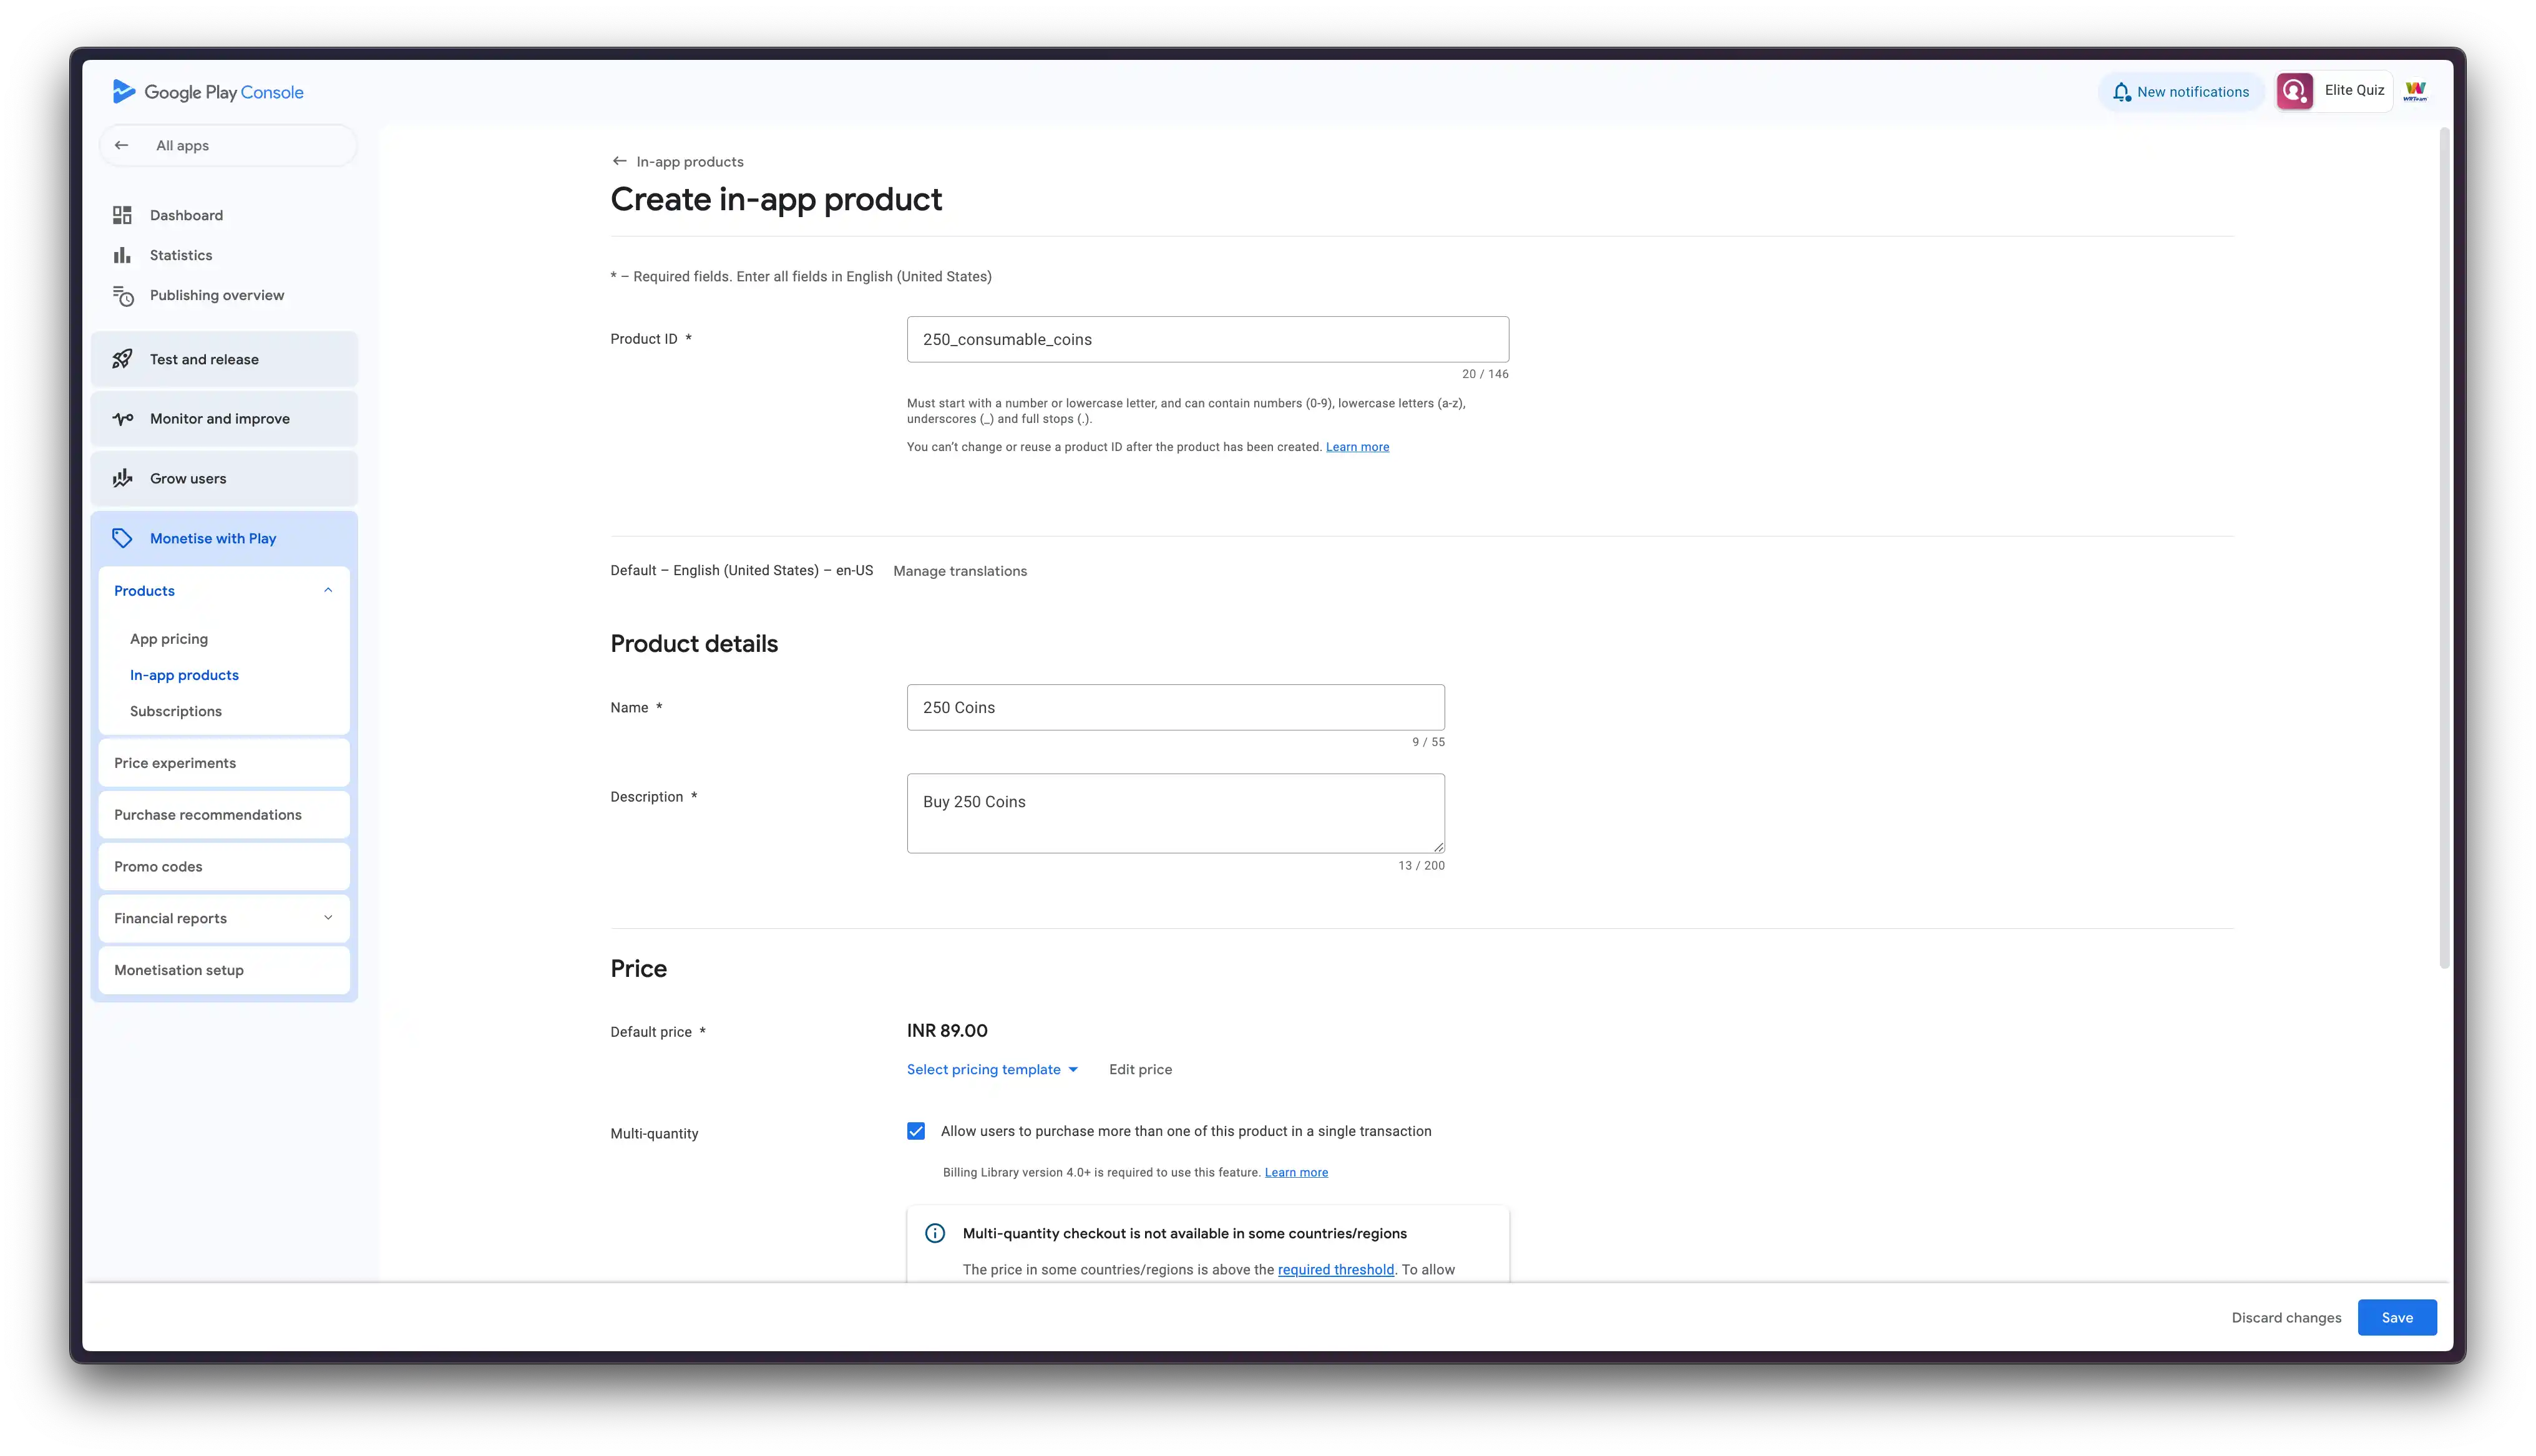
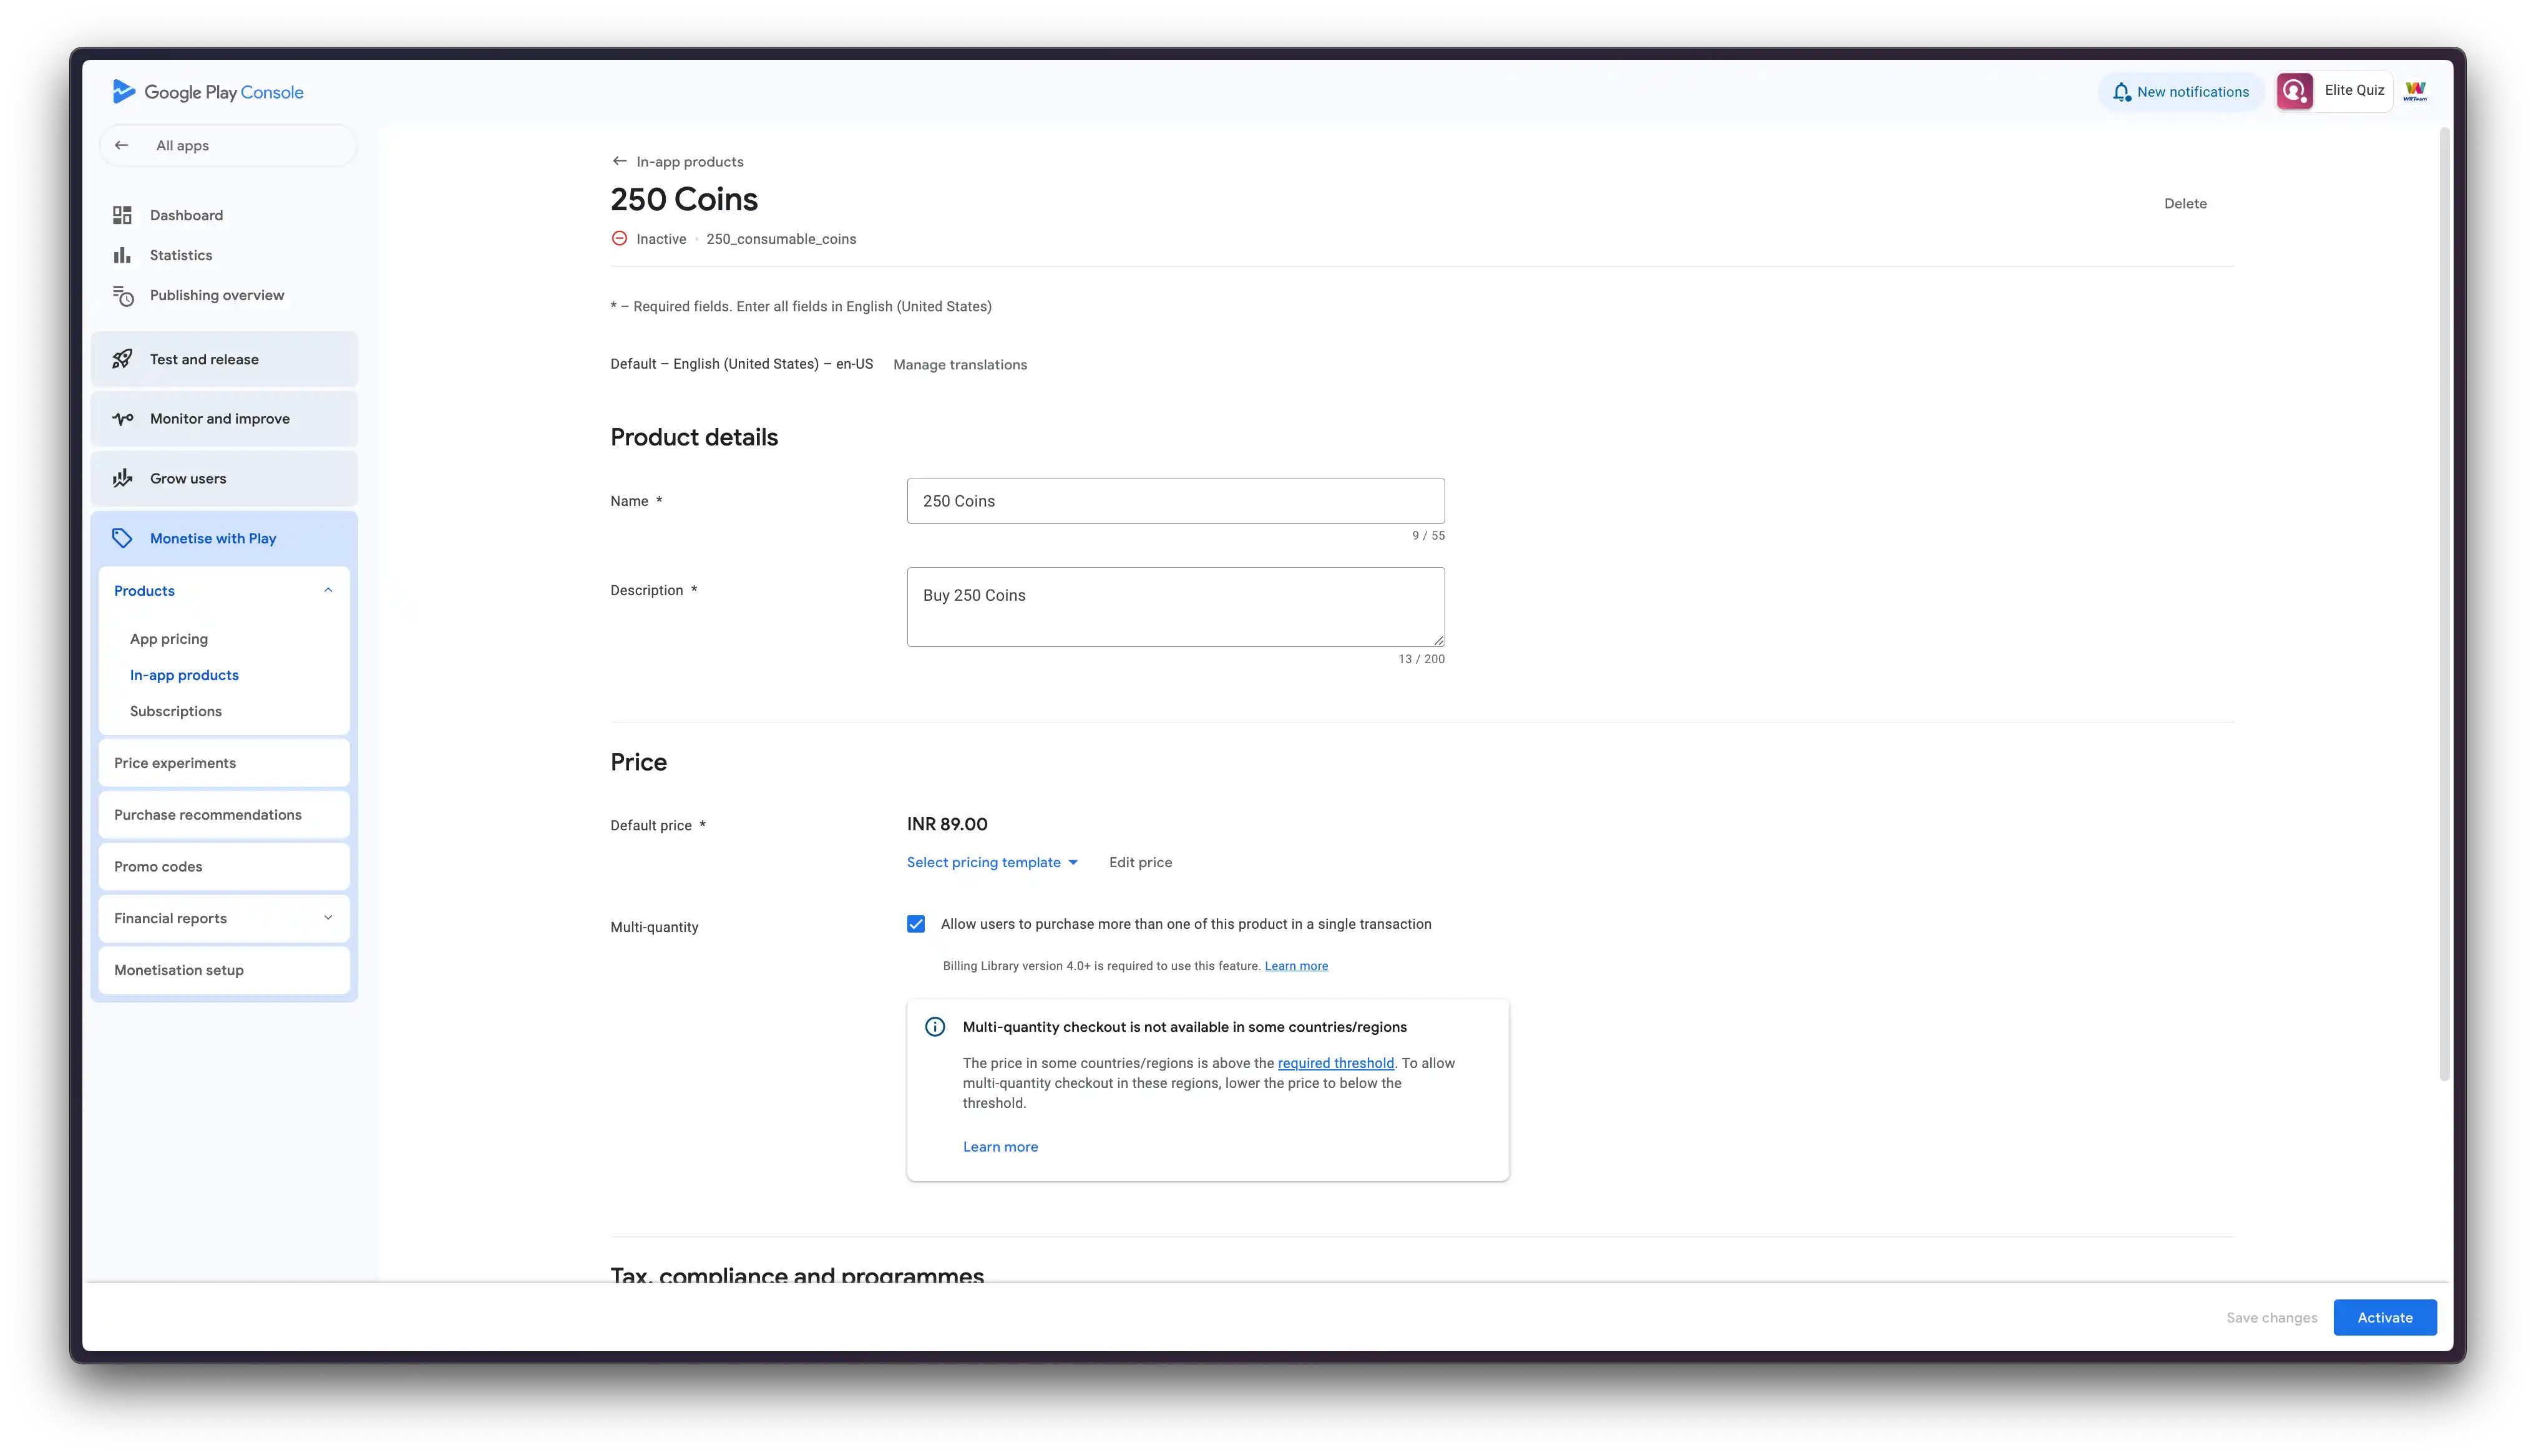
Create in-app products
To create an in-app product, do the following steps:
- Open Play Console.
- Go to the In-app products page (Monetize with Play > Products > In-app products). Click Create product.
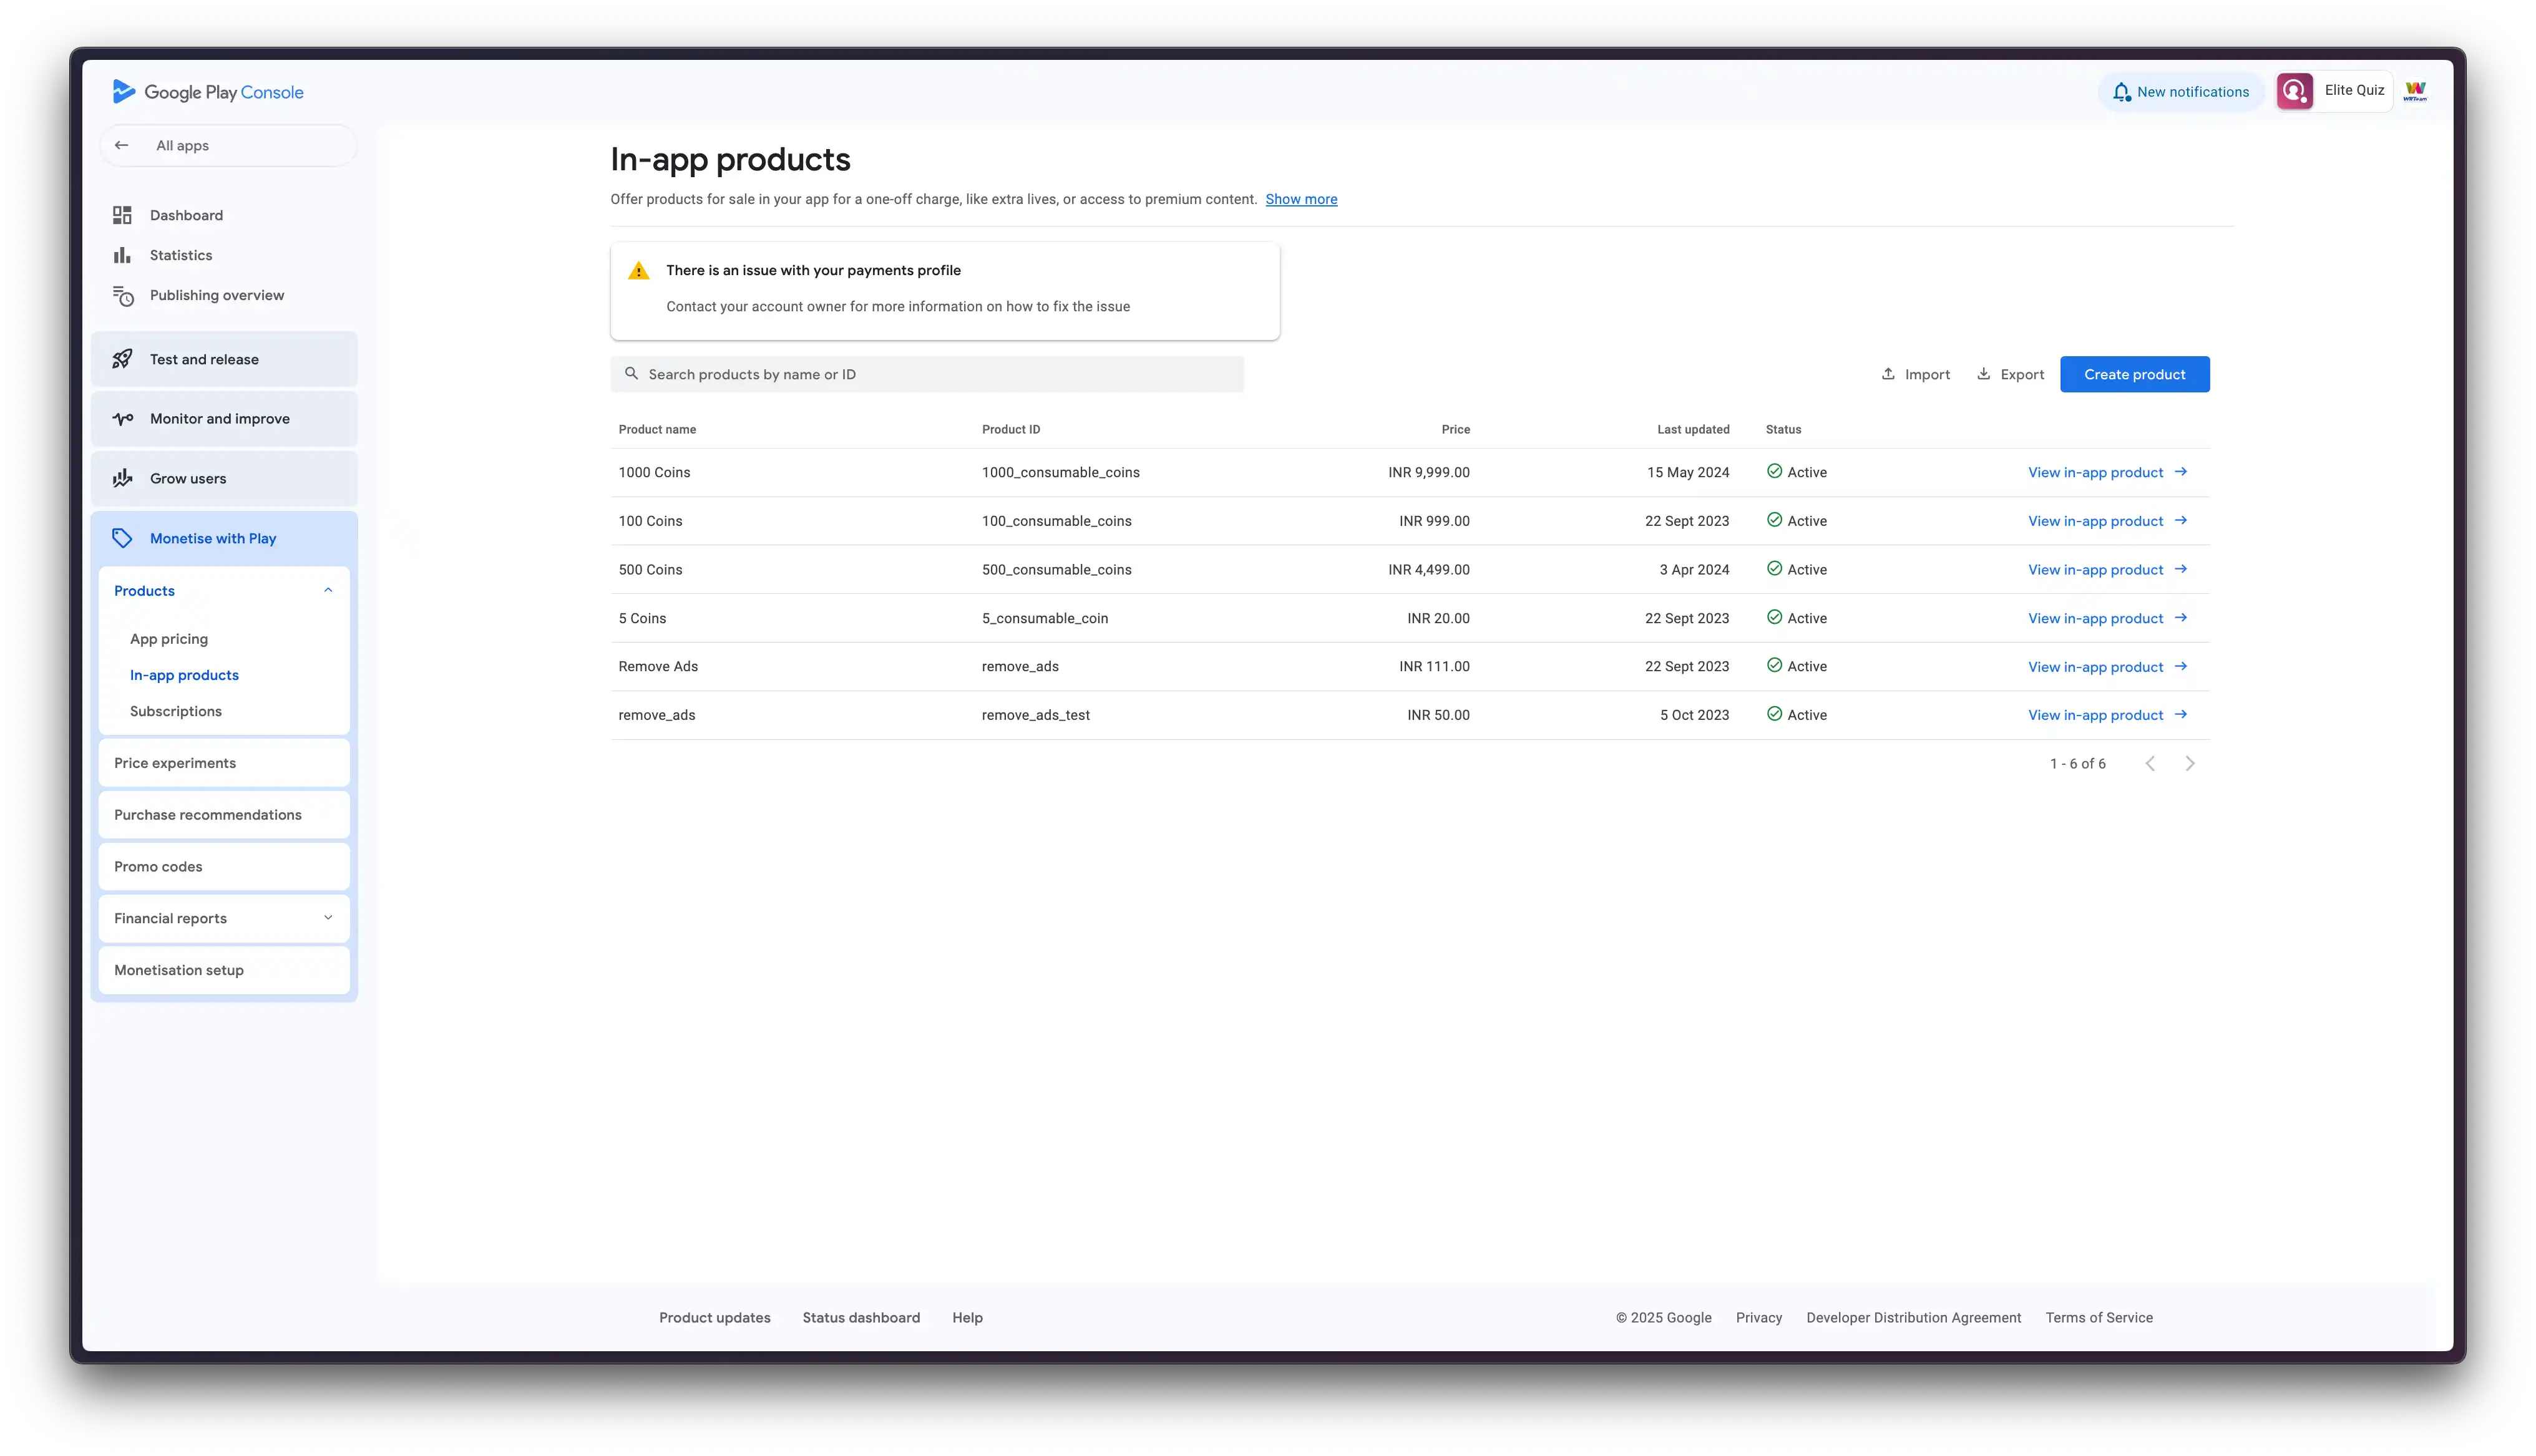
- Enter your product details.
- Product ID: A unique ID for your in-app product.
- Title: A short name of the item (up to 55 characters, but we recommend limiting titles to 25 characters to display properly in all contexts), like "Sleeping potion."
- Description: A long description of the item (up to 200 characters), like "Instantly puts creatures to sleep."
- Price: Enter a price in your local currency or select a pricing template.
- Multi-quantity: For consumable products, you should enable this option to allow users to purchase multiple quantities in a single transaction. Users will be able to purchase in multiple quantities within the threshold of their country or region. Note the following information:
- Multi-quantity checkout is not available in some countries or regions.
- In most countries or regions where multi-quantity checkout is available, the SKU price threshold is around USD 100. To allow multi-quantity checkout, you will need to adjust the price (before tax) to below the threshold in each country or region.
- Save your changes and click Activate to make your in-app product available to users.
That's it! 🎊 You have successfully created IAP in Google Play Console.
for IAP to show up in your app, you will need to publish the app once in open/closed testing or production.
Test Purchase IAP
To test purchase IAP during development phase, you can leverage the licensed testers feature in Google Play Console.
You can set up a list of Gmail accounts to test your in-app billing and subscription integration. Your own publishing account is always considered a licensed tester.
To set up application licensing, start by adding your testers in Play Console.
- Open Play Console.
- Click Settings > License testing.
- Choose your license testers from the email lists shown, or click Create list to make a new list.
- Click Save changes.
Once you're ready, make sure that:
- Your app has been published to the open, closed, internal test, or production track. We recommend publishing your app to the internal test track. Make sure that your testers are also eligible to receive your release by following the instructions for managing testers by email address or using Google Groups.
Troubleshooting Common Issues
App Store Issues
| Issue | Possible Solution |
|---|---|
| IAP not appearing in app | Ensure the IAP is "Ready to Submit" and added to your app in App Store Connect |
| Sandbox testing not working | Make sure you're using a sandbox tester account and signed out of your regular Apple ID |
Google Play Issues
| Issue | Possible Solution |
|---|---|
| Products not loading | Verify the product IDs match exactly between your app/panel and Play Console |
| Test purchases not working | Ensure your test account is properly set up as a licensed tester |
References
This documentation was created with reference to the following sources: