🚀 VPS Server Setup
Before installing e-School SaaS, you need to properly configure your VPS server. Follow these detailed steps to set up your server environment.
🔧 Initial Server Configuration
📋 Server Requirements
| Component | Minimum | Recommended |
|---|---|---|
| RAM | 4GB | 8GB |
| Storage | 80GB SSD | Expandable |
| CPU | 2 vCores | 4 vCores |
| Bandwidth | 1TB monthly | - |
| PHP Version | 8.1.0+ | 8.3+ |
| Laravel Version | 10.0 | Latest |
⚙️ Technical Requirements
- Operating System: Ubuntu latest version (clean installation, without control panels)
- VPS Type: KVM-2 VPS or Higher (recommended for better performance)
- Database Access: Root user or necessary permissions for multi-tenancy
- File Upload Limits:
- Max Upload Size: 50MB+
- Max Execution Time: 5000 seconds
- Max Input Time: 5000 seconds
- WebSocket Server: Required for real-time chat functionality
- Port Configuration: Properly configured firewall for WebSocket communication
🎛️ Control Panel Options
We recommend using one of the following control panels for easier server management:
Option 1: aaPanel

Option 2: CloudPanel
![]()
🛠️ Setup Option 1: Using aaPanel (Recommended)
aaPanel is a lightweight and powerful server management tool that makes it easier to configure and manage your server for e-School SaaS.
1️⃣ Install aaPanel
First, login to your server terminal using SSH:
ssh root@your-server-ip
Once logged in, run the following command to download and install aaPanel:
URL=https://www.aapanel.com/script/install_7.0_en.sh && if [ -f /usr/bin/curl ];then curl -ksSO "$URL" ;else wget --no-check-certificate -O install_7.0_en.sh "$URL";fi;bash install_7.0_en.sh aapanel
💡 Note: After installation completes, you'll receive the aaPanel credentials including URL, username, and password. Save these details for login.
2️⃣ Install Required Software via aaPanel
Log in to aaPanel using the provided URL and credentials, then install:
- 🌐 Web server (Nginx or Apache recommended)
- 🗄️ MySQL
- 🐘 PHP 8.3
- 📊 phpMyAdmin
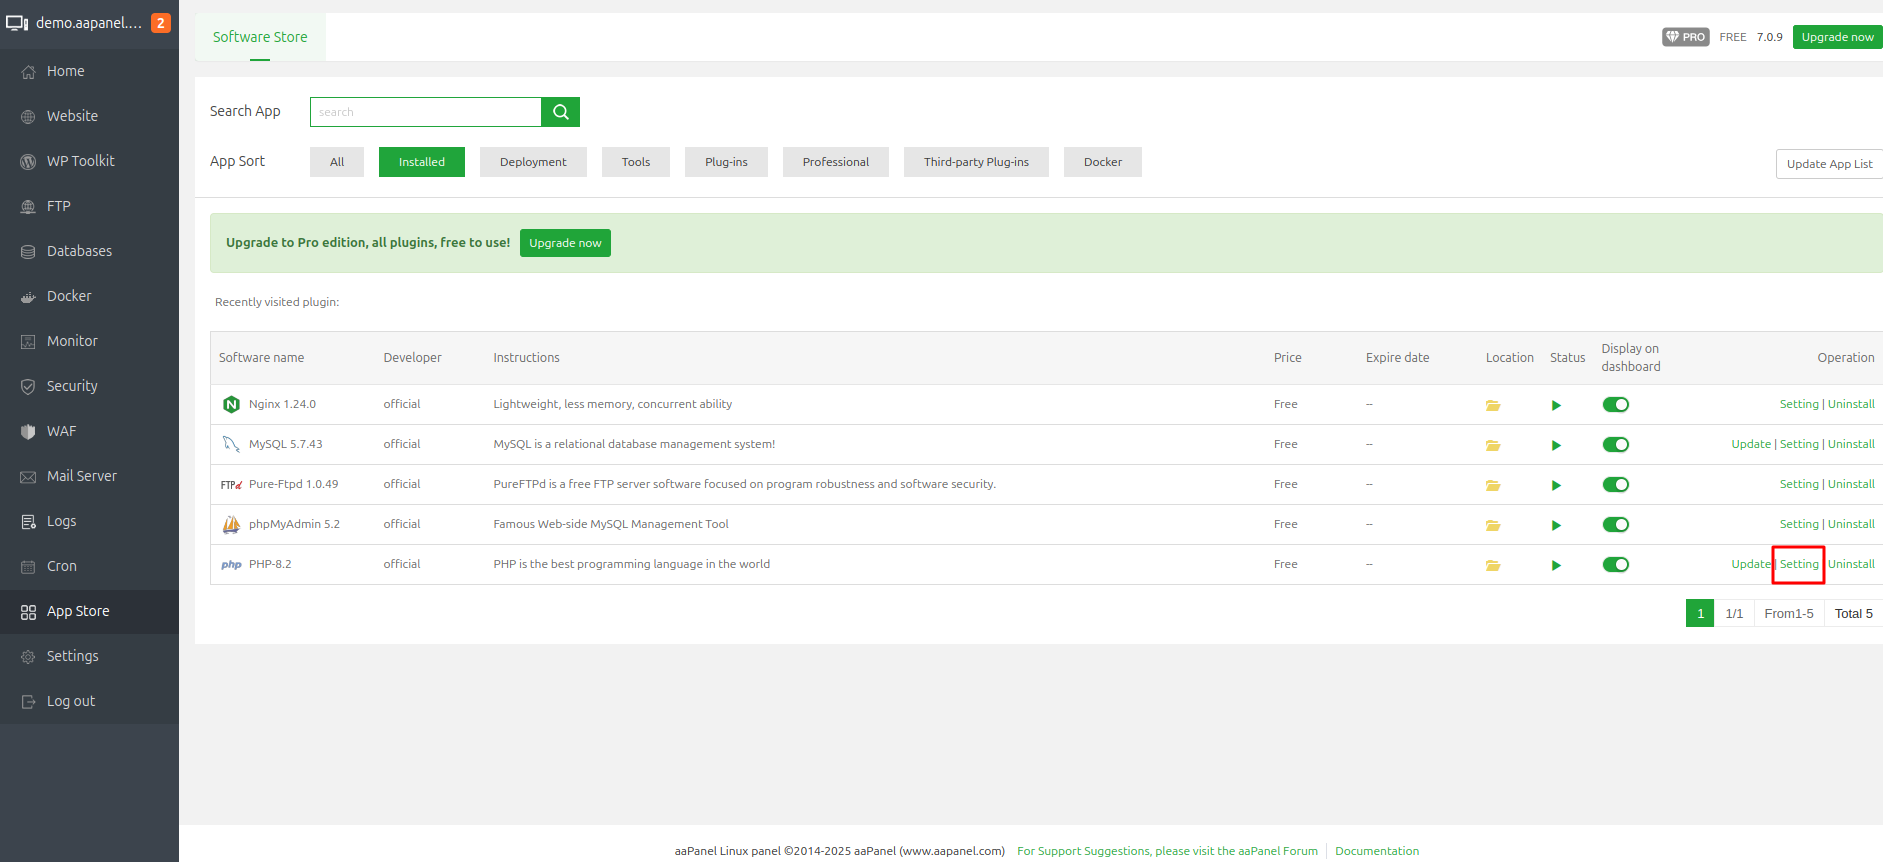
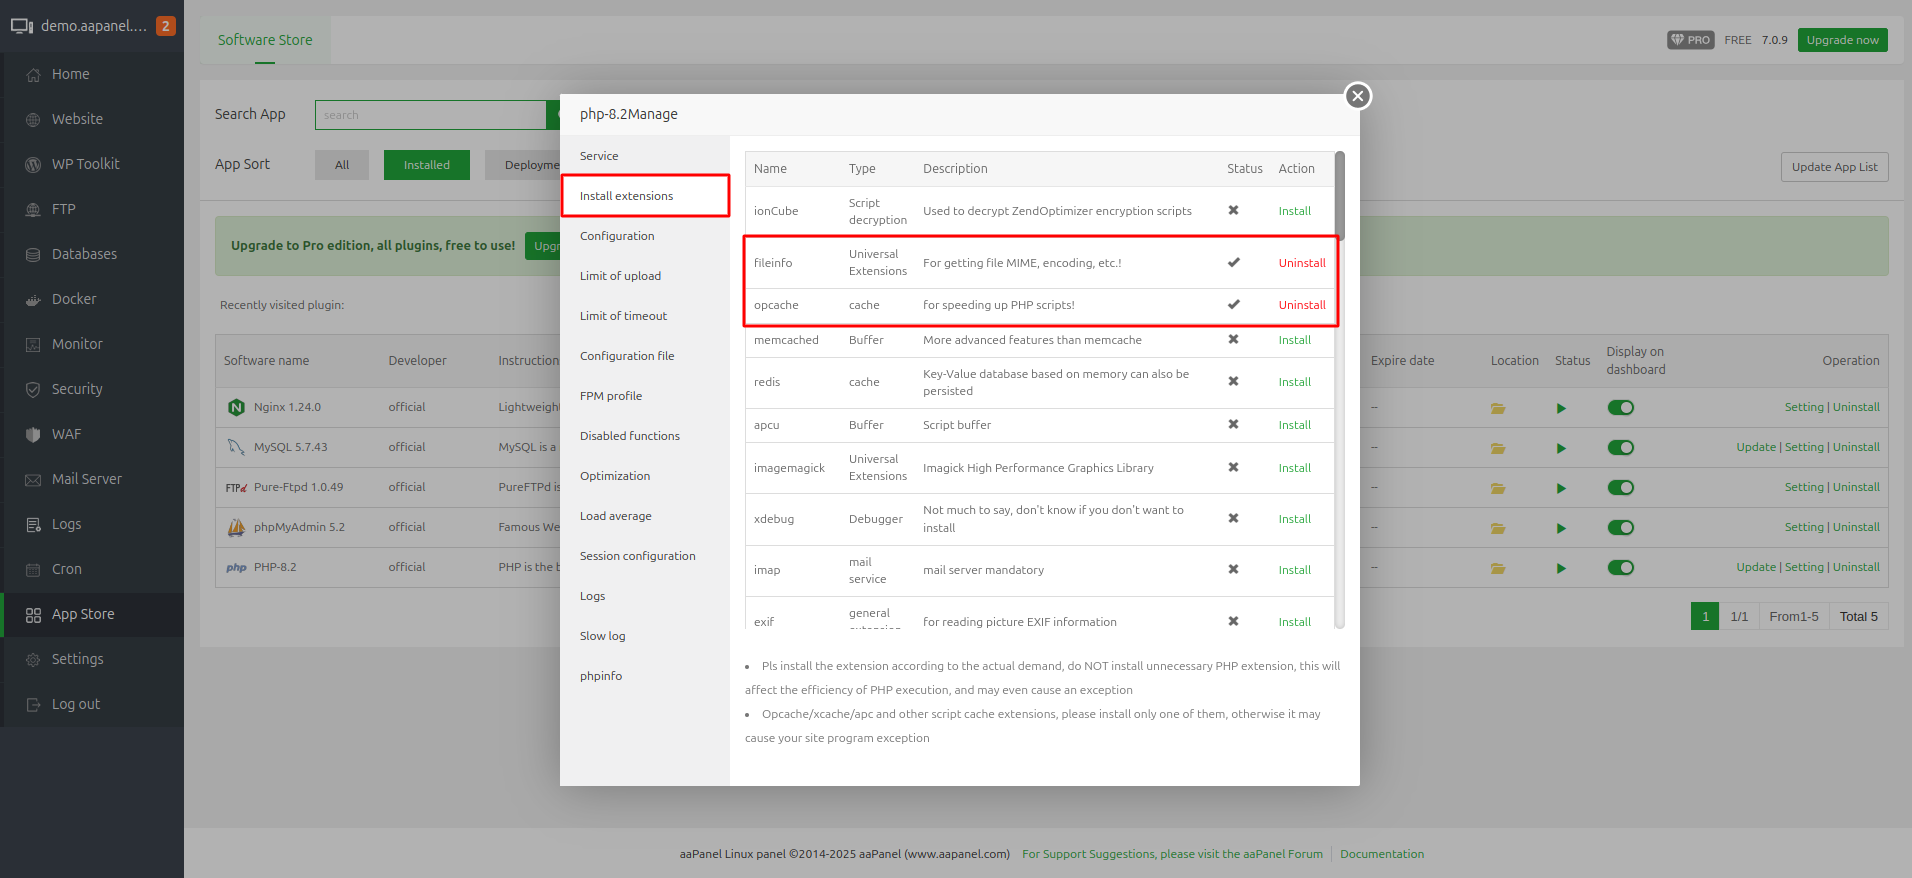
3️⃣ Configure PHP Extensions and Settings
Required PHP Extensions:
- 📁 fileinfo
- 🔤 mbstring
PHP Configuration Values:
| Setting | Value |
|---|---|
| max_execution_time | 5000 |
| max_input_time | 5000 |
| post_max_size | 50M |
| upload_max_filesize | 50M |
| max_file_uploads | 50 |
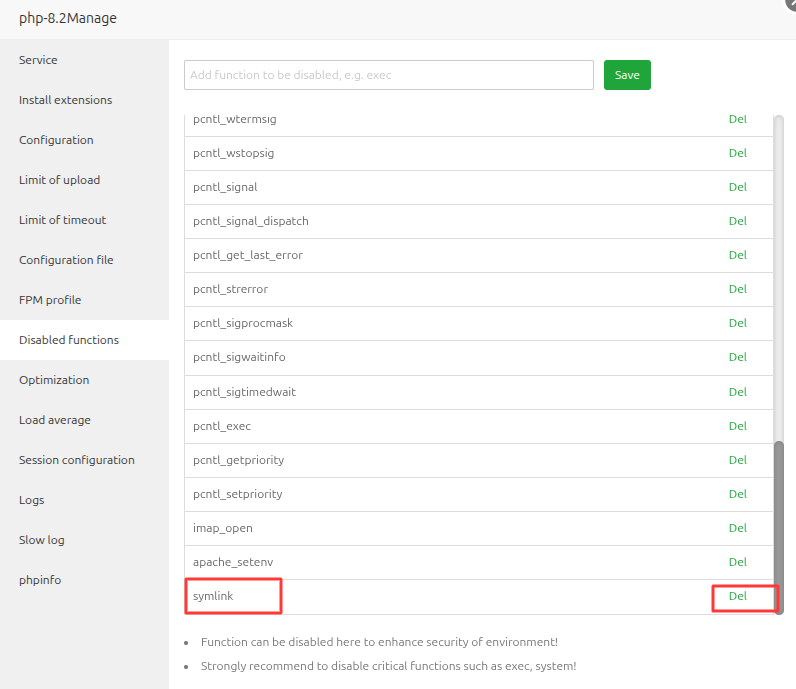
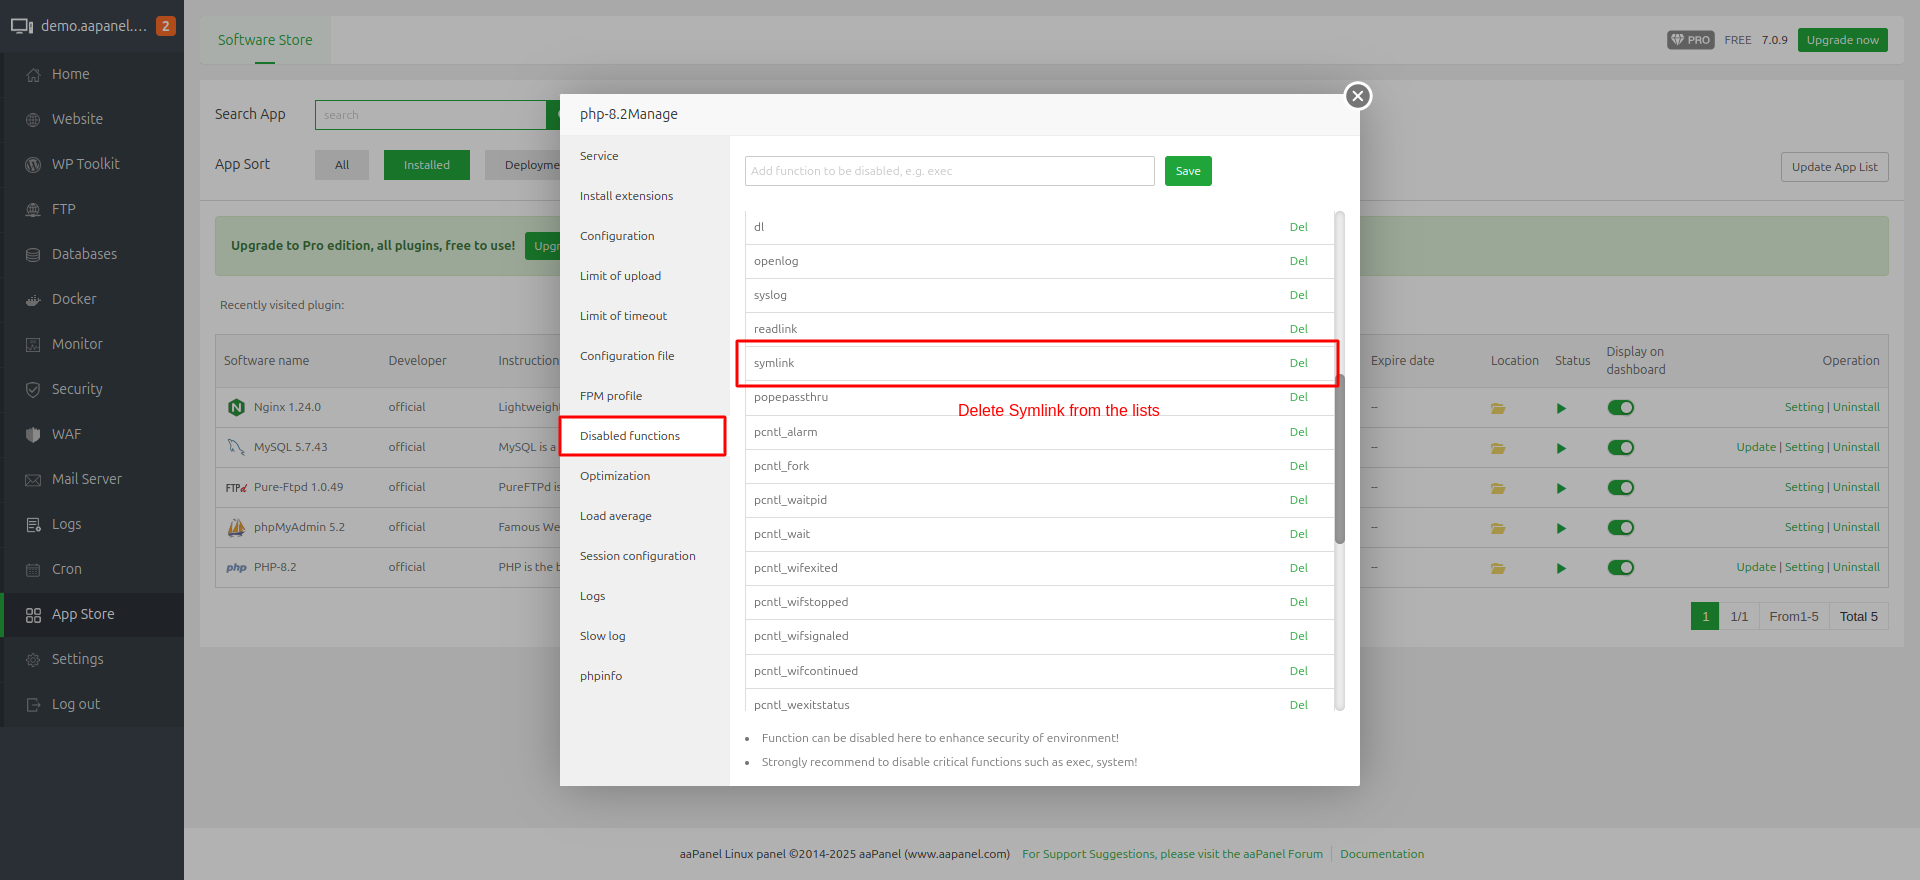
⚠️ Important: Go to PHP Disabled Functions and remove
symlinkfrom the list.
Restart PHP services after making these changes.
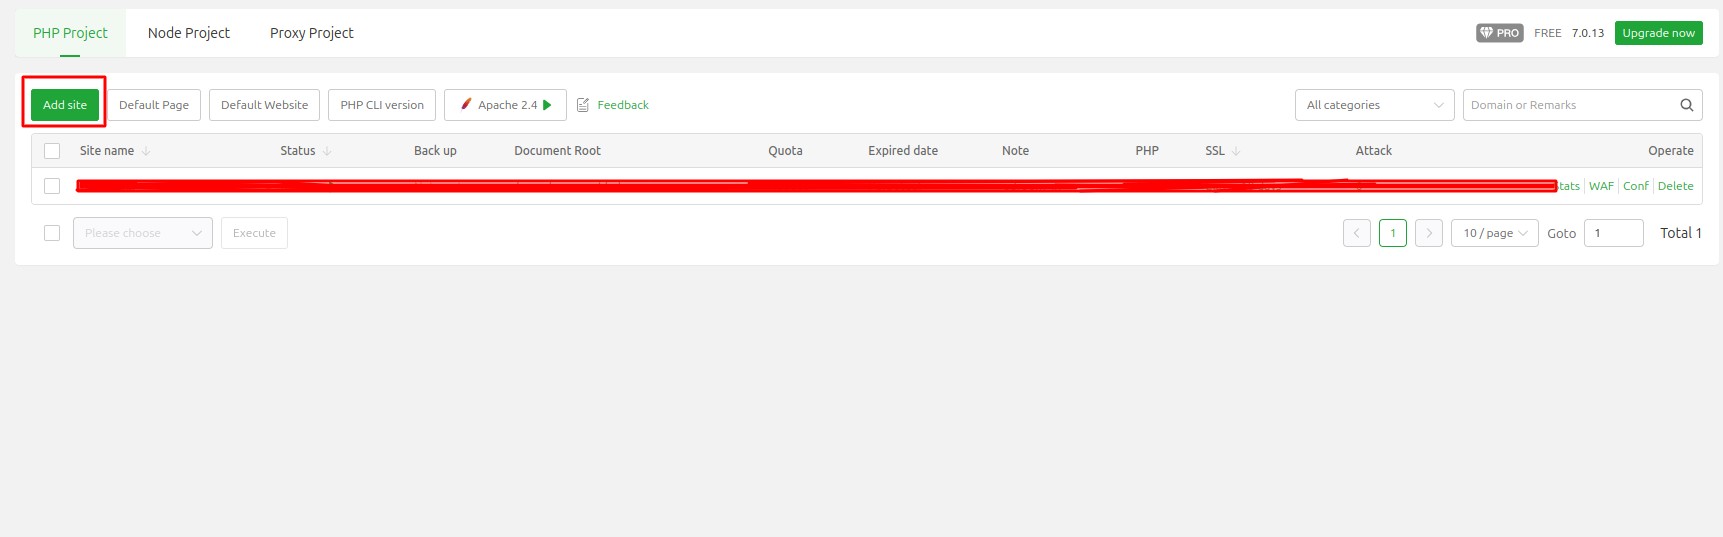
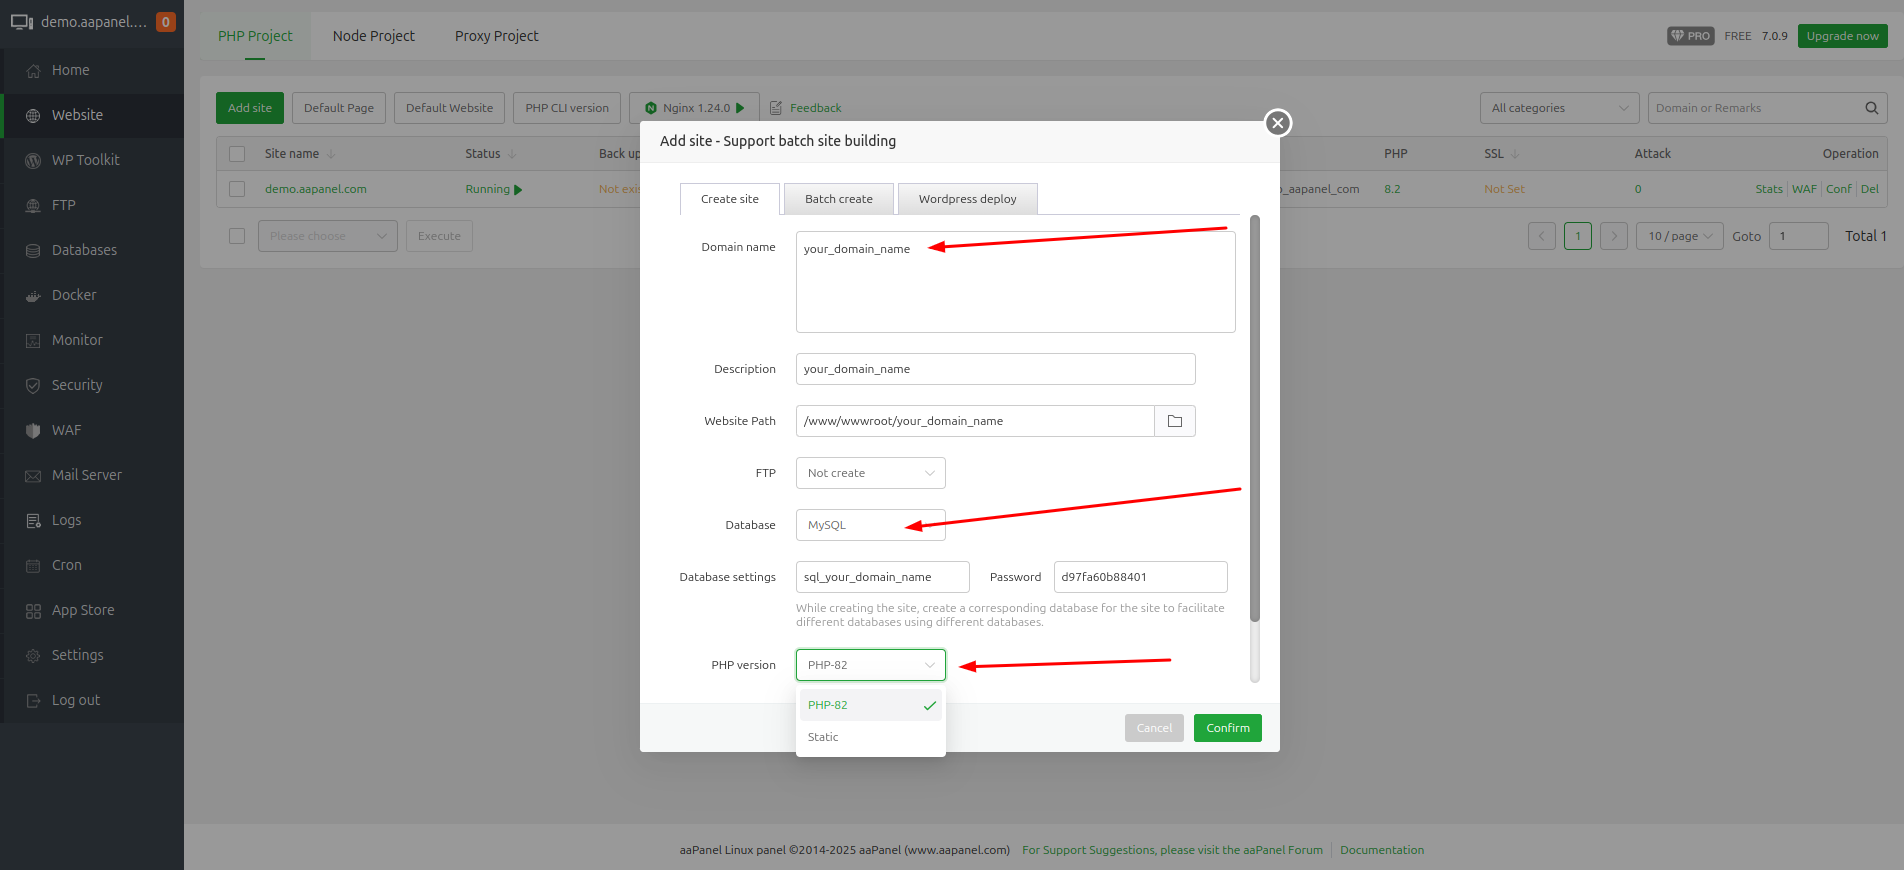
4️⃣ Add Website in aaPanel
Go to the Websites section and click on Add Site:
- Enter your domain name
- Select MySQL for the database section
- Select PHP 8.3
- Submit to create the website
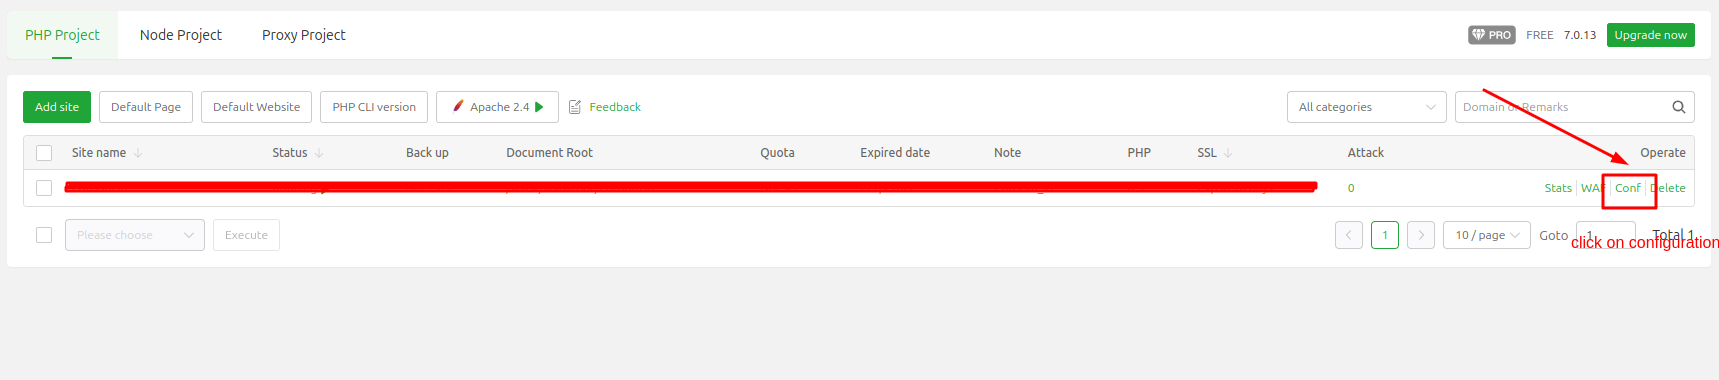
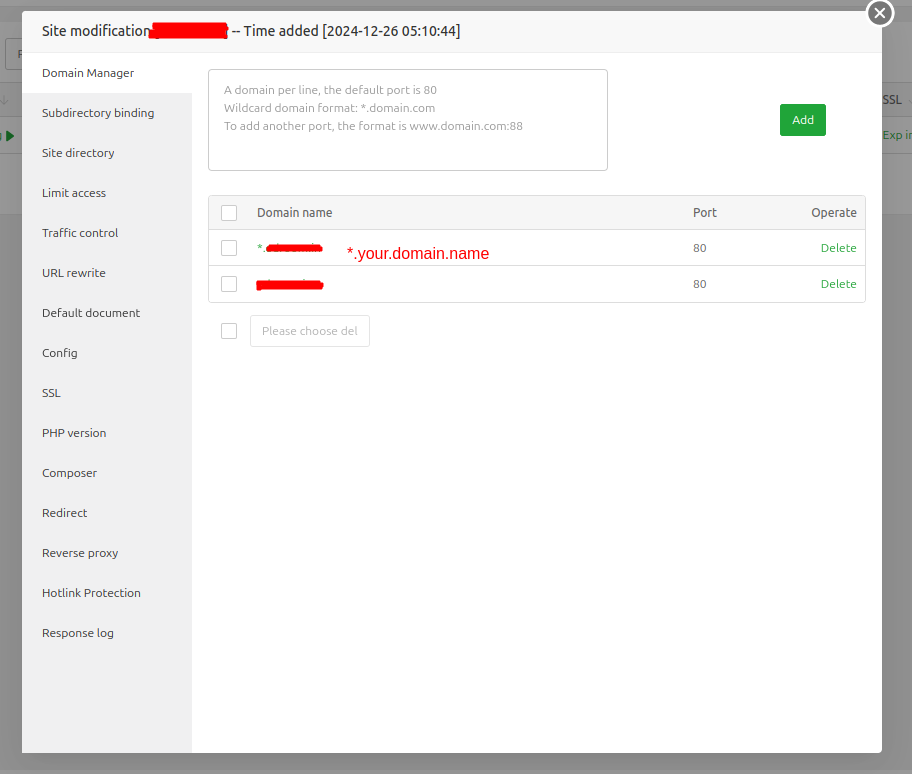
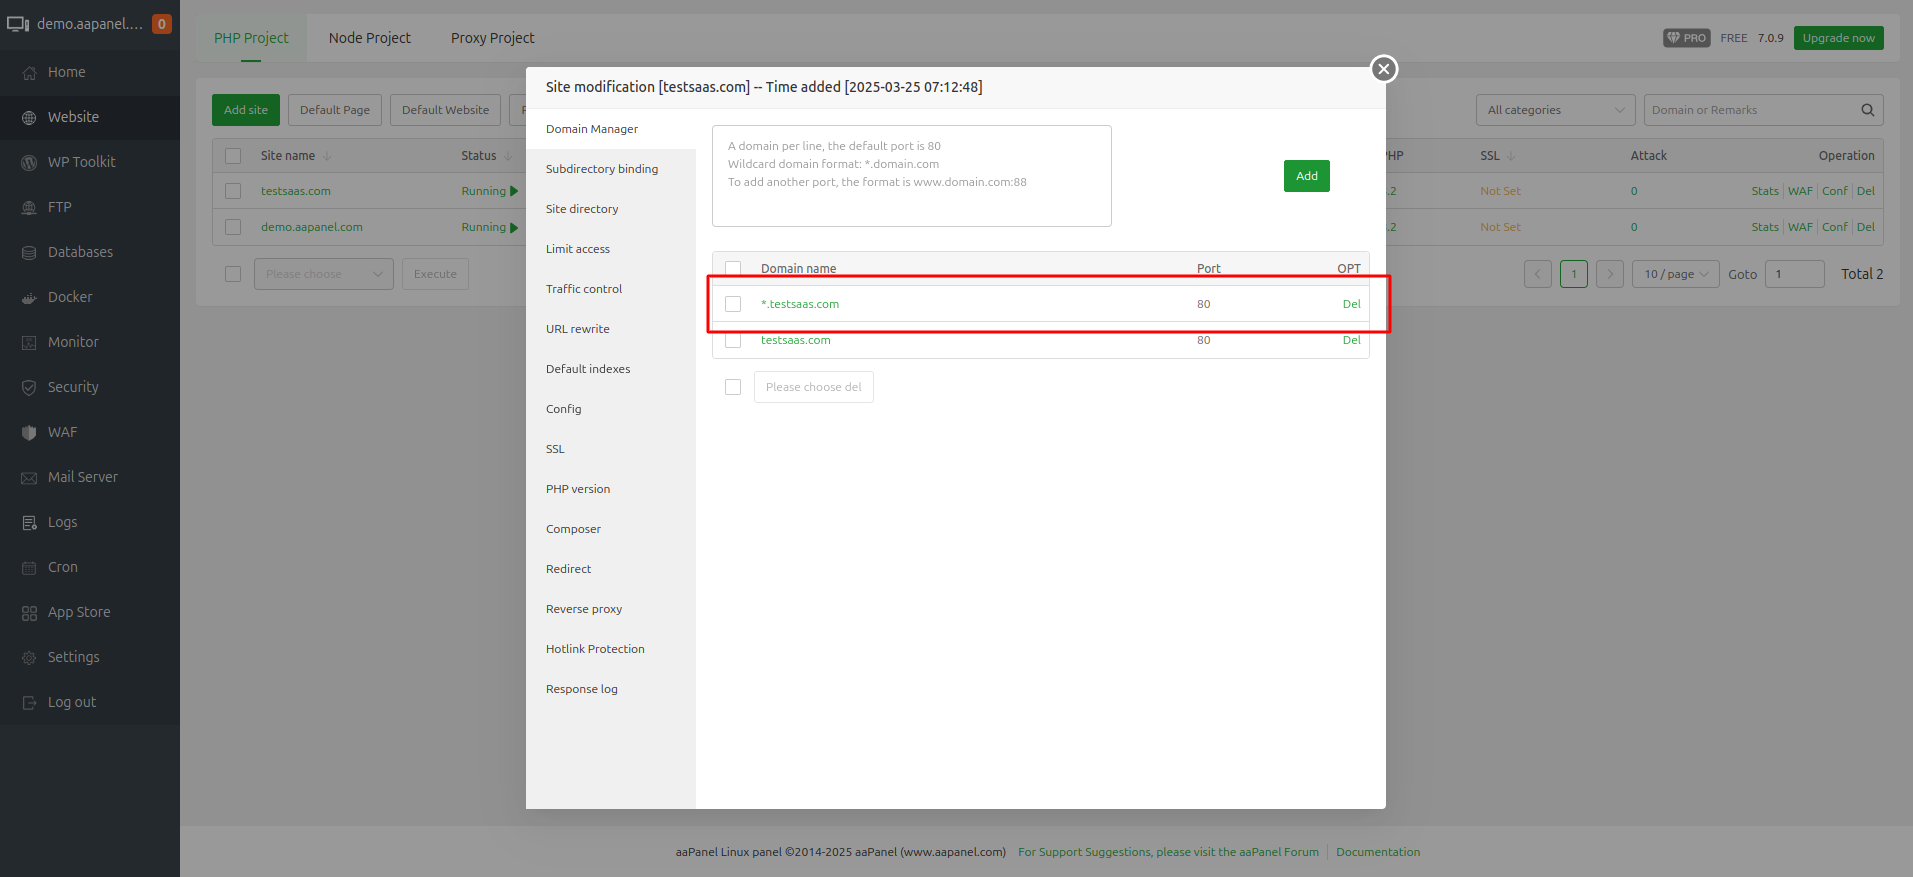
5️⃣ Add Wildcard Domain
After adding the main domain, go to the domain configuration and add a wildcard domain with the format: *.your_domain_name
6️⃣ Configure DNS
Add DNS A records for your domain:
| Type | Name | Point To |
|---|---|---|
| A | * (*.domain.com) | Your server IP |
| A | *.subdomain (*.subdomain.domain.com) | Your server IP |
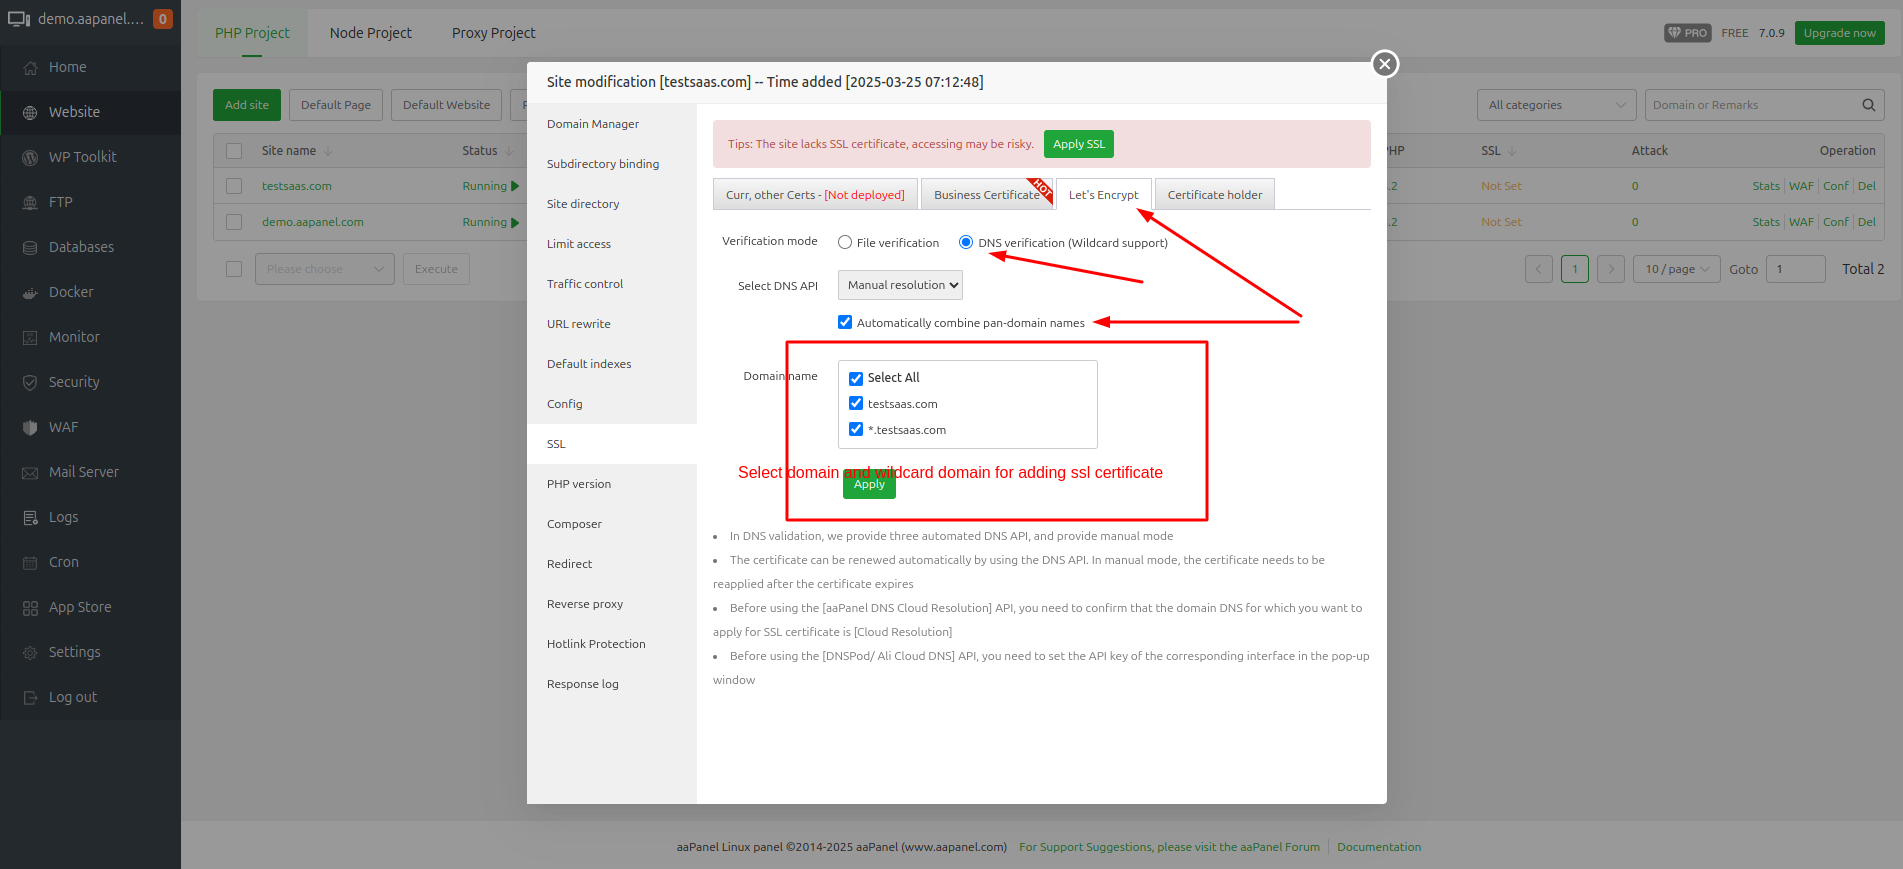
7️⃣ Add SSL Certificate
Add SSL certificates for both your main domain and wildcard domain using Let's Encrypt DNS verification.
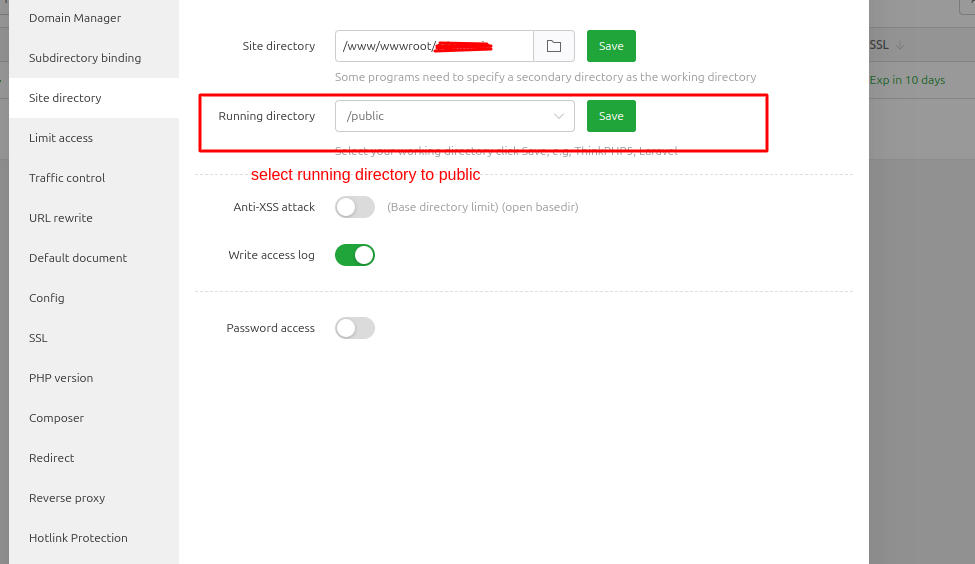
8️⃣ Upload Source Code
Upload your source code to the domain directory and ensure the web path points to the public directory.
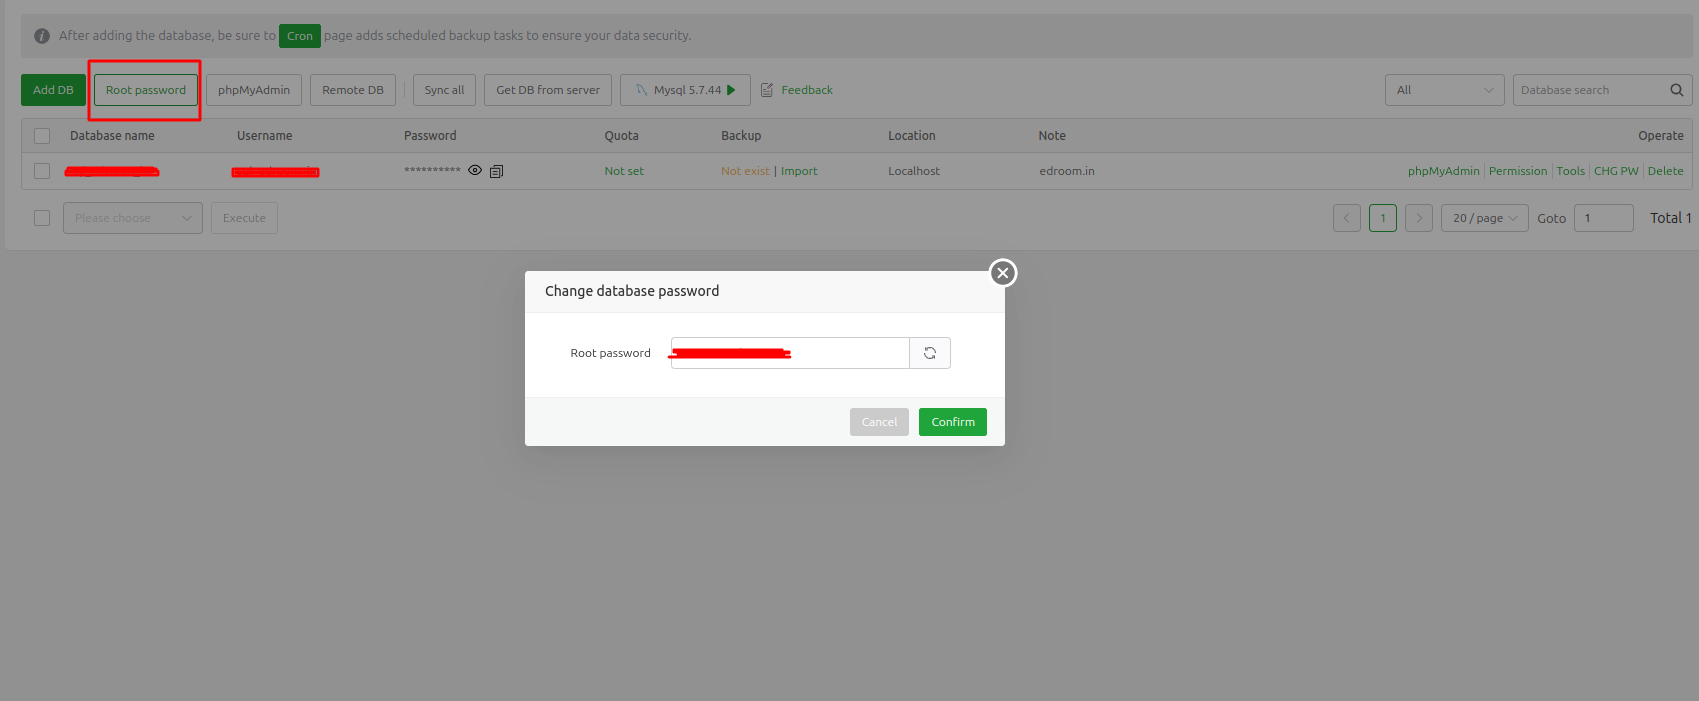
9️⃣ Get MySQL Root Credentials
ℹ️ Why are database root user credentials required for this system?
To get MySQL root credentials, run this command in the terminal:
sudo cat /root/.my.cnf
🔟 Set Up WebSocket
Install Supervisor:
sudo apt update
sudo apt install supervisor
Create WebSocket Configuration:
sudo nano /etc/supervisor/conf.d/websocket.conf
Add the following content (replace /your_root_folder_path/ with your actual path):
[program:websocket]
process_name=websocket
command=/usr/bin/php /your_root_folder_path/artisan websocket:init
autostart=true
autorestart=true
user=www-data
redirect_stderr=true
stdout_logfile=/your_root_folder_path/storage/logs/websocket.log
stderr_logfile=/your_root_folder_path/storage/logs/websocket.log
Update Supervisor:
sudo supervisorctl reread
sudo supervisorctl update
sudo supervisorctl status
🔒 Security Note: Enable port 8090 in your firewall for WebSocket communication.
Your WebSocket URL will be:
ws://your_server_ip:8090
1️⃣1️⃣ Set Queue for School Creation
Click Here
🎉 Congratulations! Your server is now ready for the e-School SaaS installation. Proceed to the next section to install the application.