Deployment Guide
This guide covers deploying the Student Web Portal to production environments.
Prerequisites
Before deployment, ensure:
- Application is tested locally
- Production environment variables are configured
- Admin Panel API is accessible from production
- Domain name and SSL certificate (for HTTPS)
Deployment Options
Option 1: Deploy on Vercel
Step 1: Prepare for Vercel
-
Remove Static Export: Open
next.config.jsand remove the lineoutput: 'export'. Vercel handles the build automatically and supports dynamic features. -
No .htaccess Needed: Vercel uses its own routing, so you do not need the
.htaccessfile configuration.
Step 2: Deploy via GitHub
- Push your code to a GitHub repository.
- Log in to Vercel using your GitHub account.
- Click "Add New..." -> "Project".
- Import your repository.
- Vercel will auto-detect Next.js. Click Deploy.
- Your site will be live in minutes!
Option 2: Deploy on VPS Server
Web Automatic Deployment
Upload your web code to your server, open the terminal, navigate to your web code directory, and run the ./install.sh command.
Web Manually Deployment
-
Deployment of the Next JS needs a bit of knowledge about
node jsnpmpm2technologies. We have assumed that you are using adebianbased OS, apt is your package manager. If you are using any other linux distro then apt will be replaced with the respective package manager of the OS -
We do not recommend deploying on shared hosting as it may not support all Node.js features. If you do not have a VPS server, you can proceed with this method, but we cannot provide support for any issues that arise.
Before starting the project deployment, you must upload your project to the server. Project can be upload to the server using FileZila or in other ways.
Installing NodeJS
NodeJS can be installed using NVM by which multi Node version can be controlled easily.
sudo apt install curl
curl https://raw.githubusercontent.com/creationix/nvm/master/install.sh | bash
nvm install node 20.*
Check if node js is installed correctly using this command:
node -v
For more information, use official documentation
Installing PM2 Server
By running the following command, PM2 server can be installed globally:
npm install pm2 -g
Set Port
Before setting the port, check available ports with this command:
sudo lsof -i -P -n | grep 8003
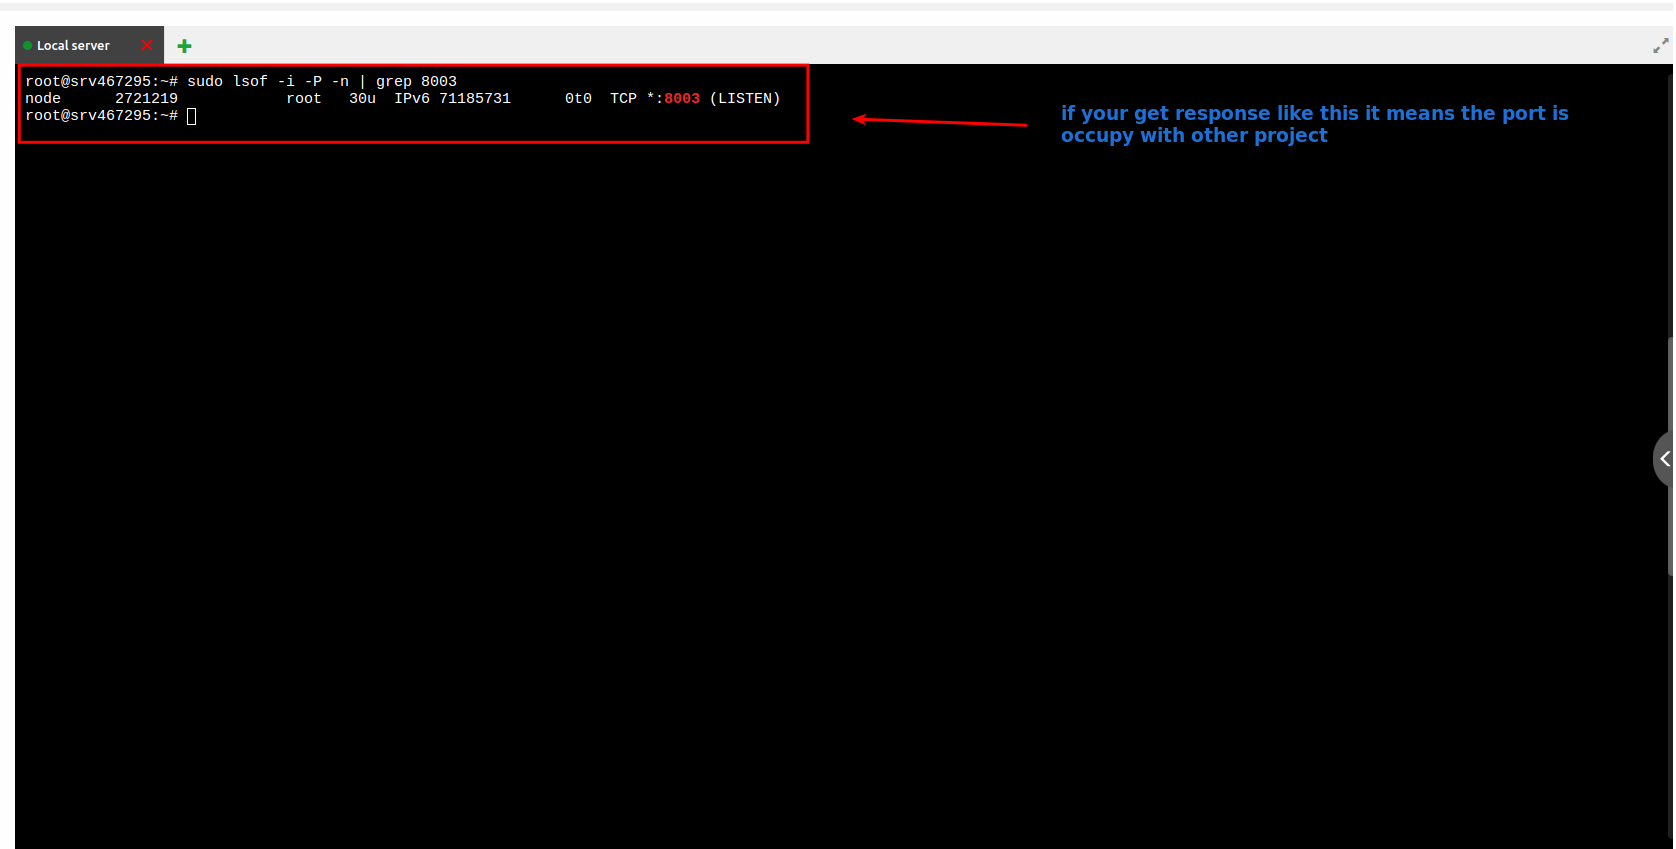
If you get a response like this it means this port is occupied with another project, so try another port (e.g. 8000, 8001, 8002, 8003, 8004, etc.)
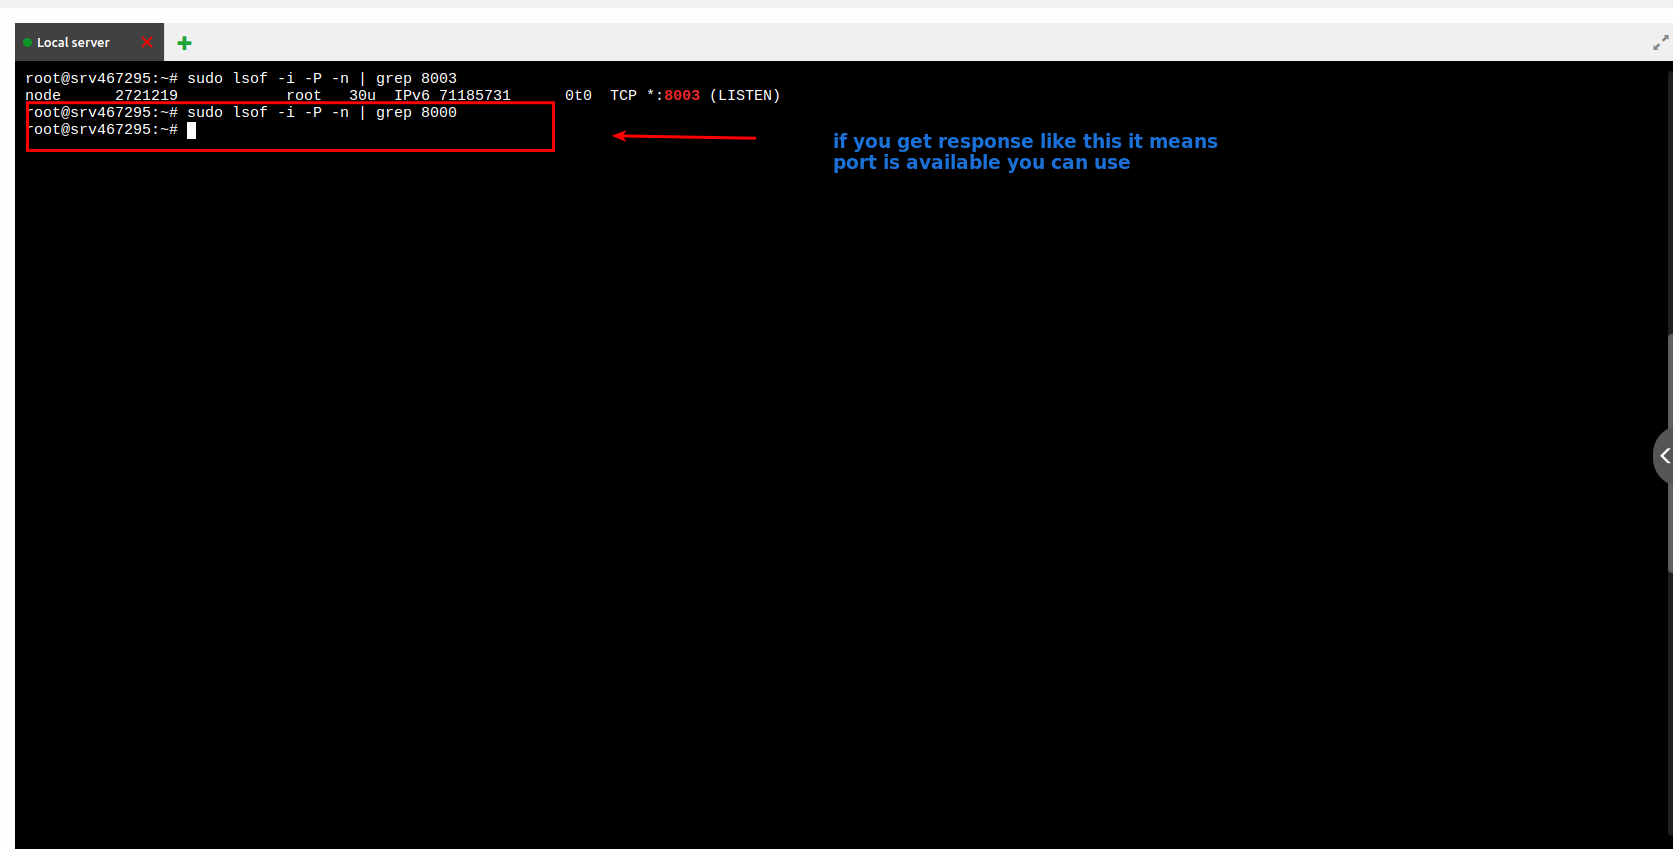
If you get a response like this it means this port is available and you can use it.
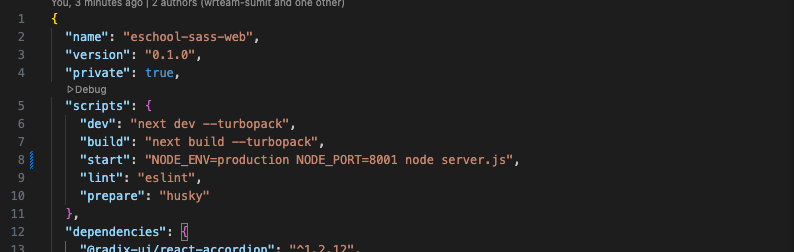
Now add the available port to your package.json file:
Configure .htaccess
Add the following configuration to your .htaccess file. Make sure to replace 8004 with the port you set in your package.json:
<IfModule mod_rewrite.c>
    RewriteEngine On
    RewriteBase /

    RewriteRule ^/.well-known/acme-challenge/(.*) /.well-known/acme-challenge/$1 [L]

    RewriteRule ^_next/(.*) /.next/$1 [L]
    # Allow access to static files with specific extensions
    RewriteCond %{REQUEST_URI} \.(js|css|svg|jpg|jpeg|png|gif|ico|woff2)$
    RewriteRule ^ - [L]

    RewriteRule ^index.html http://127.0.0.1:8004/$1 [P]
    RewriteRule ^index.php http://127.0.0.1:8004/$1 [P]
    RewriteRule ^/?(.*)$ http://127.0.0.1:8004/$1 [P]
</IfModule>
Setup the Project
Make sure you have node_modules installed in your directory.
For installing packages, run the following command:
npm install
The above command will install all the node modules in your directory.
After that, the project must be built. Run the following command, which will build the production application in the .next folder:
npm run build
Run the PM2 Server
Go to the project root and run the following command:
pm2 start "npm start" -n "YOUR_PROJECT_NAME"
Check if the PM2 process is running OK:
pm2 ls
When you run pm2 ls you will see 2 types of output:
-
Error — If you are getting errors in the PM2 process, then run
pm2 logsand send us a screenshot of the error so that we can guide you to resolve the issues. -
Success — If successful, set up a startup script for your operating system to ensure PM2 restarts automatically after a system reboot:
pm2 startupAfter setting up PM2 with the startup command, save the current process list:
pm2 saveIf you want to restart your PM2 process, run:
pm2 restart id # Replace id with your process id
For deleting a previous project running in the PM2 server, use the following command:
pm2 delete "YOUR_PROJECT_NAME"
For more information, use official documentation
Troubleshooting
Issue: White Screen After Deployment
Solution:
- Check browser console for errors
- Verify
PUBLIC_URLin.env - Check build file paths
Issue: API Calls Failing
Solution:
- Verify API URL in production environment
- Check CORS configuration
- Ensure API is accessible from production server
Issue: Routes Not Working
Solution:
- Configure server to redirect all routes to
index.html - Check
.htaccessor Nginx configuration