Update the Site
1. Prepare Configuration Files
Before uploading, ensure that the following configuration files are correctly updated with your production credentials:
.envFile: Verify that all environment variables are correctly configured for your live server.firebase-messaging-sw.js: Double-check that your Firebase configuration object inpublic/firebase-messaging-sw.jsmatches your project settings to ensure push notifications function correctly.
2. Backup Current Code on Server
Before removing or overwriting anything, create a backup of the current code on your server to avoid any data loss.
3. Upload Latest Code
Delete the existing code from the server (after backing up) and upload the latest version with your updated configuration files.
4. Access the Server
Once the files are uploaded, connect to your server via SSH to perform the terminal-based setup.
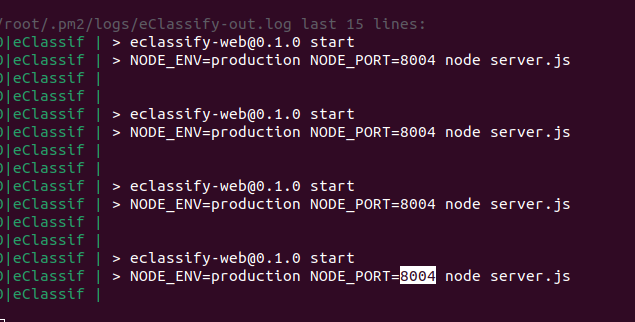
5. Check Running Port
pm2 logs
Run the PM2 logs command to check the port on which your website is currently running. Look for the NODE_PORT value displayed in the output.
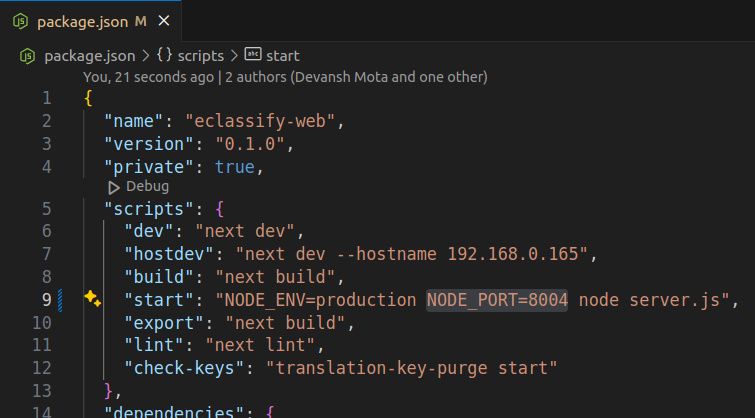
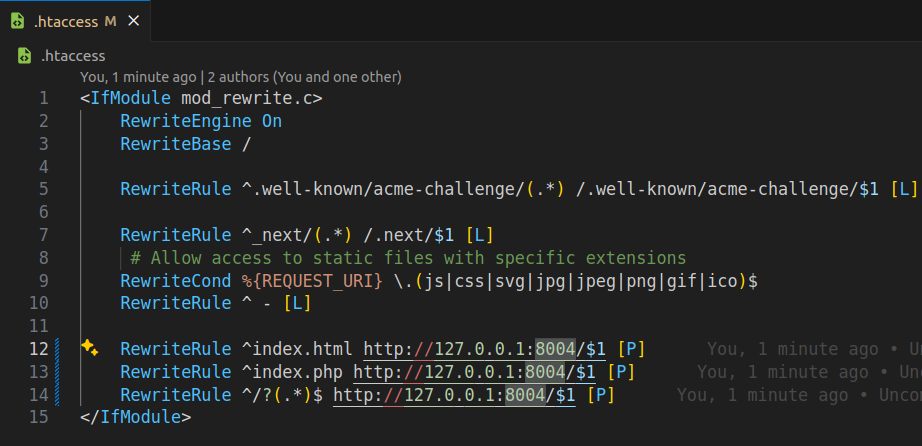
6. Update Port in Latest Code
Open the package.json file in your latest code on the server and update the NODE_PORT value to match the server's running port. Also, update the .htaccess file with the same port.
7. Install Dependencies
npm i
Navigate to the web code directory in the terminal and run npm i command to install all dependencies from the package.json file, ensuring the application functions properly.
8. Build the Project
npm run build
Execute the npm run build command to generate the necessary files for deployment. This step compiles the project and optimizes it for production.
9. Restart PM2 Process
pm2 restart id
Restart the PM2 process by running the pm2 restart command followed by the process ID or name. This ensures the new version of the code is loaded.

10. Verify the Deployment
Check if the website is running properly by accessing it in a browser. If there are any issues, review the PM2 logs for errors.