Flutter App Installation
Setup Java JDK
If your System already has Java jdk-19.0.2 installed, you can skip this step.
- Download Java-19.0.2 jdk from JAVA jdk-19.0.2
- Download Java-19.0.2 JDK for your version (32 bit or 64 bit)
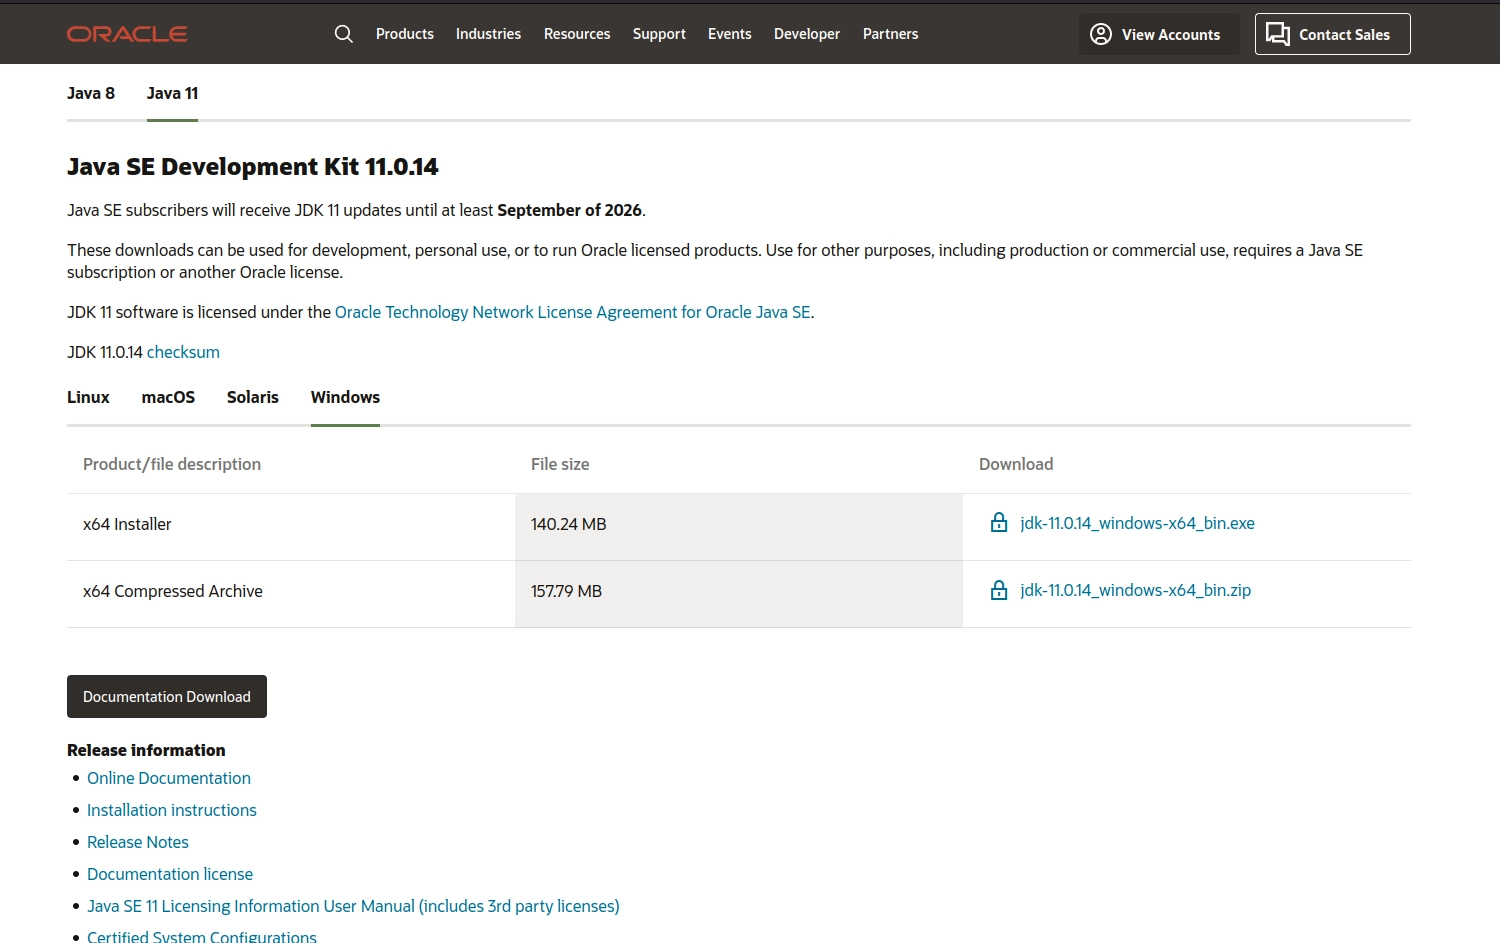
- When you click on the Installation link, a popup will open. Click on "I reviewed and accept the Oracle Technology Network License Agreement for Oracle Java SE development kit"
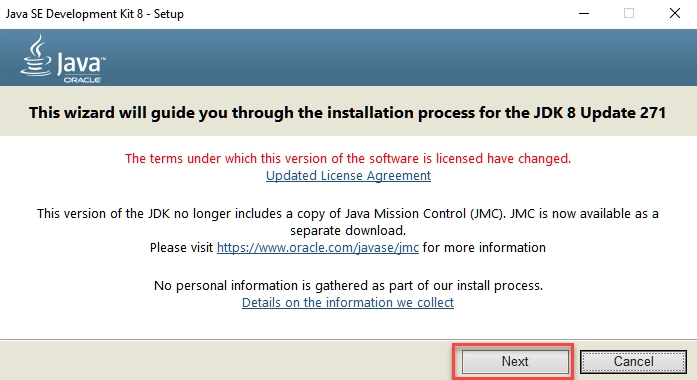
- Once the Java JDK 19.0.2 download is complete, run the exe to install JDK. Click Next
- Select the PATH to install Java in Windows. You can leave it Default. Click next

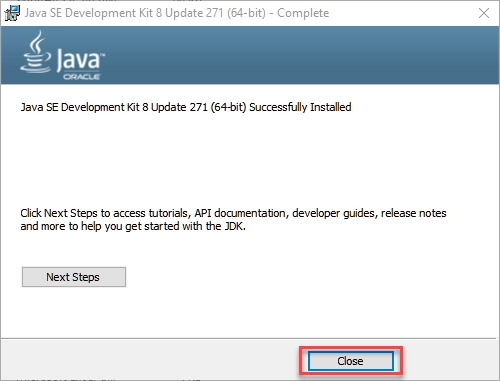
- Once you install Java in Windows, click Close
-
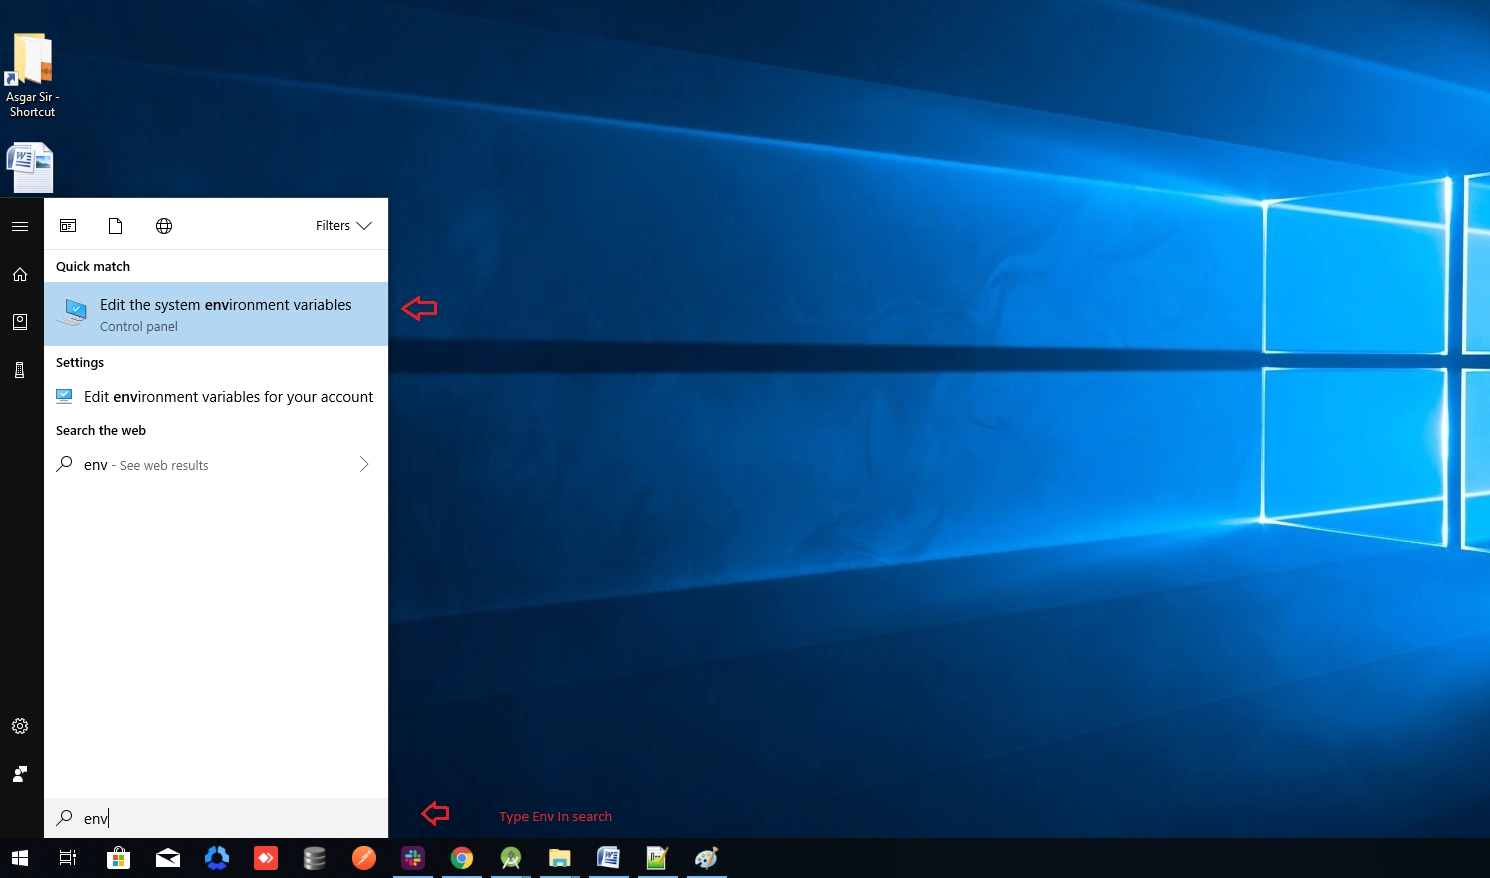
Now set your environment variable:
- From the Start search bar, type 'env' and select "Edit environment variables for your account"
- Under User variables check if there is an entry called Path
- Click on Edit. From the dialog that opens, click on new and copy the path of the bin folder which is installed in JDK folder
- Paste the path of bin folder in Variable value. Click on OK Button

-
Repeat the above process but this time set variable name JAVA_HOME instead of "path/PATH", and set JDK bin folder path in the variable value
-
Restart your PC for changes to take effect
-
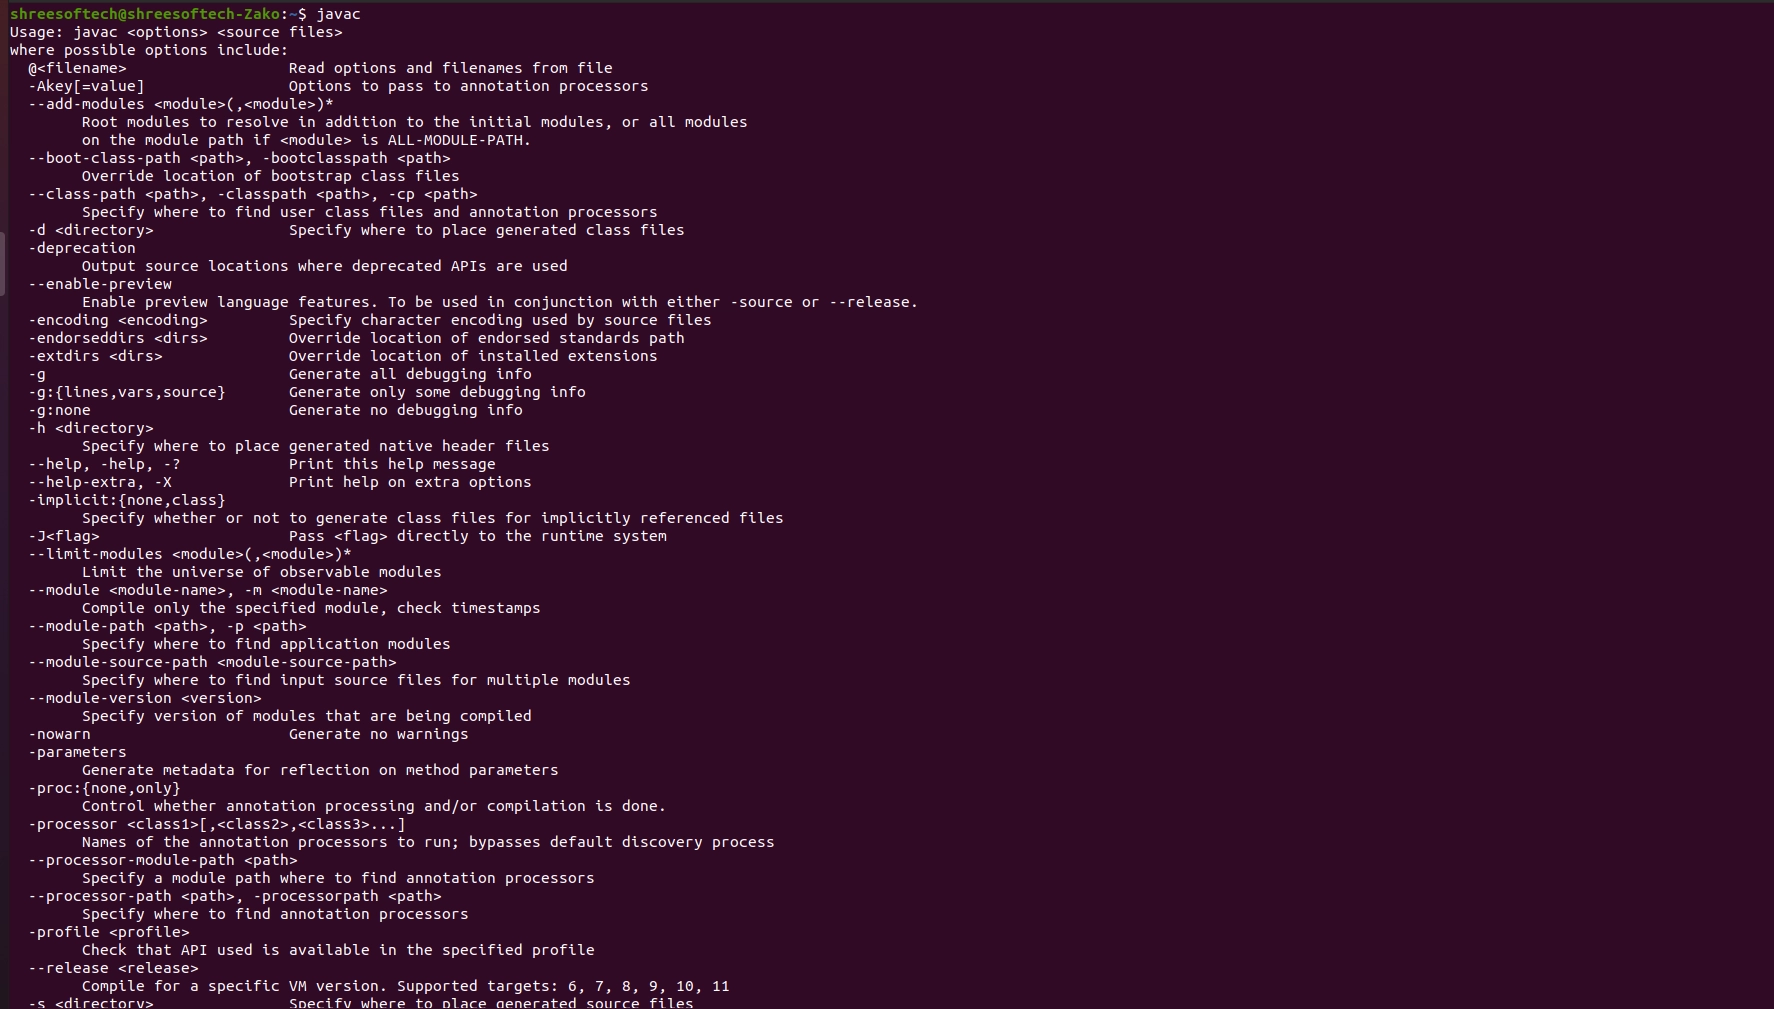
Check if everything is working by going to command prompt and typing javac commands
Setup Flutter
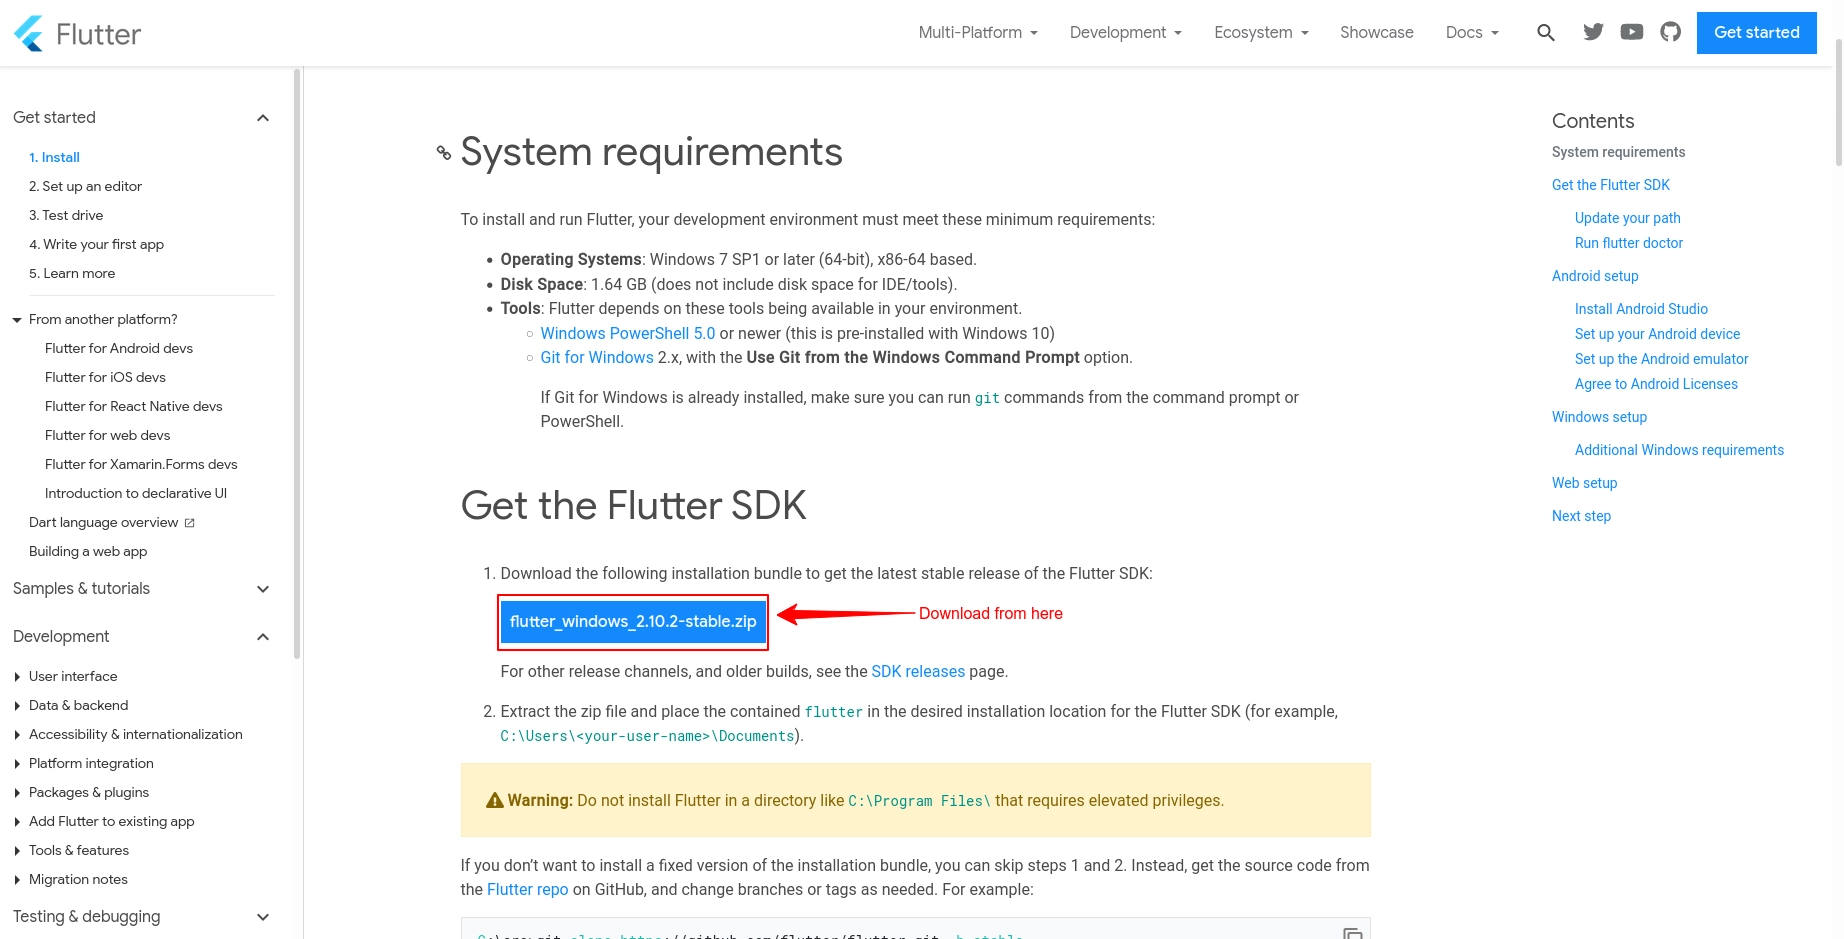
- Download Latest Flutter SDK from Flutter sdk
- Extract the zip file and copy flutter folder into your desired installation location for the Flutter SDK (e.g., C:\src\flutter; do not install Flutter in a directory like C:\Program Files)
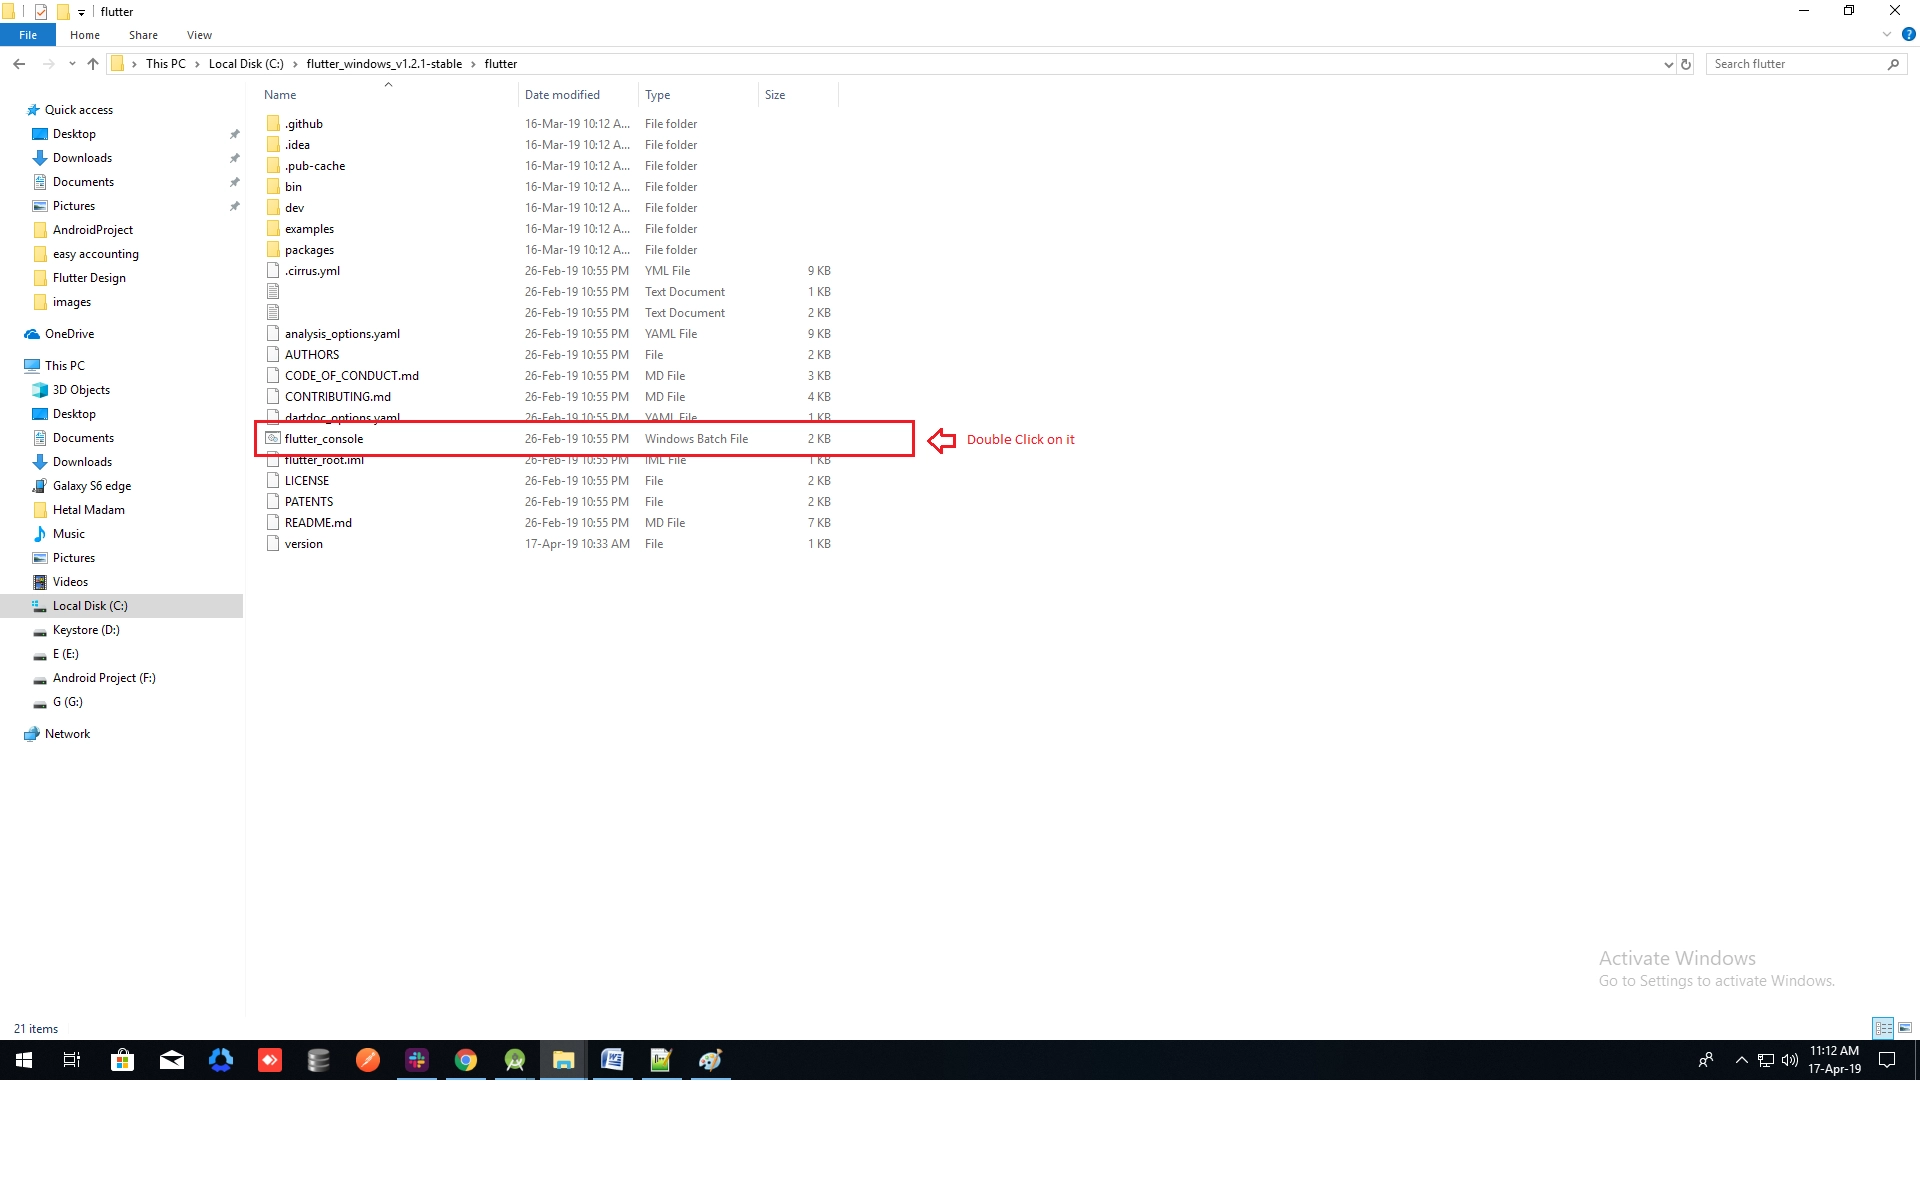
- Inside Flutter folder find flutter_console.bat. Start it by double-clicking
-
Now set your environment variable:
- From the Start search bar, type 'env' and select "Edit environment variables for your account"
- Under User variables check if there is an entry called Path
- Click on Edit. From the new dialog, click on new and copy full path to flutter\bin as its value
- Restart your PC for changes to take effect
-
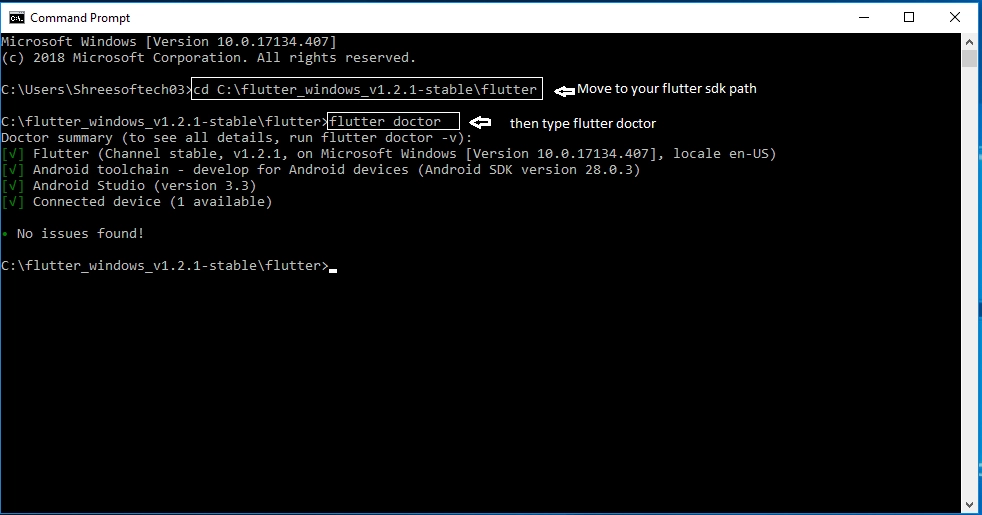
Check everything is working by opening cmd and running flutter doctor
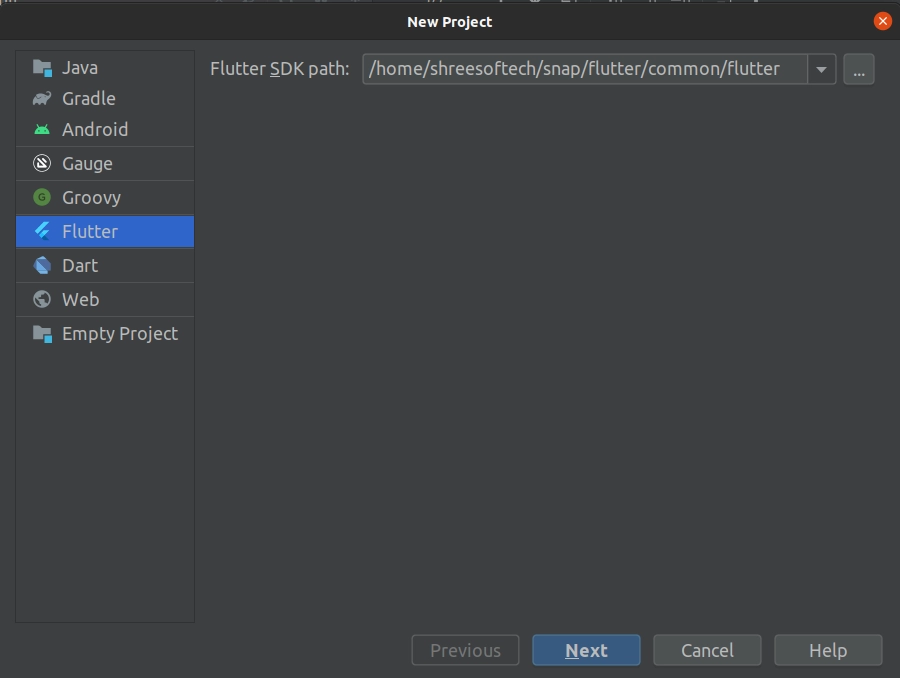
- Now open Android Studio and create new flutter project, then select your flutter sdk file to the location where you downloaded it earlier
Upgrade Flutter
- To upgrade, go to terminal in Android Studio and type
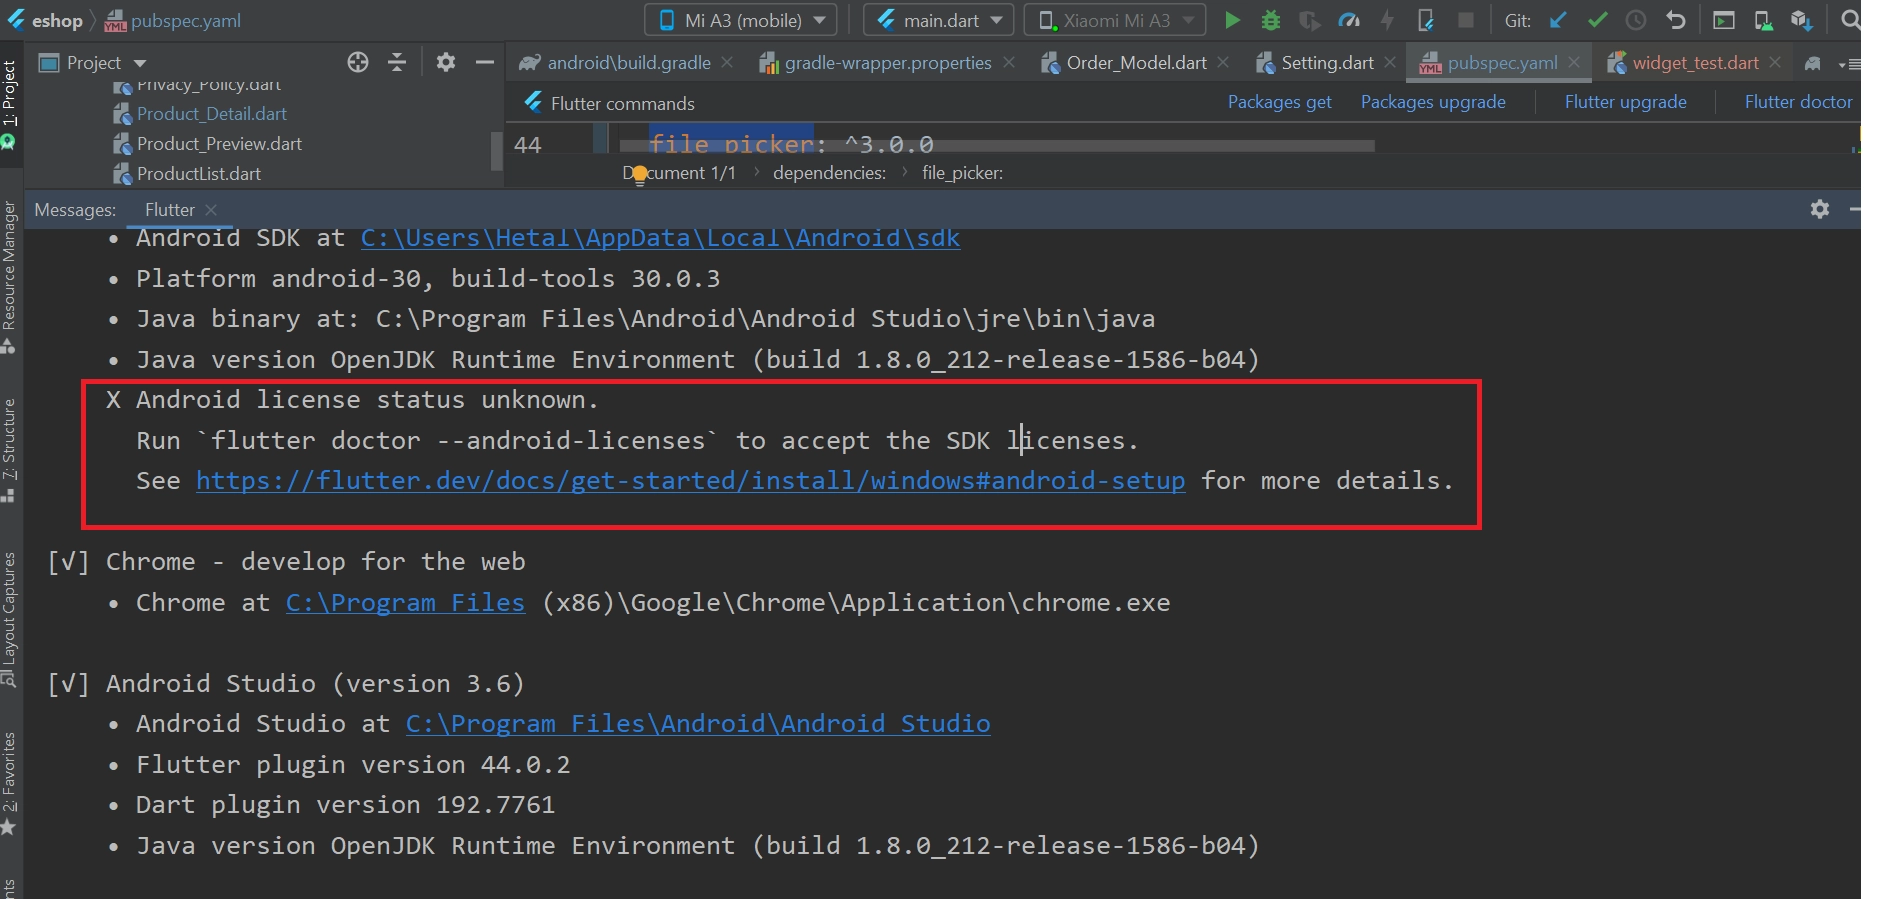
flutter upgrade. It will automatically pick the latest version with stable channel - If you have updated flutter 2.x after upgrade, run
flutter doctor. If you see an error like "license status unknown":
- Go to SDK manager from upper right corner
- Go to Android SDK inside that SDK tools
- Uncheck "hide obsolete package"
- Check Android SDK command line tool (latest)
- Apply and OK to download the latest version
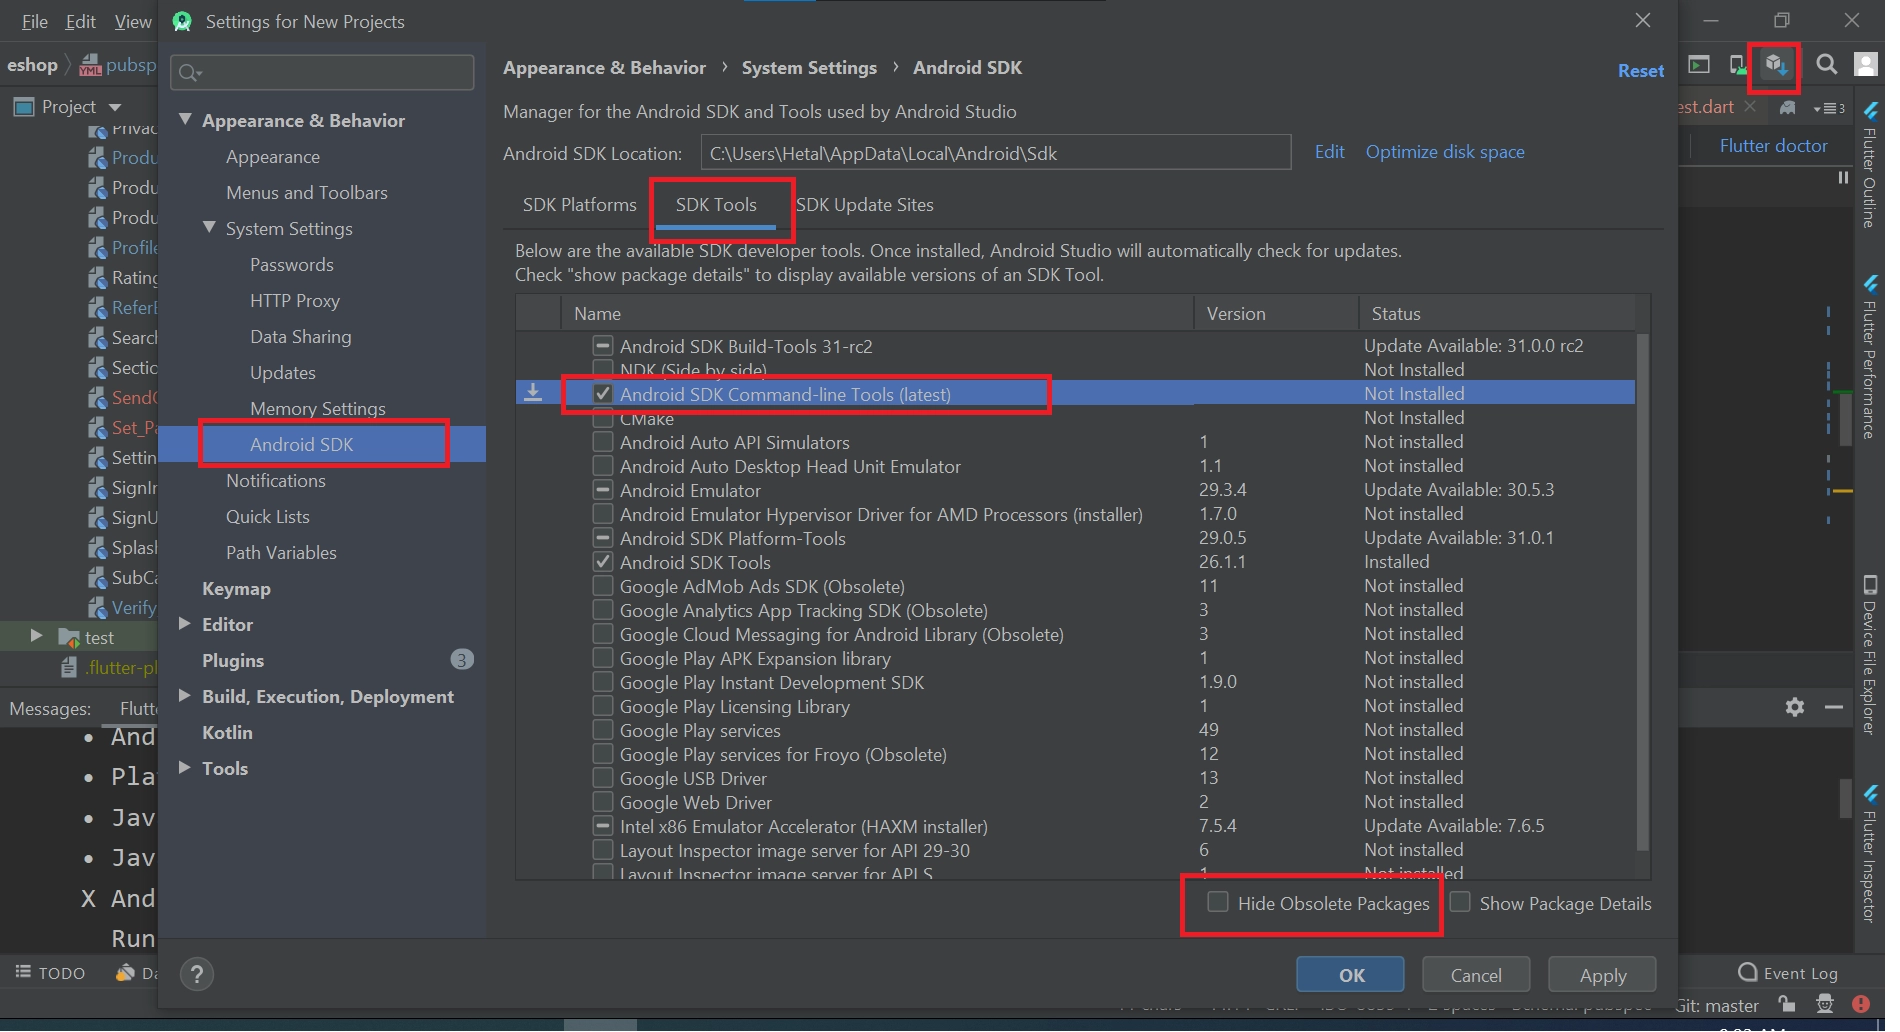
- Now run
flutter doctoragain and your error should be resolved