Integrate with Firebase
1. Install Firebase CLI
Before creating a Firebase app from Flutter, you must install Firebase CLI.
Follow the official guide to install Firebase CLI: Firebase CLI Installation Guide
2. Create a Firebase Project
-
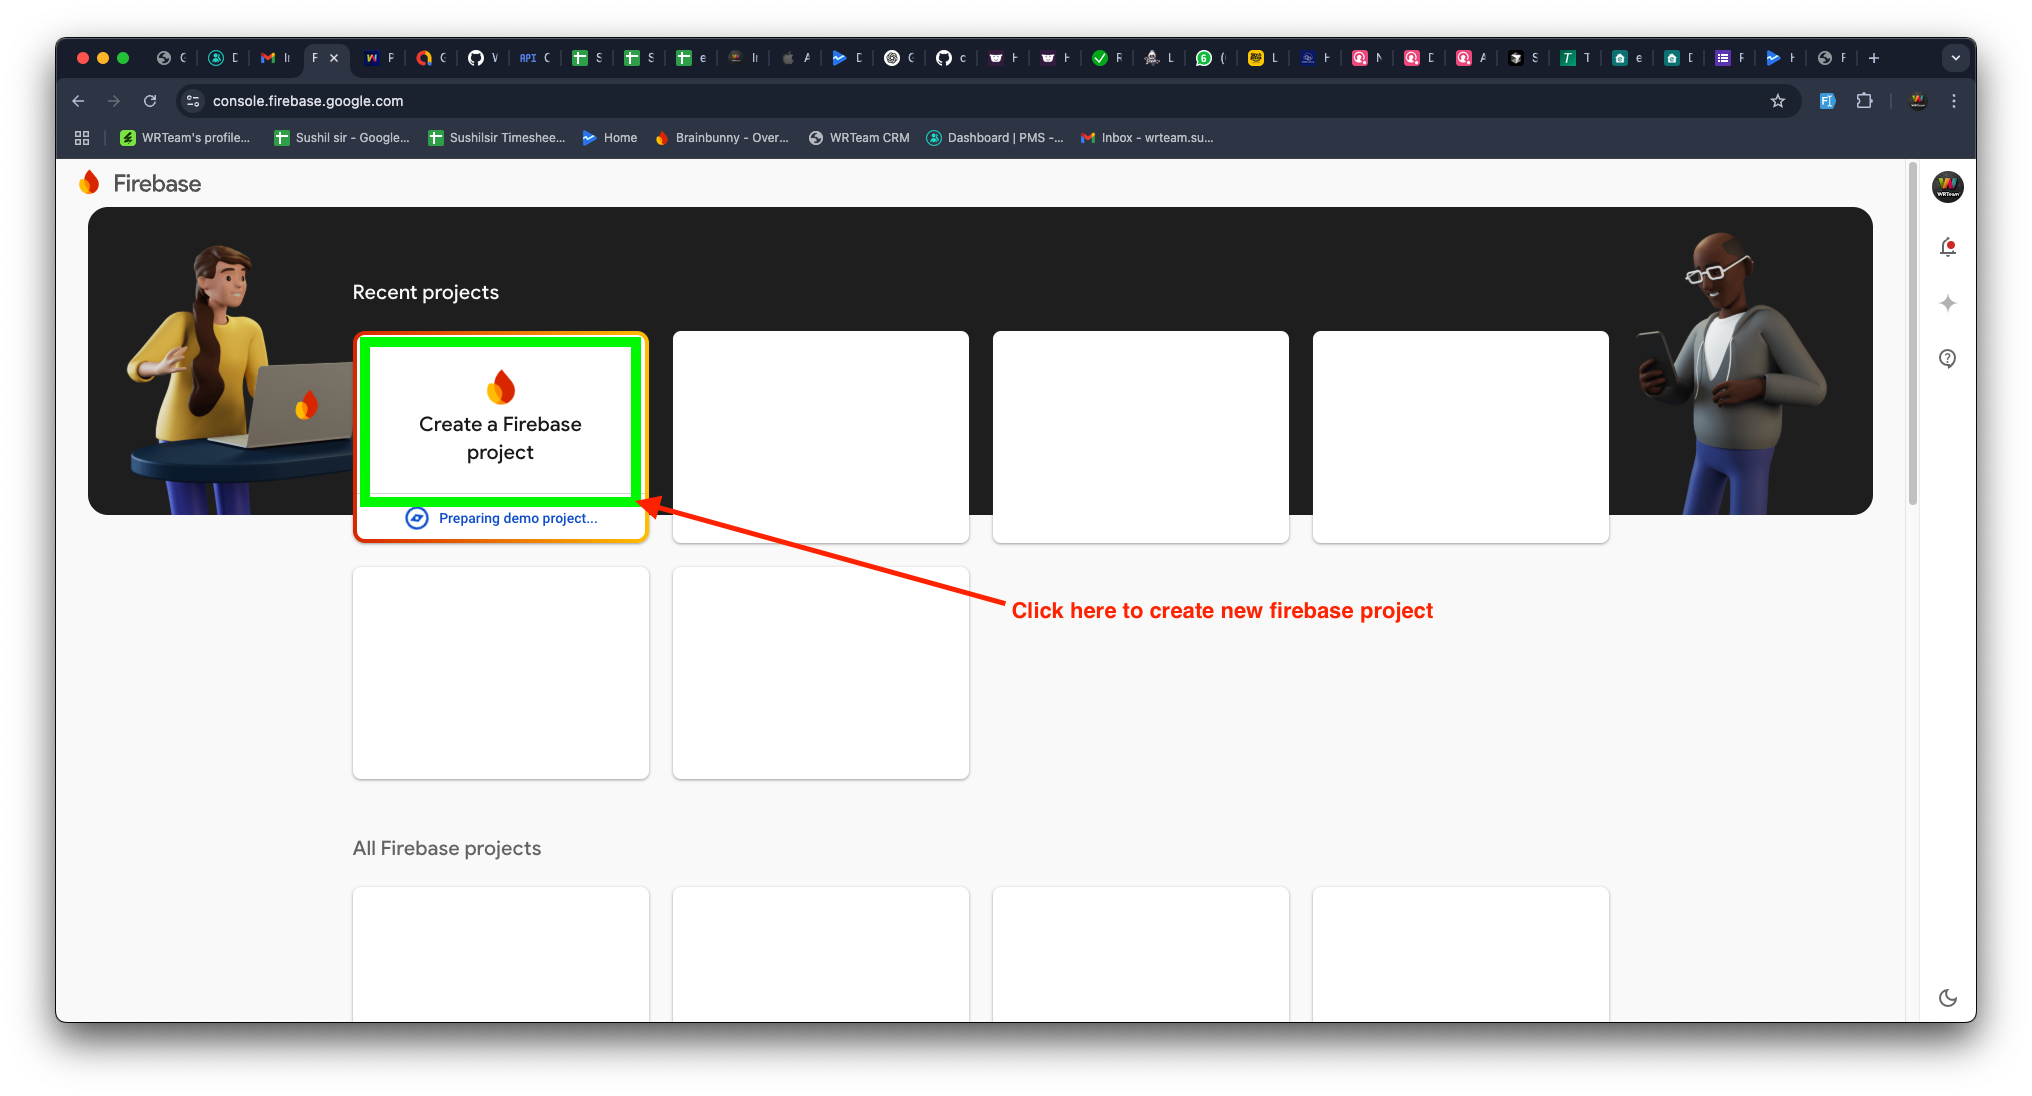
Open Firebase Console and click Create a Project.
-
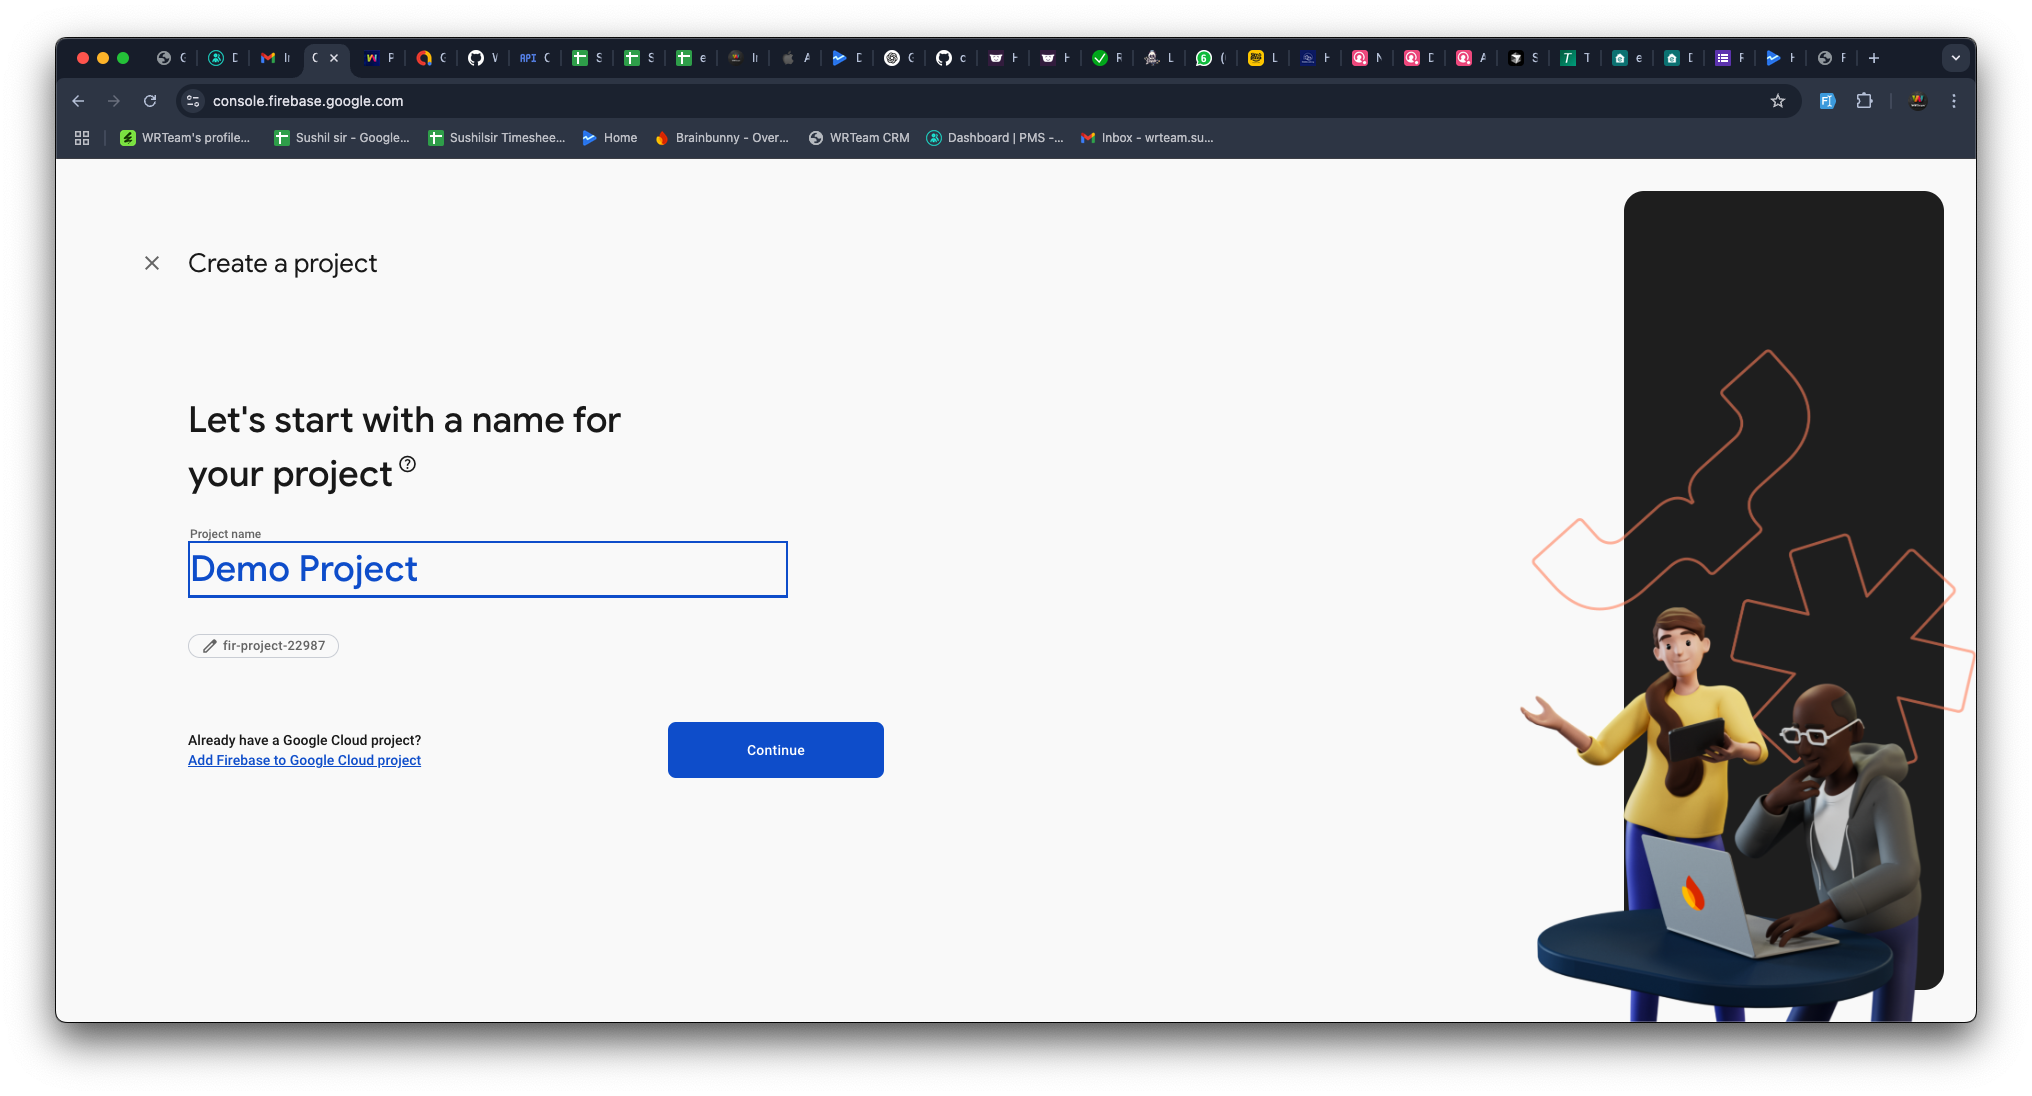
Enter your project name and press Continue.
-
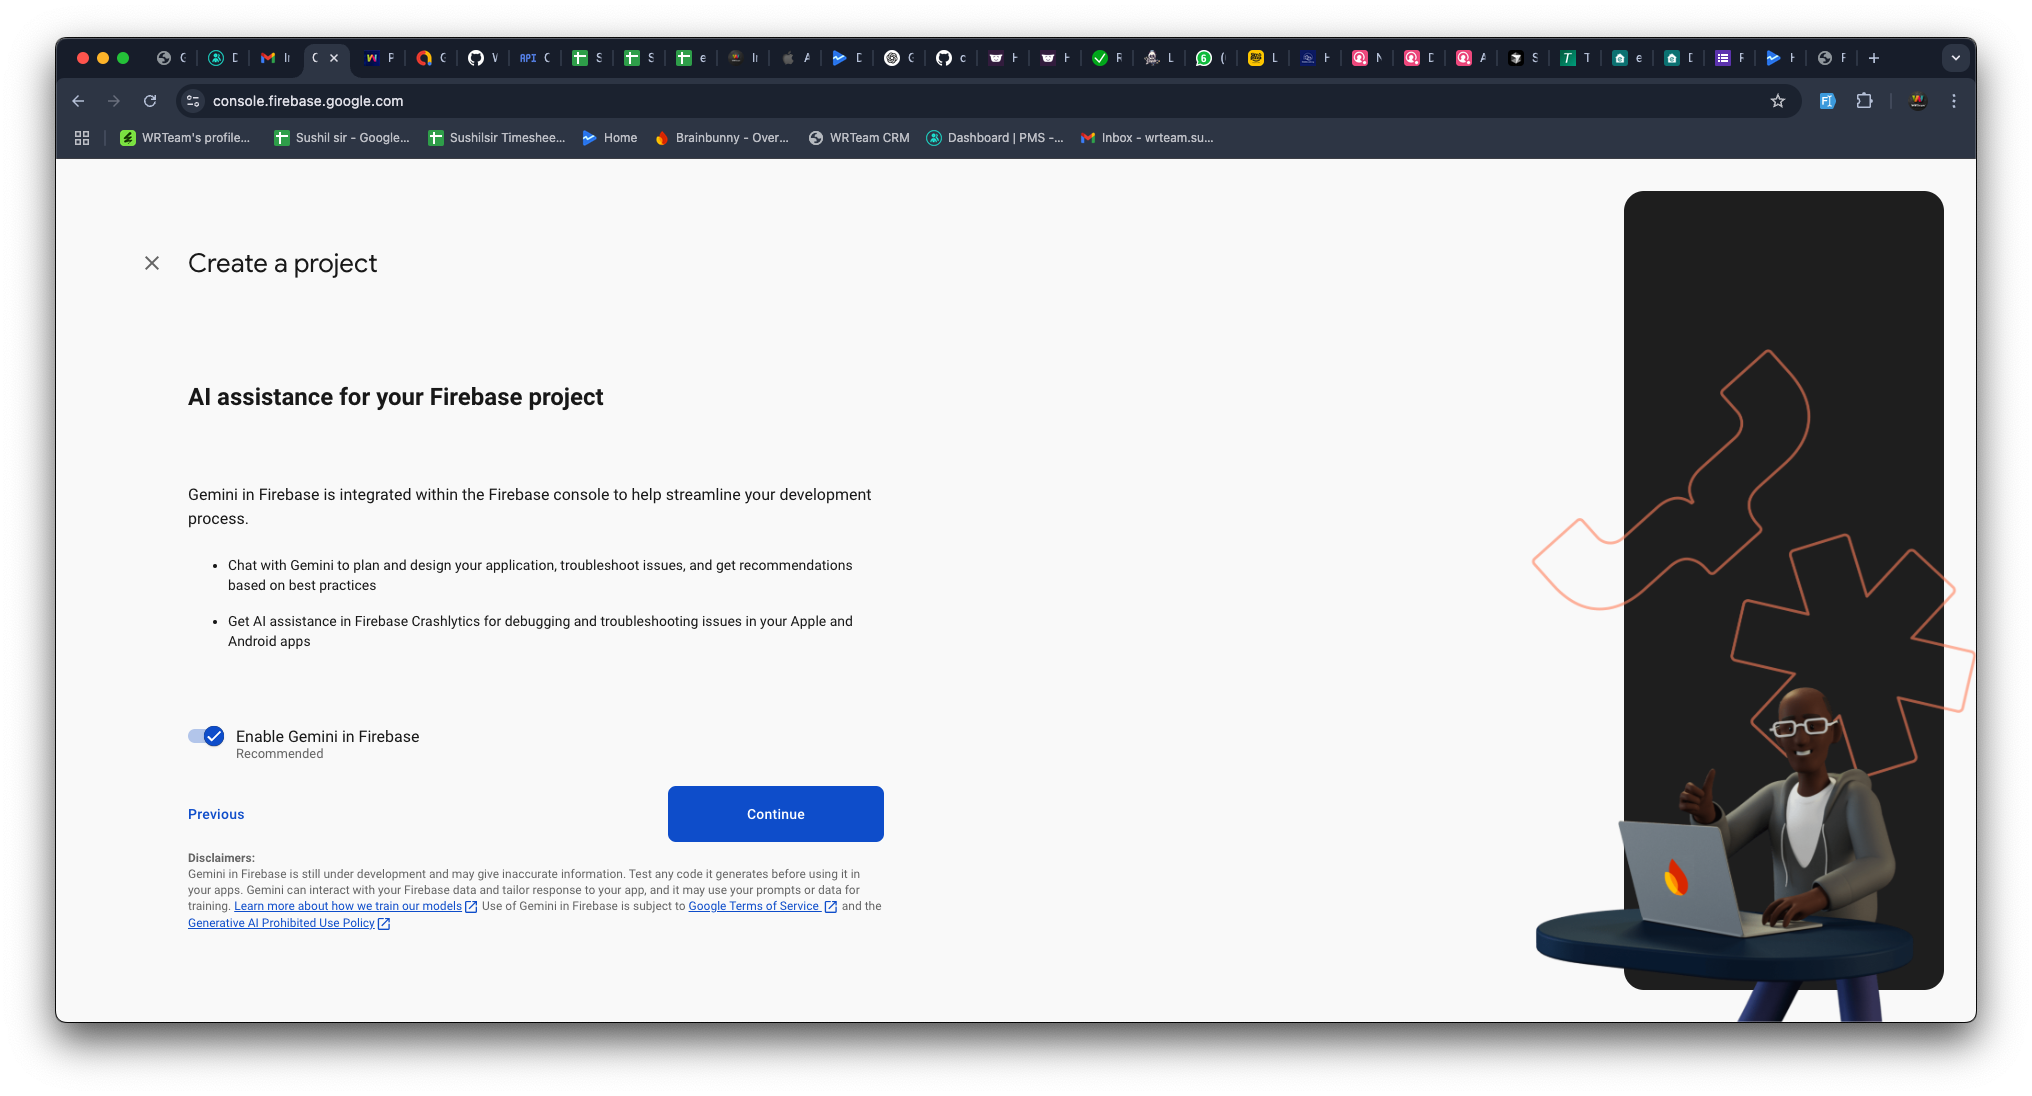
Press Continue on the next screen.
-
Click Create Project and wait for the setup to complete.
-
Once done, press Continue.
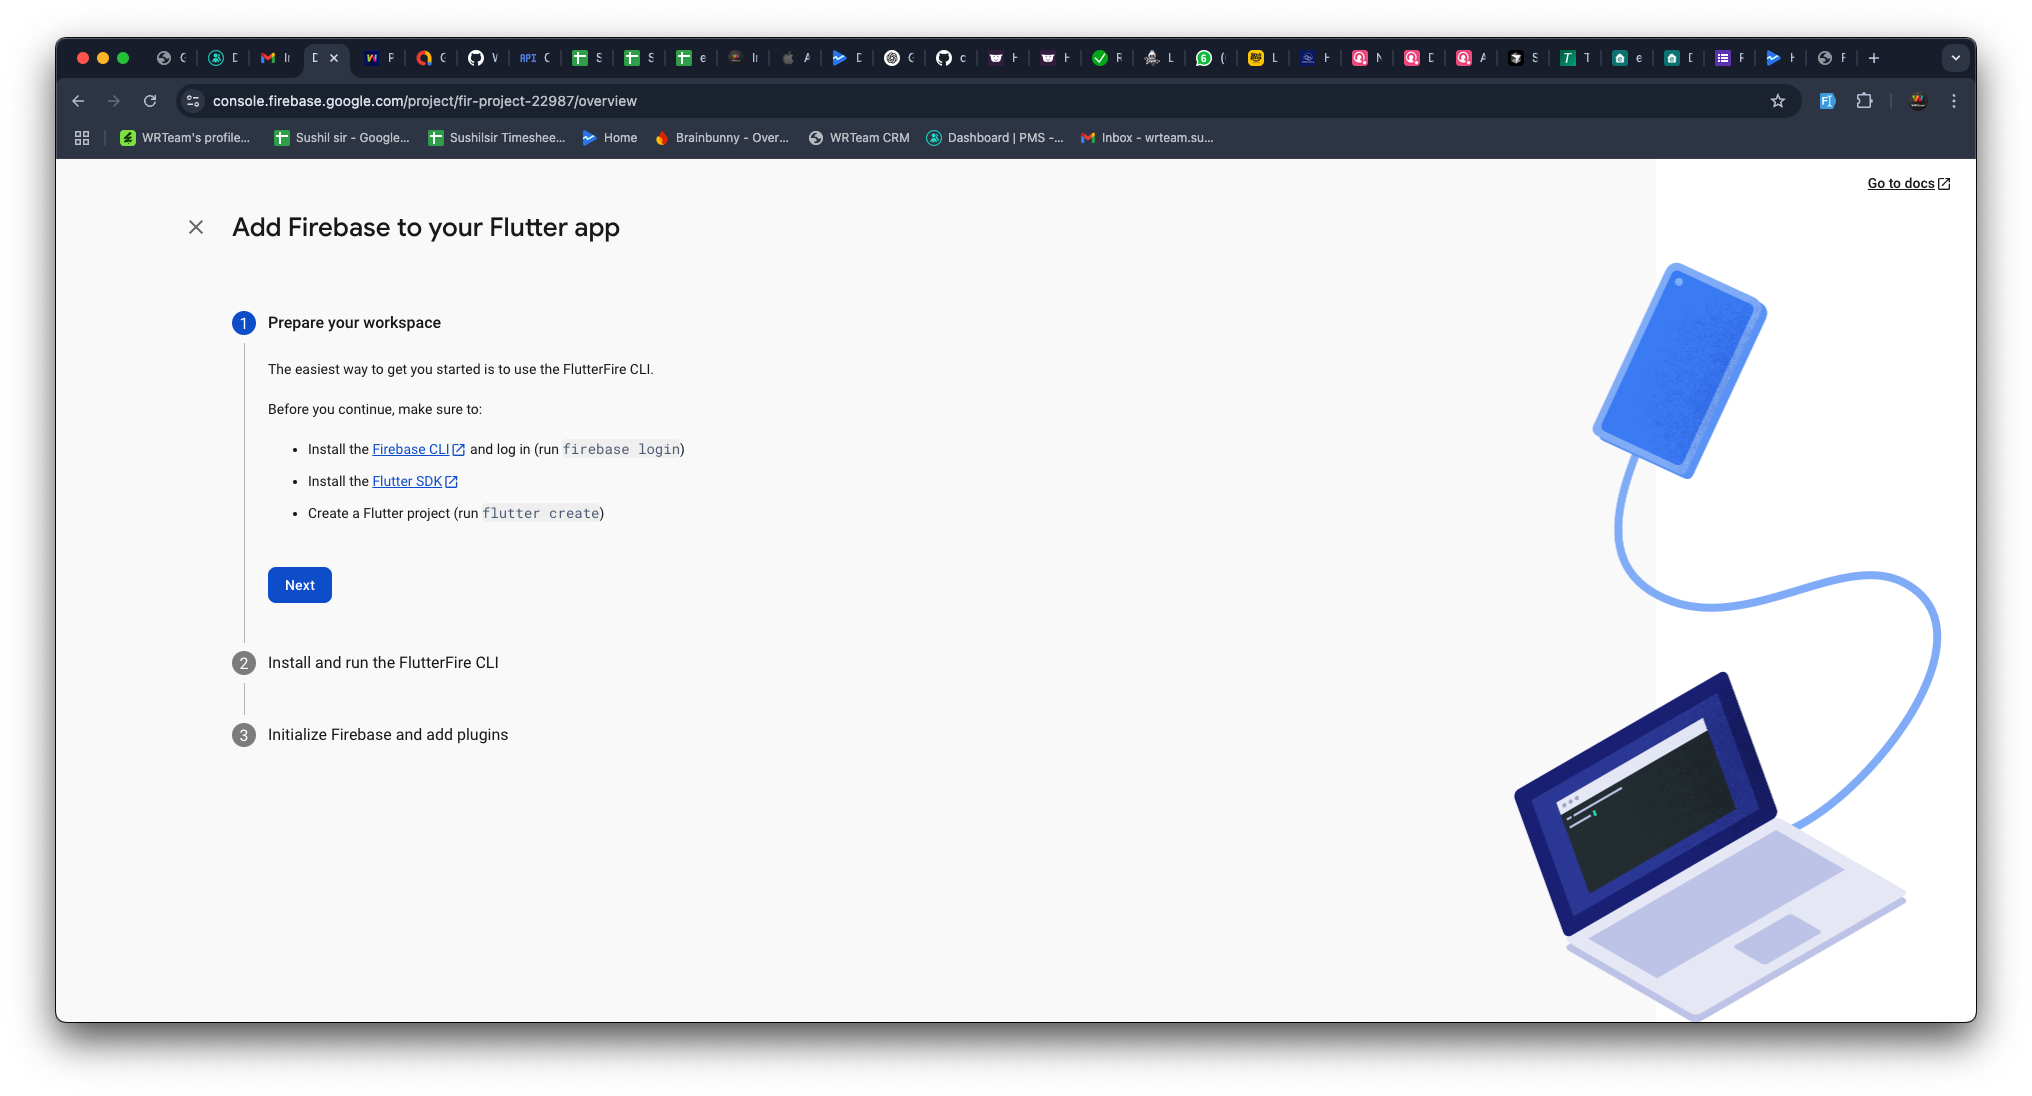
3. Create a Firebase App for Flutter
-
Select Flutter as the app type (refer to the image below).
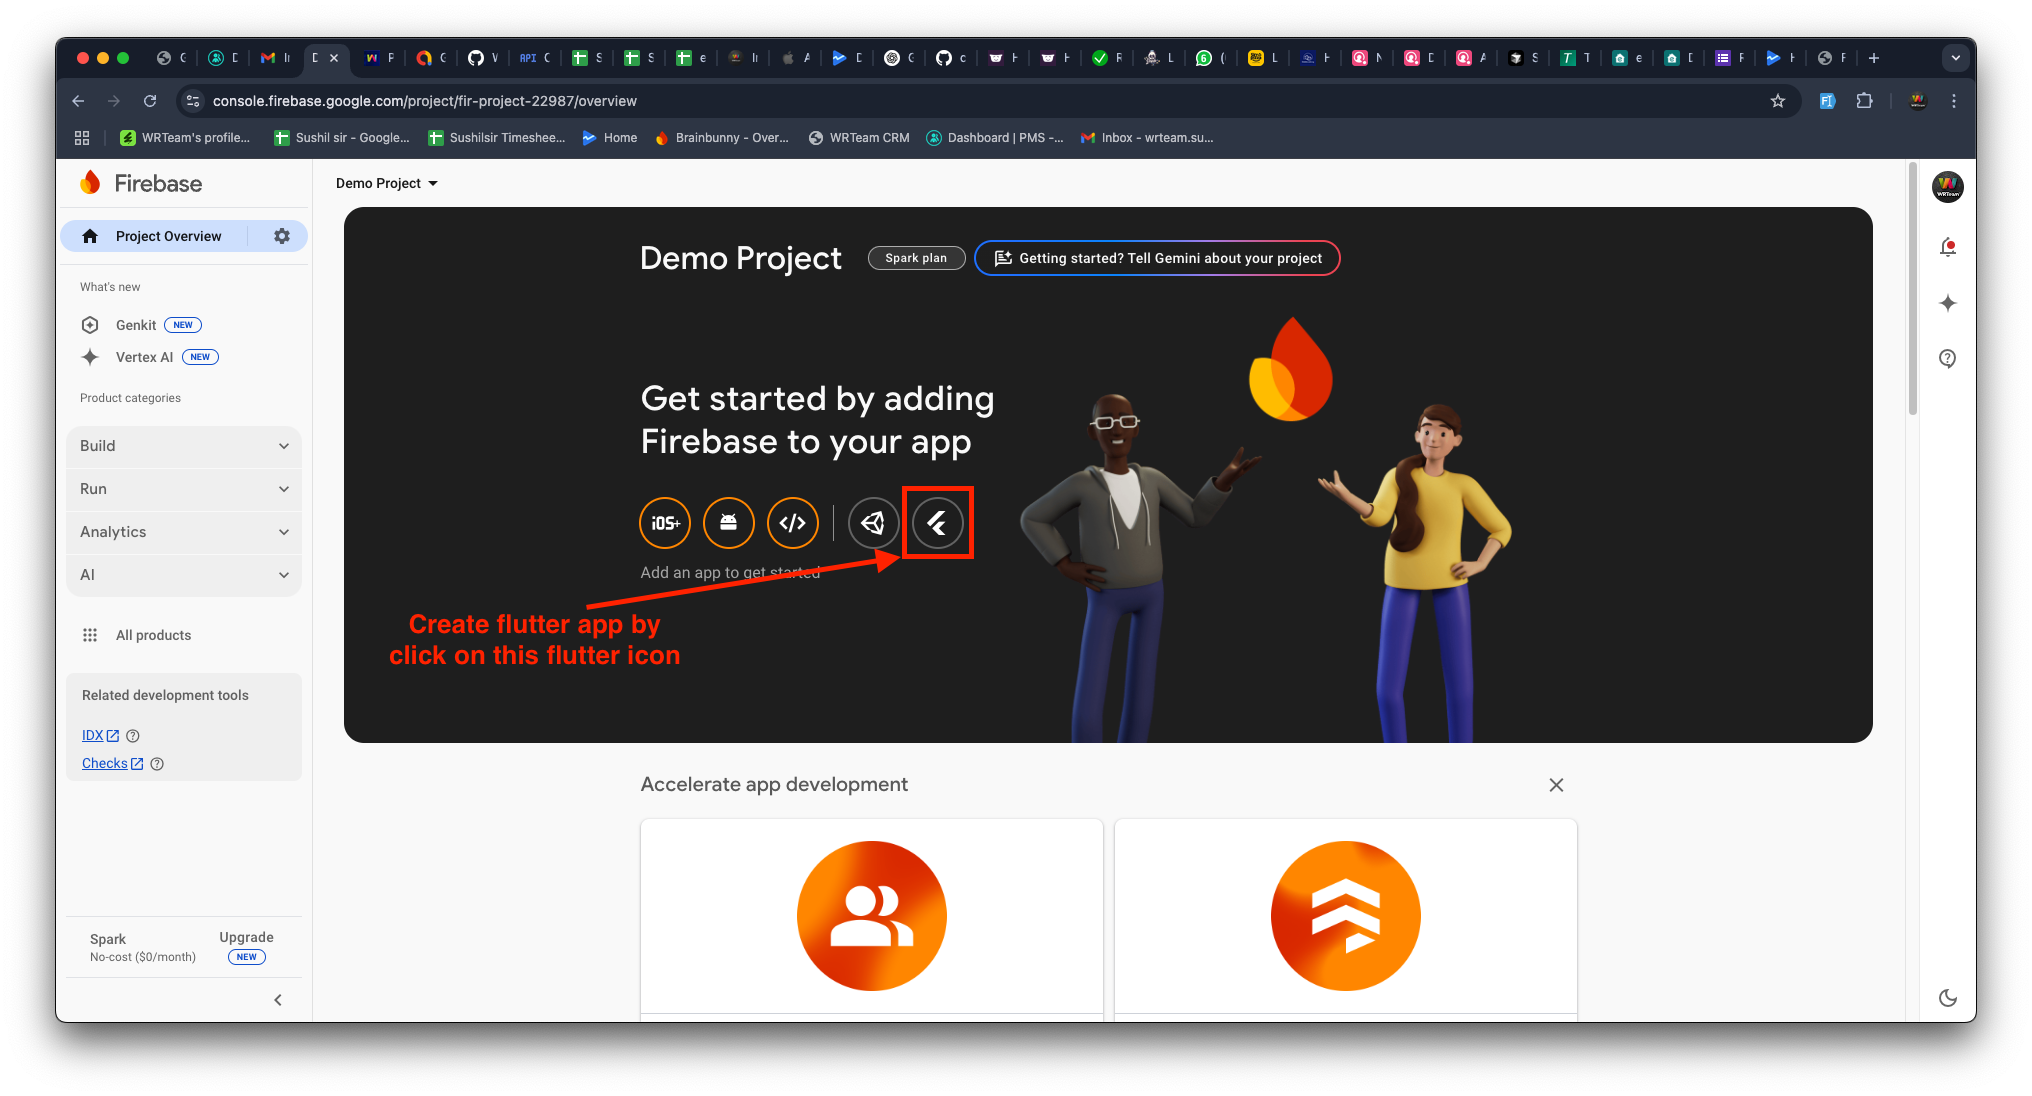
-
Press Next to continue.
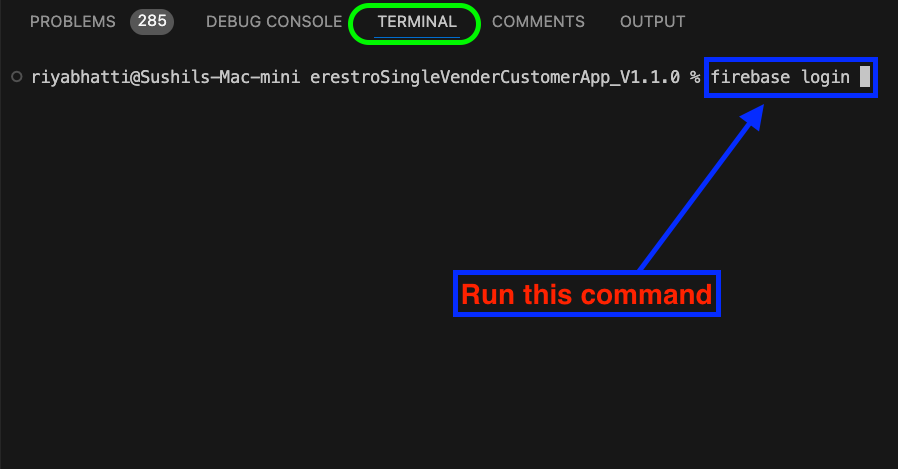
4. Log in to Firebase via Terminal
-
Open CLI Terminal (e.g., Visual Studio Code, Android Studio).
-
Run the following command to log in (if you are already logged in, then you can move to the step 5):
-
A browser window will open—log in to your Firebase account.
-
When prompted, allow Firebase to collect CLI usage data by entering YES and pressing Enter.
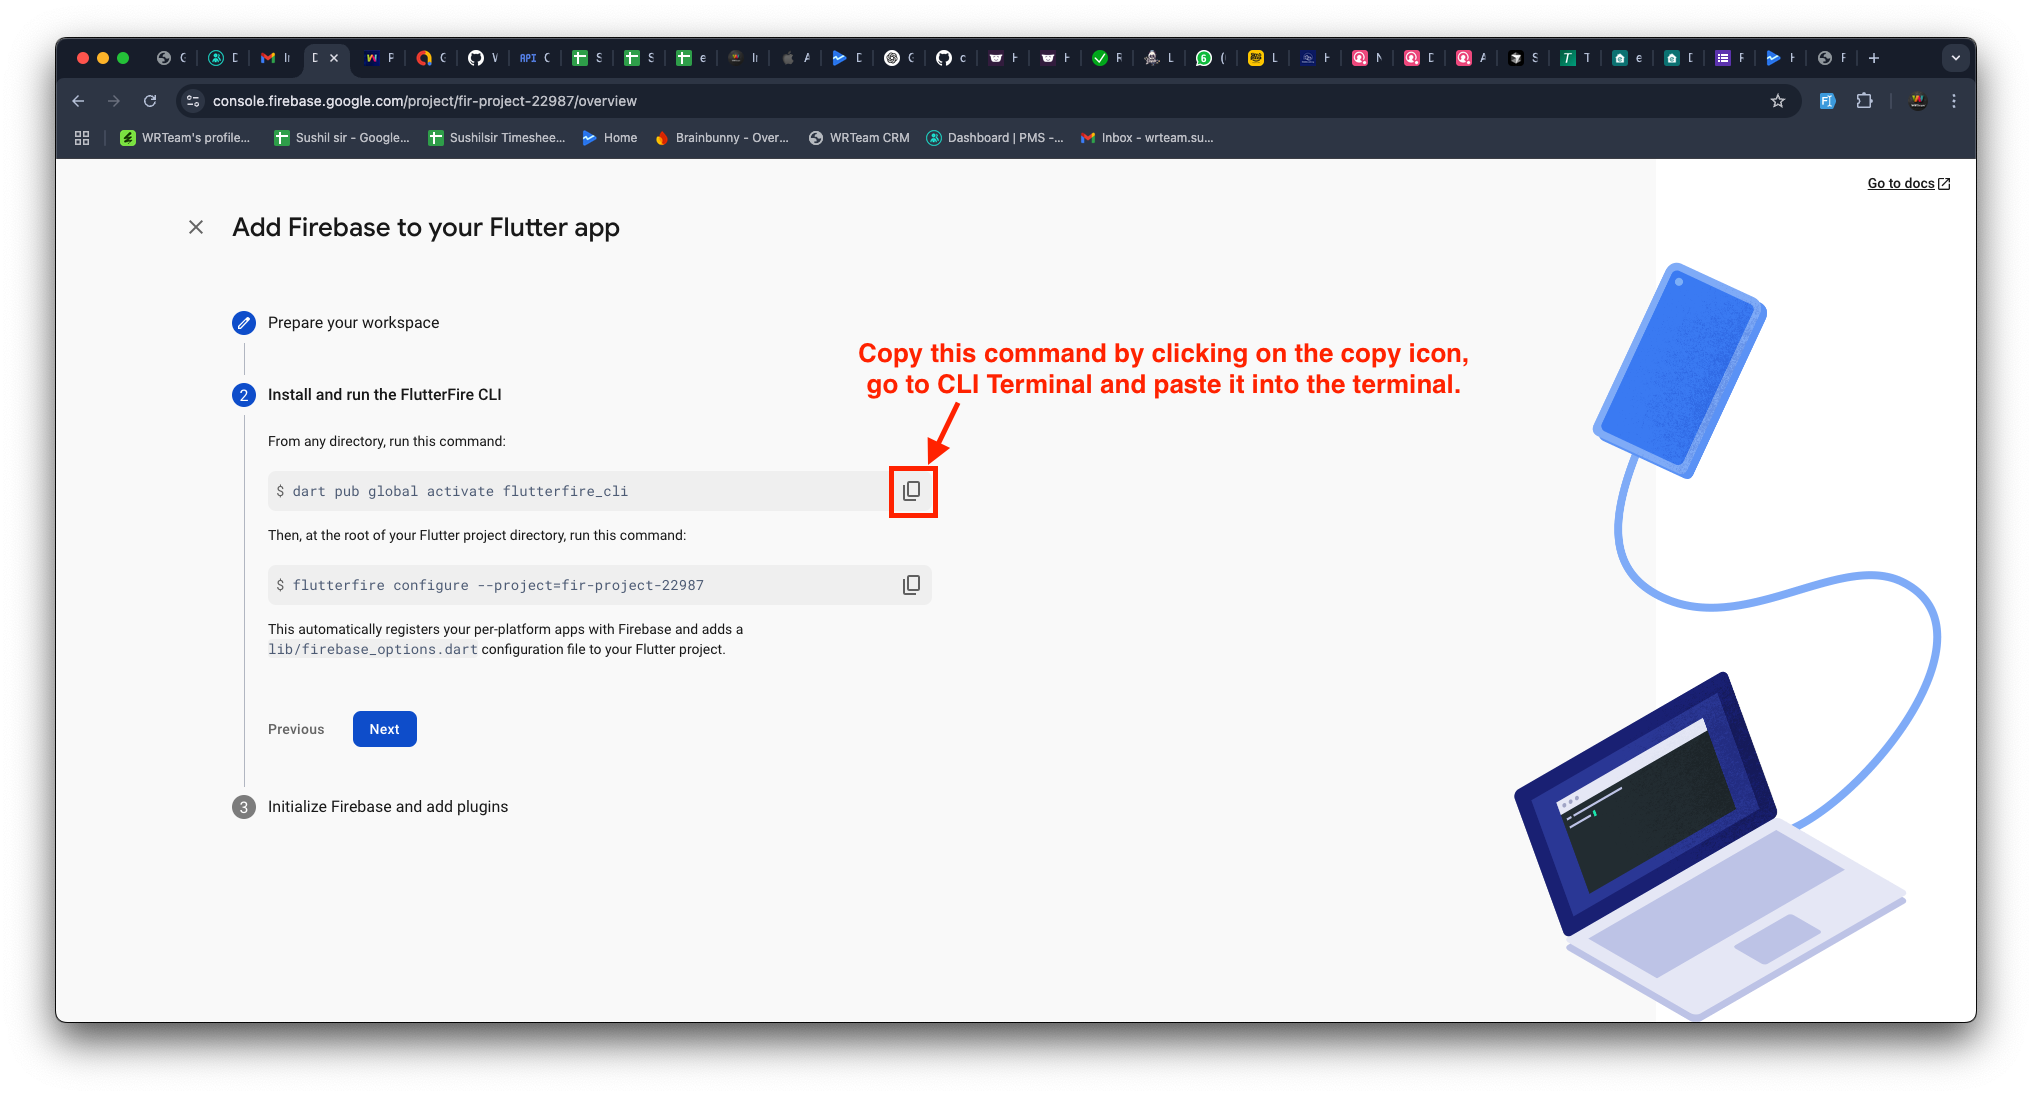
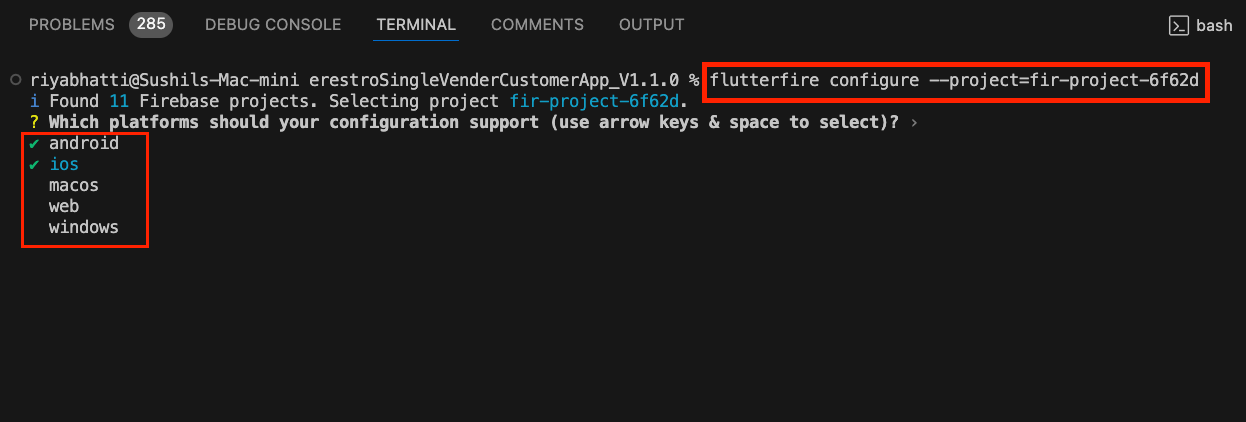
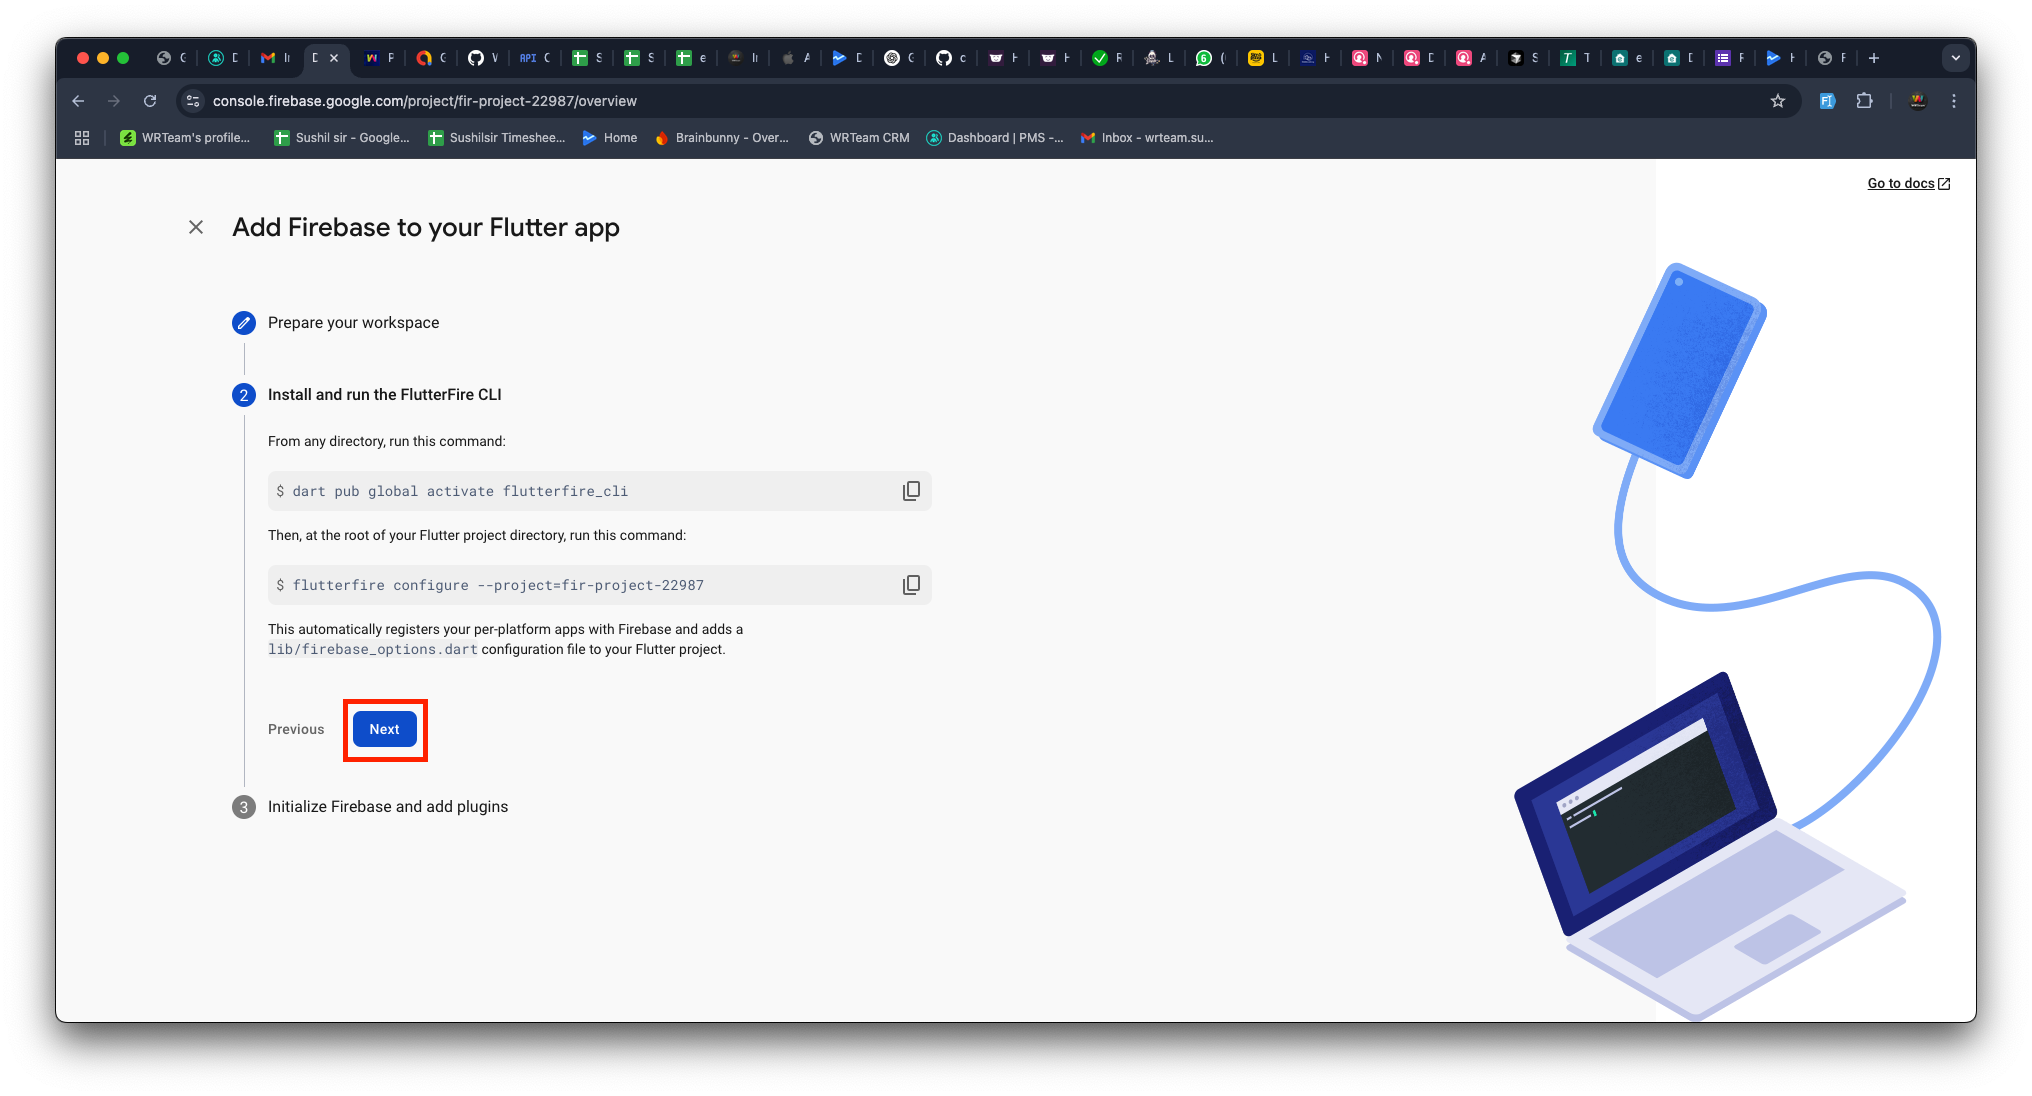
5. Run Firebase Initialization Commands
-
In CLI Terminal (e.g., Visual Studio Code, Android Studio), run the first Firebase setup command (as per the provided image).
-
Run the second Firebase setup command in the terminal.
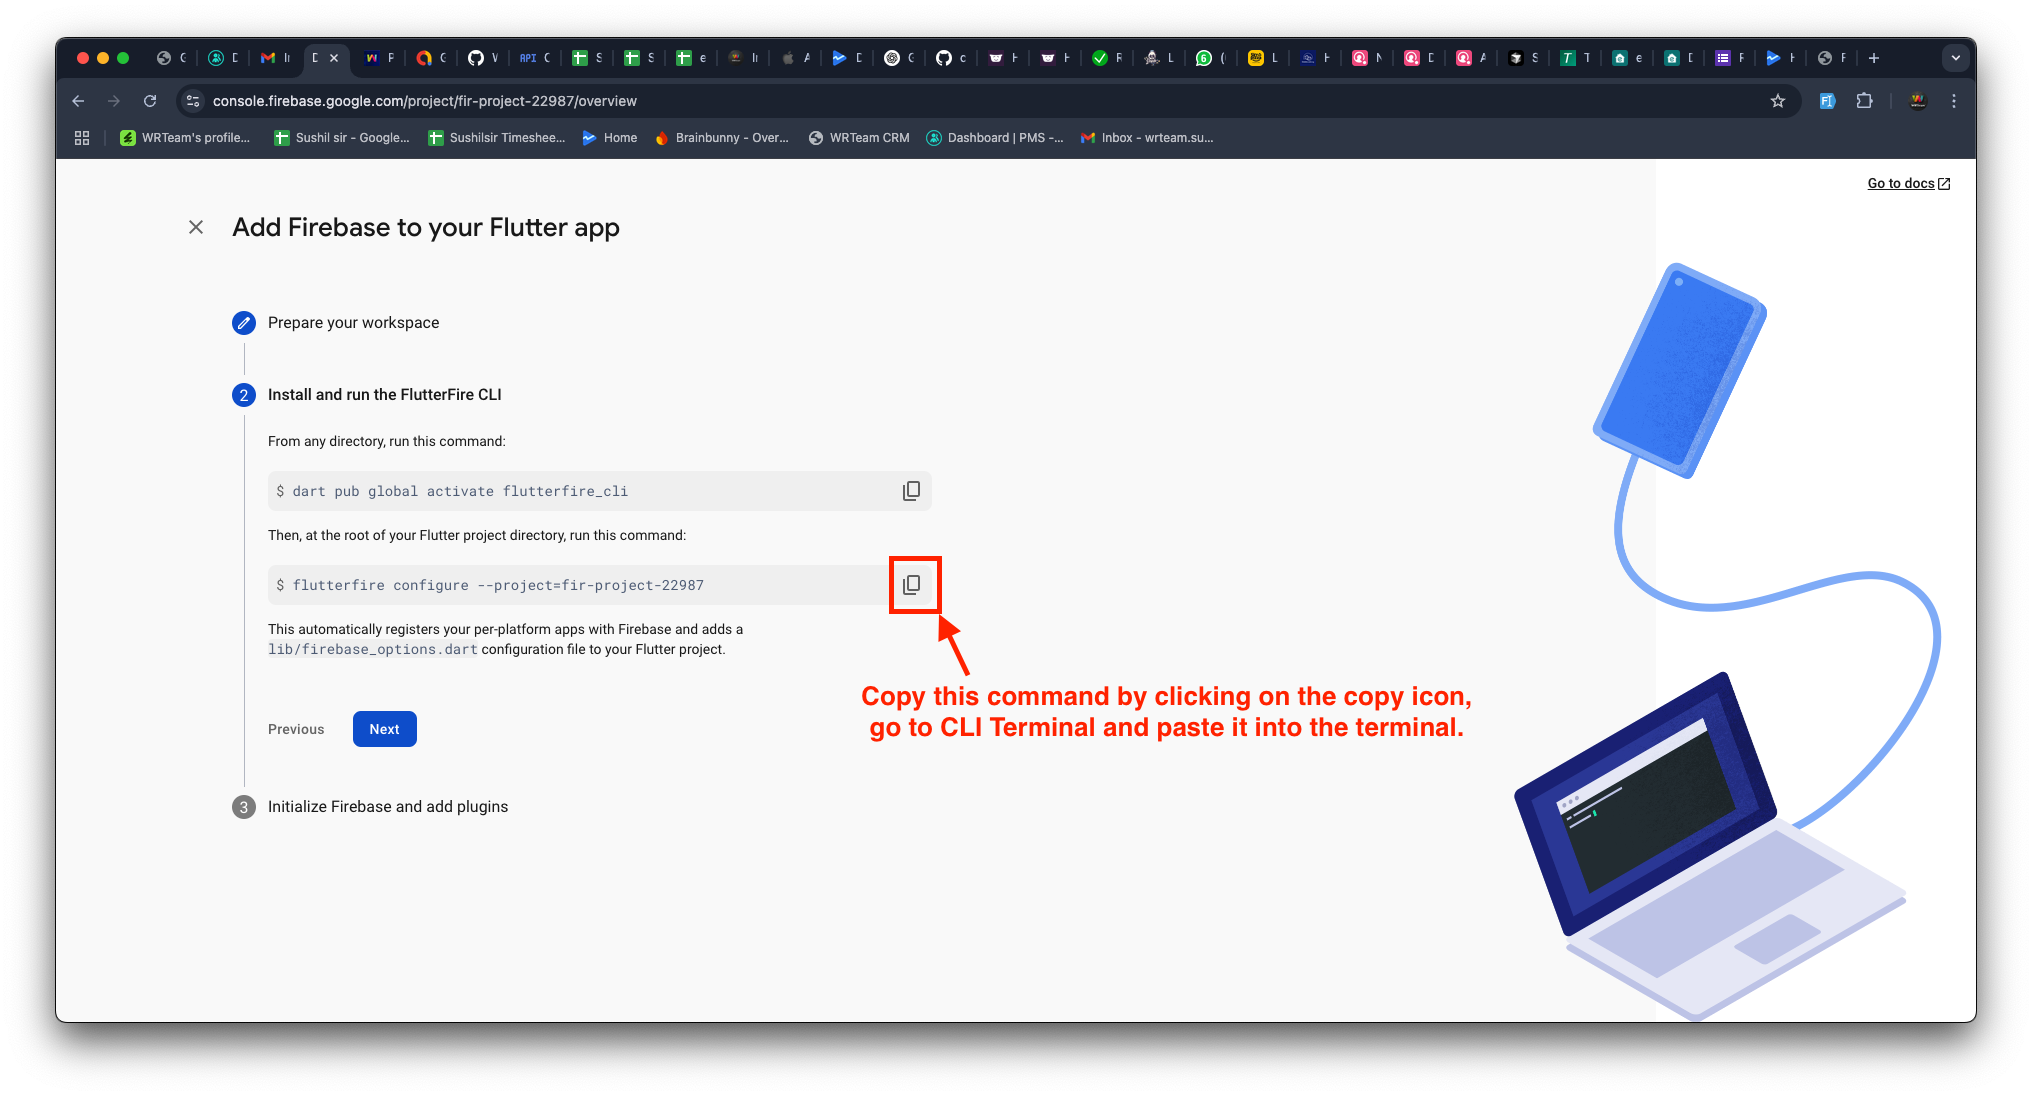
-
When the terminal asks for confirmation, press Enter.
-
If prompted again, press Y to confirm.

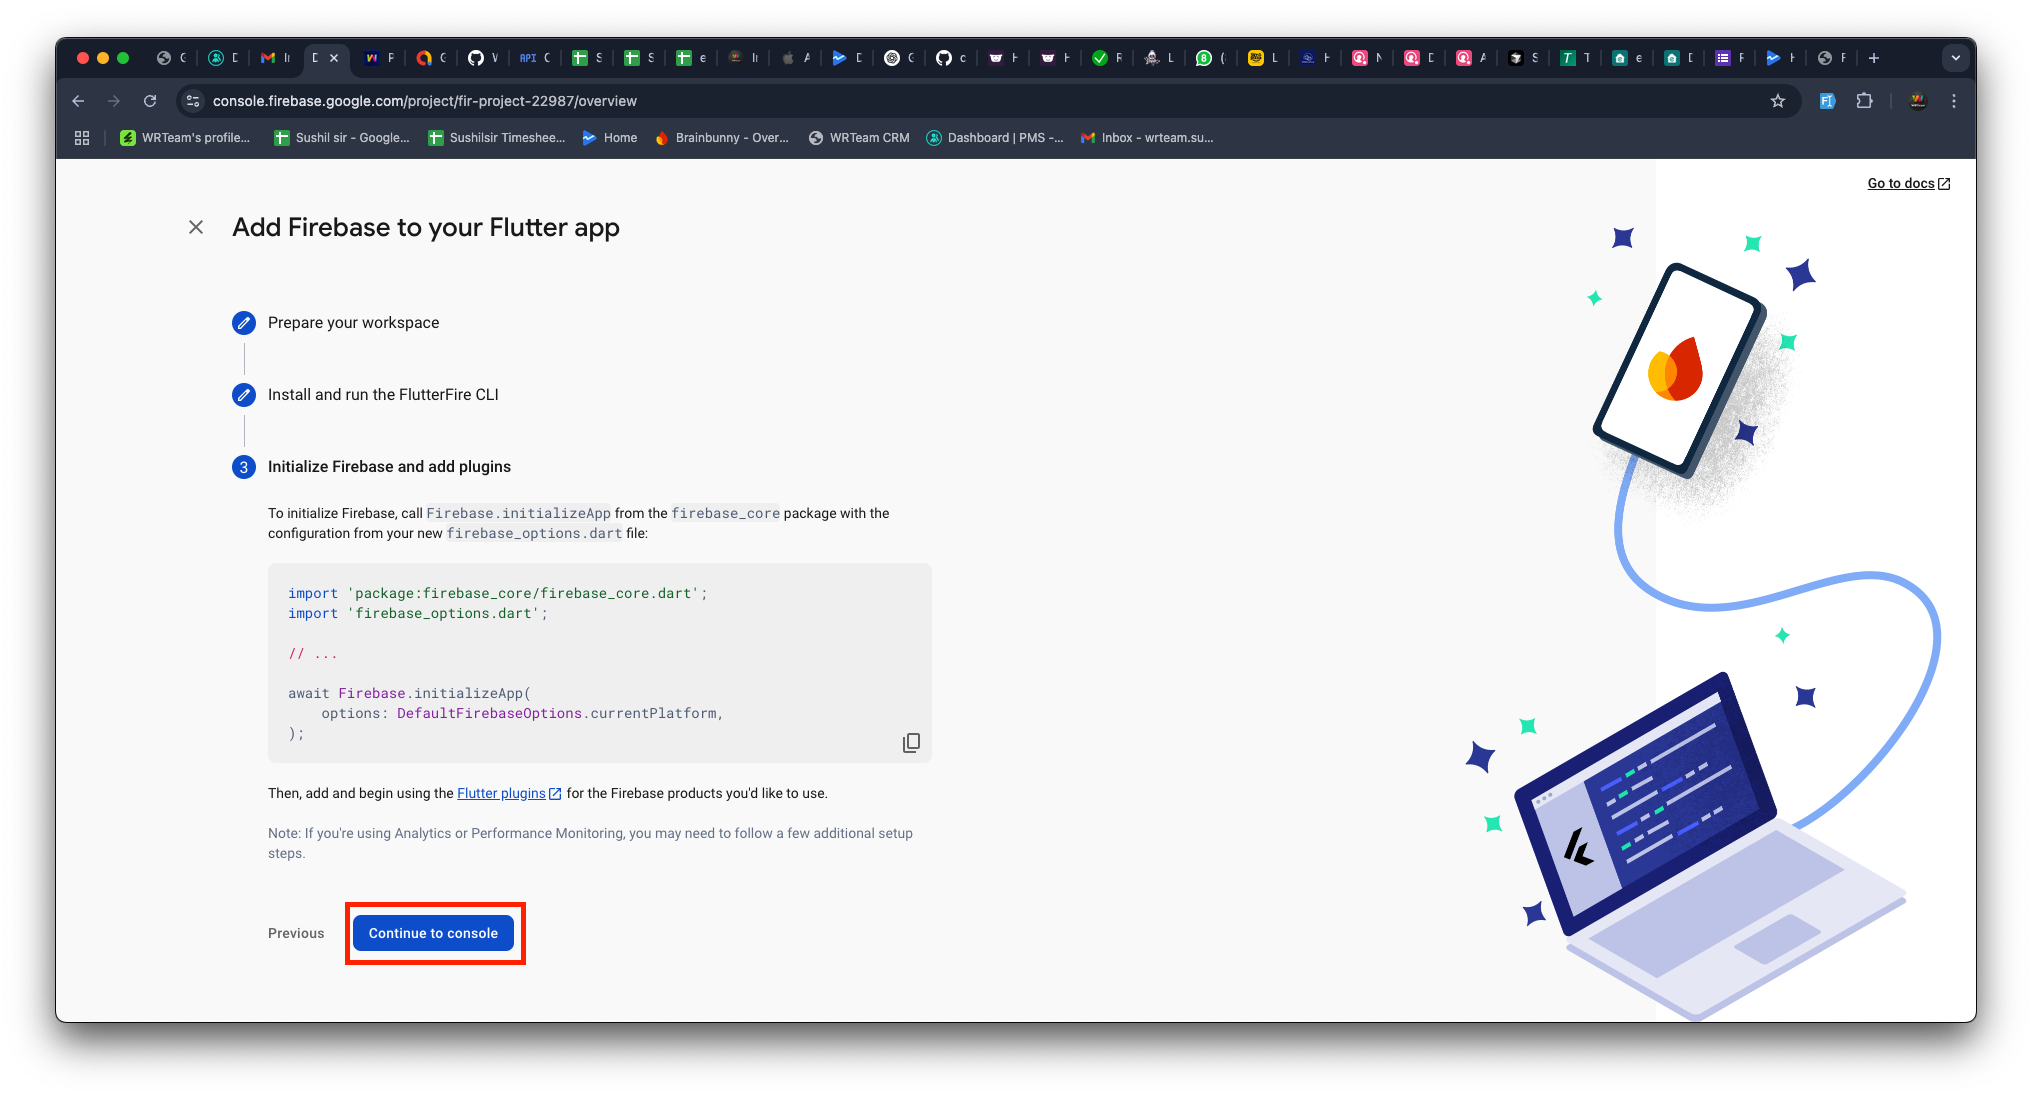
6. Finalizing Firebase Setup
-
Press Next to continue.
-
Click Continue to Console.
7. Please configure this settings in-order to send ios notifications.
https://firebase.flutter.dev/docs/messaging/apple-integration