Partner App Configuration
Open and Run eGrocer Partner App
- Go to file > open > then choose your downloaded project location to open the project
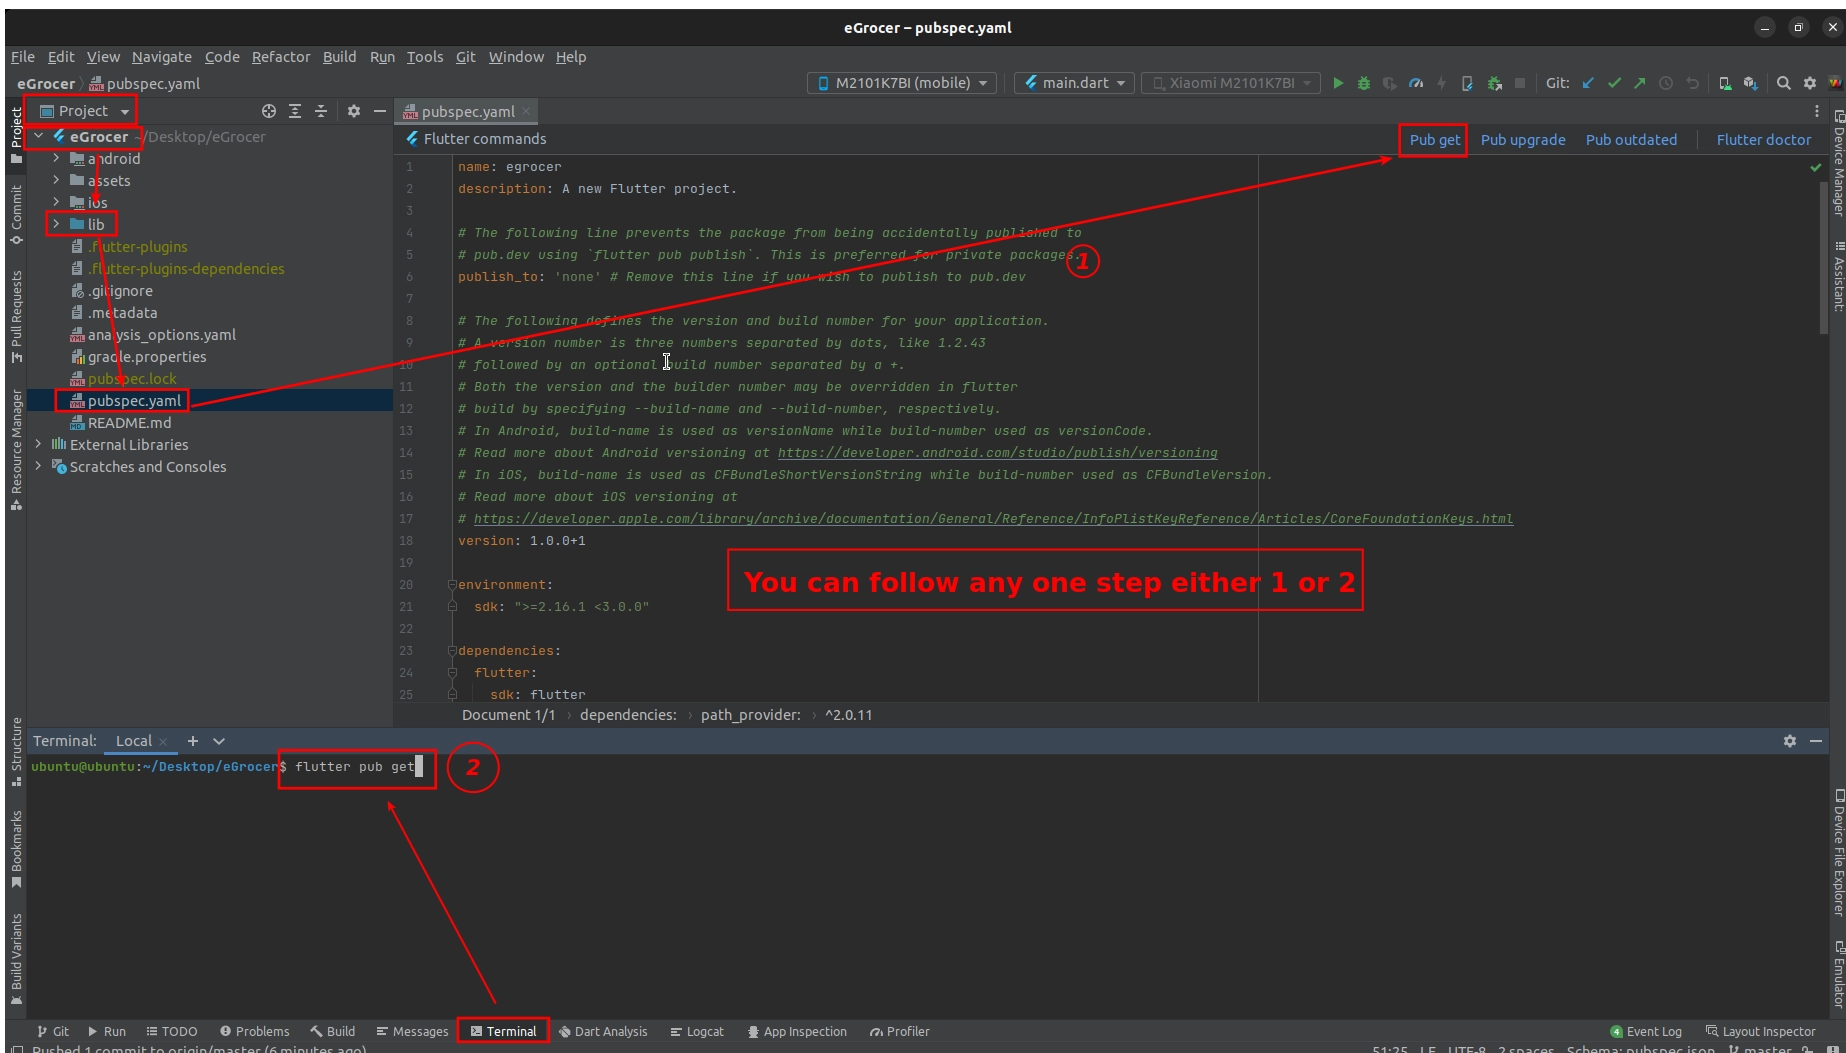
- If you see "enable dart support" in the upper right corner, click that and go to pubspec.yaml file
- In the upper right part, click pub get or package get and then press the run button
If you are getting errors, you can perform these troubleshooting steps:
- If firewall is on in your system, temporarily disable it and try to run the project
- If your flutter channel is not stable, change it to stable. Check your flutter channel in terminal by typing
flutter channel
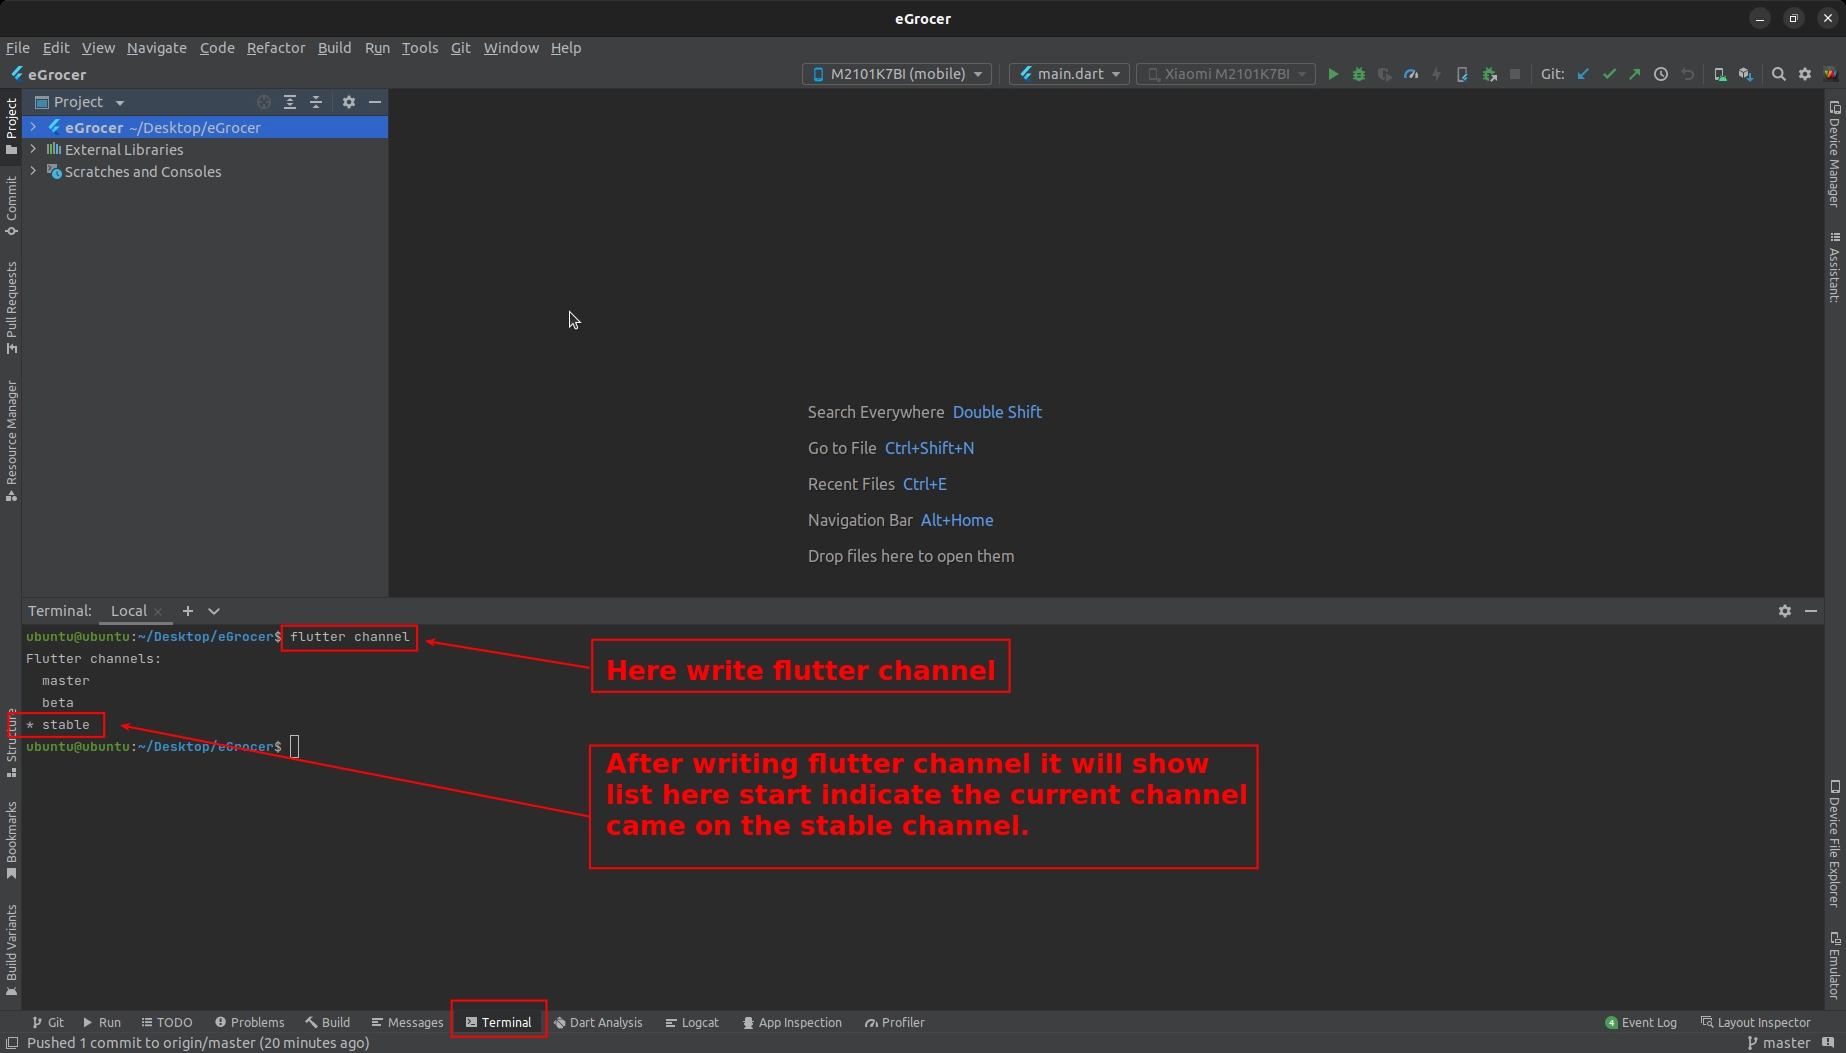
- If not in stable, type
flutter channel stable - Go to Tools > Flutter > Flutter Clean
- Go to file > invalidate cache/restart
Change App Name
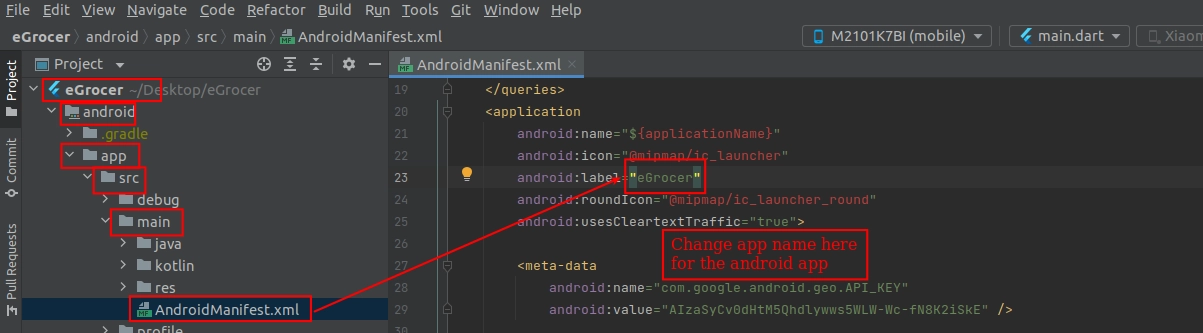
For Android
To change the label shown below Android app icon, open android > app > src > main > mainfest.xml and change the label string.
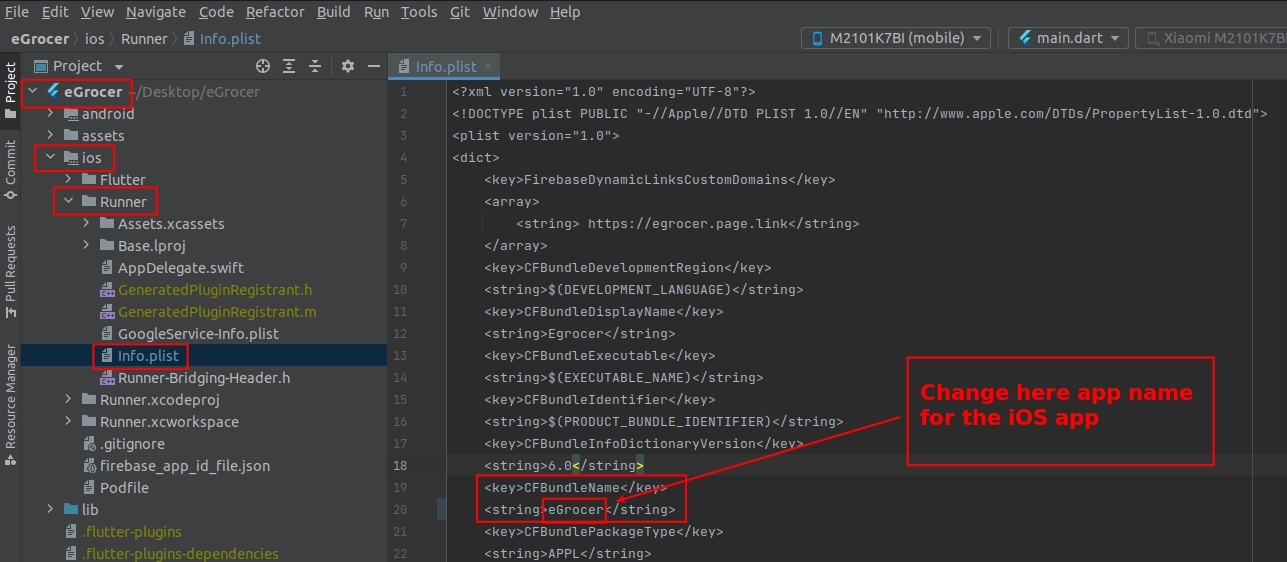
For iOS
To change the label shown below iOS app icon, open ios > Runner > Info.plist and find <key>CFBundleName</key> to change that string.
Change App Version
- Go to pubspec.yaml
- Update version: A.B.C+X in pubspec.yaml
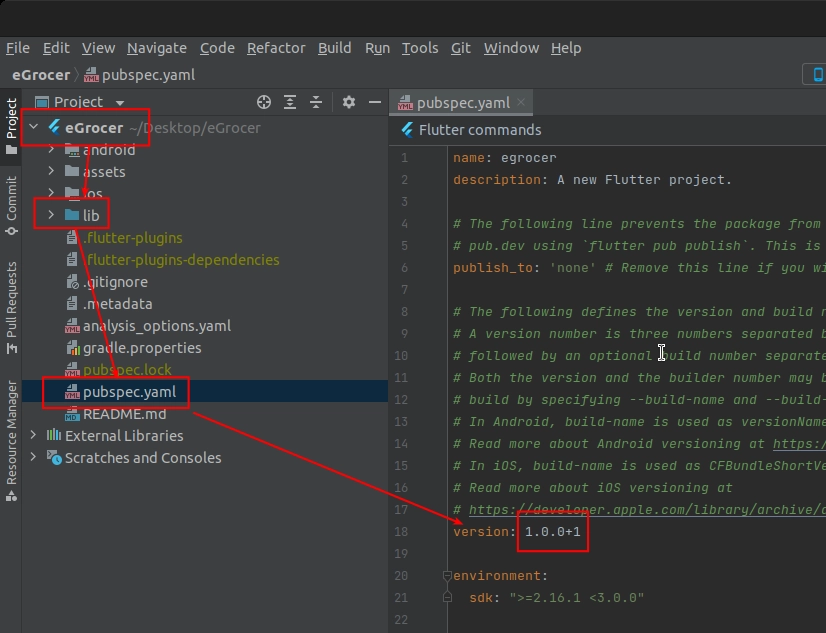
For Android:
- A.B.C represents the versionName such as 1.0.0
- X (the number after the +) represents the versionCode such as 1, 2, 3, etc.
For iOS:
- A.B.C represents the CFBundleShortVersionString such as 1.0.0
- X (the number after the +) represents the CFBundleVersion such as 1, 2, 3, etc.
Do not forget to execute flutter packages get, flutter build or flutter run after this step
Change App Logo
For Android
Open android > app > src > main > res > mipmap and add your logo according to device screen size
![]()
For iOS
Open ios > Runner > Assets.xcassets > AppIcon.appiconset and put your logo according to different sizes
![]()
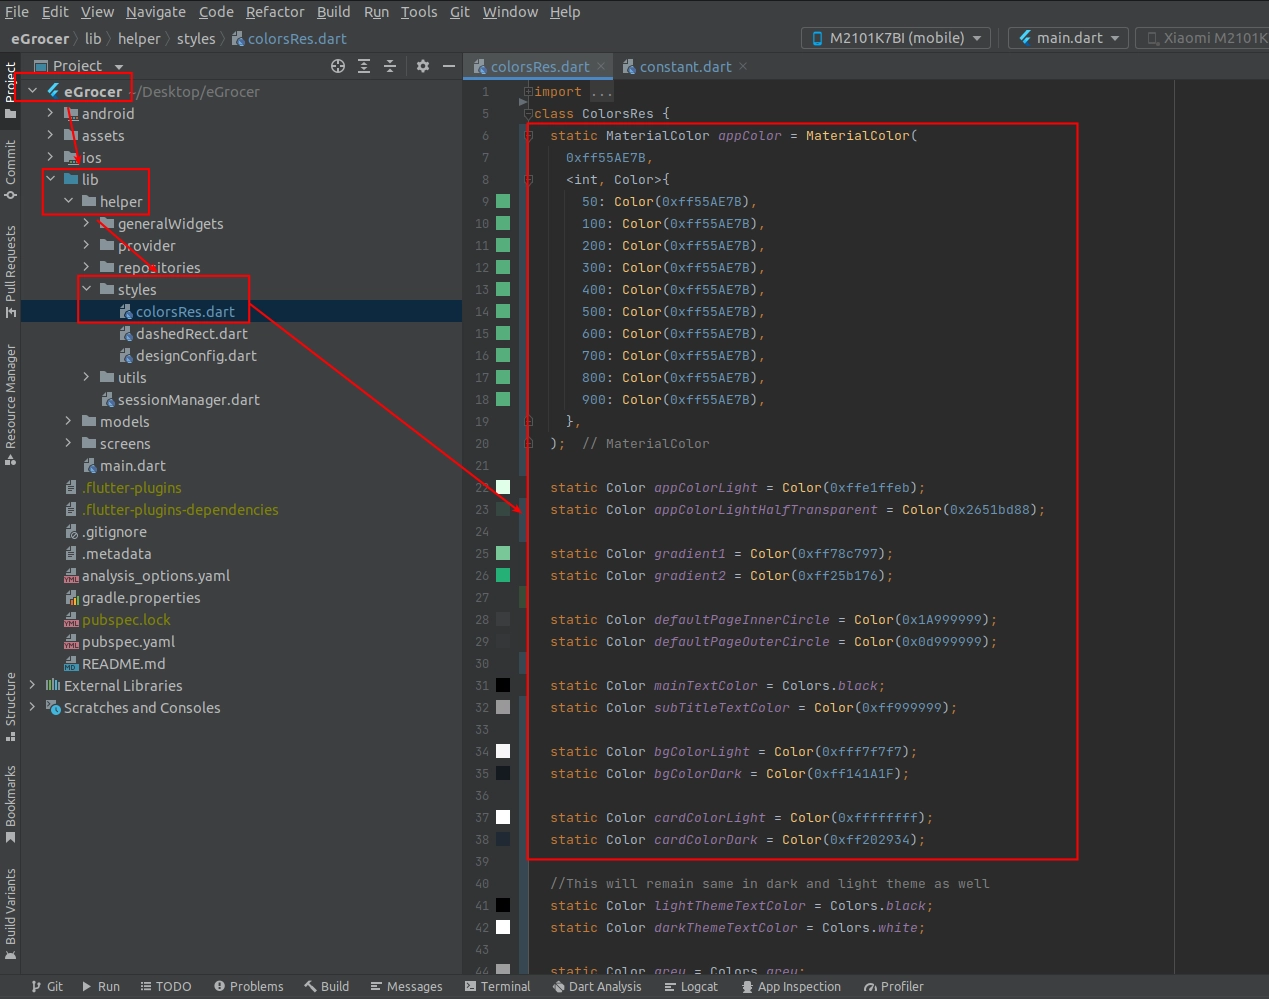
Change App Theme
To change app color, add your color code in lib > helper > color.dart
In Flutter, color code starts with 0xff so you have to add your color hex after these 4 digits. You can change primary, secondary, font color.
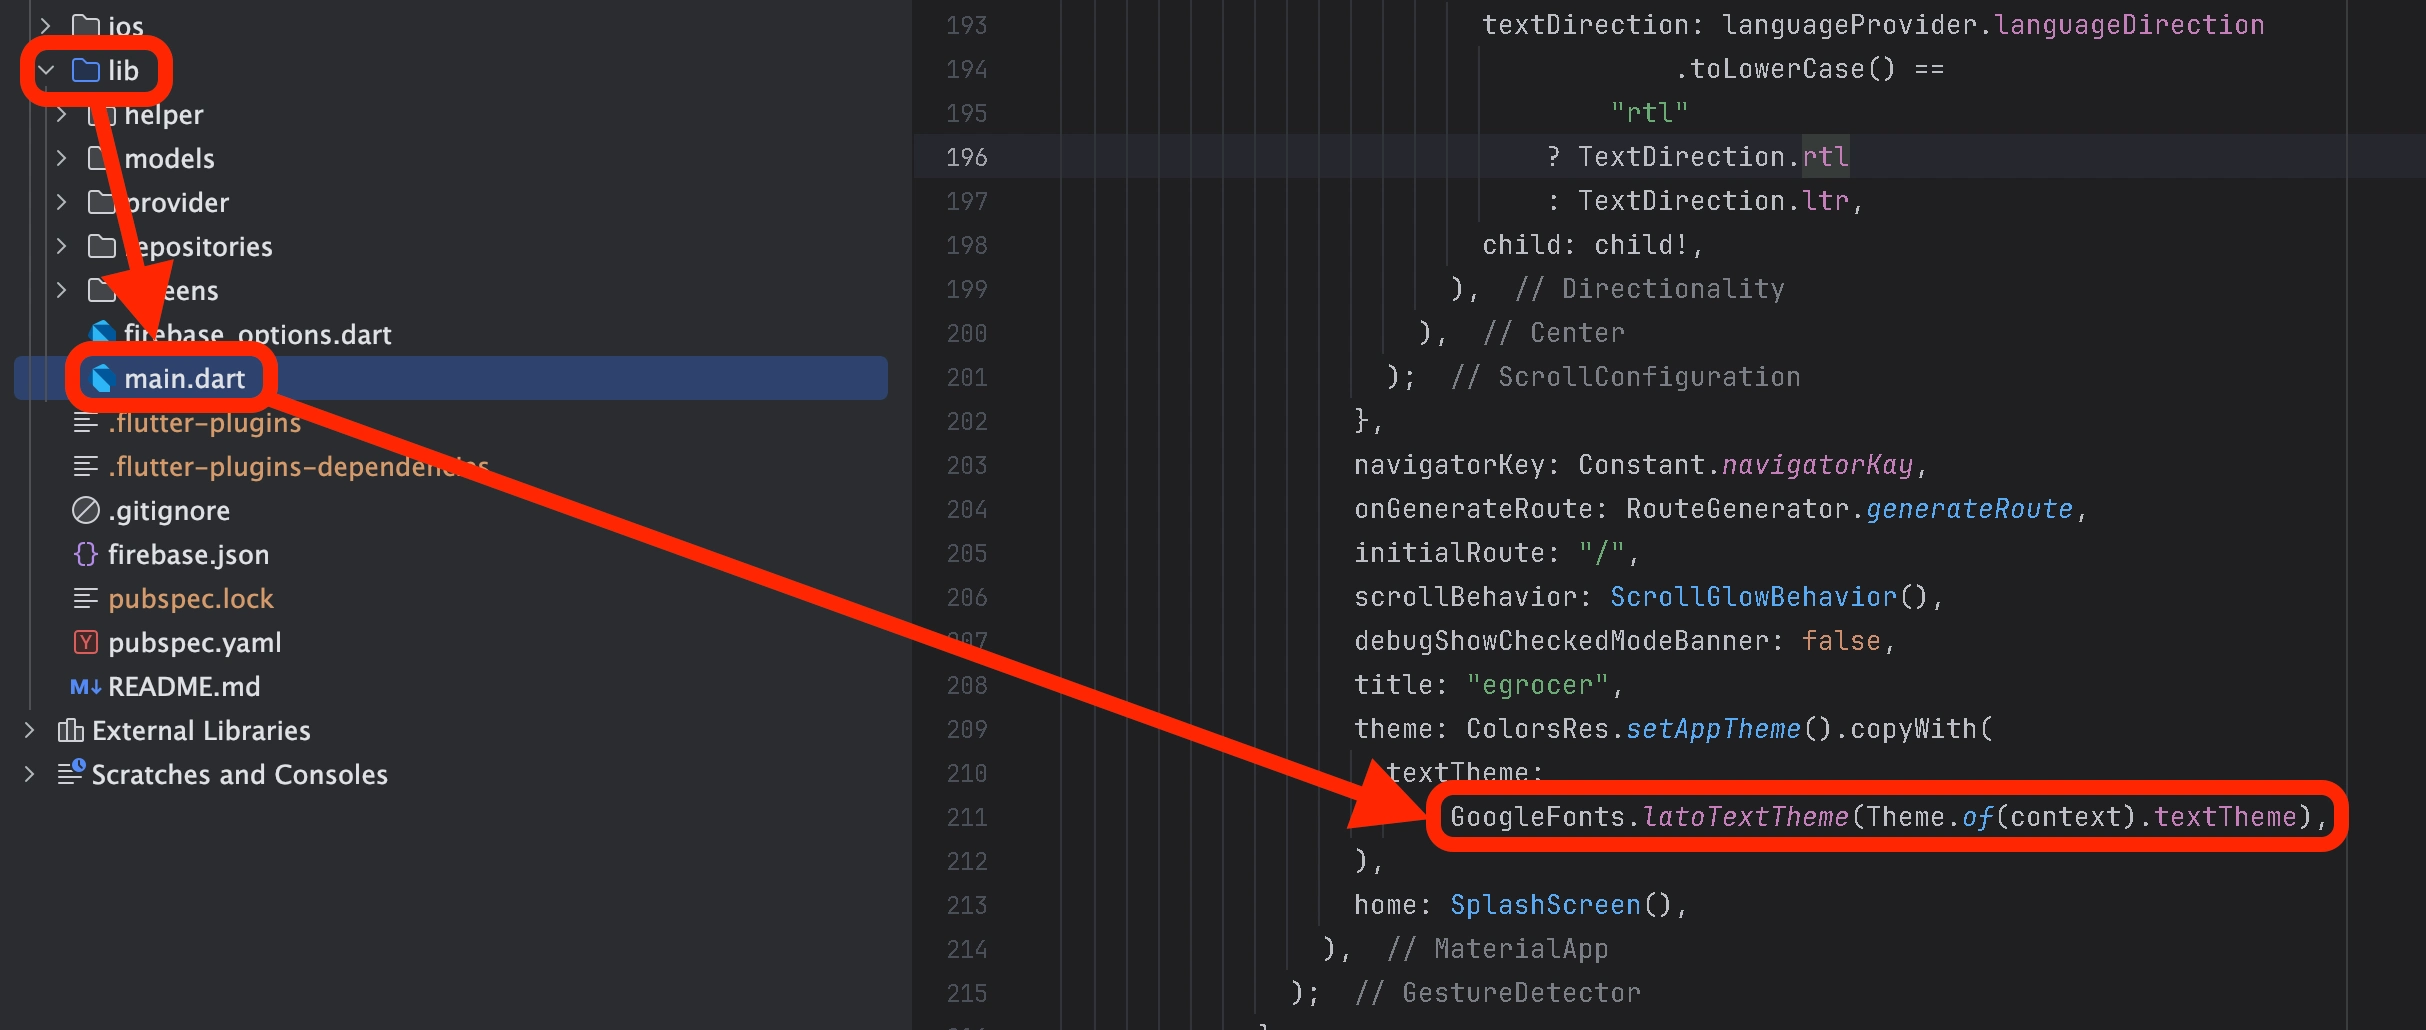
Change Package Name
- To change package name press ctrl + shift + R and enter, or you can change it manually by replacing the package name
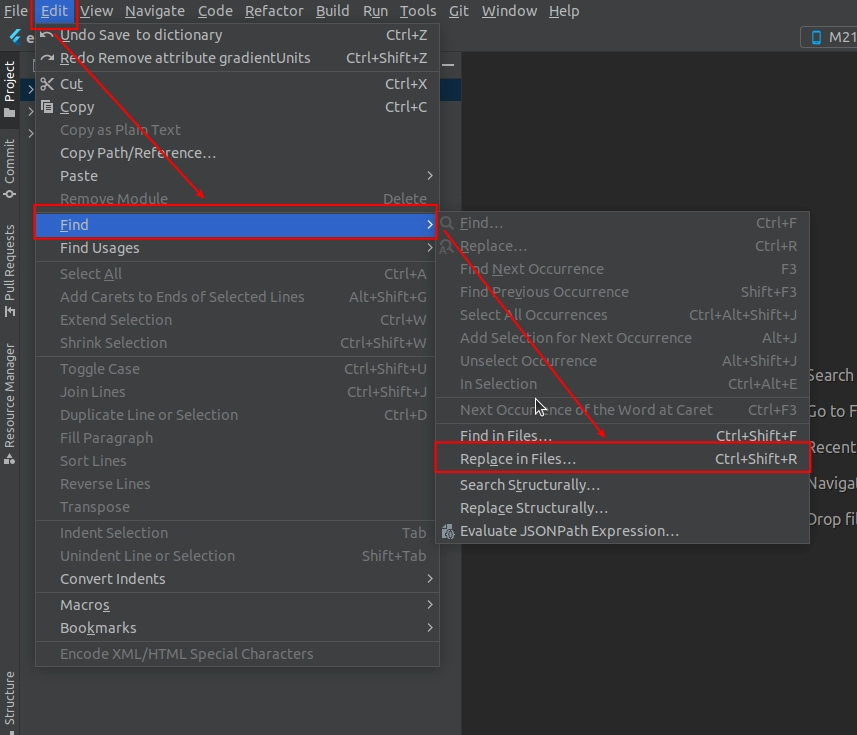
- After step 1 follow below image:
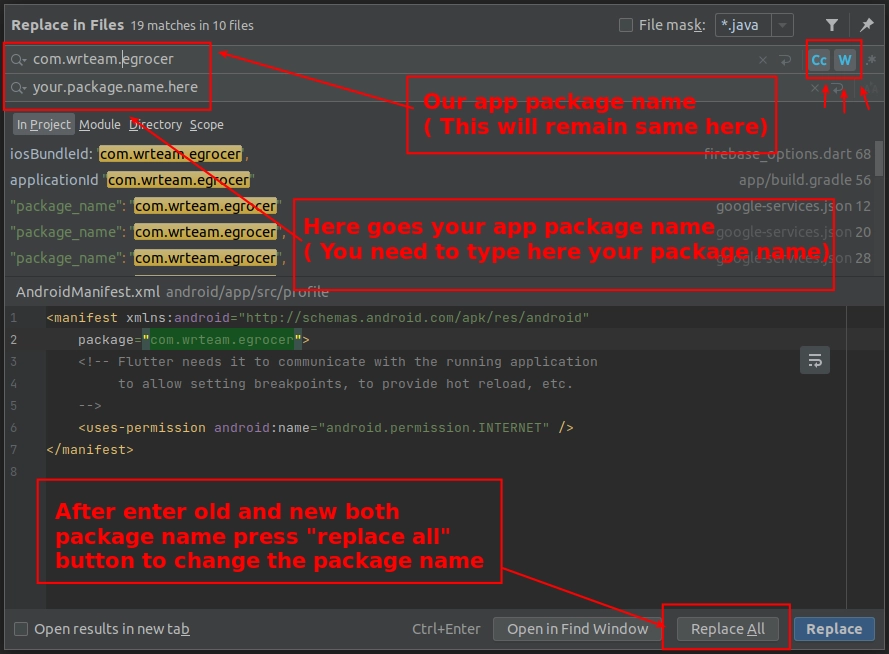
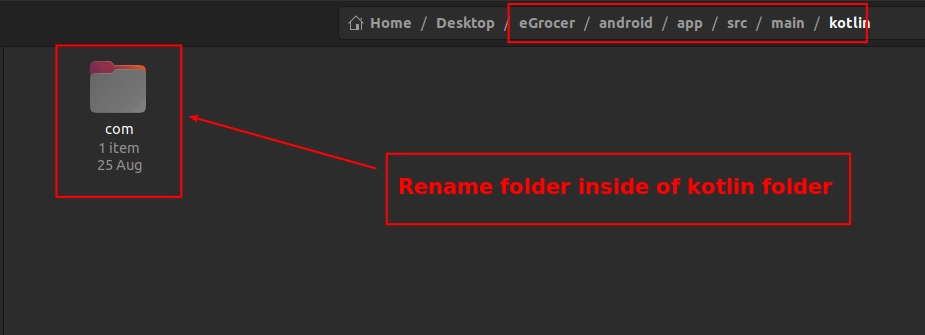
- When changing package name, you also need to change the names of folders according to your package name in (android\app\src\main\kotlin) location in the project
- For example, if Package name is "com.wrteam.egrocer" then inside kotlin folder, the folder structure is com\wrteam\egrocer
- If your package name is "com.wrteam.egrocer.customer", you'd have \com\wrteam\egrocer\customer
- Copy first command and paste it into android studio terminal and press enter
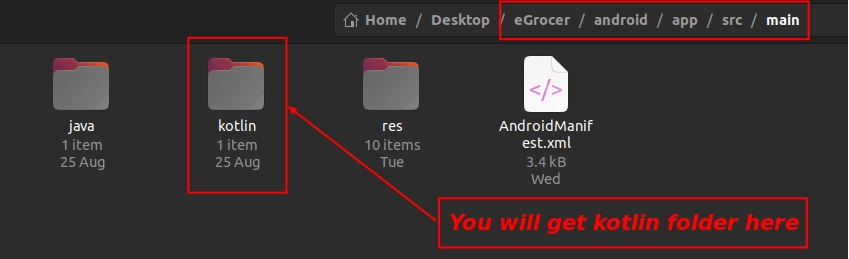
- For changing the names of these folders, open your project folder, navigate inside the kotlin folder, and rename the folders according to your package name
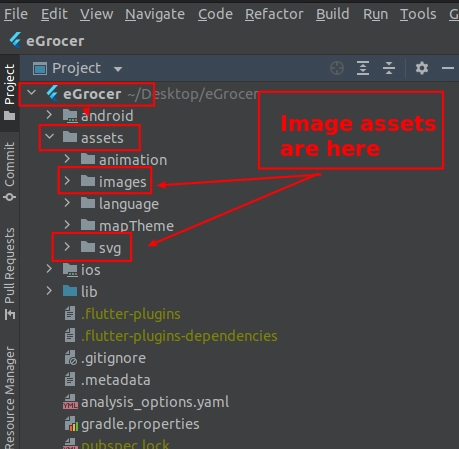
Change Assets Images
Go to Assets > images folder. Here you have 2 folders: 1.webp and 2.svg. You can change your image to existing image with the same name.
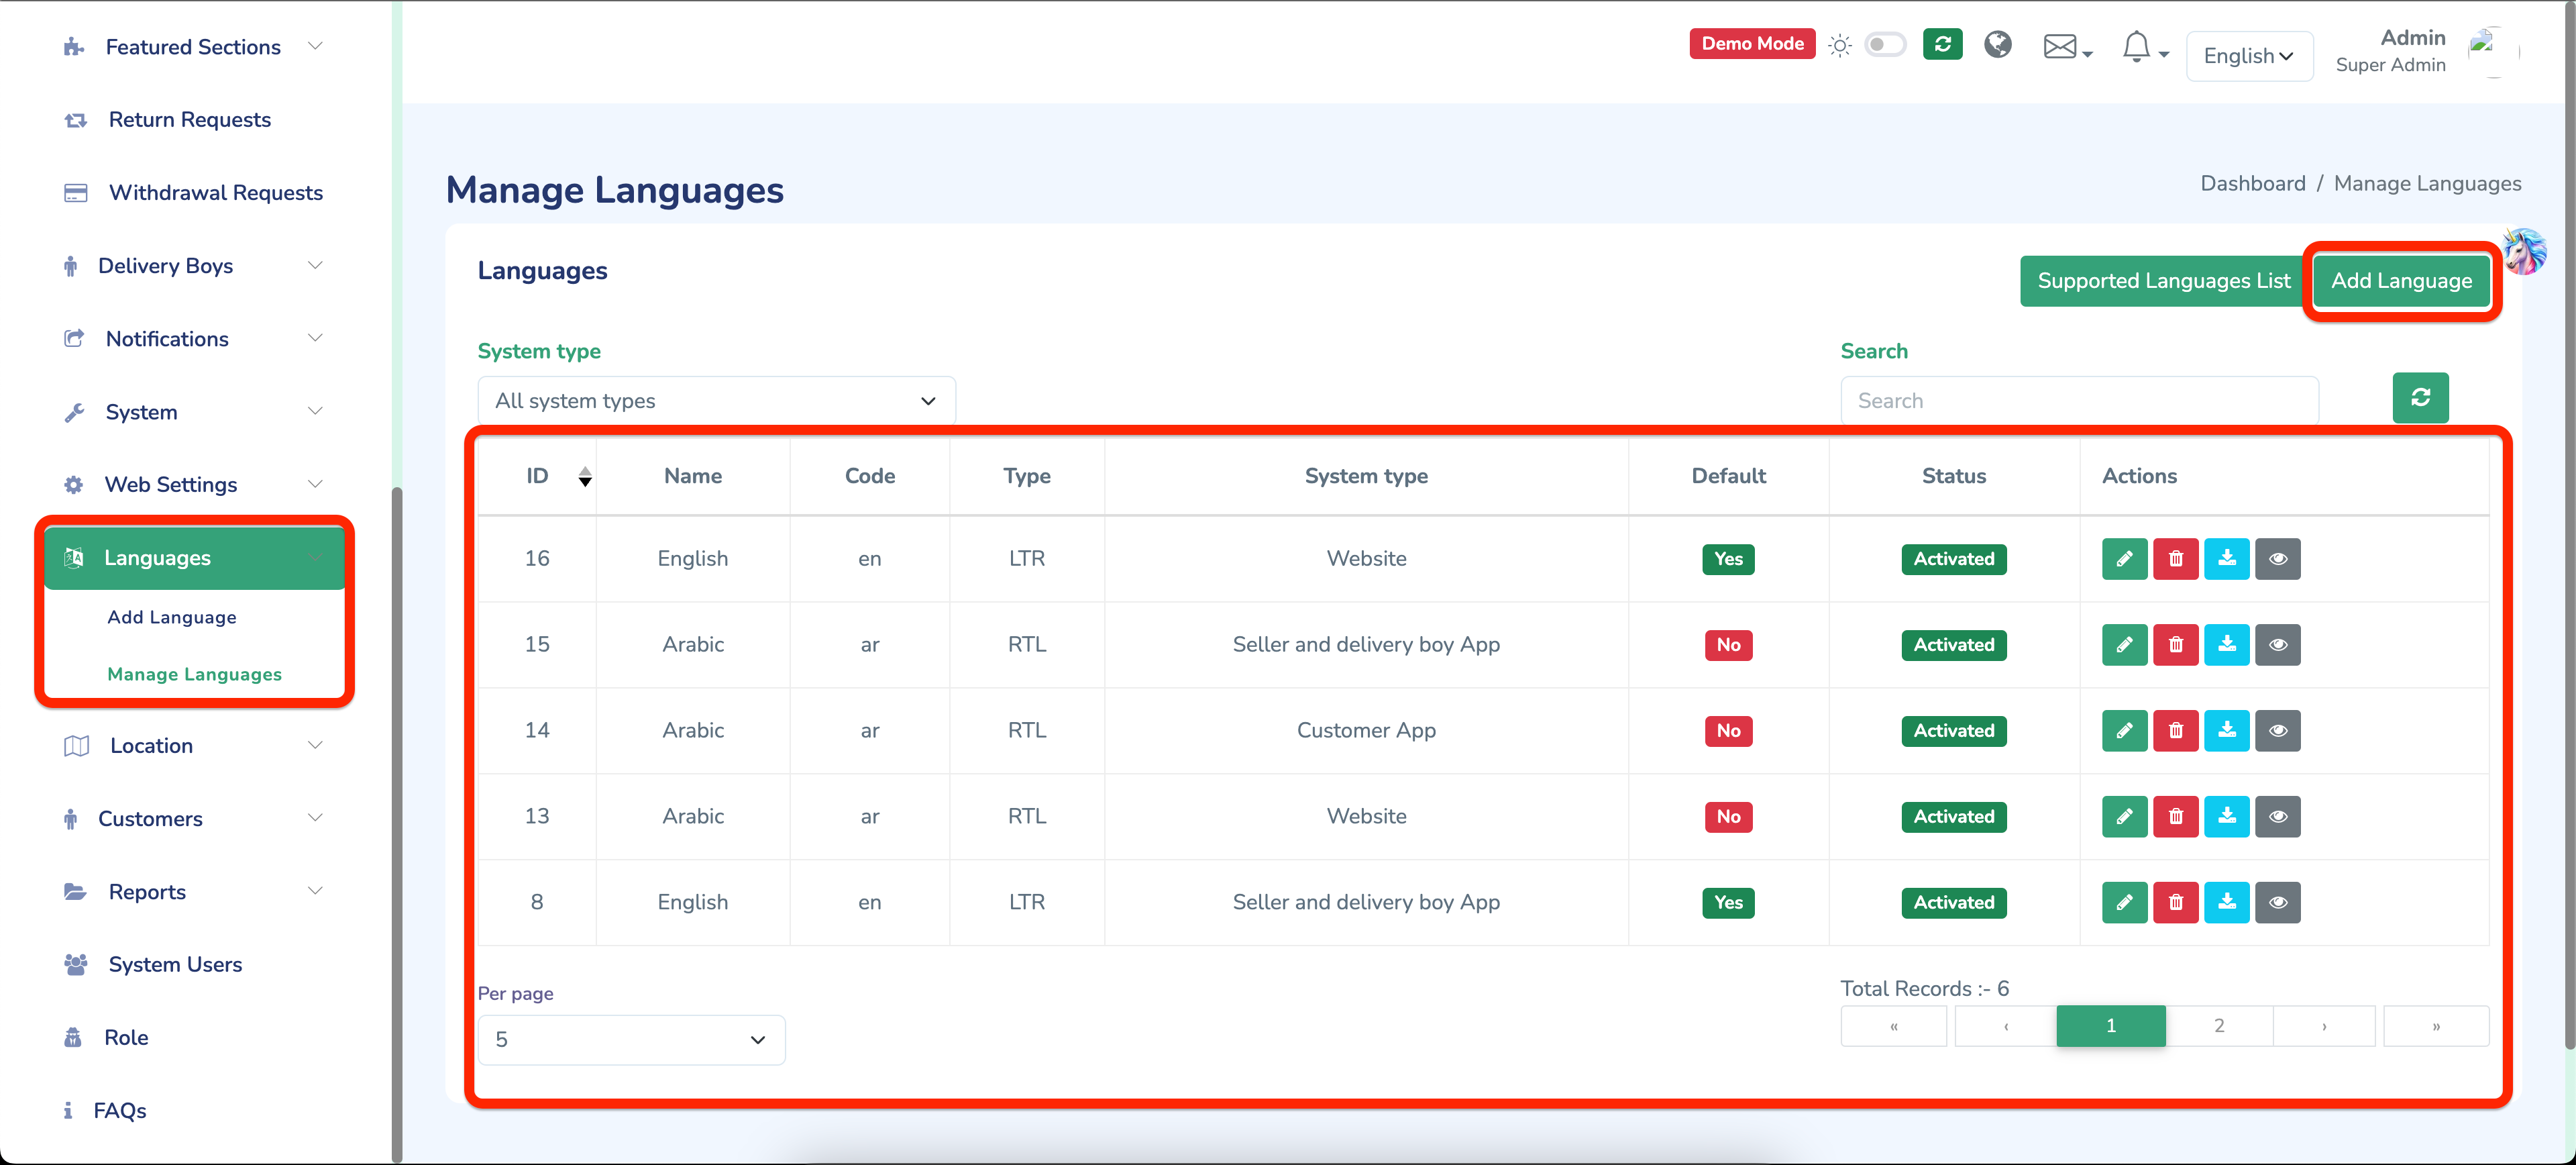
Manage Languages
You can manage all app and website languages from the admin panel:
- Go to Admin Panel > Language > Add Language OR Manage Languages
Change Font Family
- You need to select font from Google Fonts only. Visit https://fonts.google.com/
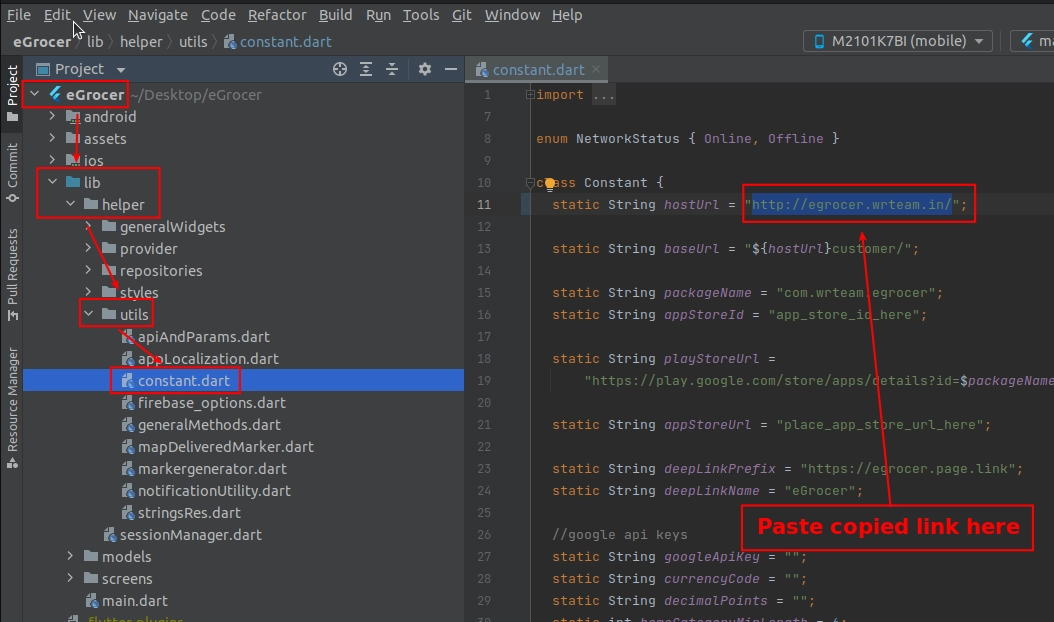
Change Server URL
- Open your admin panel, copy link from URL as shown below
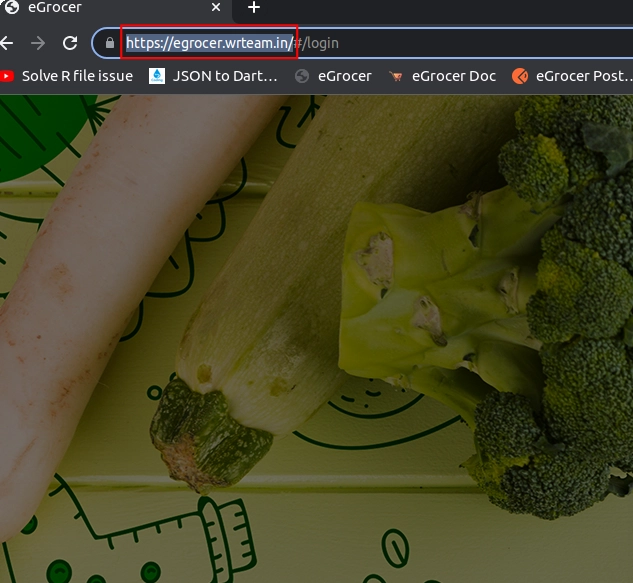
- In Android code go to lib > helper > utils > constant.dart and paste the URL
Create Flutter Firebase App
For creating a firebase app from flutter you must install firebase cli first.
To install firebase cli follow https://firebase.google.com/docs/cli
After firebase cli installation, follow these steps:
-
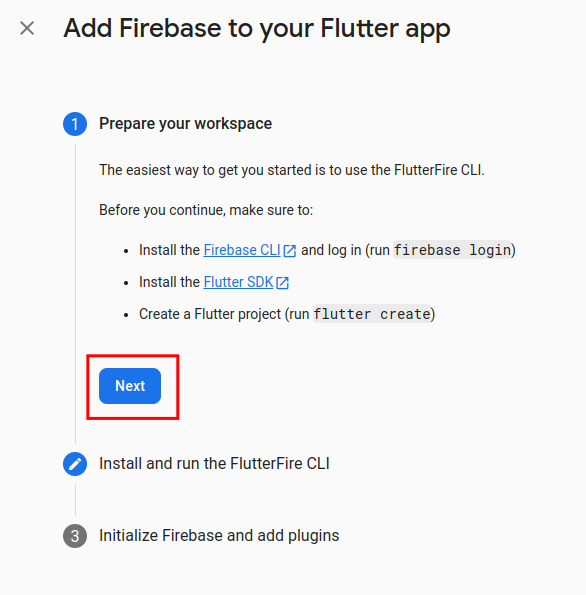
Create flutter app:
- Press "Flutter" option
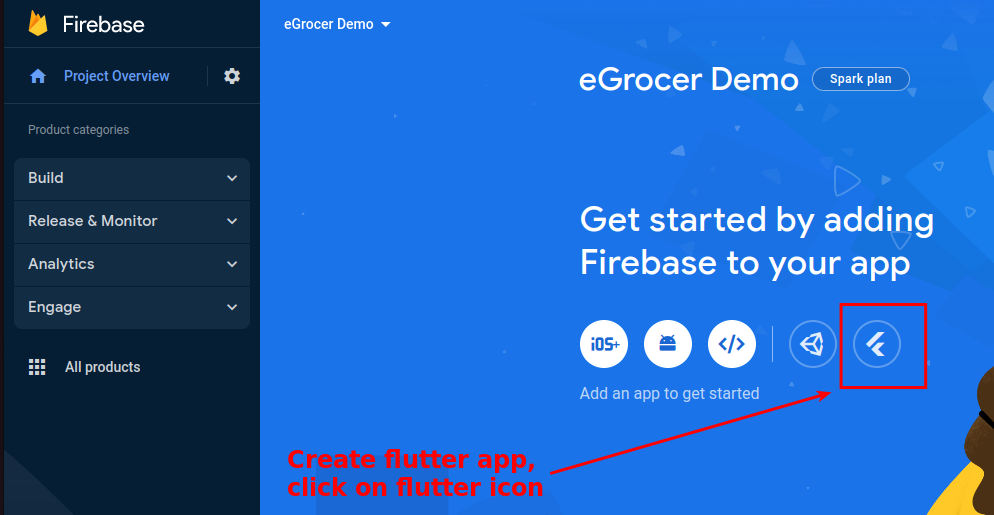
- Press next
-
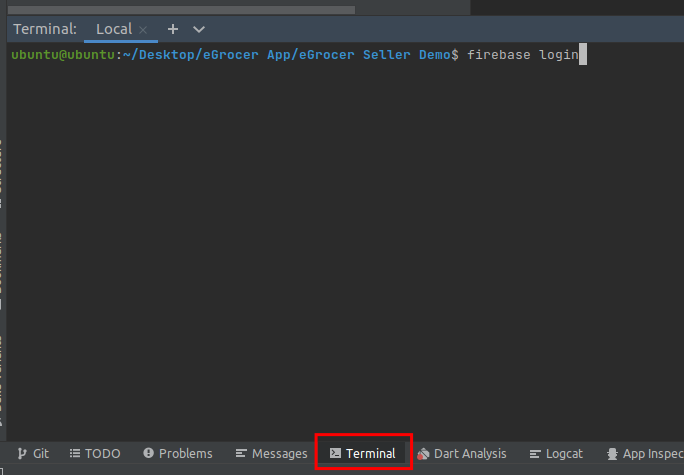
Go to Android Studio terminal and run "firebase login" command:
- Allow Firebase to collect CLI and Emulator Suite usage and error reporting information? Set "YES" and press enter
- Login to firebase from the browser when prompted
-
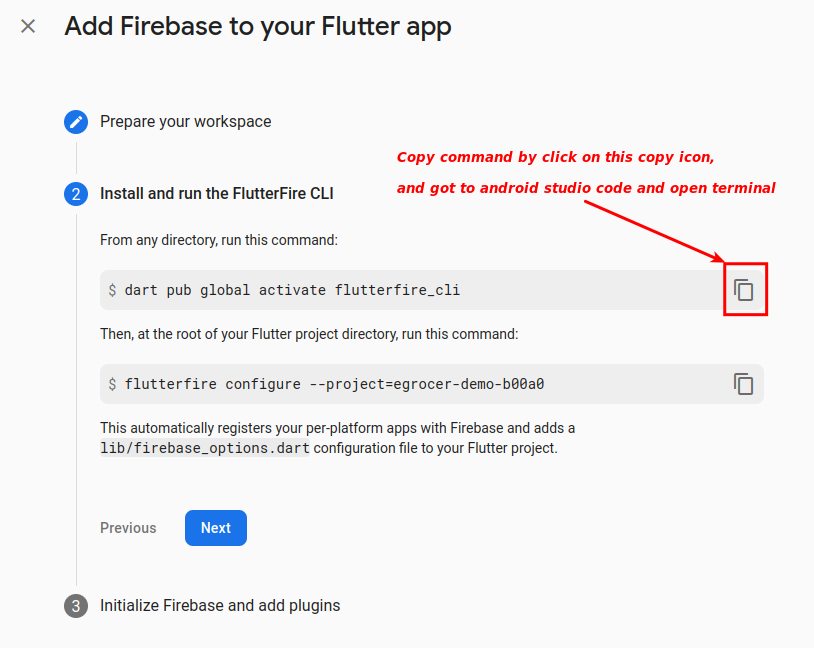
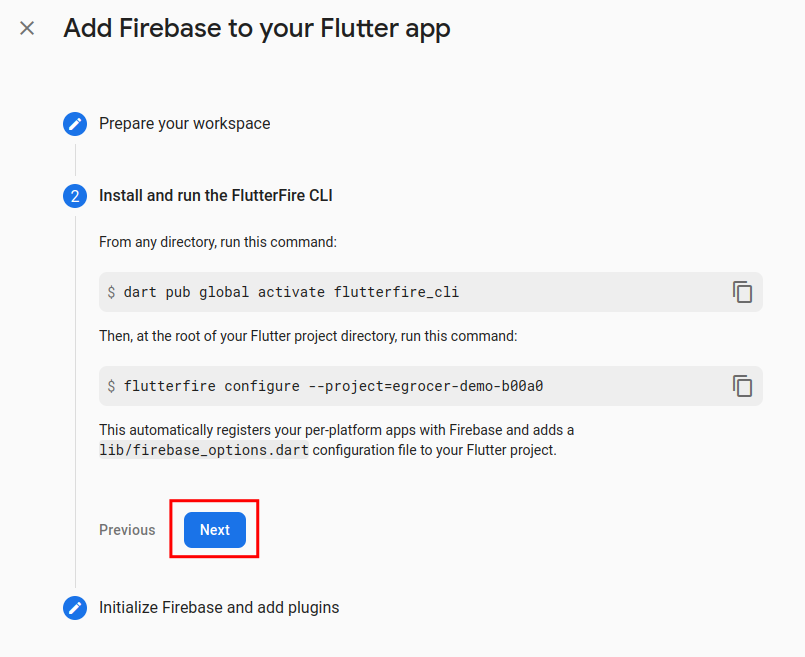
Run the first command shown in the Firebase console in Android Studio terminal
-
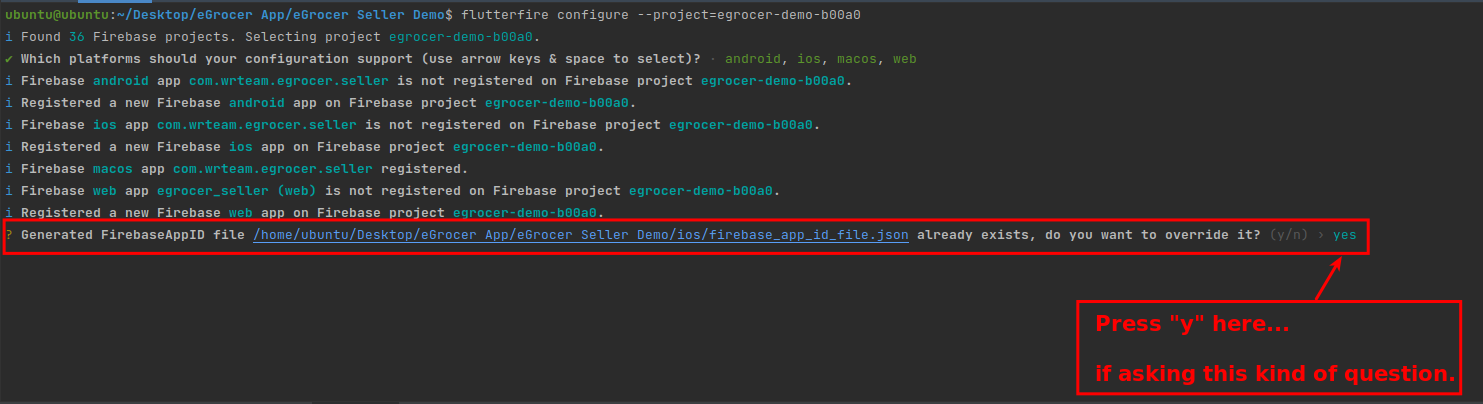
Run the second command shown in the Firebase console in Android Studio terminal:
- Once output is shown, press "Enter" in terminal
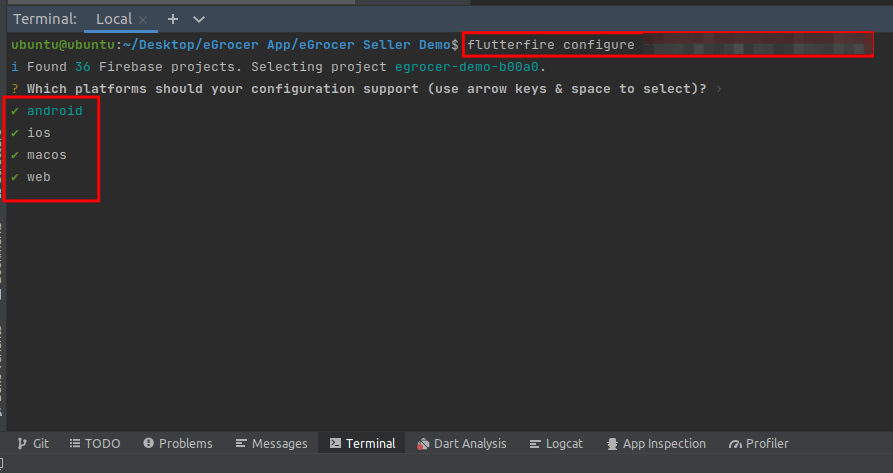
- When prompted again, press "y" in terminal
-
Press continue in the Firebase console
-
Press "continue to console"
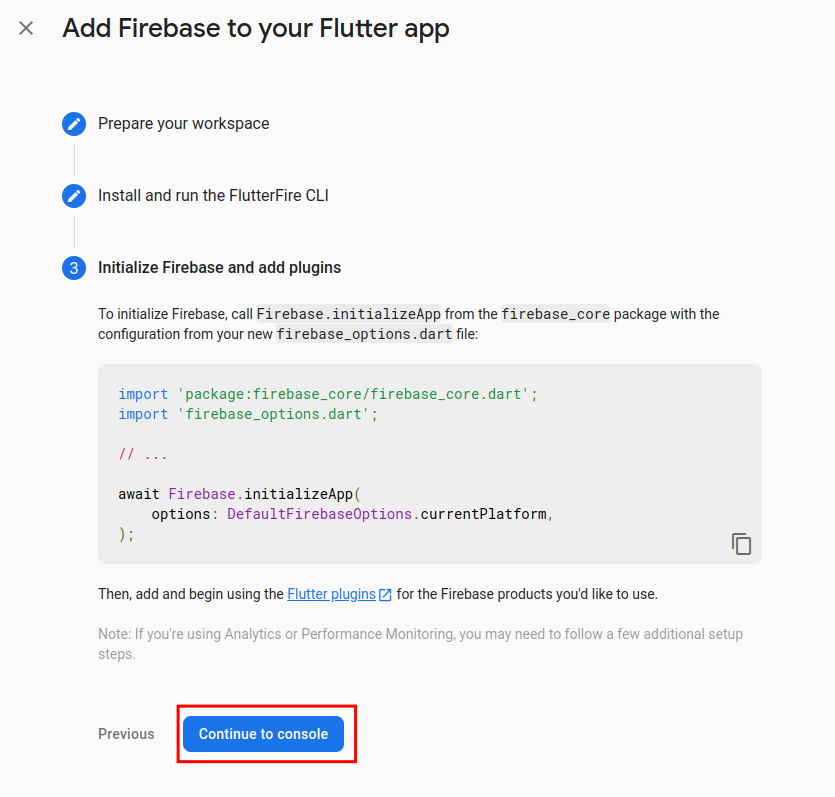
Your firebase setup is now complete.
Set Notifications
For iOS, you need to perform these steps:
- In Xcode, open the project
- In the Project Navigator (the left-hand menu), select the project icon that represents your app
- In the top-left corner of the right-hand pane in Xcode, select your app's target
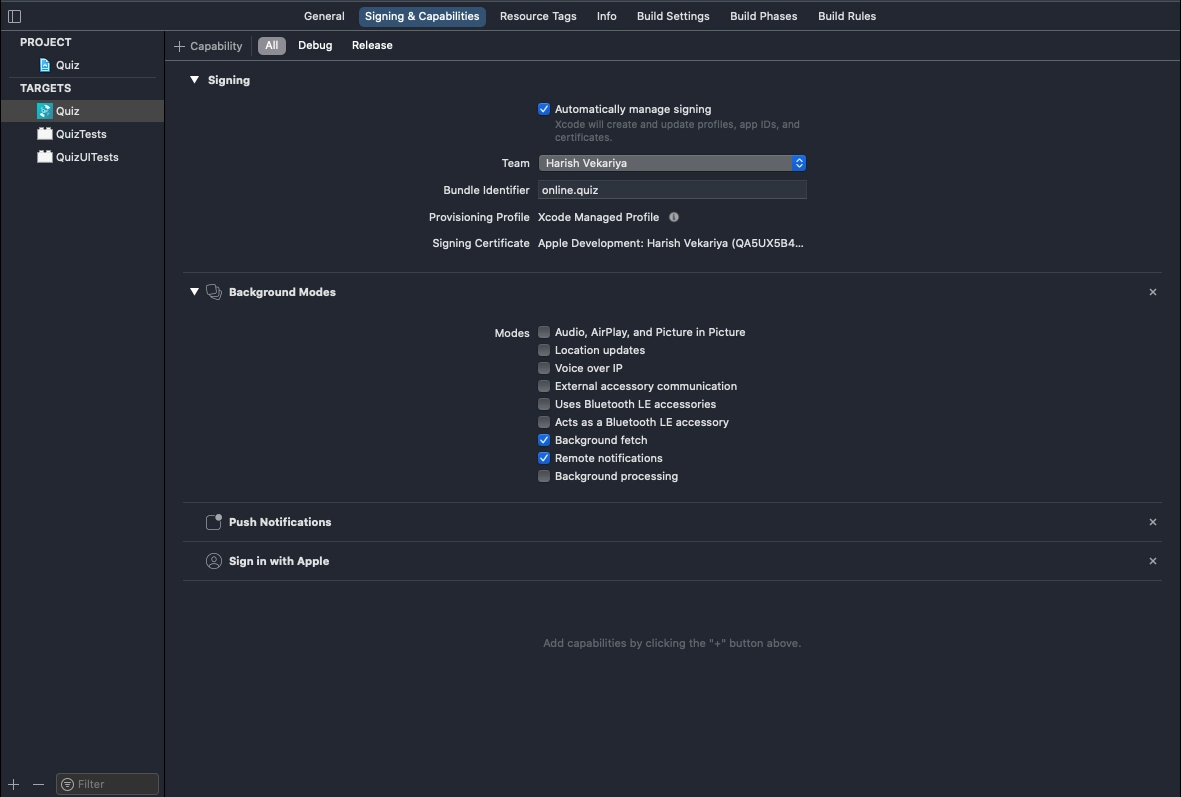
- Navigate to the Capabilities tab
- Enable Push Notifications
- Check Remote Notifications and Background Fetch from Enabling Background Modes
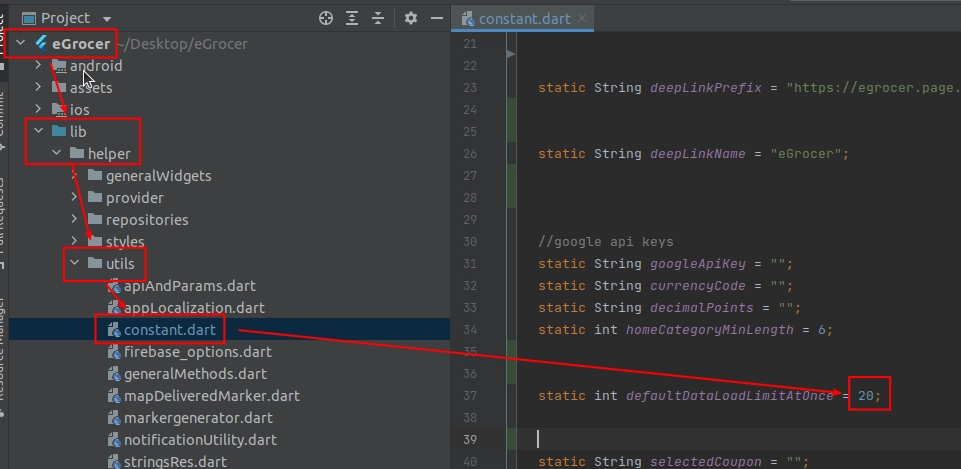
Increase Product Load Limit
You can change how many items are fetched at a time when a request is sent to the server:
- Go to lib > helper > Constant.dart
- Find the parameter that controls the product load limit
- Adjust the value as needed
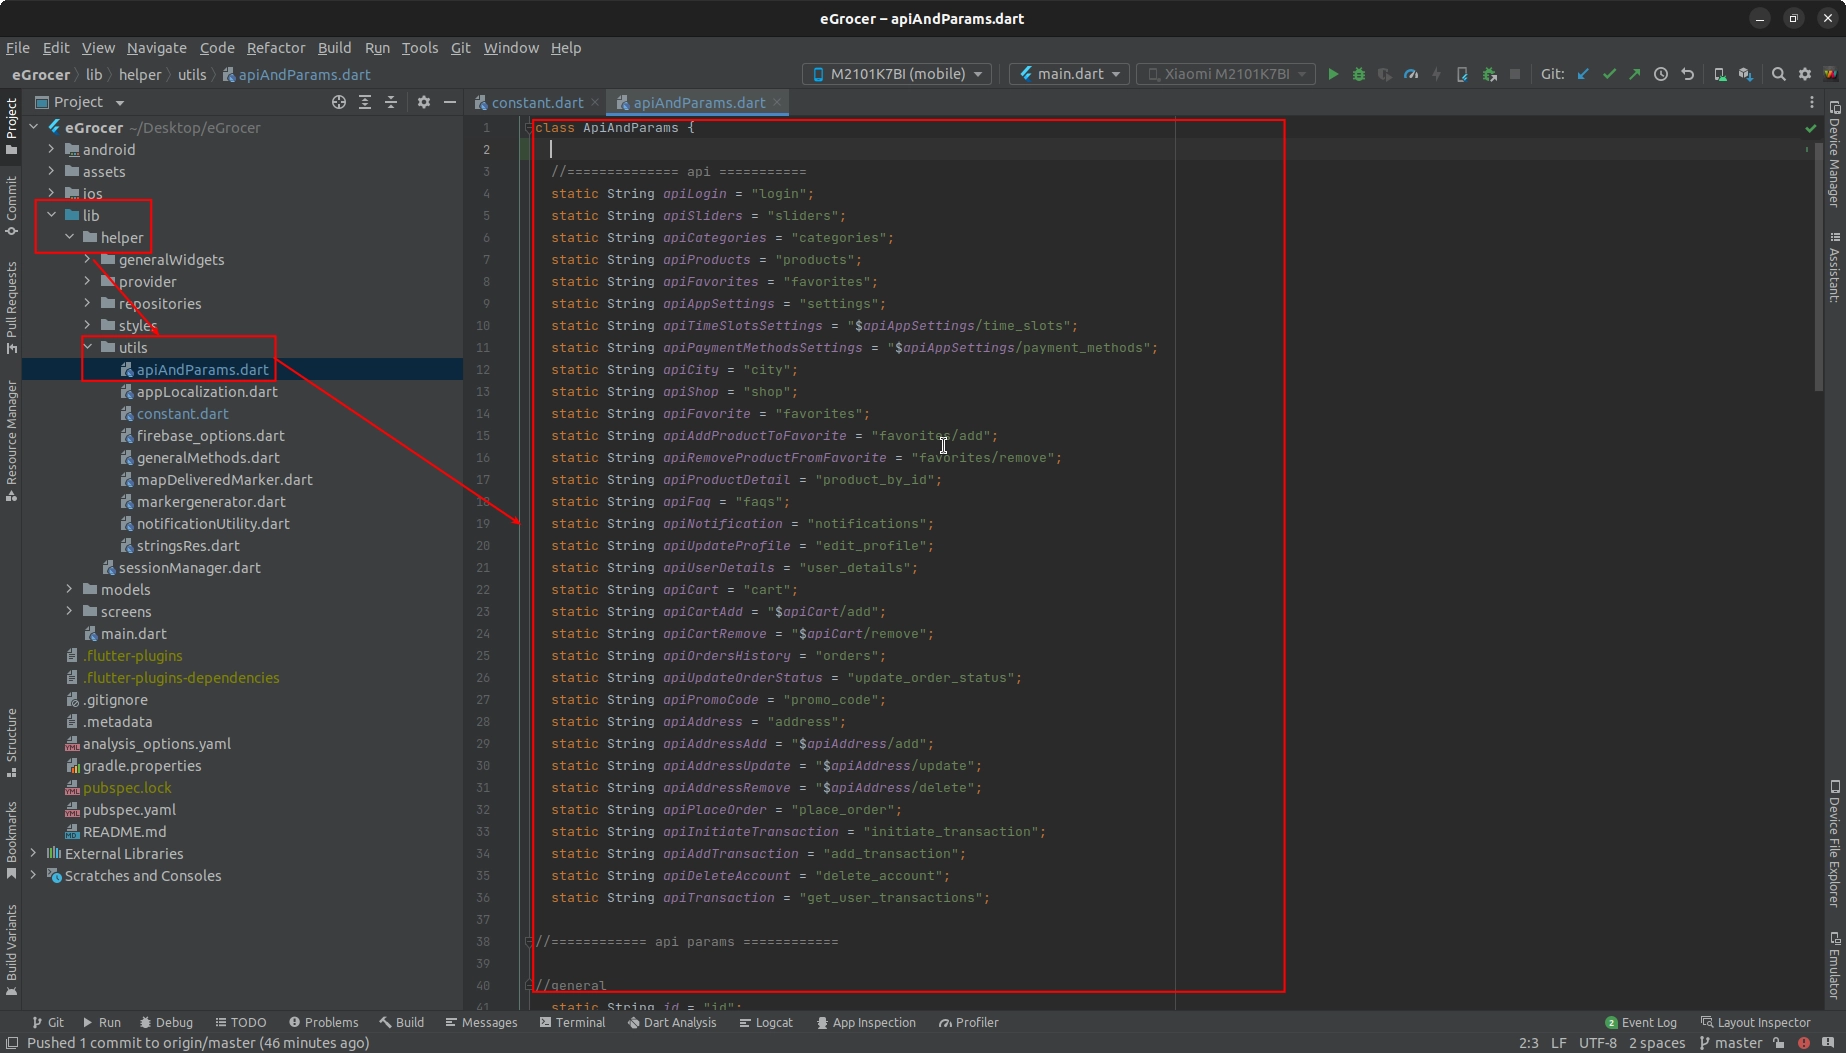
Change API Parameter
You can change or add API parameters from lib > Helper > String.dart. Here, all list of APIs and API parameters are listed that are used in the app.
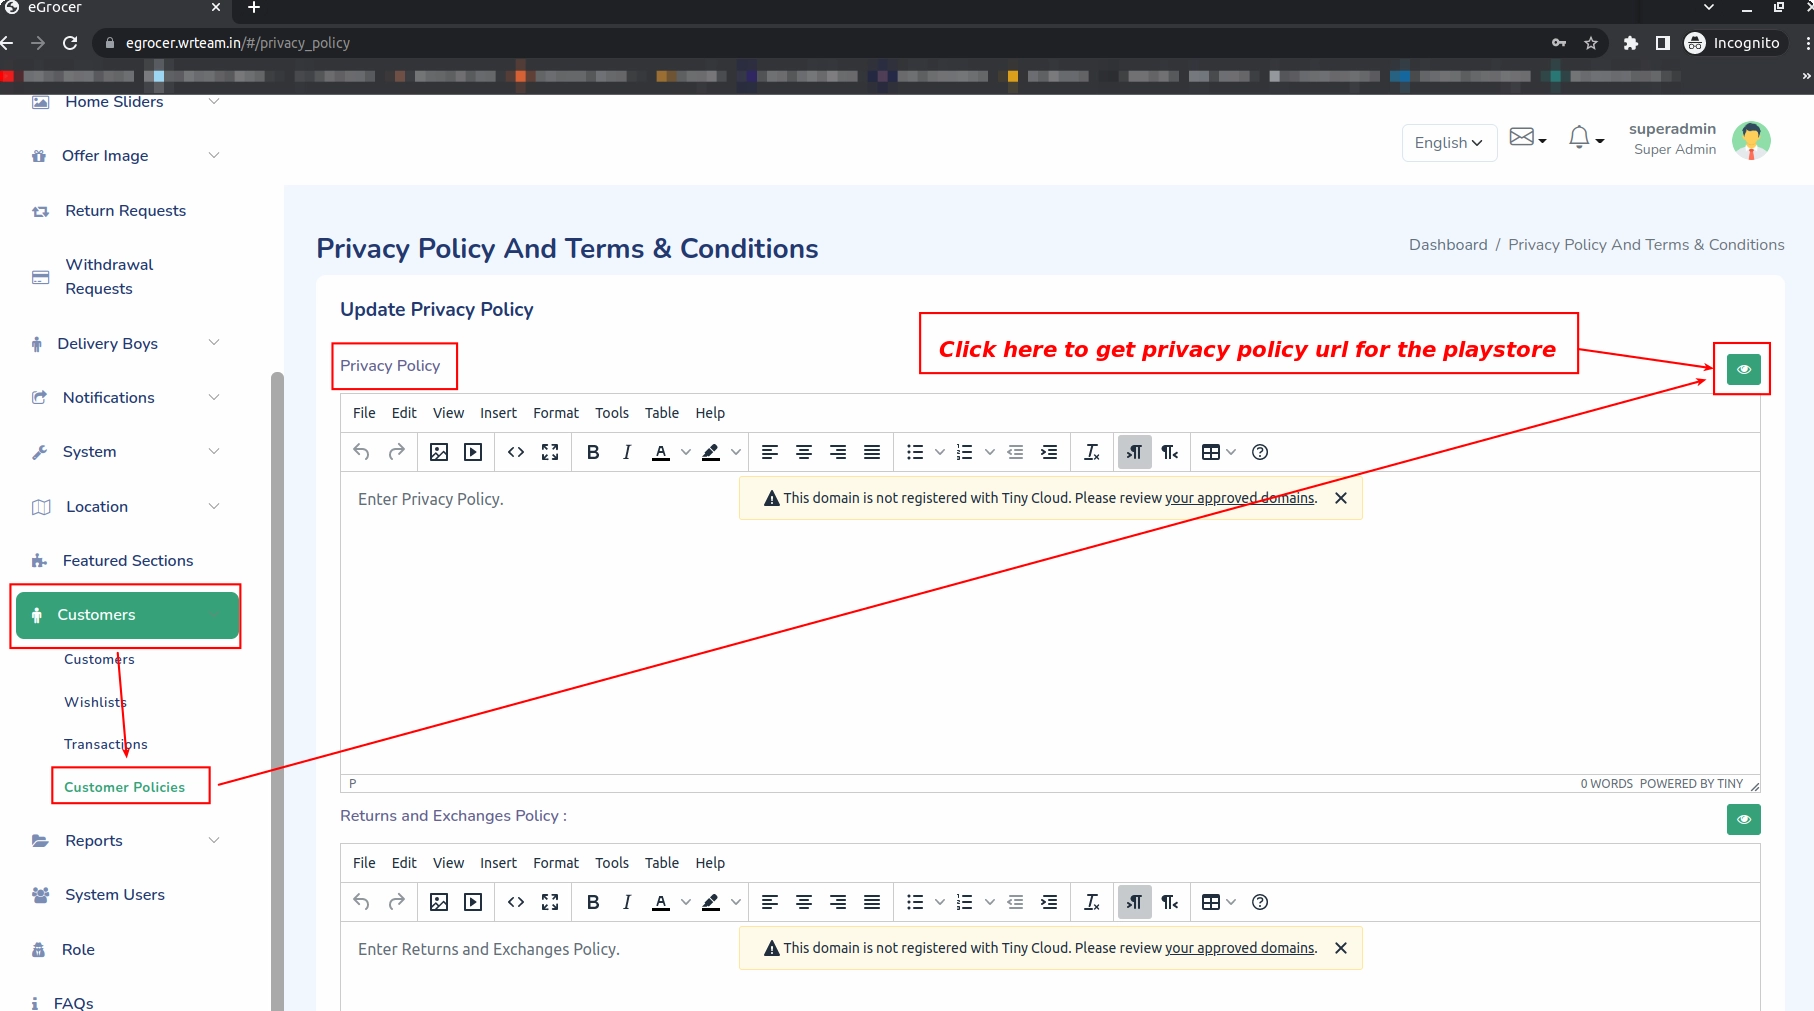
Privacy-Policy PlayStore
To get the privacy policy URL for your PlayStore submission:
- First login to admin panel
- Go to System > Privacy Policy
- Use the URL provided there in your app store submissions
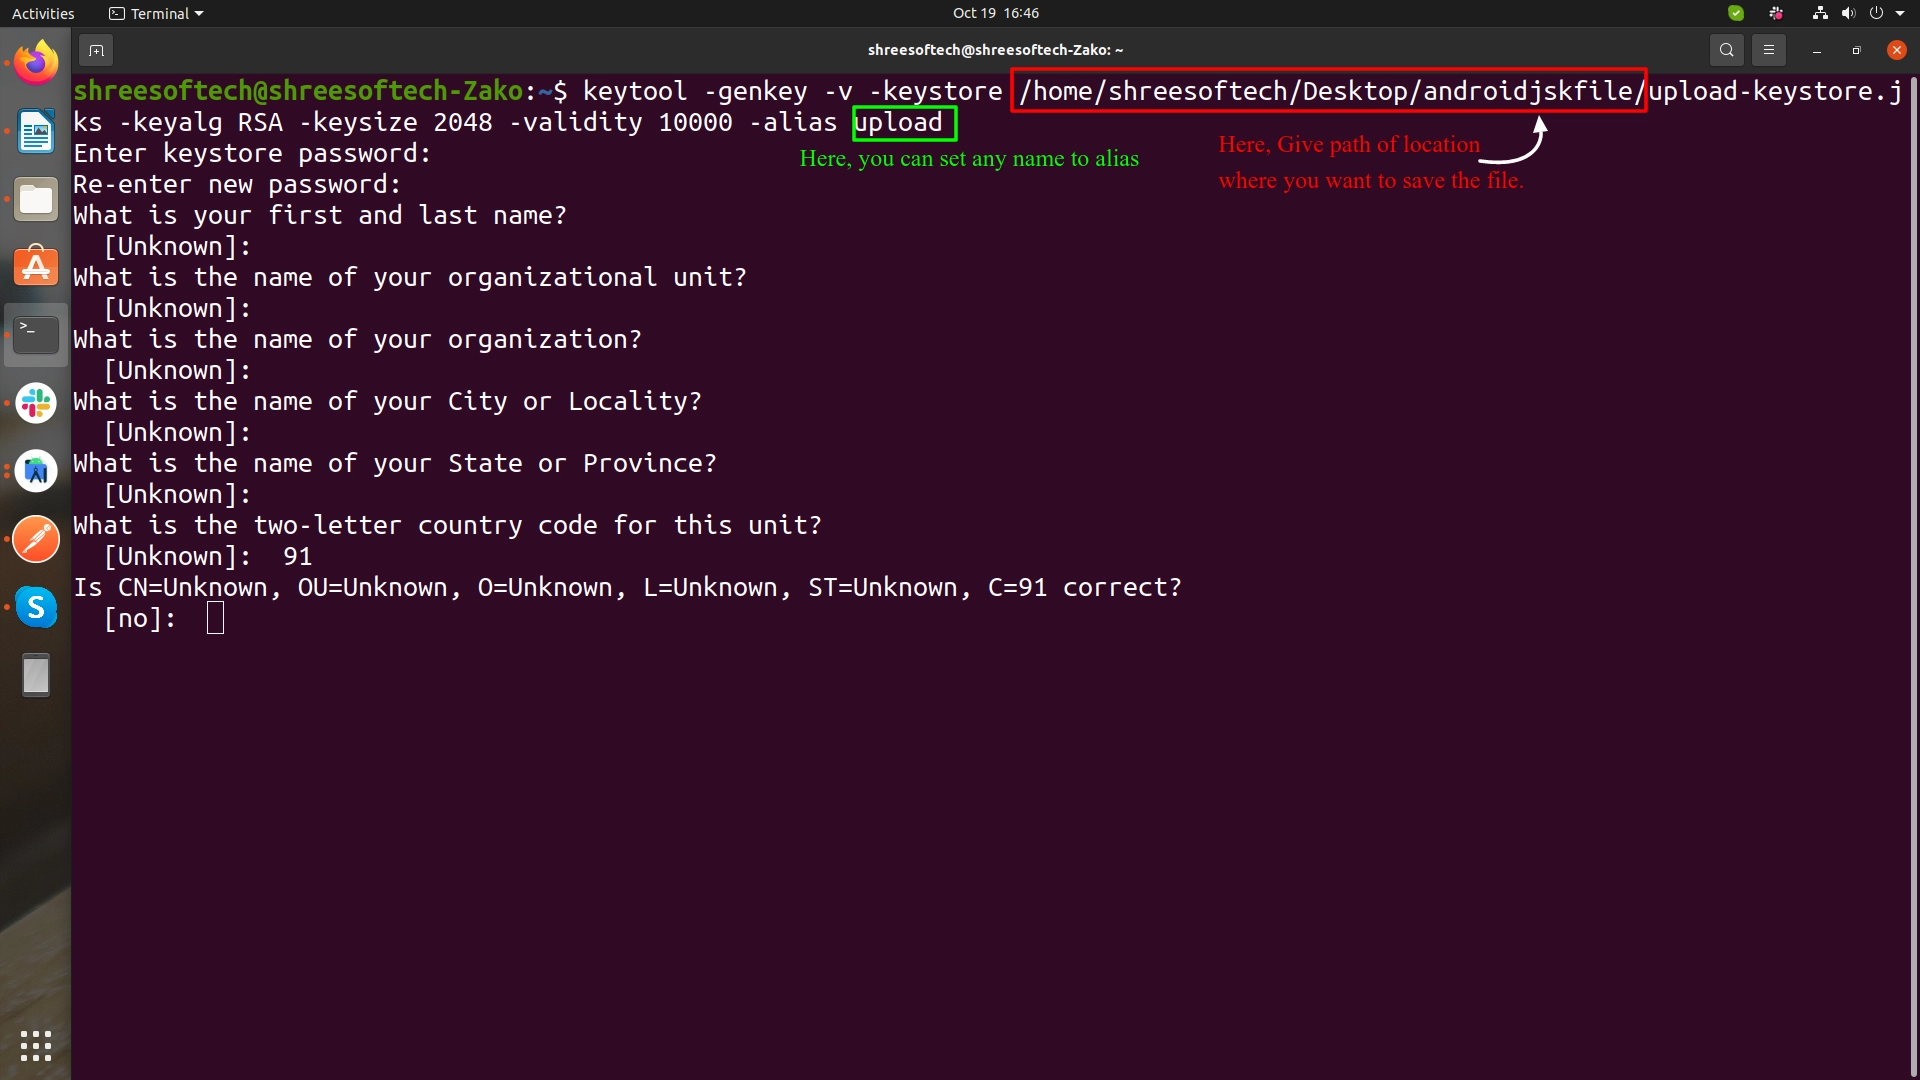
Generate Release APK
-
Create an upload keystore by running one of the following commands:
- On Mac/Linux:
keytool -genkey -v -keystore ~/upload-keystore.jks -keyalg RSA -keysize 2048 -validity 10000 -alias upload - On Windows:
keytool -genkey -v -keystore c:\Users\USER_NAME\upload-keystore.jks -storetype JKS -keyalg RSA -keysize 2048 -validity 10000 -alias upload
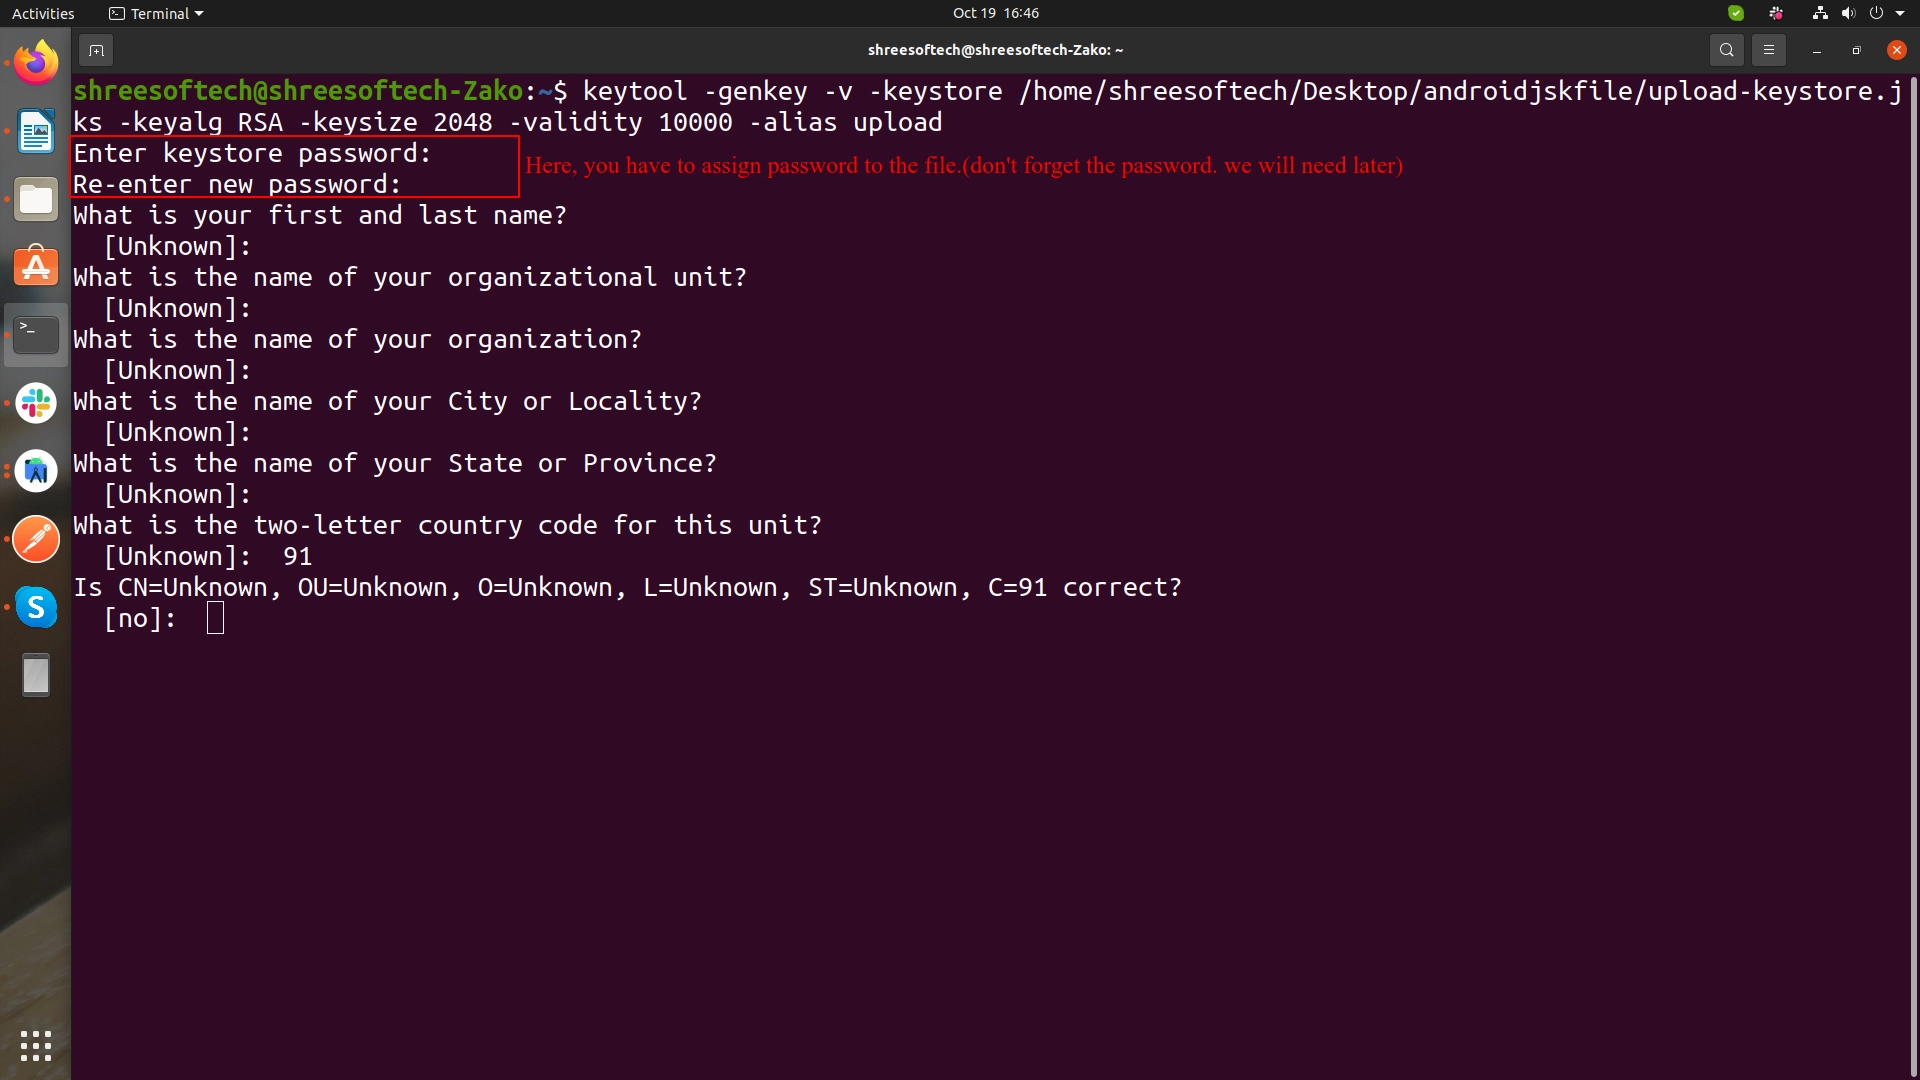
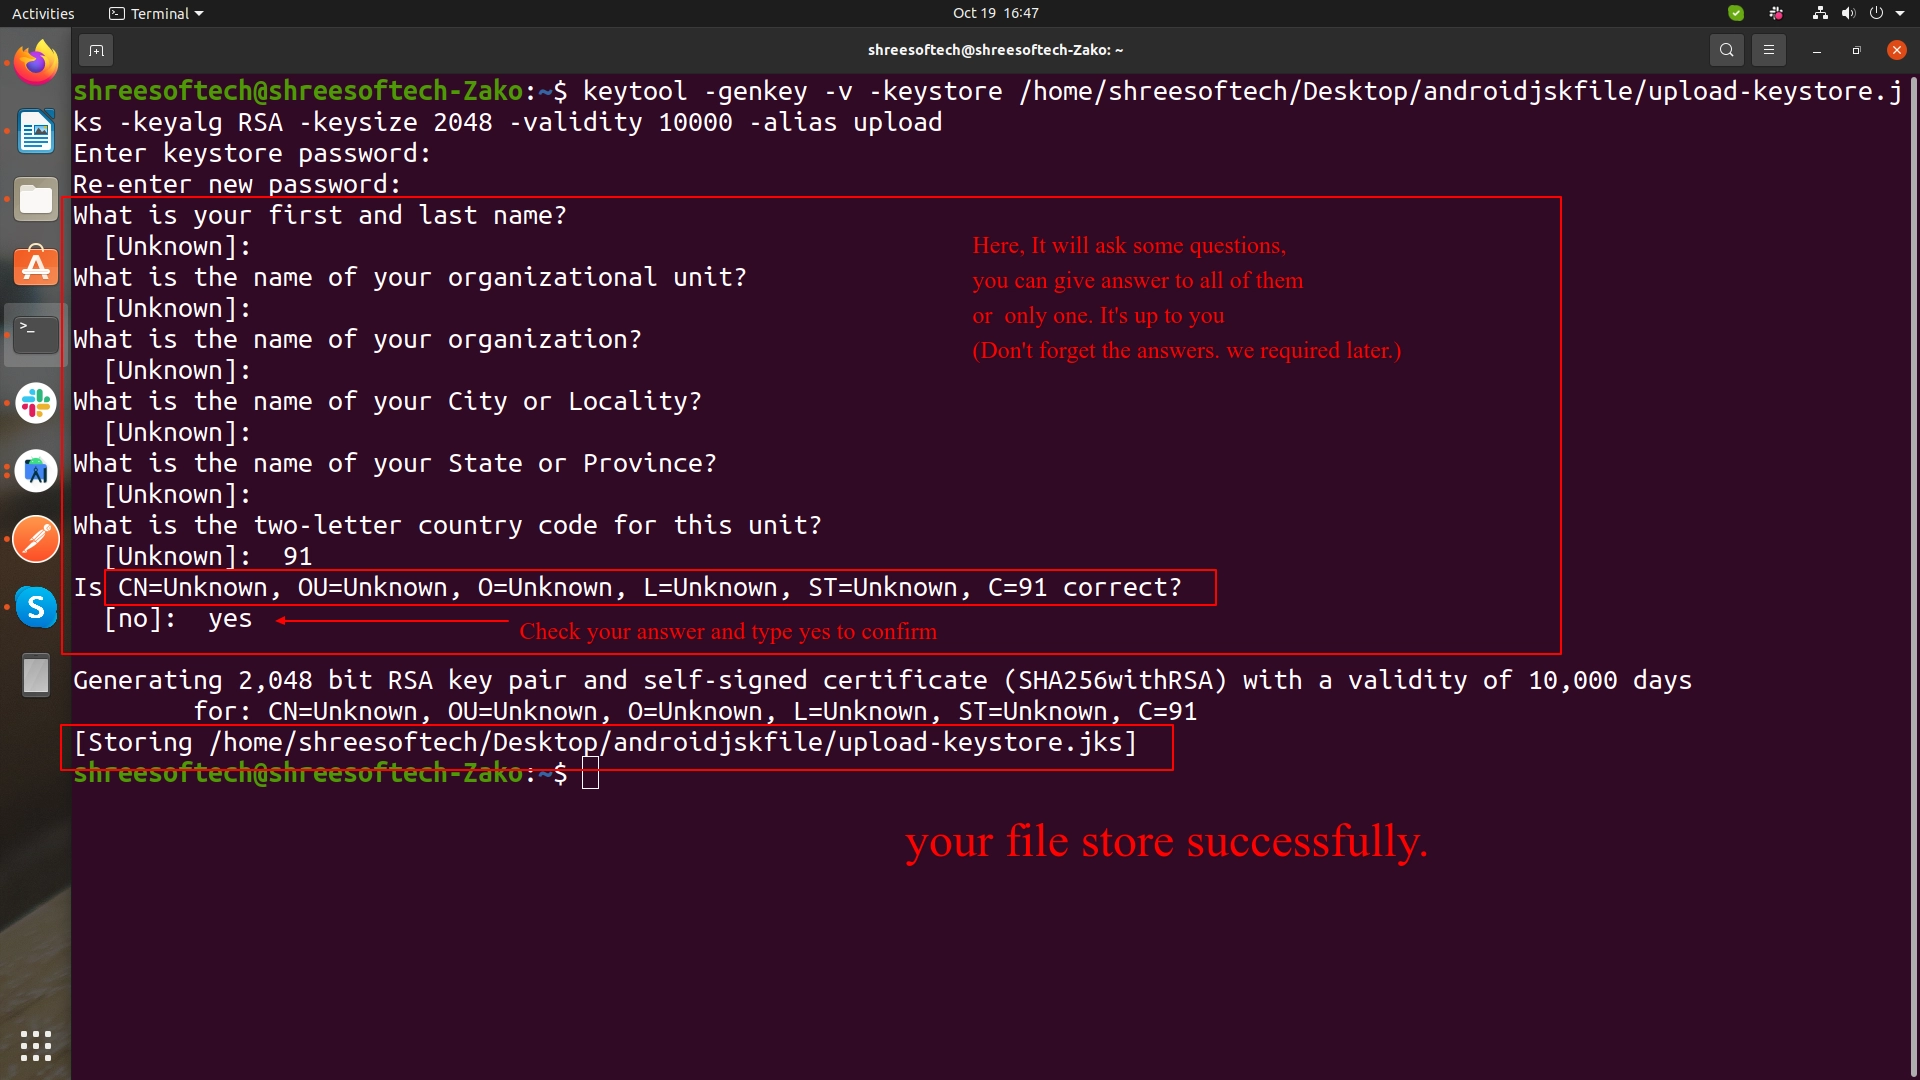
- On Mac/Linux:
-
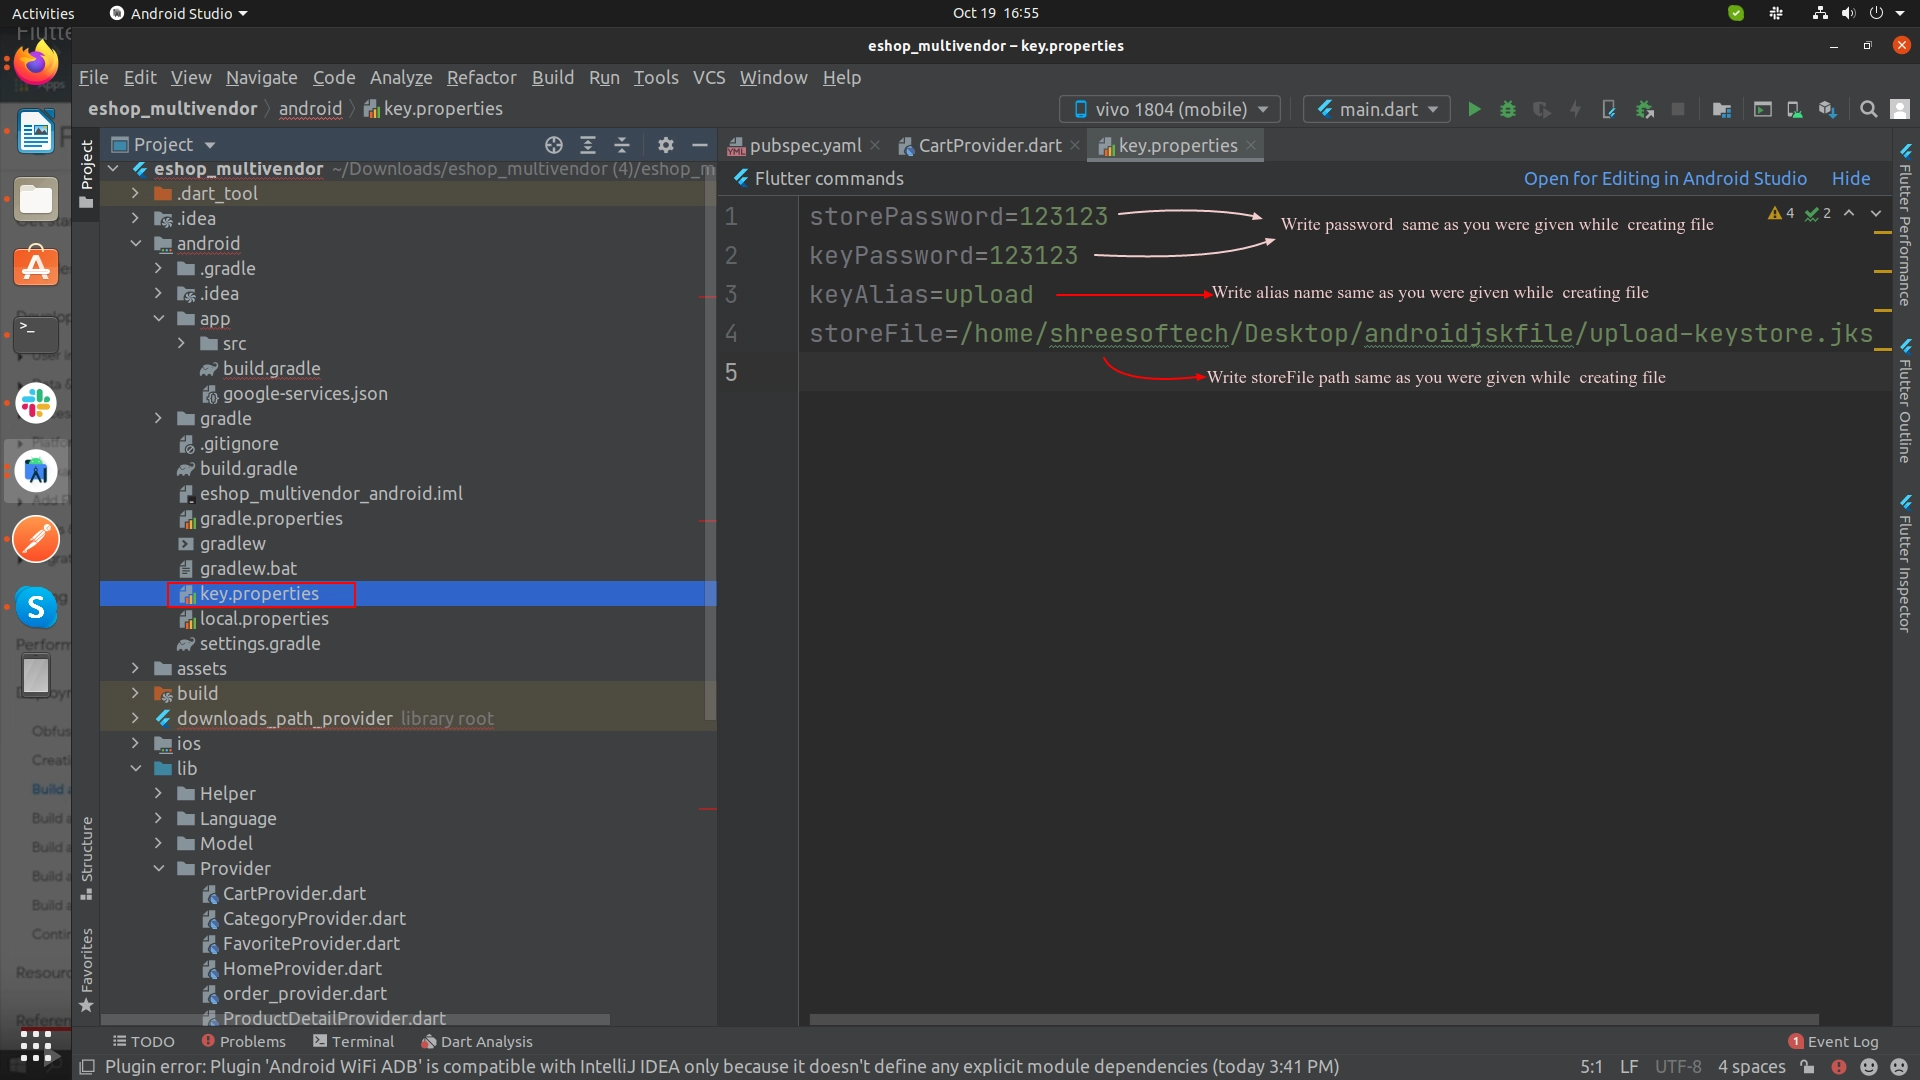
Reference the keystore from the app:
- Create a file named [project]/android/key.properties that contains a reference to your keystore:
- Copy below code, paste into key.properties file and change as per your configuration:
storePassword=<password from previous step>
keyPassword=<password from previous step>
keyAlias=upload
storeFile=<location of the key store file, such as /Users/username/upload-keystore.jks>
-
Run one of the following commands in Terminal:
- To generate an APK:
flutter build apk - To generate an App Bundle:
flutter build appbundle
- To generate an APK:
Publish iOS App
-
Open your Project's Runner.xcworkspace file in Xcode
-
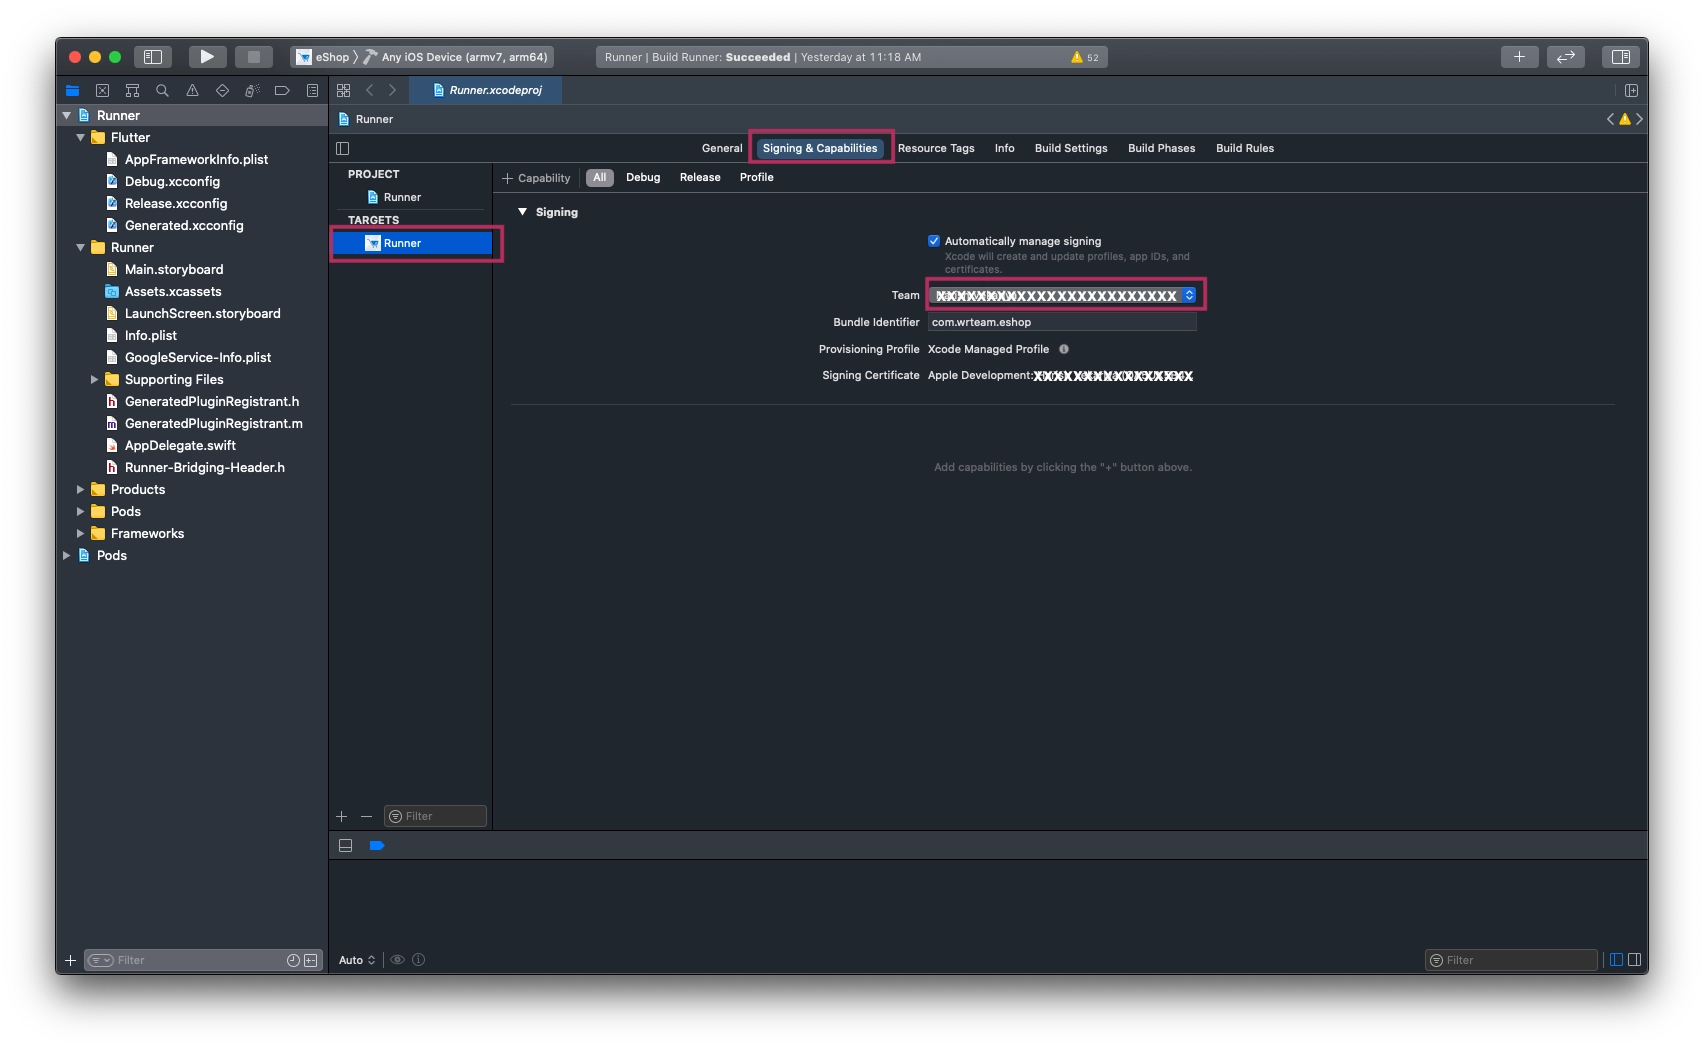
Add your Team [Your Apple Developer ID]
-
Insert GoogleService-Info.plist file [Downloaded from Firebase Project] inside the folder named Runner
-
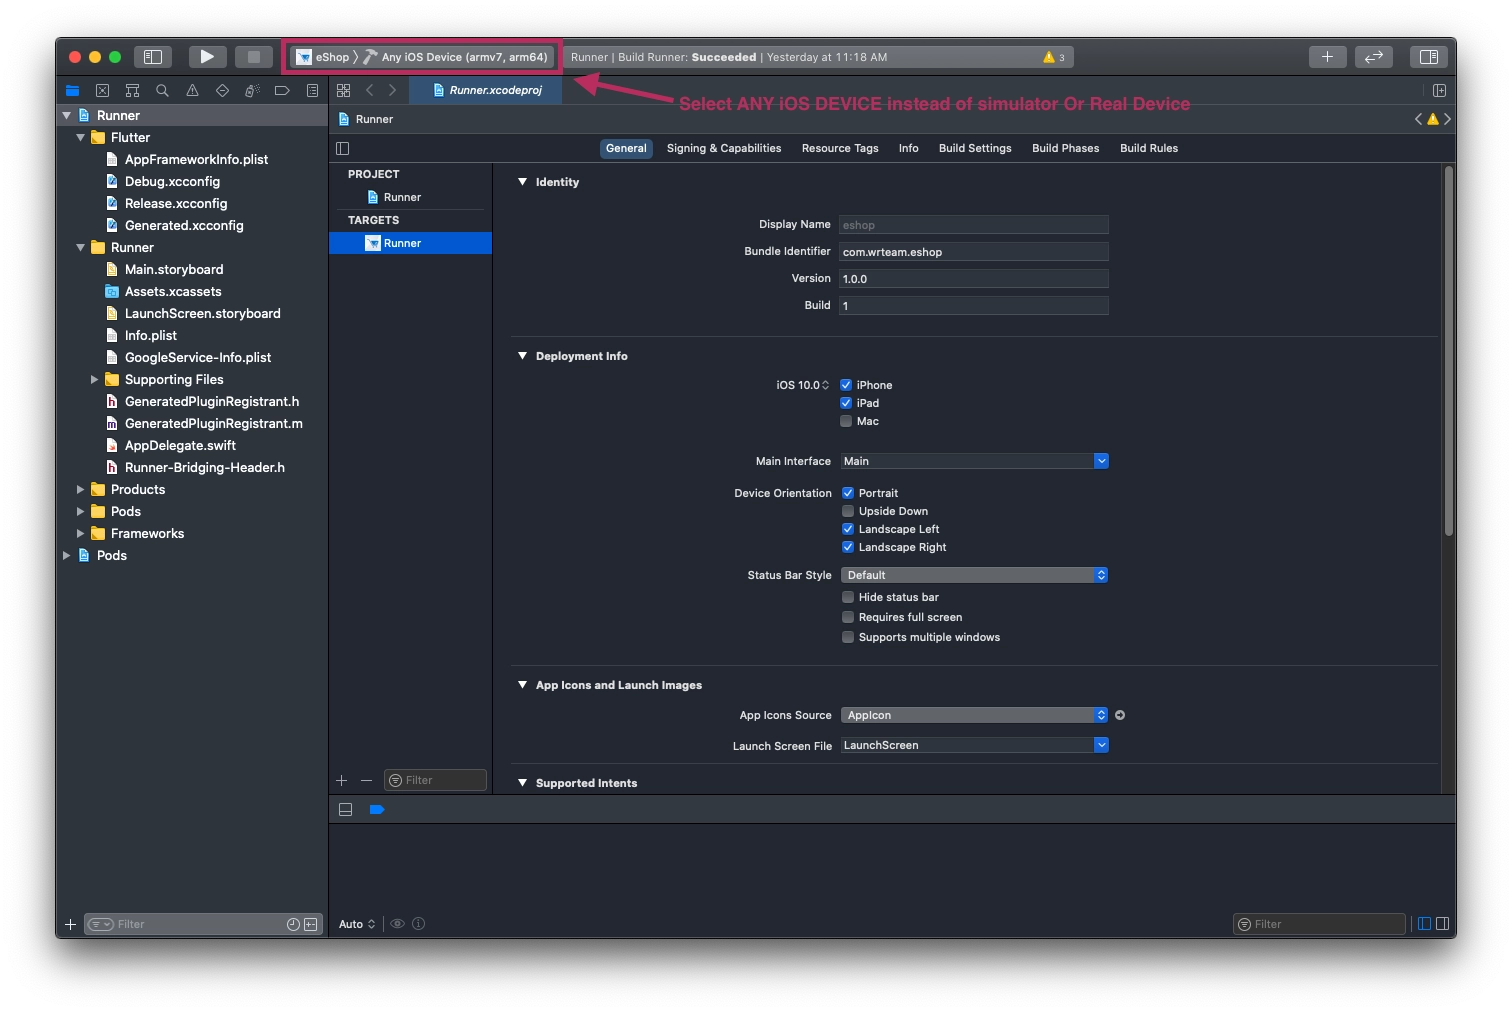
Select Any iOS Device (armv7,arm64)
-
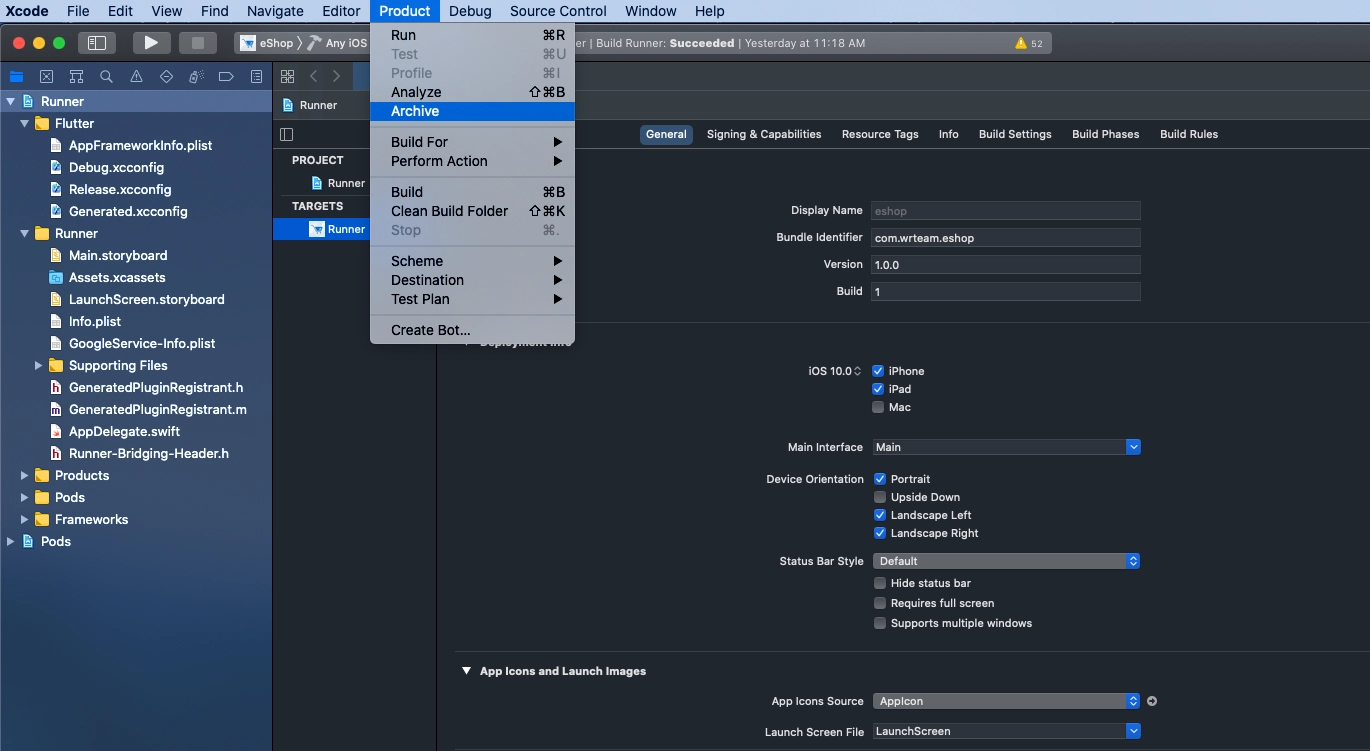
Select Archive from the Product Menu of Xcode
-
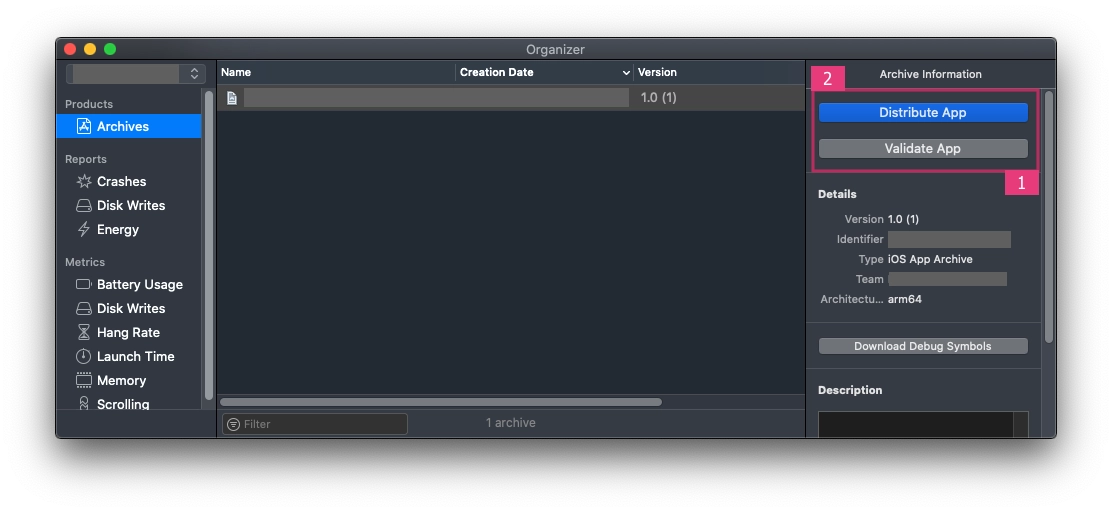
Once Build/Archive is generated, a popup window will be shown
-
Validate app first, and after successful validation, you can distribute the app to AppStore
-
After successful submission of the build file, it will be reflected in your Apple Developer Account
For detailed help, see Submit Your App to the App Store