Firebase Integration
Create Flutter Firebase App
For creating a firebase app from flutter, you must install firebase cli first.
To install firebase cli, follow https://firebase.google.com/docs/cli
Important Notes:
- You need to add Partner app in eGrocer customer's firebase project only, otherwise FCM notification will not work.
- After firebase cli installation, follow these steps:
Steps to Create Firebase App
-
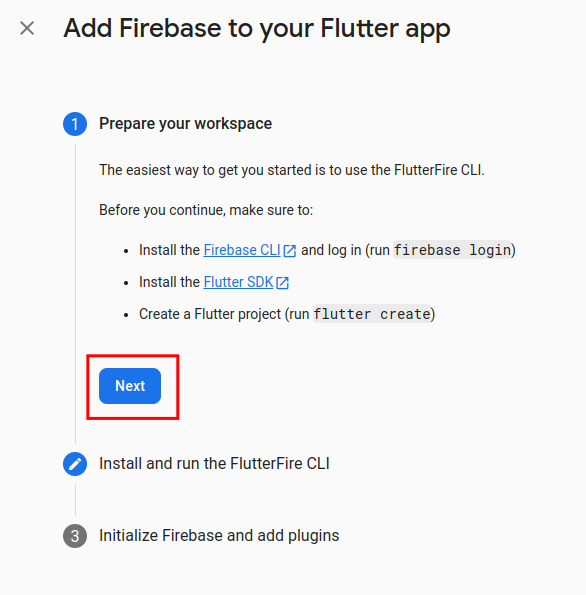
Create flutter app:
- Press "Flutter" option
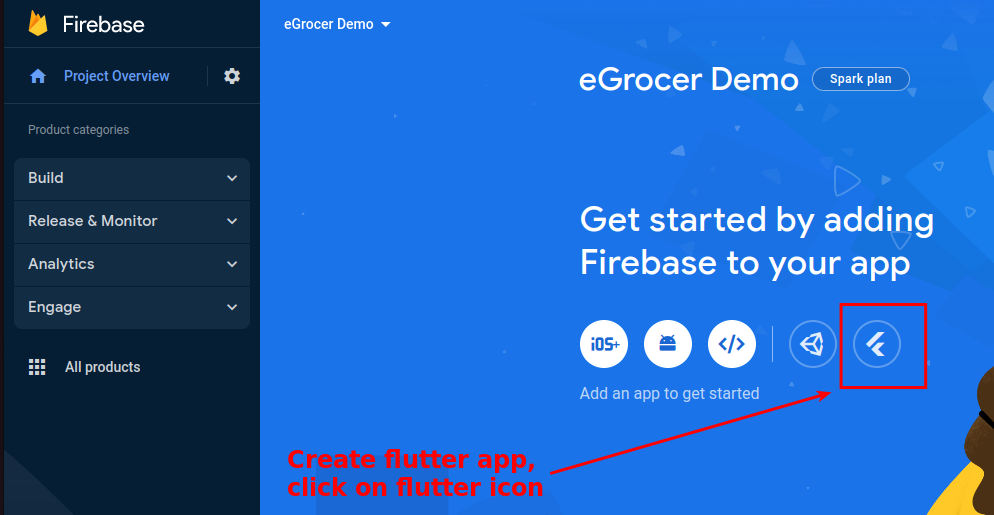
- Press next
-
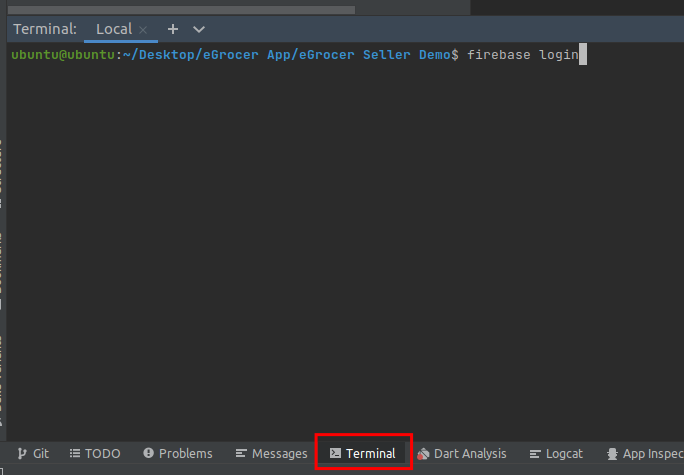
Go to Android Studio terminal and run "firebase login" command:
- Allow Firebase to collect CLI and Emulator Suite usage and error reporting information? Set "YES" and press enter
- Login to firebase from the browser when prompted
-
Run the first command shown in the Firebase console in Android Studio terminal:
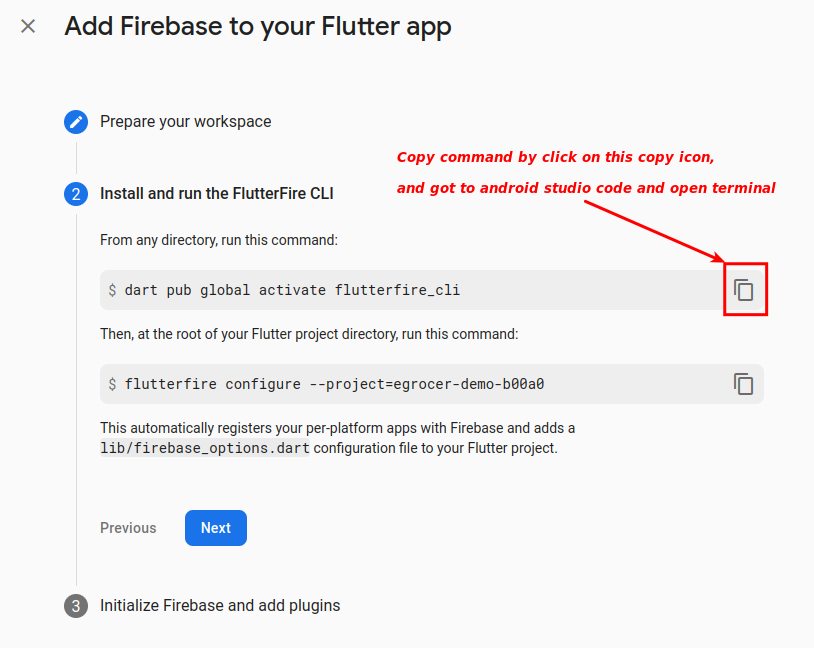
-
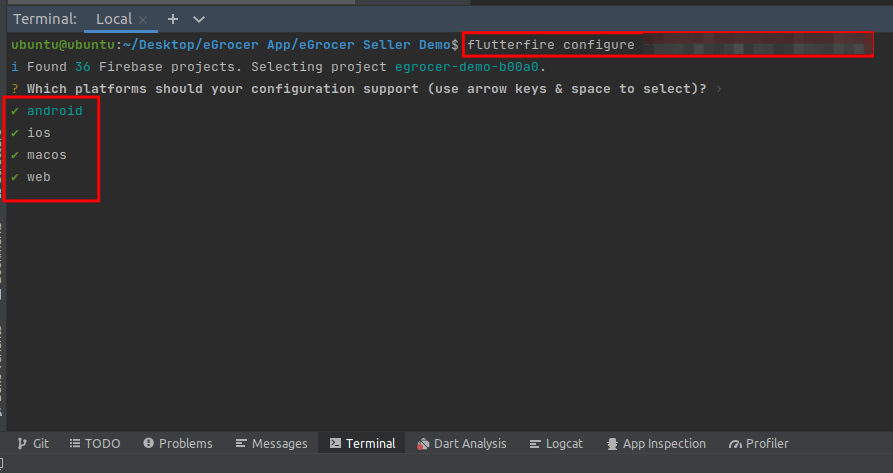
Run the second command shown in the Firebase console in Android Studio terminal:
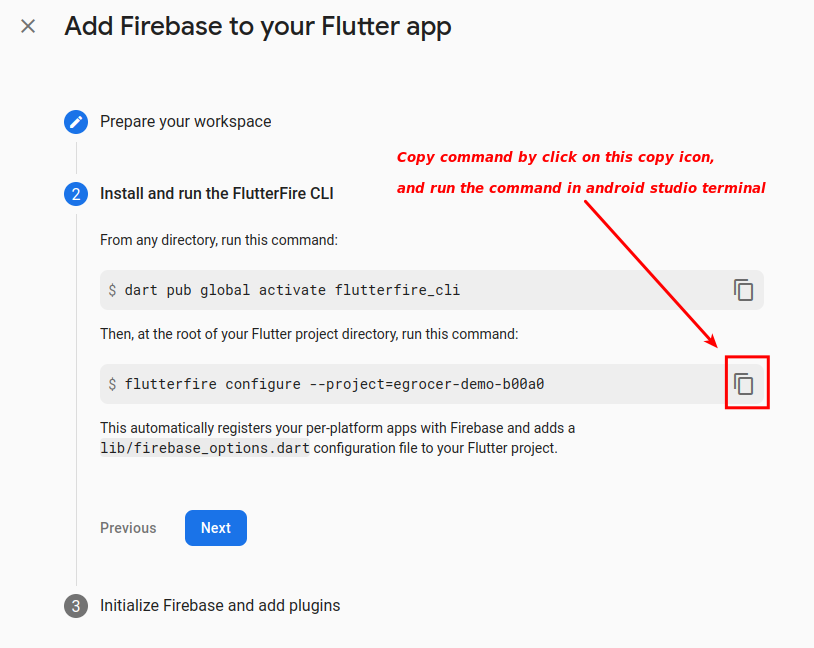
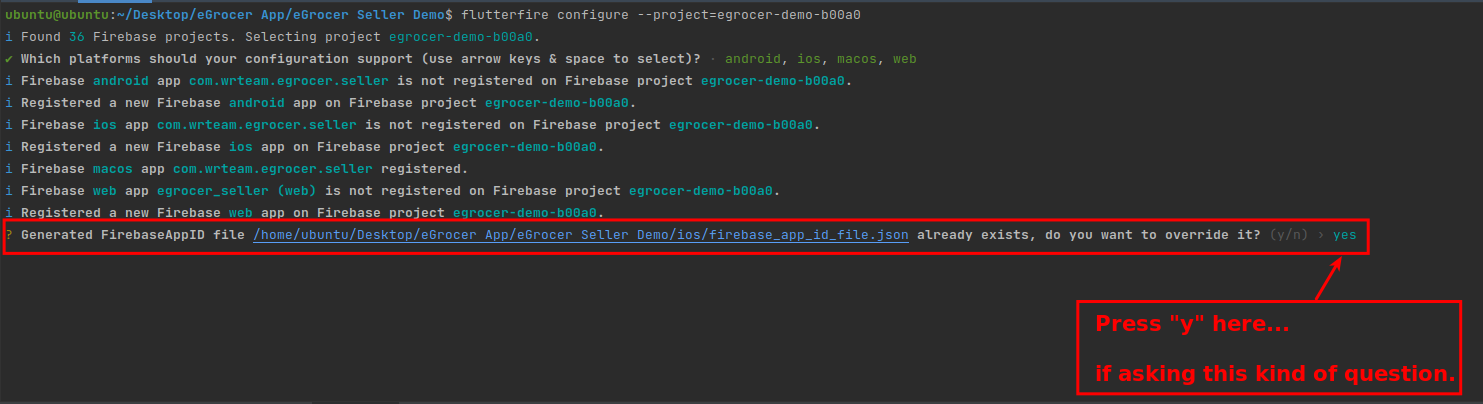
- Once output is shown, press "Enter" in terminal
- When prompted again, press "y" in terminal
-
Press continue in the Firebase console
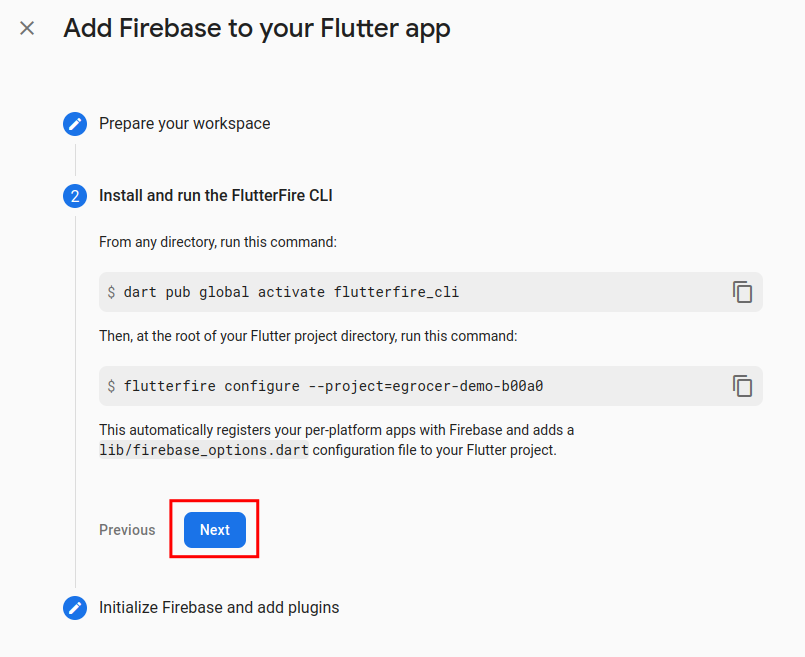
-
Press "continue to console"
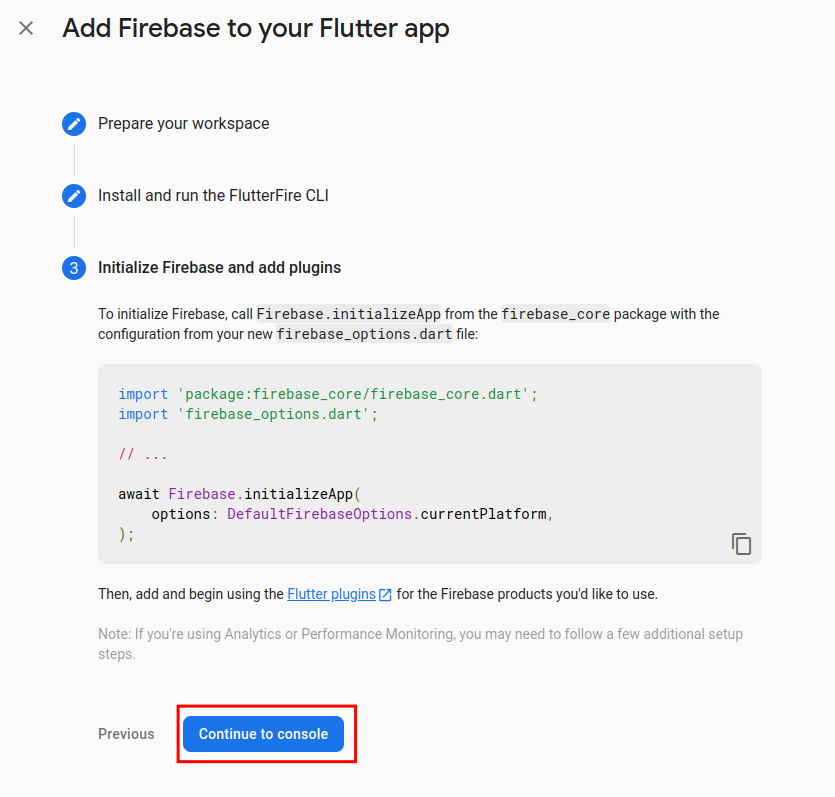
Your firebase setup is now complete.
Set Up Push Notifications
iOS Configuration
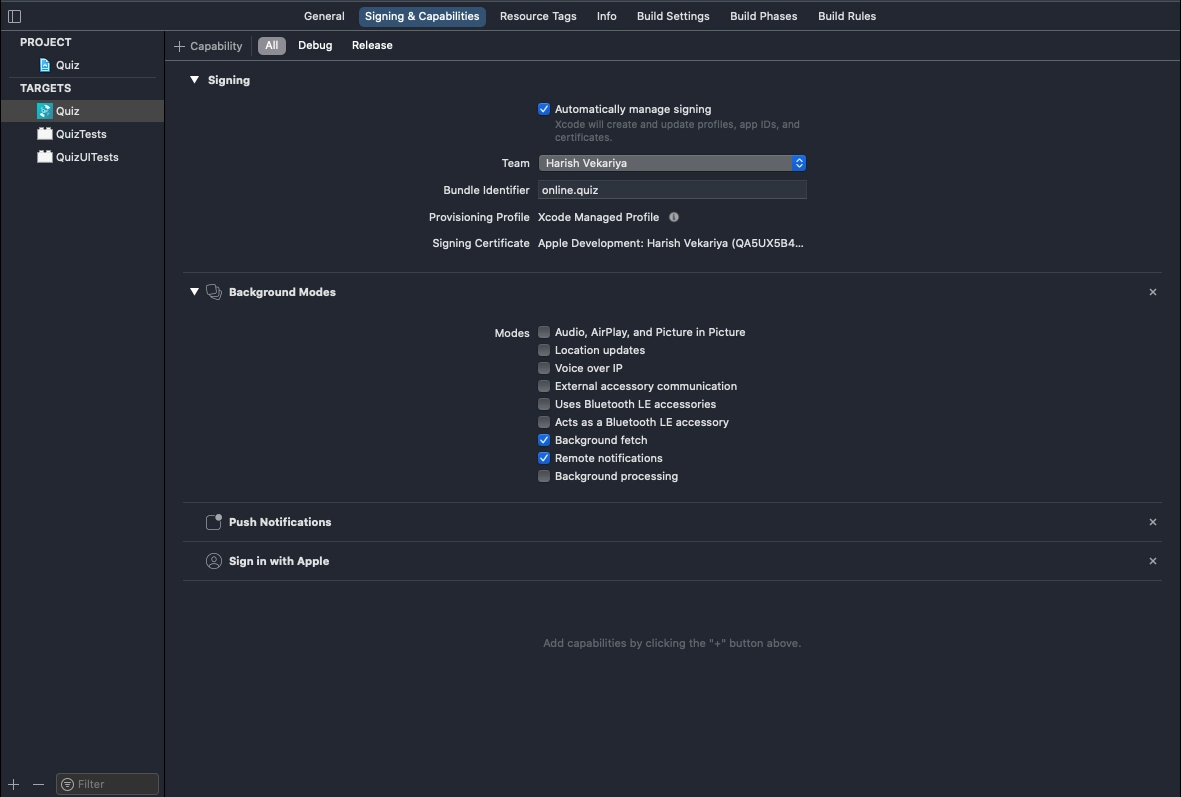
For iOS, you need to perform these additional steps:
- In Xcode, open the project
- In the Project Navigator (the left-hand menu), select the project icon that represents your app
- In the top-left corner of the right-hand pane in Xcode, select your app's target
- Navigate to the Capabilities tab
- Enable Push Notifications
- Check Remote Notifications and Background Fetch from Enabling Background Modes
Setting Up APNs for iOS
APNs (Apple's Push Notification service) currently supports two types of connections: token-based (.p8) and certificate-based (.p12). You can follow either one of them:
For Token-based (.p8)
- Log in to the Apple Developer Portal
- Navigate to Certificates, IDs & Profiles > Identifiers > App IDs and click the App ID associated with your app
- On the screen for your App ID, check Capabilities > Push Notifications
- Select App ID in next page & click continue
- Create Development SSL Certificate & Production SSL Certificate by adding CSR certificate. Follow Apple's Create a certificate signing request instructions
- Navigate to Certificates, IDs & Profiles > Keys Section and add a Universal key for Notifications, which you can use for more than one app as well
- Save and Download & keep it safe, as it will be downloaded only once
- Then go to Firebase and add this .p8 file along with Your Key ID and Team ID
For Certificate-based (.p12)
-
Log in to the Apple Developer Portal
-
Navigate to Certificates, IDs & Profiles > Identifiers > App IDs and click the App ID associated with your app
-
On the screen for your App ID, check Capabilities > Push Notifications
-
Click Save and respond to the Modify App Capabilities dialog box that appears
-
To create the certificate:
- In a new browser tab, follow Apple's Create a certificate signing request instructions
- In the Apple Developer Portal, navigate back to your App ID
- Click Capabilities > Push Notifications > Configure
- Click one of the following buttons:
- Development SSL Certificate > Create Certificate (for testing)
- Production SSL Certificate > Create Certificate (for production)
- Click Choose File and select the certificate signing request you created
- Click Continue
- Click Download to download the certificate
- Use this file to export a .p12 file in the next step
-
Navigate in the Apple Developer Portal to Certificates, IDs & Profiles > Provisioning Profiles
-
Click the provisioning profile you'd like to edit
-
Edit the provisioning profile as necessary, and click Save
-
Click Download, and double-click the downloaded provisioning profile to install it
-
Export the downloaded certificate (.cer file) as a .p12 file:
- On your Mac, double-click the .cer file to open it in Keychain Access
- In Keychain Access, select Category > Certificates
- Select the certificate to export
- Choose File > Export Items
- Enter a name in the Save As field
- Accept the default .p12 file format and click Save
- Enter a password for the file if necessary
- Upload this file to firebase