Common Firebase Configuration
This guide covers the complete Firebase setup for Elite Quiz, for both the Mobile App and the Web App. No prior experience with Firebase is required. Just follow the steps in order.
If you use both the Mobile App and the Web App, use one Firebase project for both. Do Step 1, Step 3, and Step 4 once, then follow the part of Step 2 for each platform you use.
Why Do I Need Firebase?
Elite Quiz uses Firebase for two main things:
- Authentication: Let users sign in with Email, Google, Apple, or Phone, or play as a guest.
- Realtime Database: Store live data for 1v1 Battle and Group Battle, such as battle rooms and player progress.
Setup order:
Step 1: Create Firebase Project
        │
        ▼
Step 2: Connect Your Apps ──► 2A. Mobile App (Flutter)
        │                └──► 2B. Web App (Next.js)
        ▼
Step 3: Enable Authentication
        │
        ▼
Step 4: Set Up Realtime Database
Step 1: Create Your Firebase Project
If you already created a Firebase project for the other platform (e.g., you bought the App first and are now setting up the Web), skip this step and use the same project.
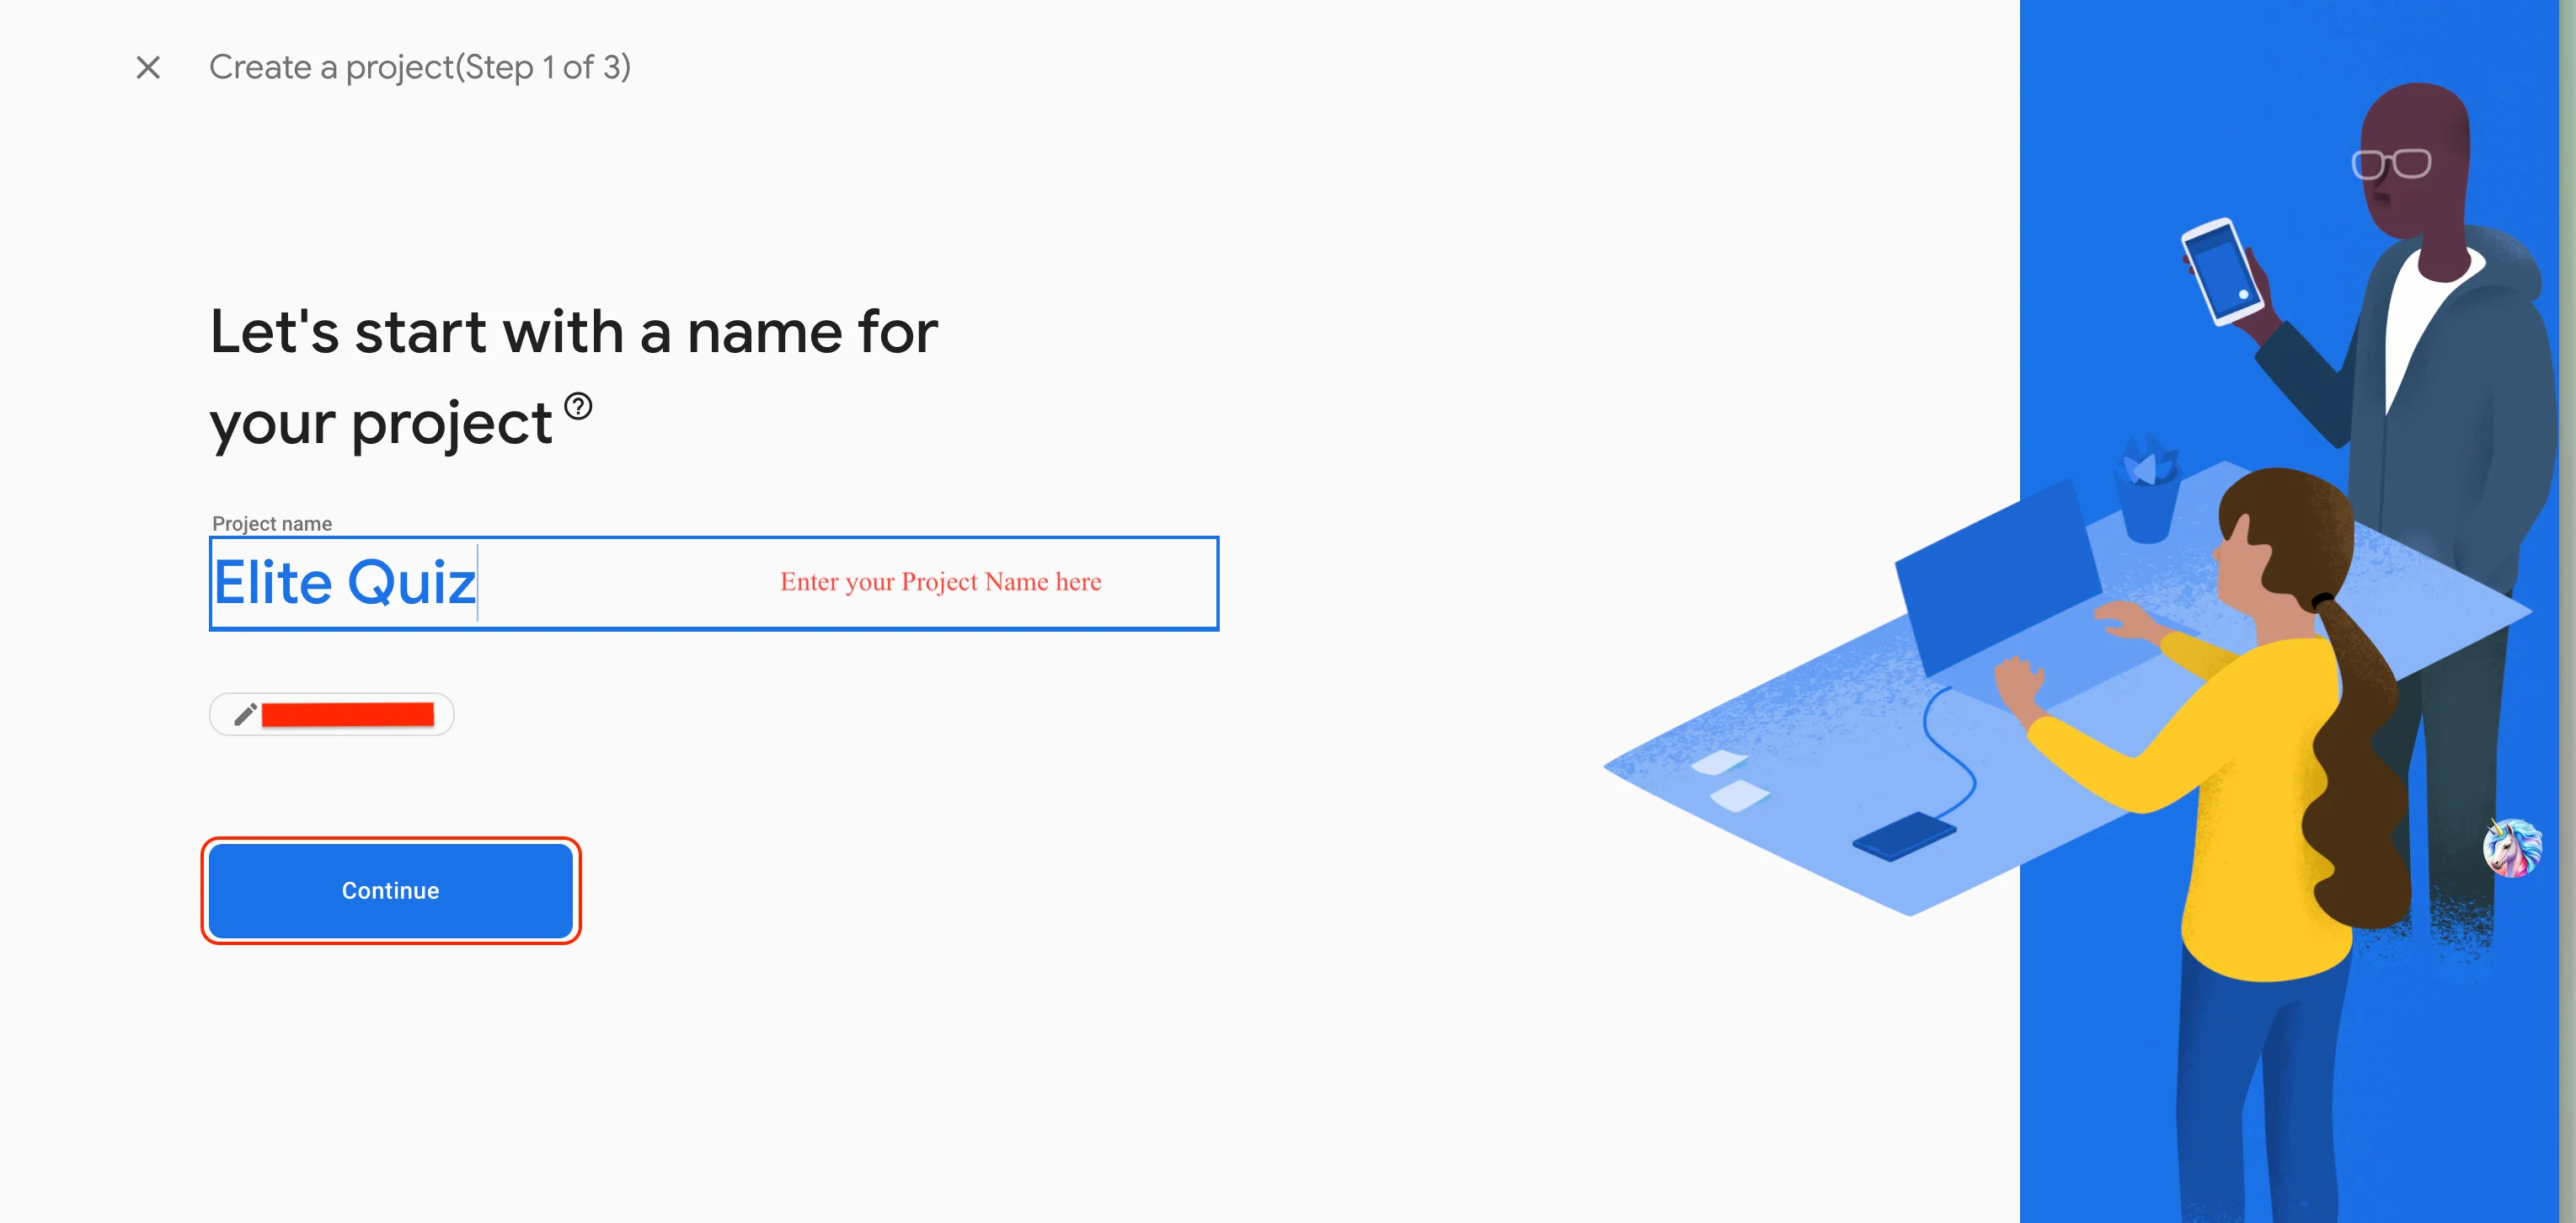
- Go to the Firebase Console.
- Click Add project.
- Enter a project name (e.g.,
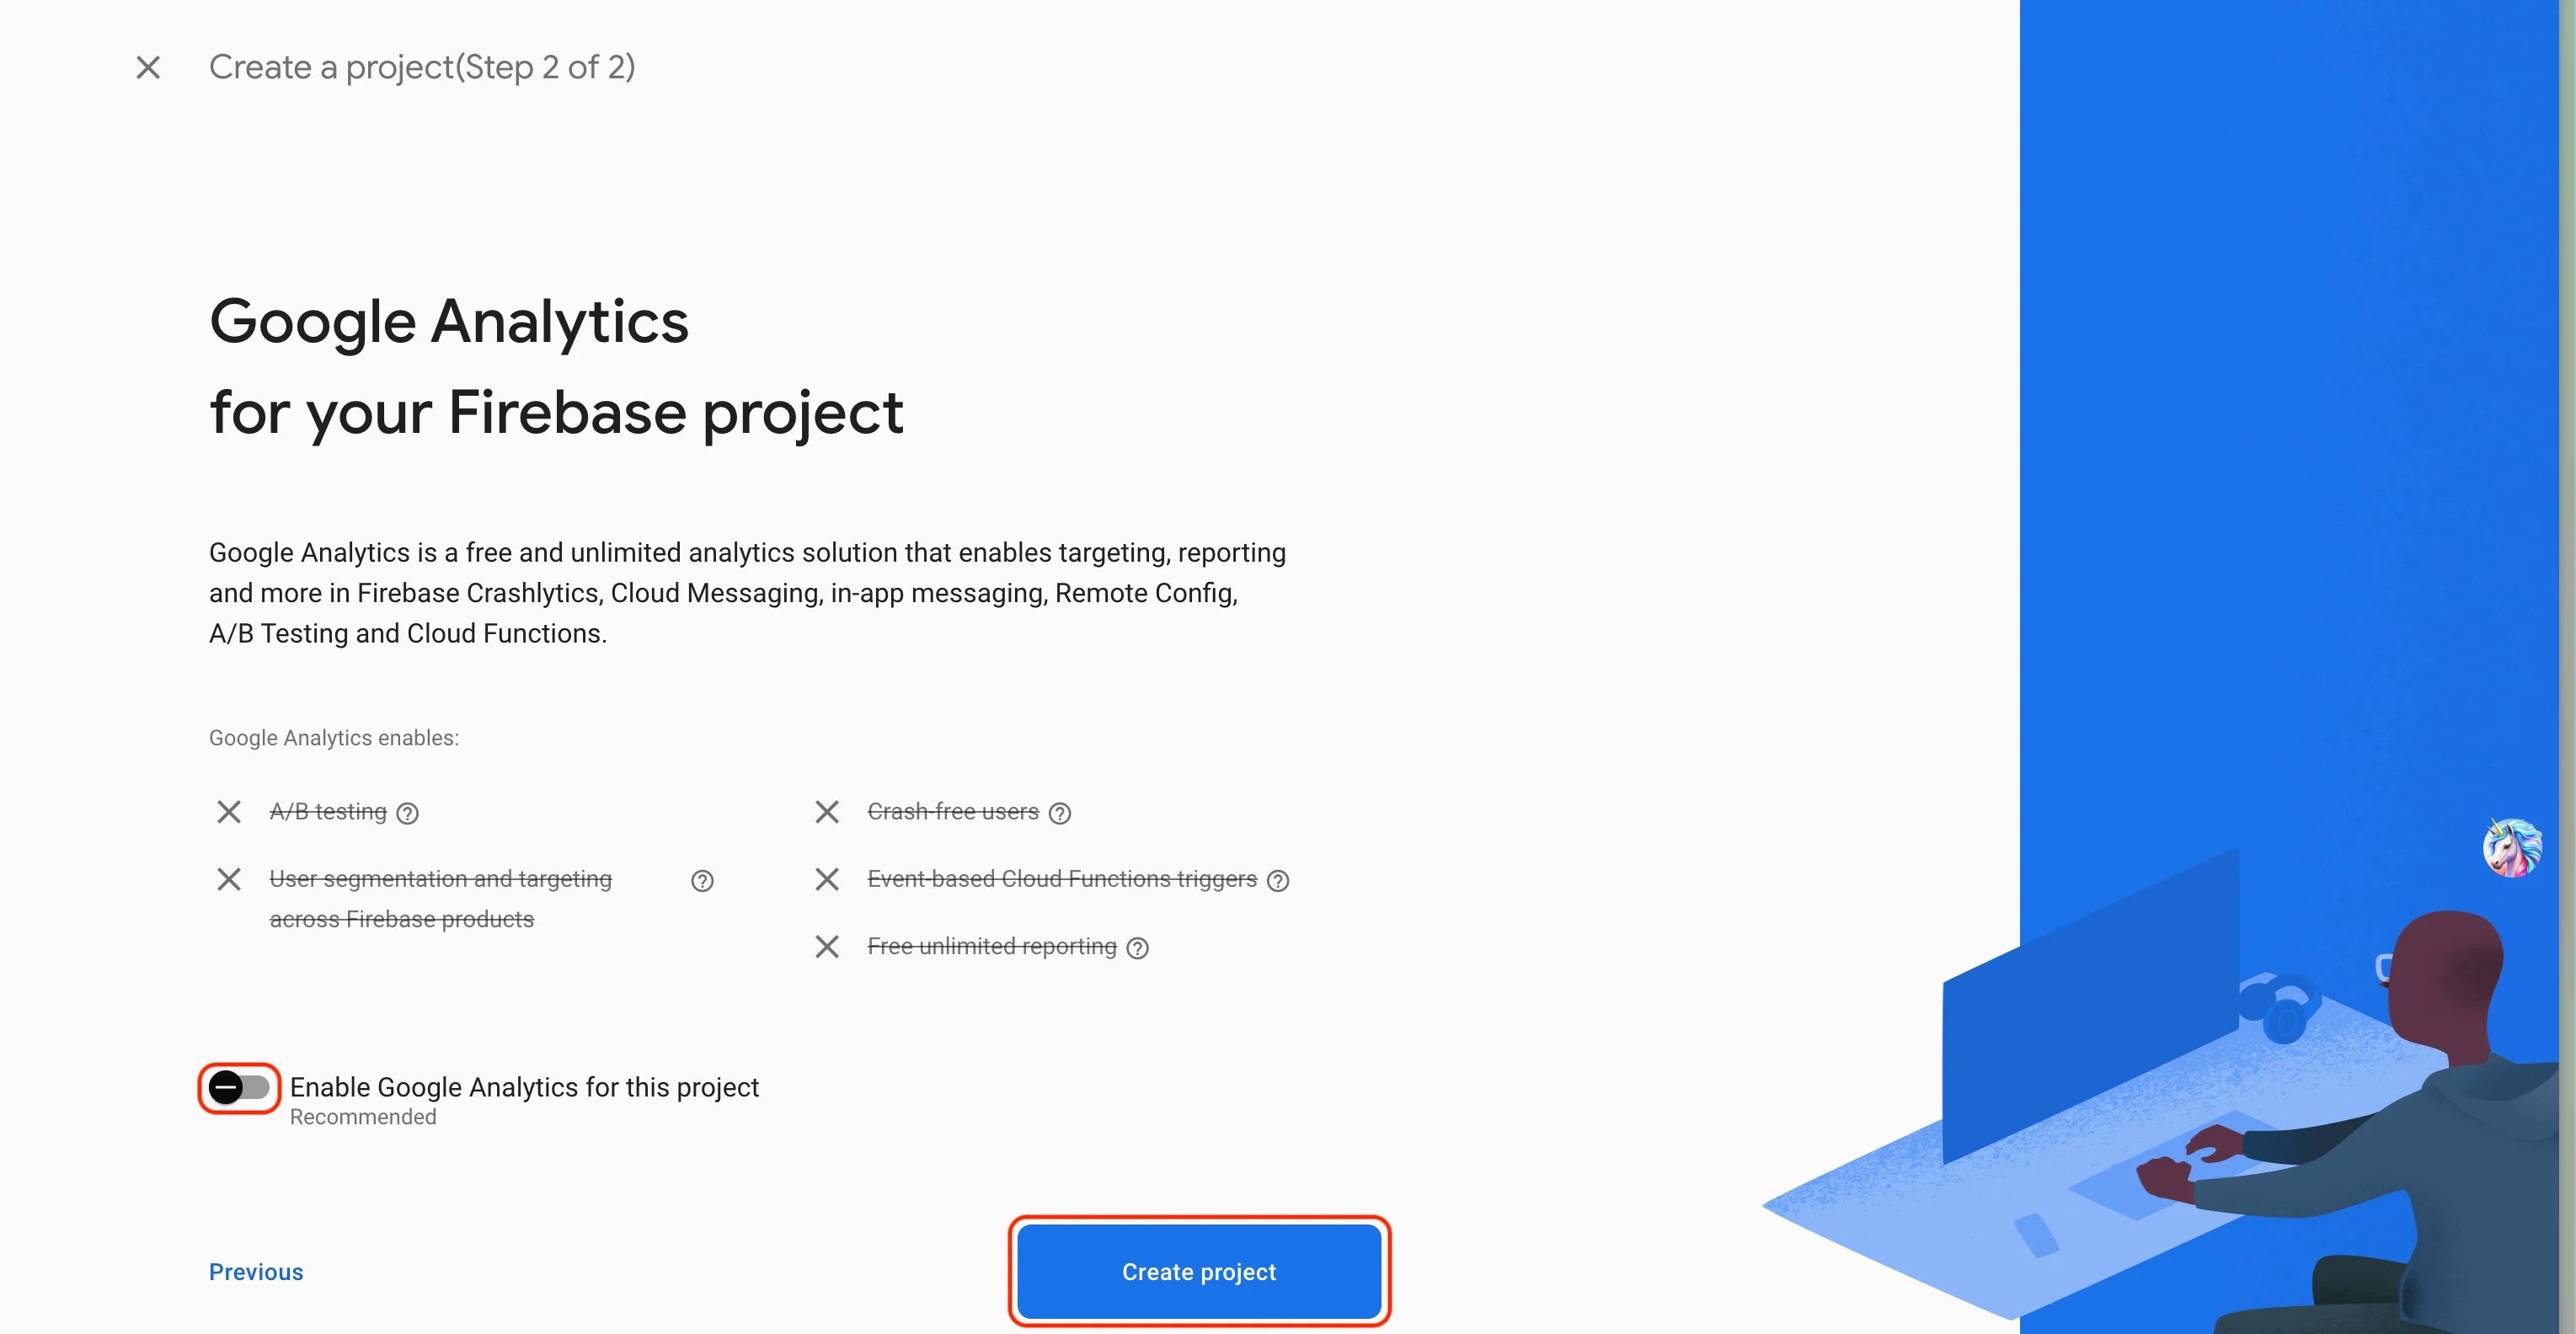
EliteQuiz) and accept the terms. - Choose whether to enable Google Analytics (recommended for most users, and required if you want analytics on the Web App).
- Click Create project and wait for setup to finish.
You’ll see your new project dashboard when it’s ready.
Step 2: Connect Your Apps to Firebase
Connect each platform you use to the Firebase project you created in Step 1.
2A. Mobile App (Flutter)
Add your Android and iOS apps to the Firebase project and add the Firebase configuration files to the Flutter code. Follow our Flutter Firebase setup guide:
Click the link below to connect your Android and iOS apps to Firebase
Click here →
When you're done, check that:
- The Android config file (
google-services.json) and the iOS config file (GoogleService-Info.plist) from your Firebase project are in the app code. - You've added your app's SHA-1 fingerprint to the Android app in Firebase. Google Sign-In will not work on Android without it.
2B. Web App (Next.js)
Video Tutorial
Steps
-
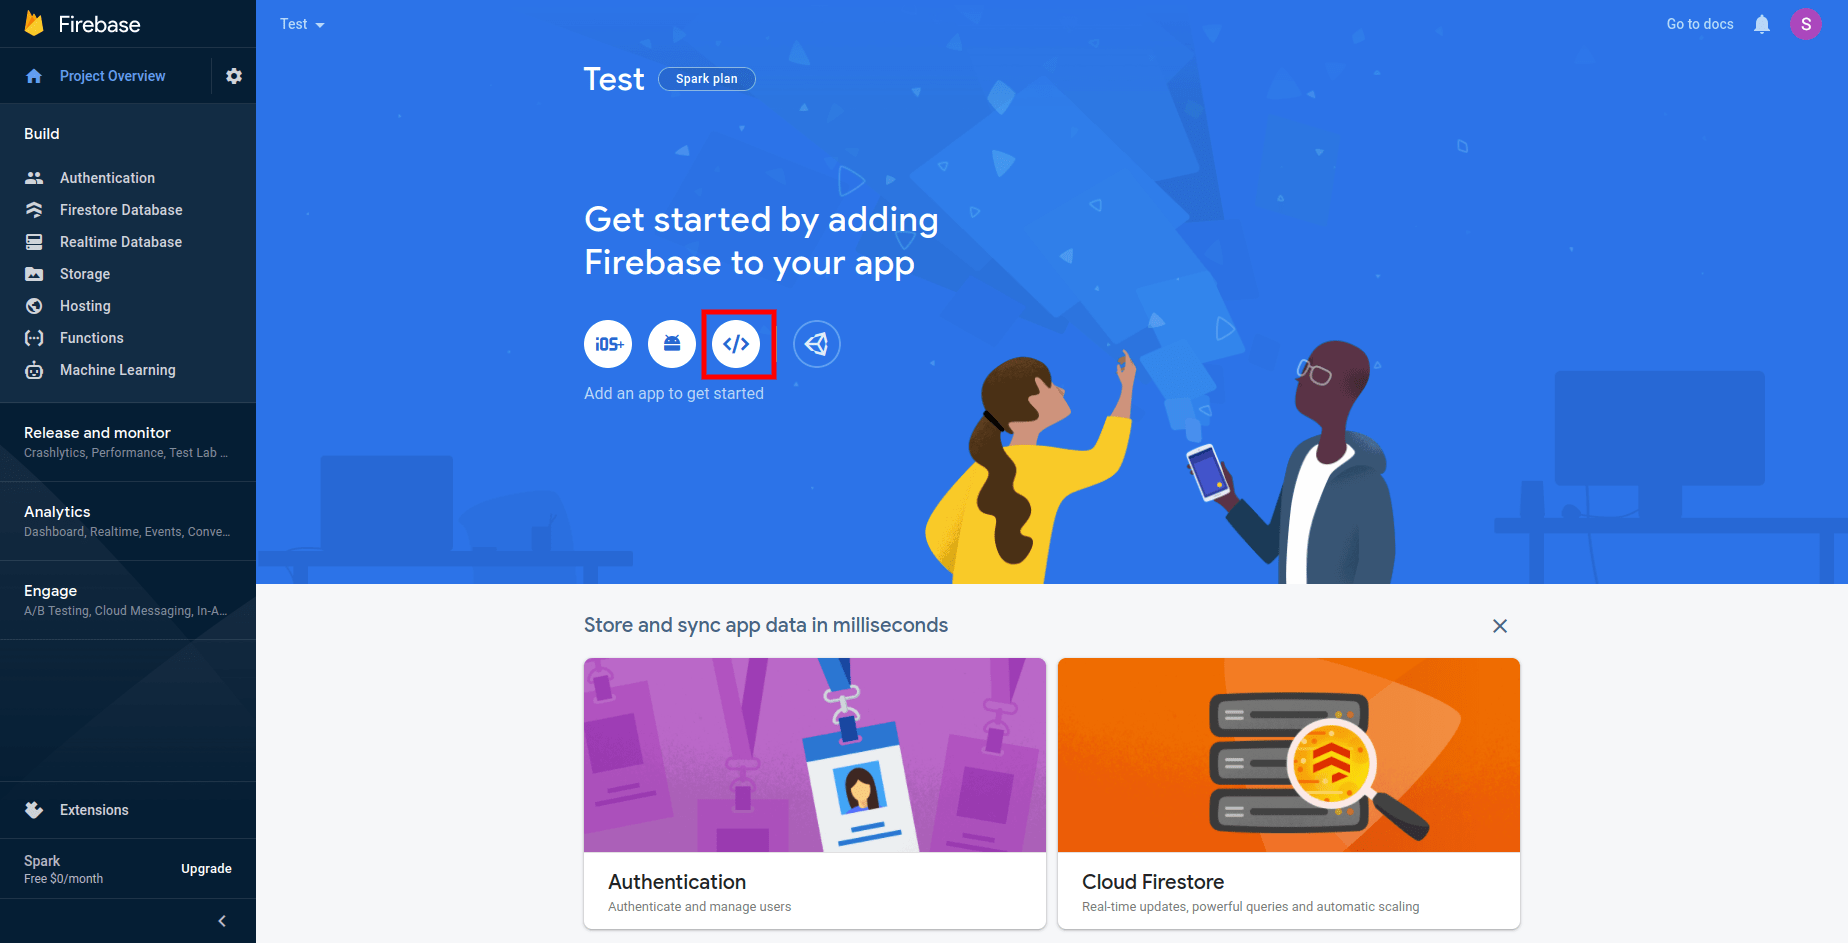
Add a web application to your Firebase project:
-
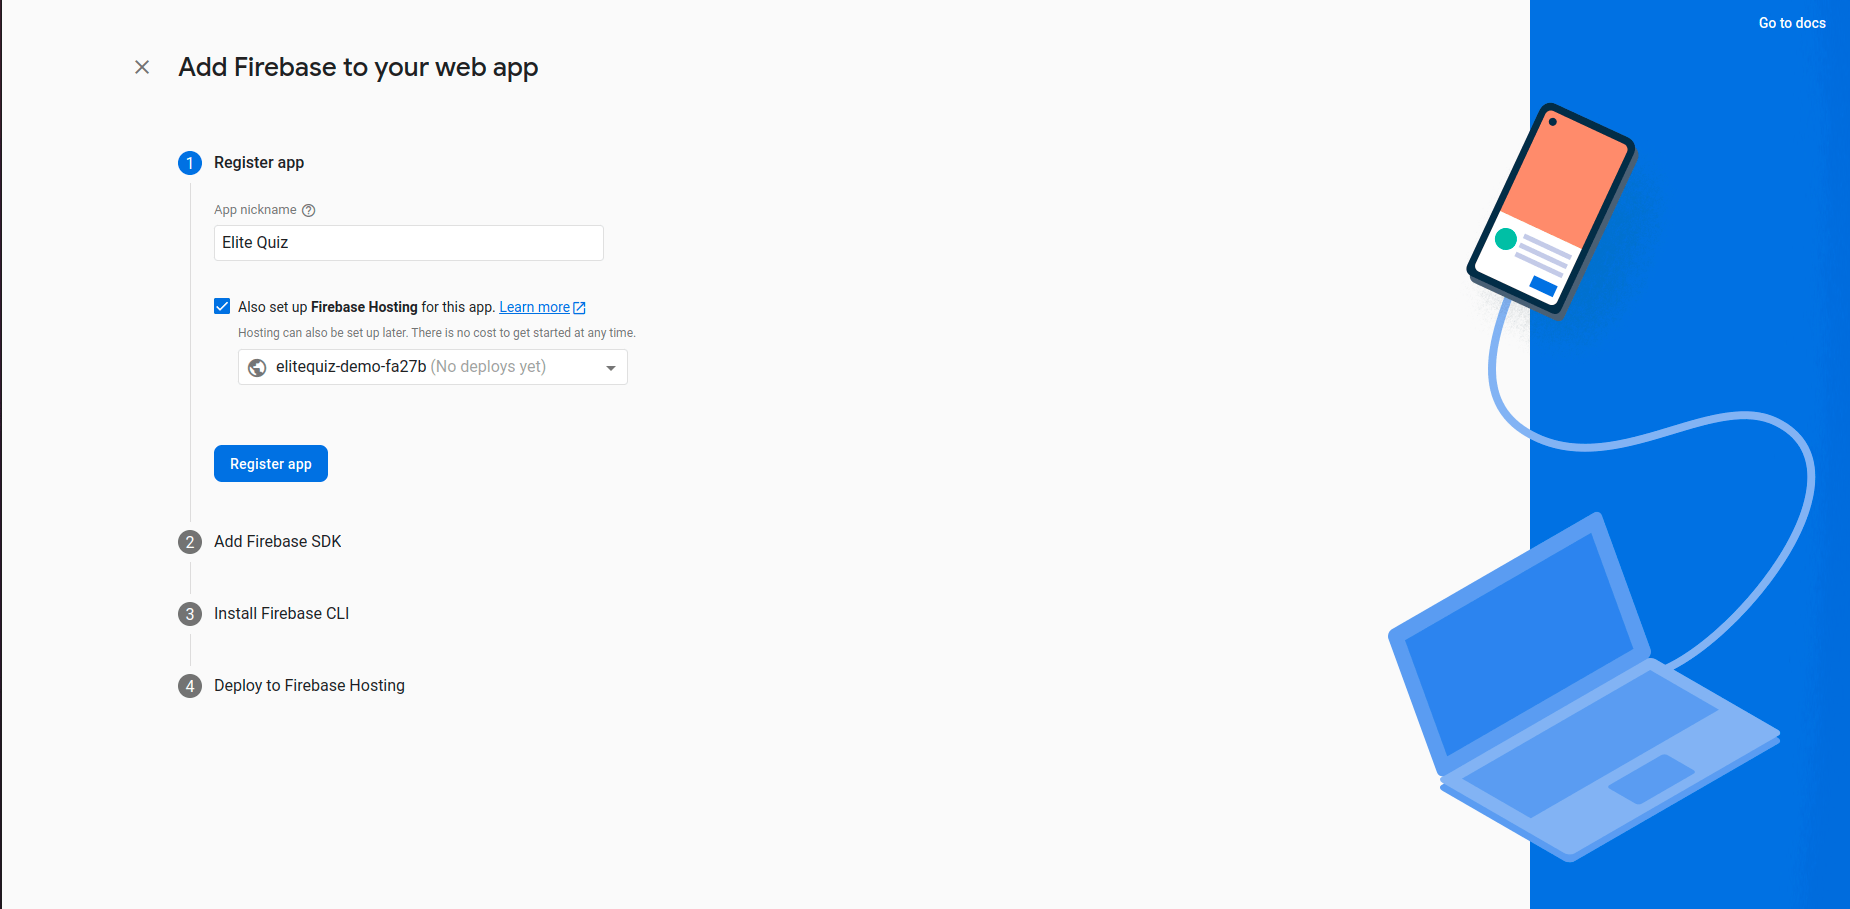
Enter the App Name and click Register App:
-
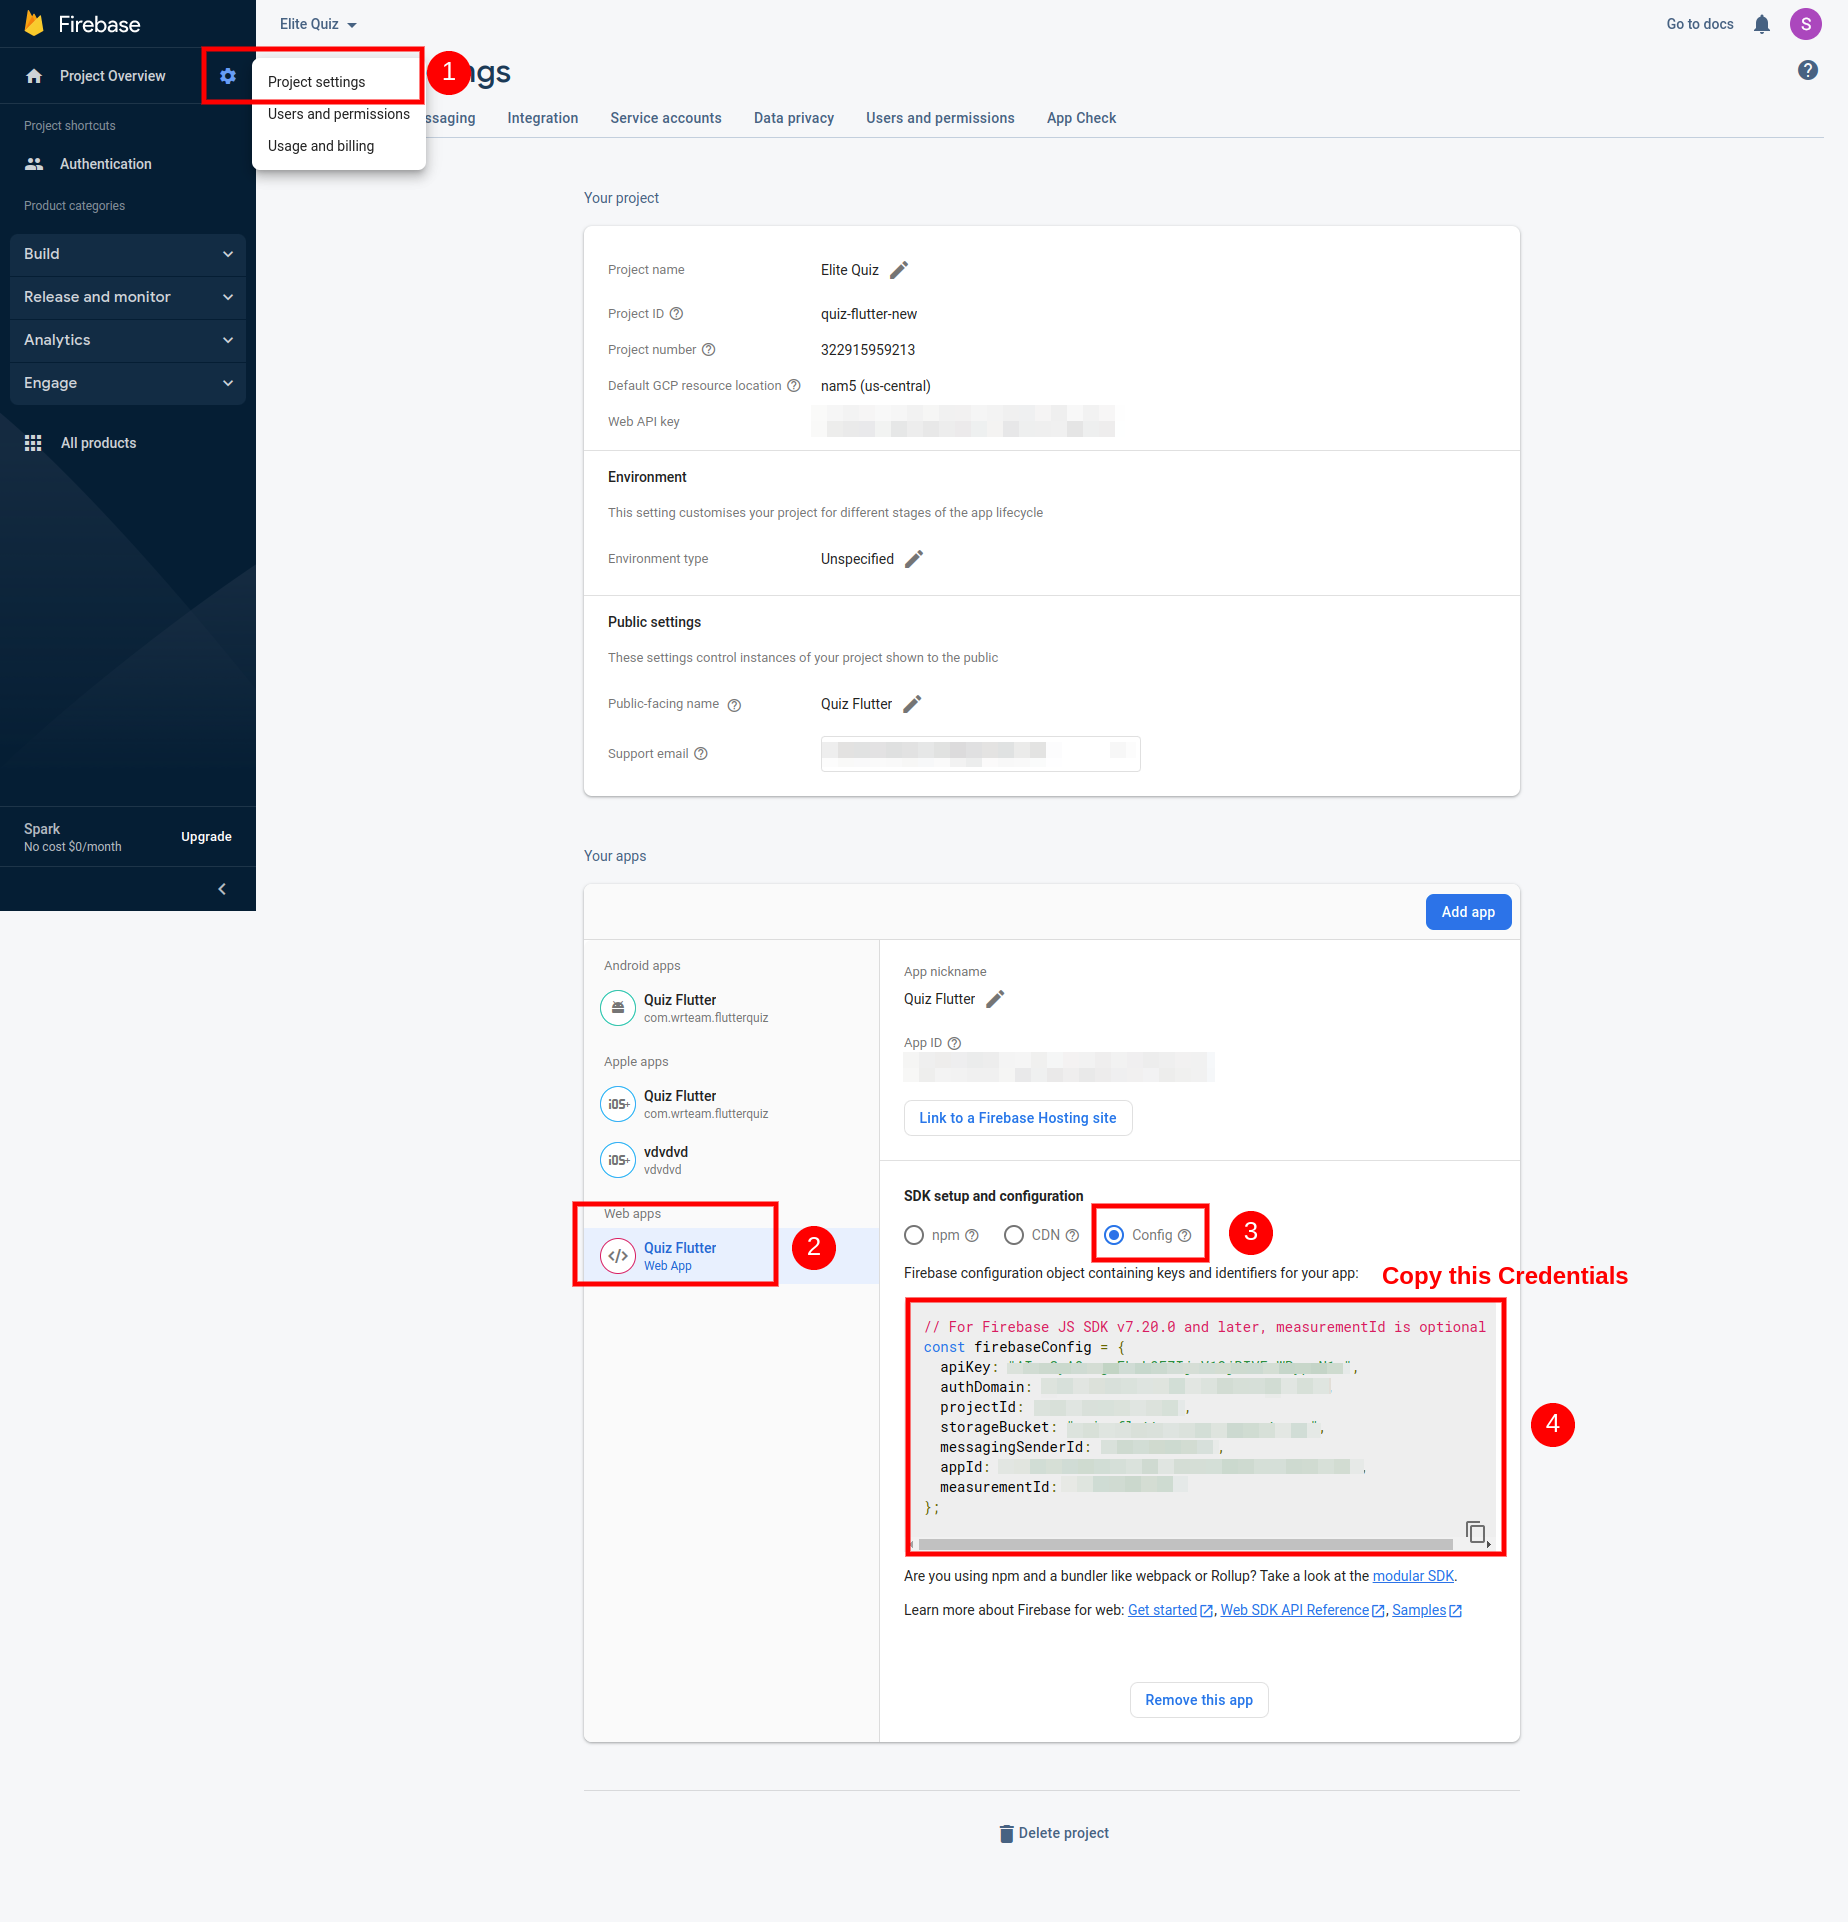
Open Project settings, select your web app, and choose Config to view its credentials:
-
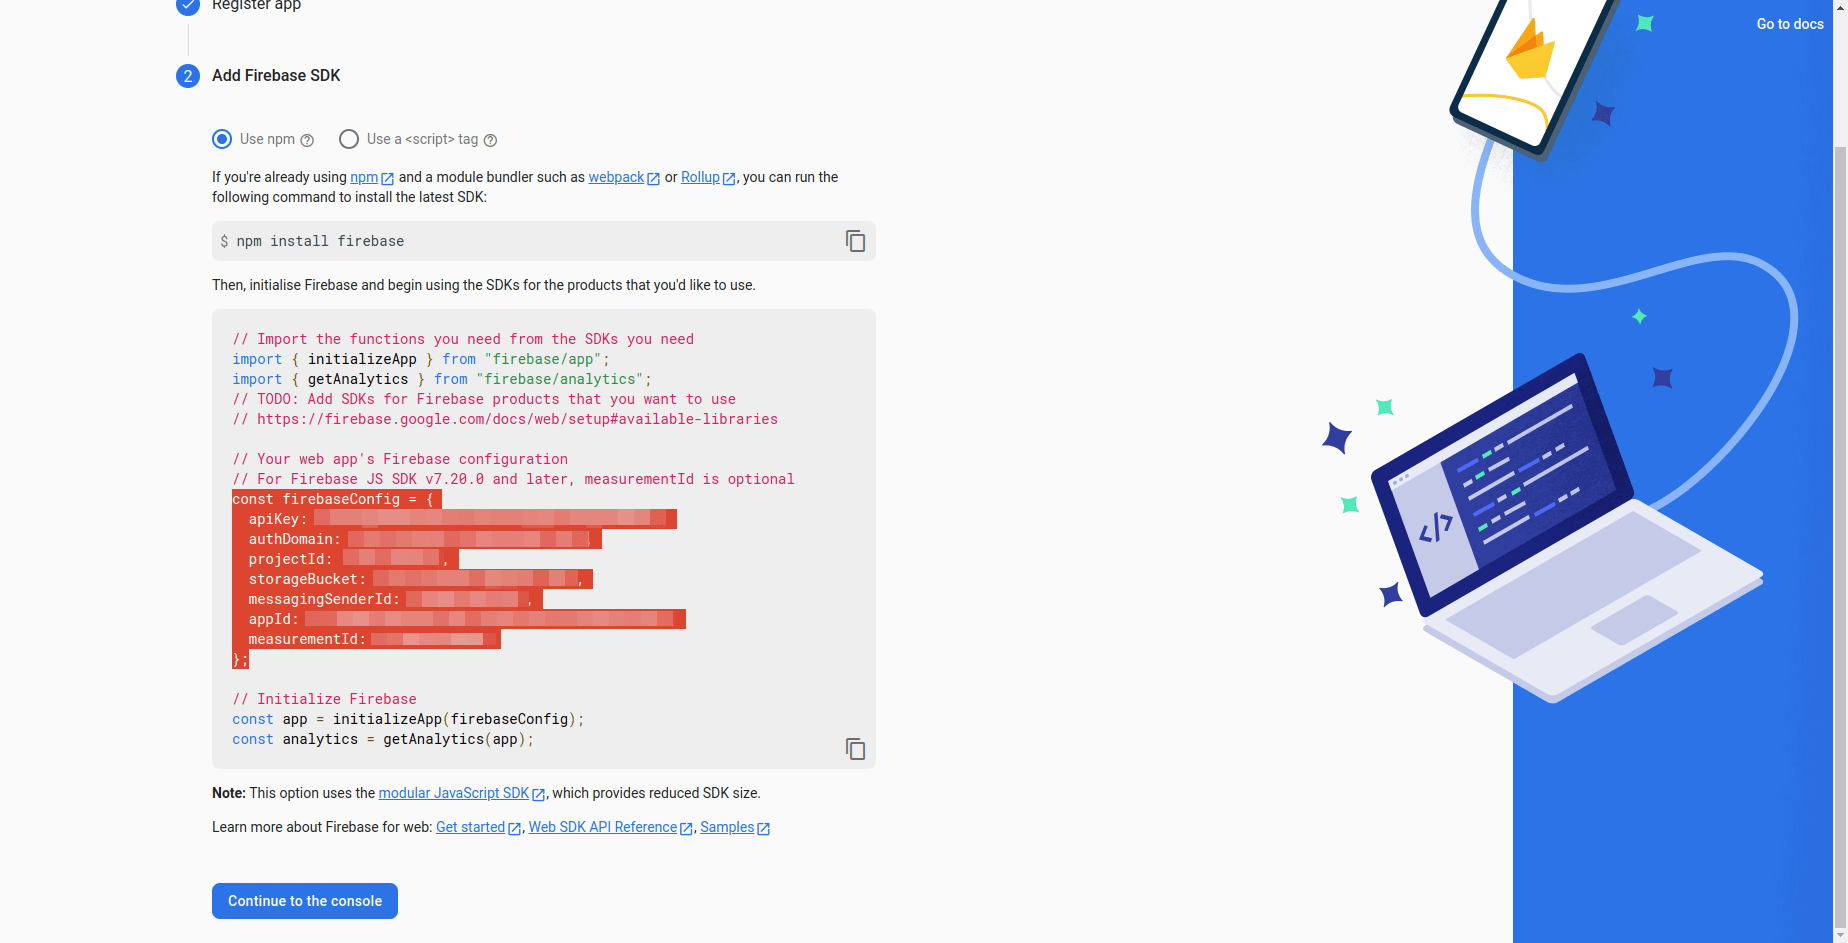
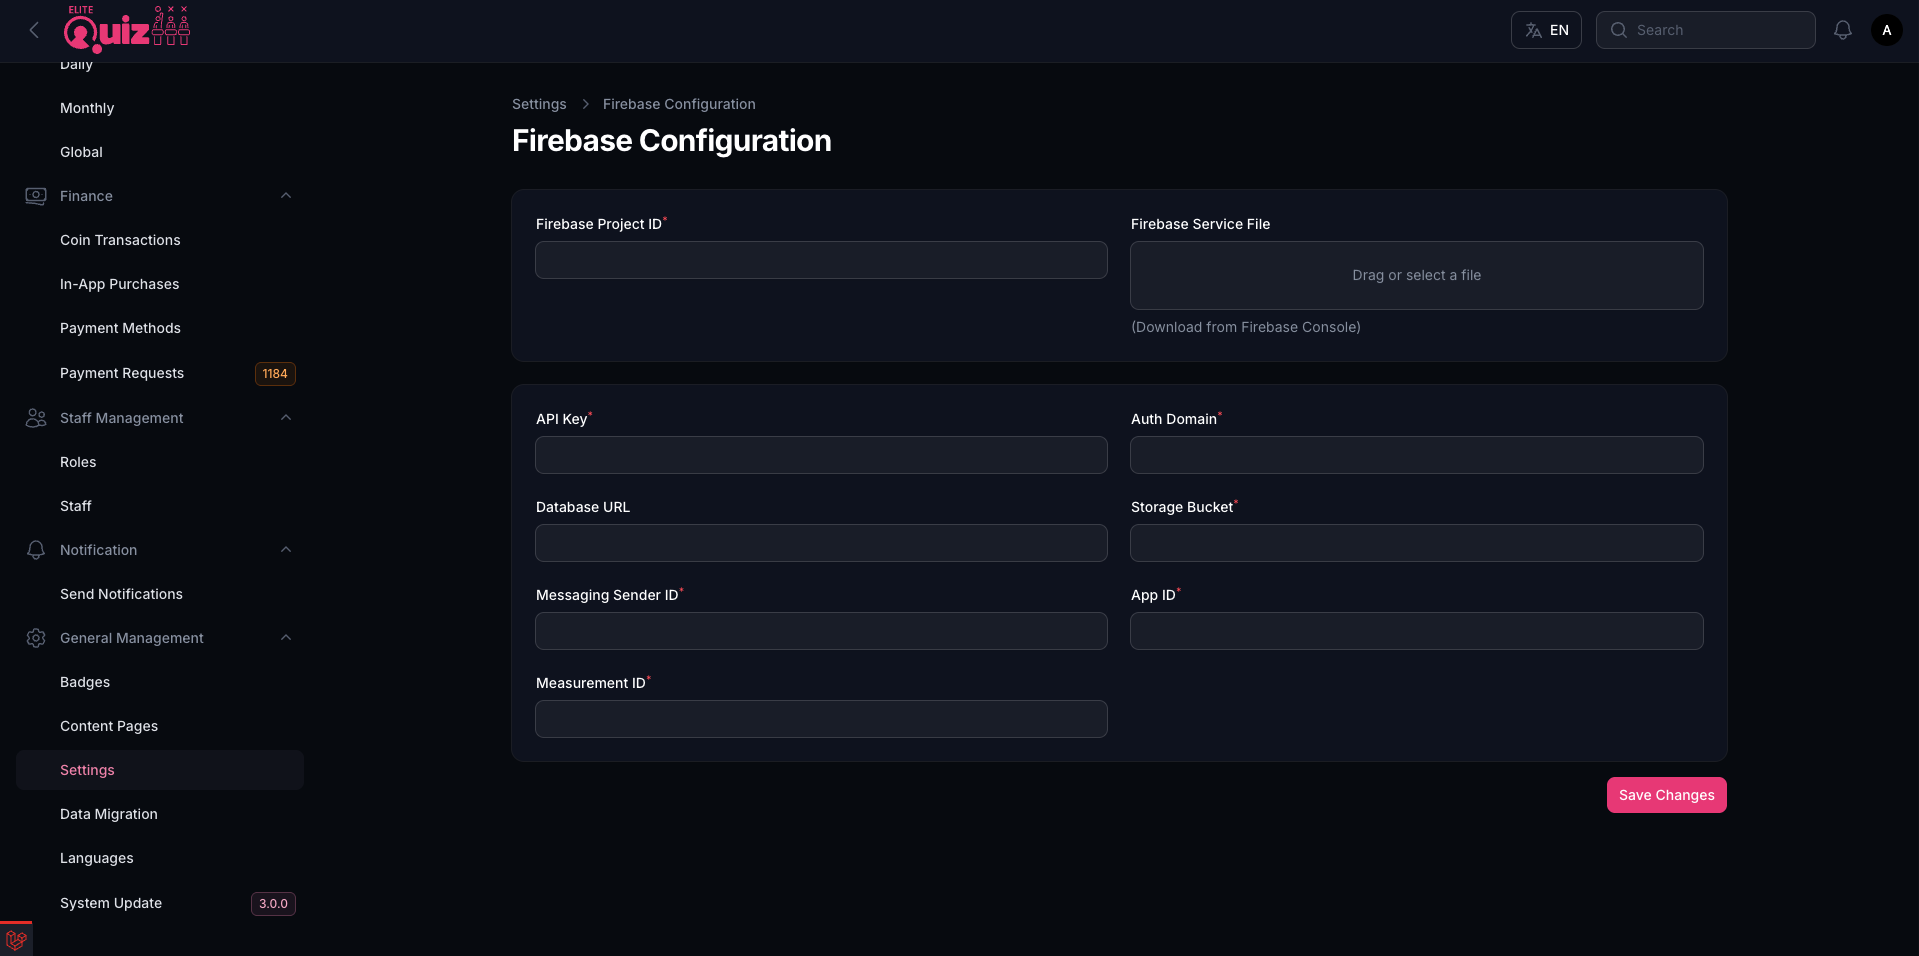
Copy the highlighted code and paste each value into the matching field in Admin Panel > Web Settings > Settings:
-
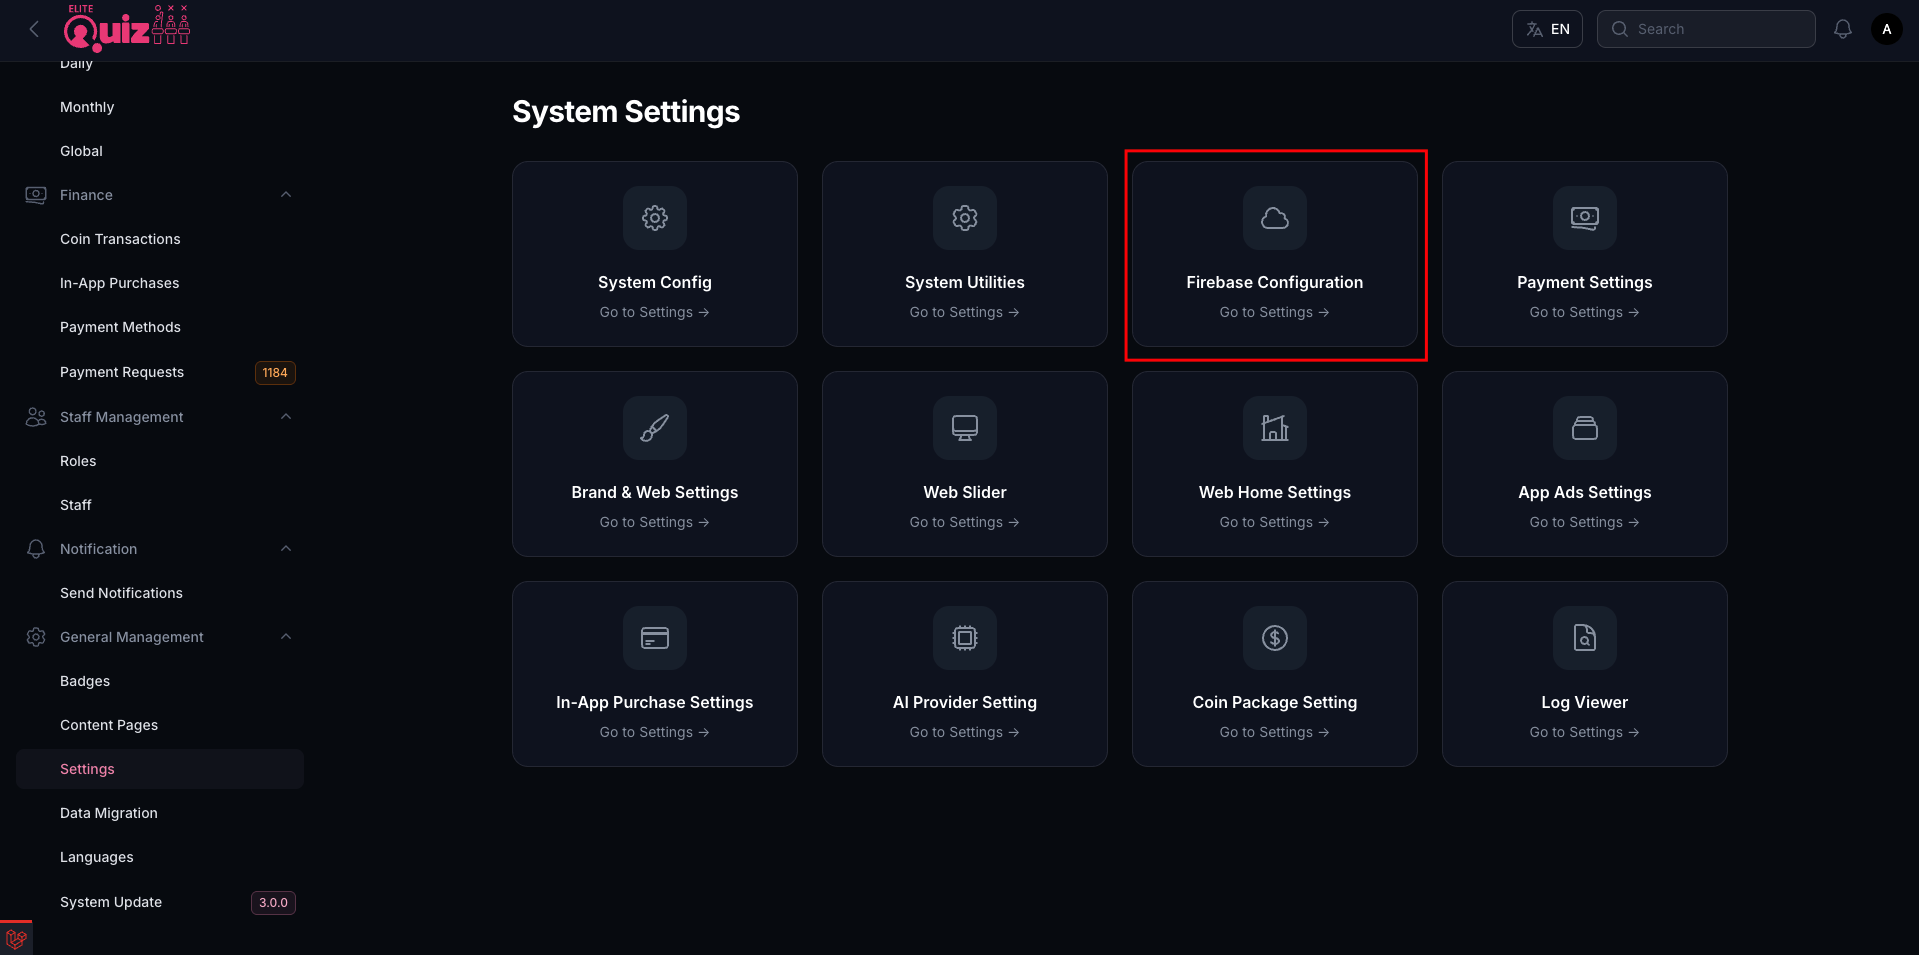
These credentials must match the ones you set in the admin panel. Otherwise, the Web App will not work properly:
-
Add your website domain to Authentication > Settings > Authorized domains. Enter only the domain name, without
http://,https://, orwww.(e.g.,elitequiz.wrteam.in). Login will not work on your live site without this step.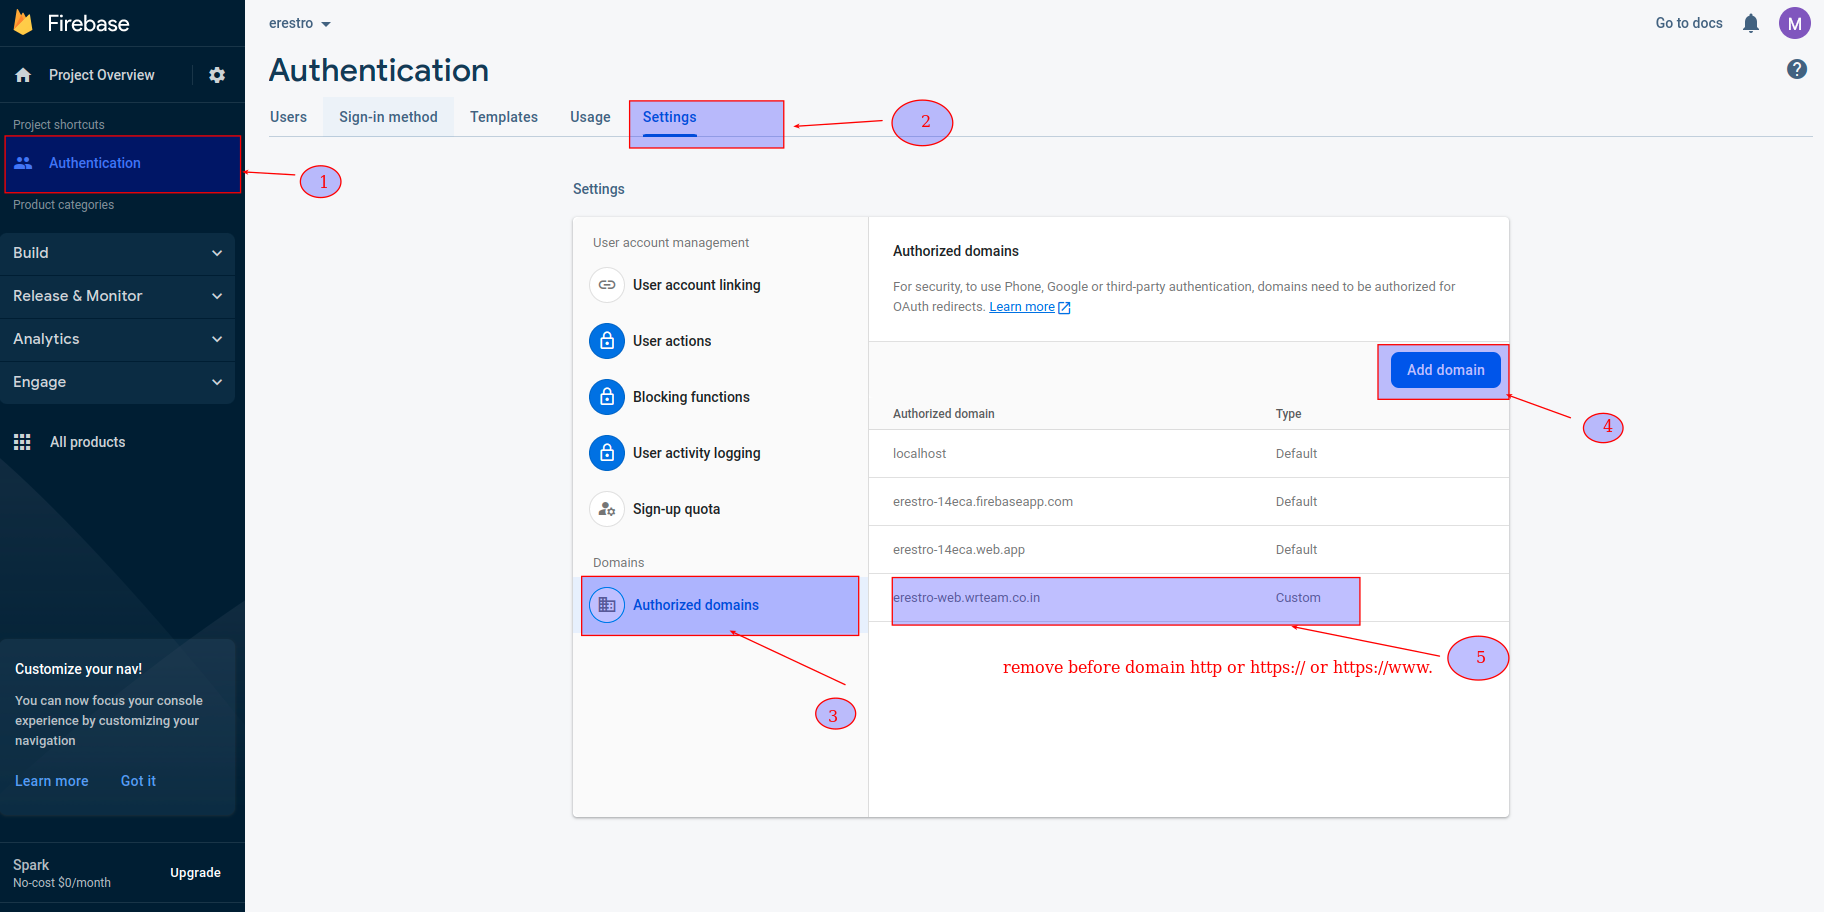
-
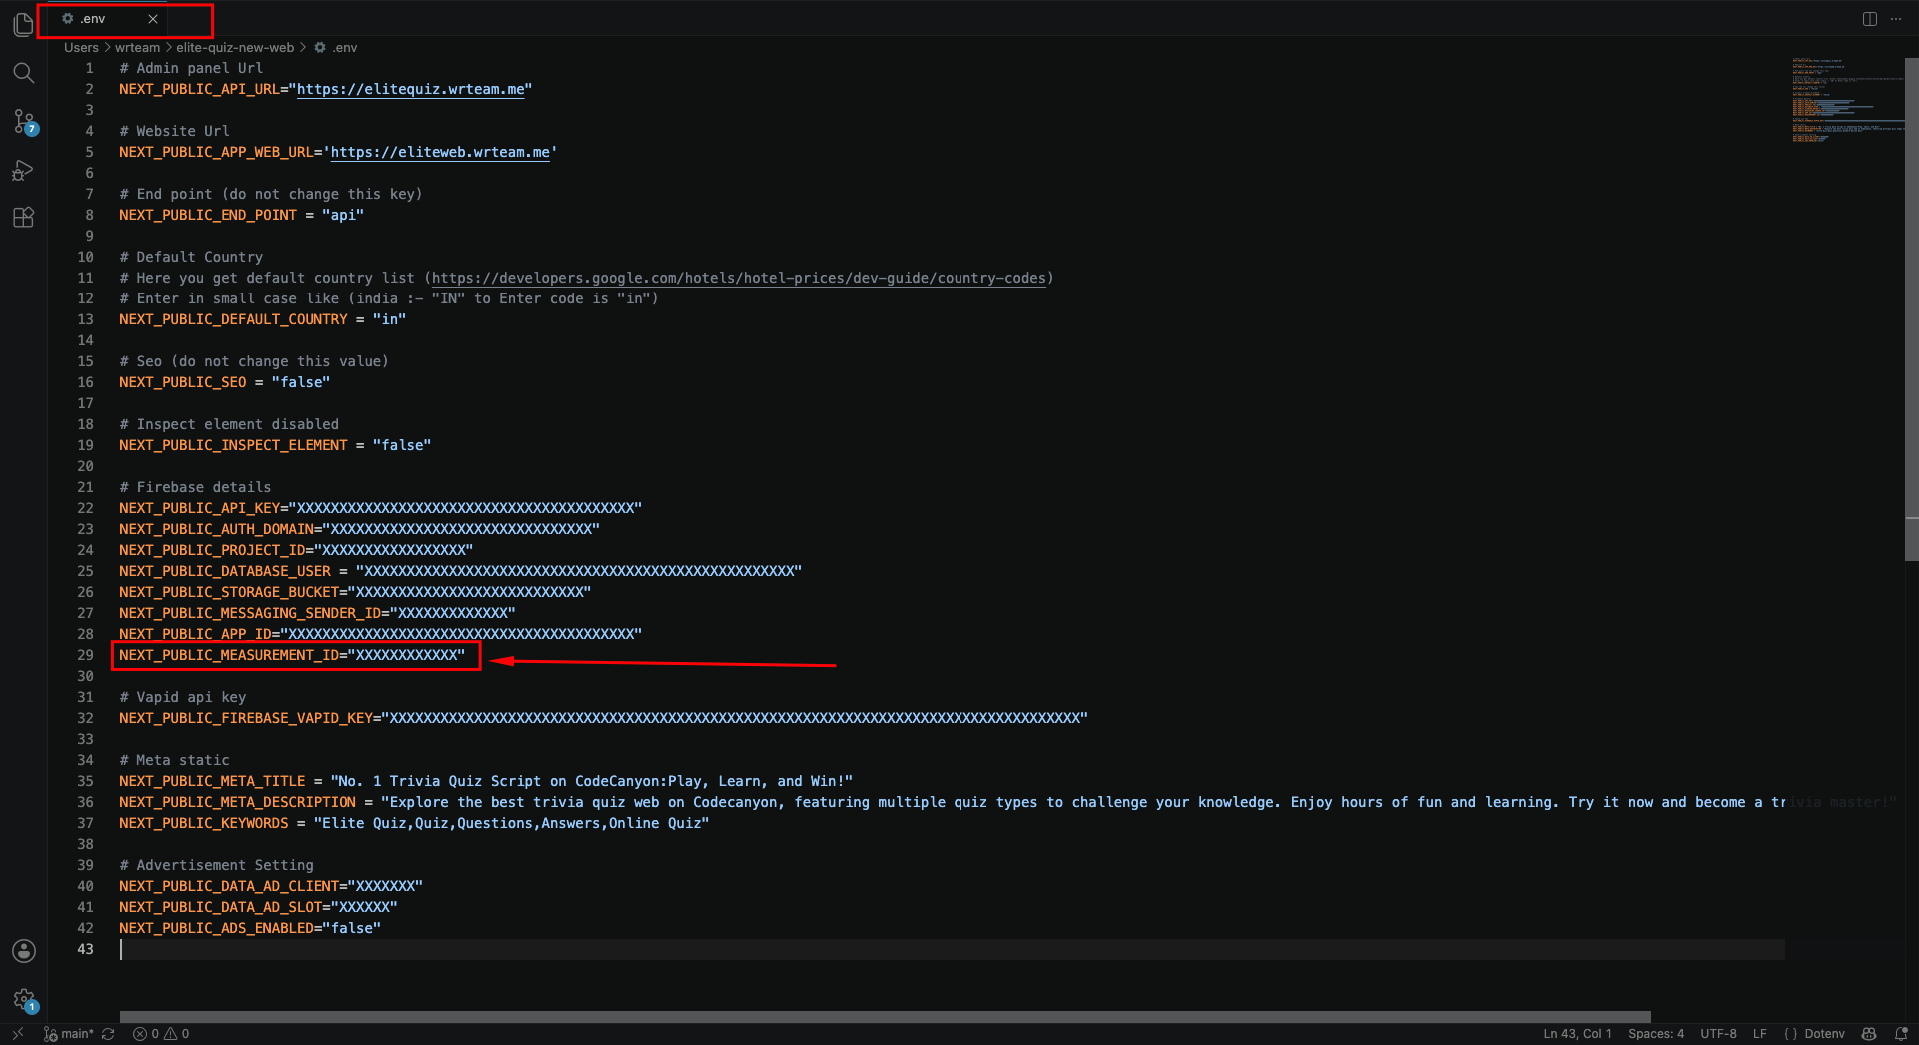
(Optional) Google Analytics: Copy the
measurementIdand paste it in the.envfile in the website code: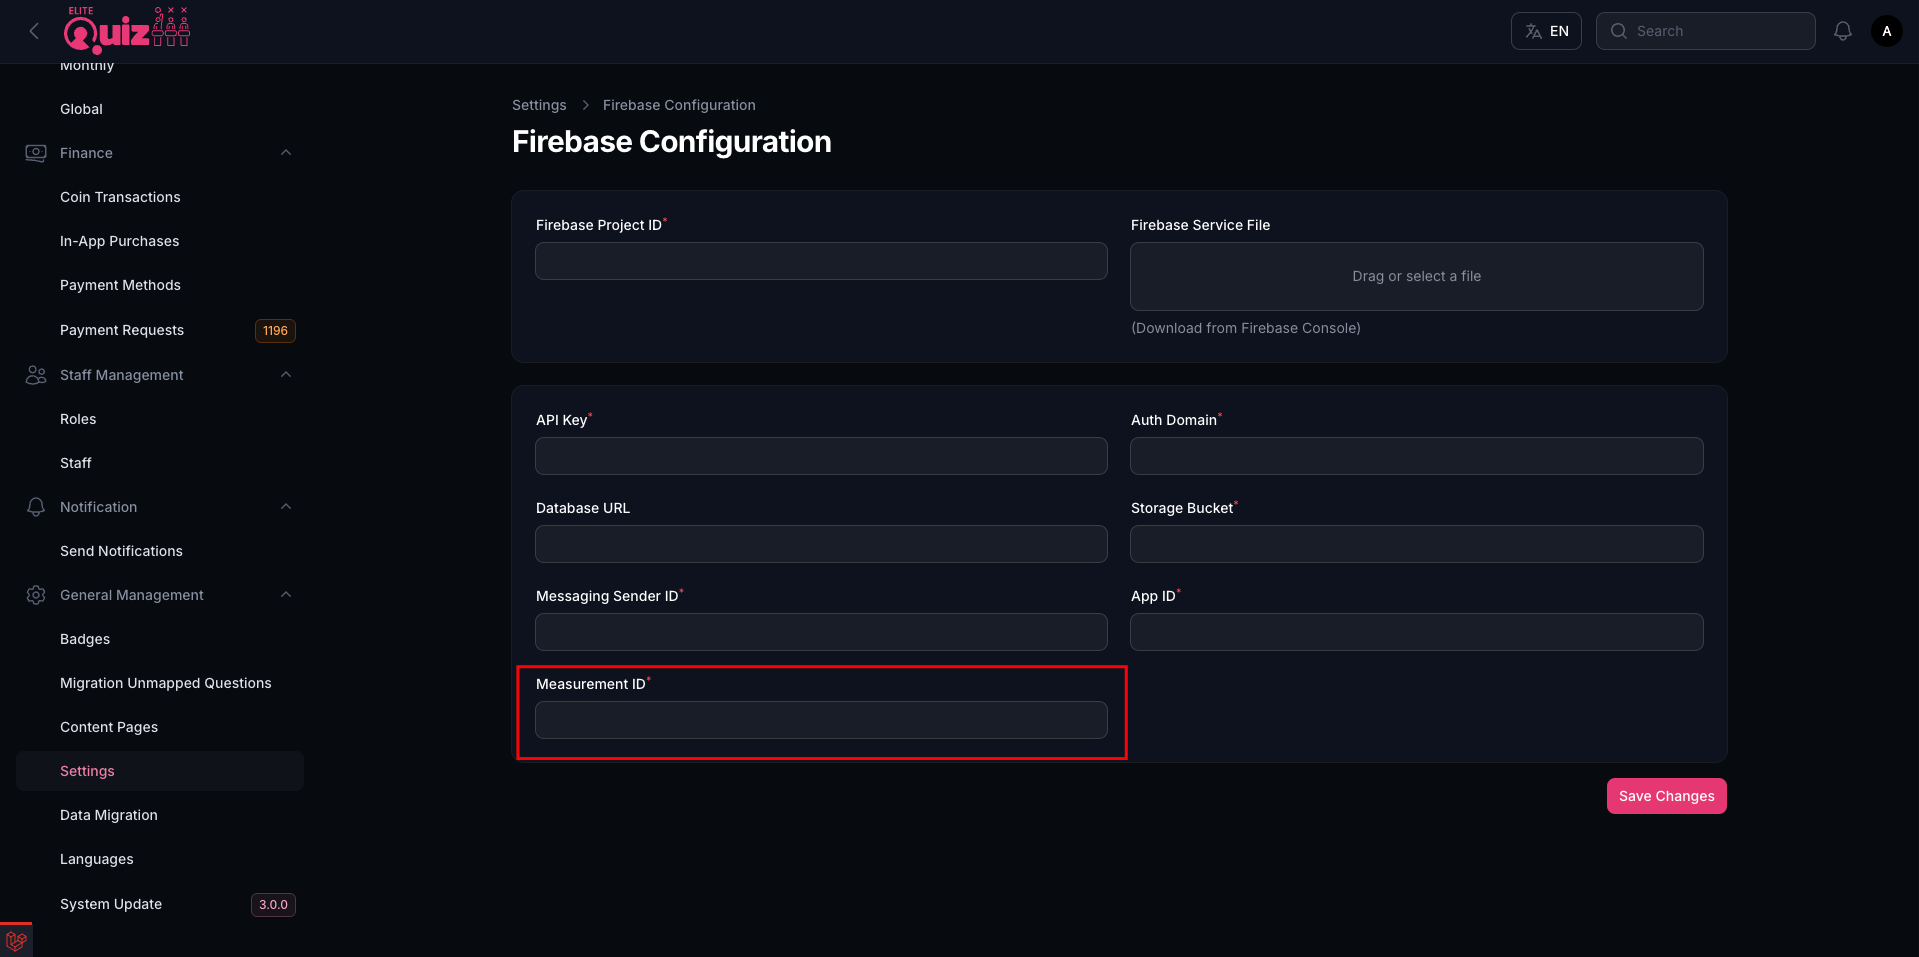
-
Log in to Google Analytics using the same account you used to create the Firebase project.
Step 3: Enable Authentication
Elite Quiz supports several ways for users to sign in. Enable them all now. You can hide any you don’t want later from the admin panel.
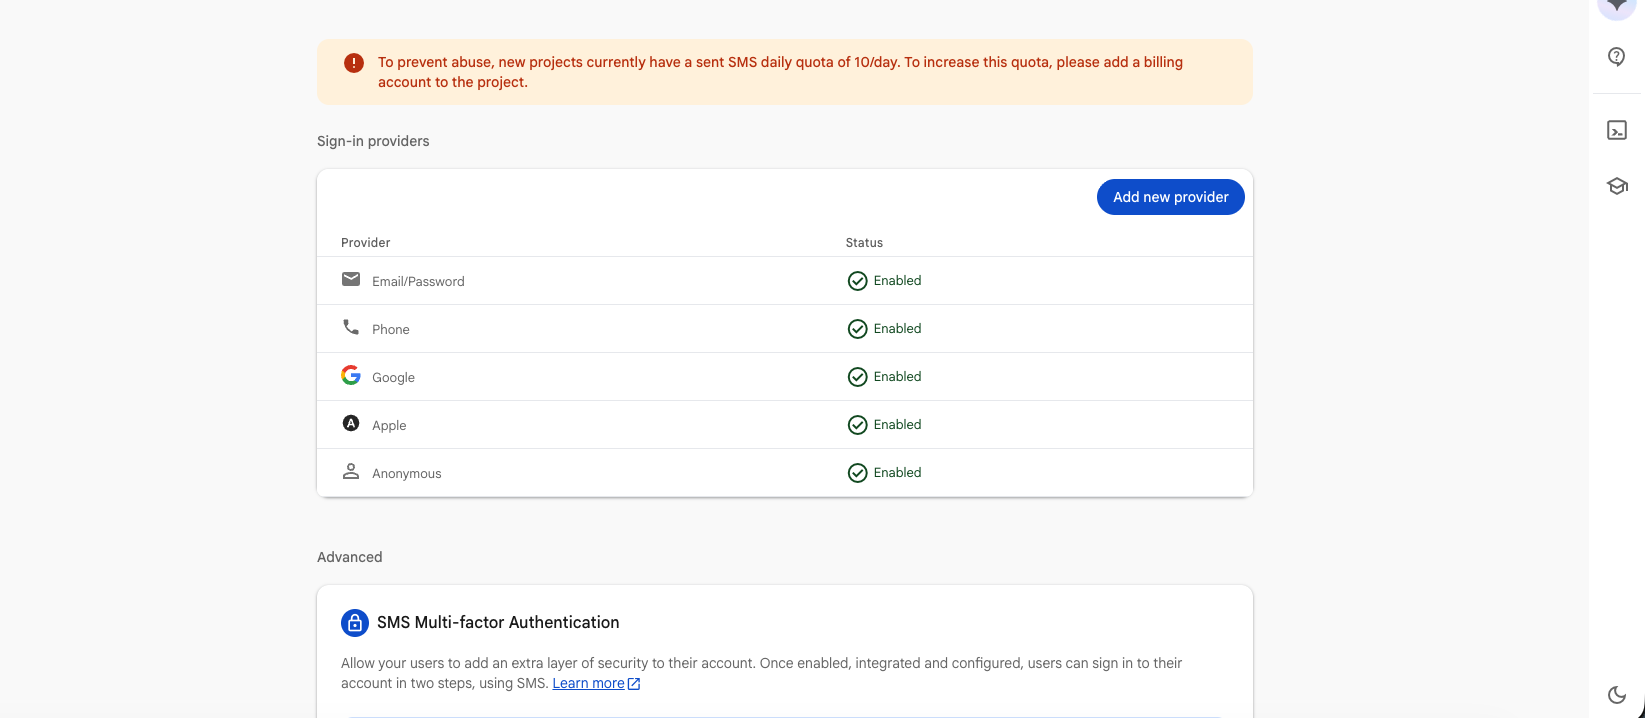
To use Phone/OTP Login, your Firebase project must be on the Blaze (pay-as-you-go) plan. Without a billing account, Firebase limits new projects to 10 SMS per day, so most users won't receive their OTP.
-
In your Firebase project, click Authentication in the left menu.
-
Go to the Sign-in method tab.
-
Click Add new provider and enable each of these providers:
- Email/Password
- Phone
- Apple
- Anonymous: required for Guest mode, which lets users play without creating an account
When you're done, all five providers should show Enabled:
 Guest mode needs Anonymous sign-in
Since v3.0.2, Elite Quiz supports Guest mode on the Mobile App and the Web App. If Anonymous is not enabled, guest login will fail.
-
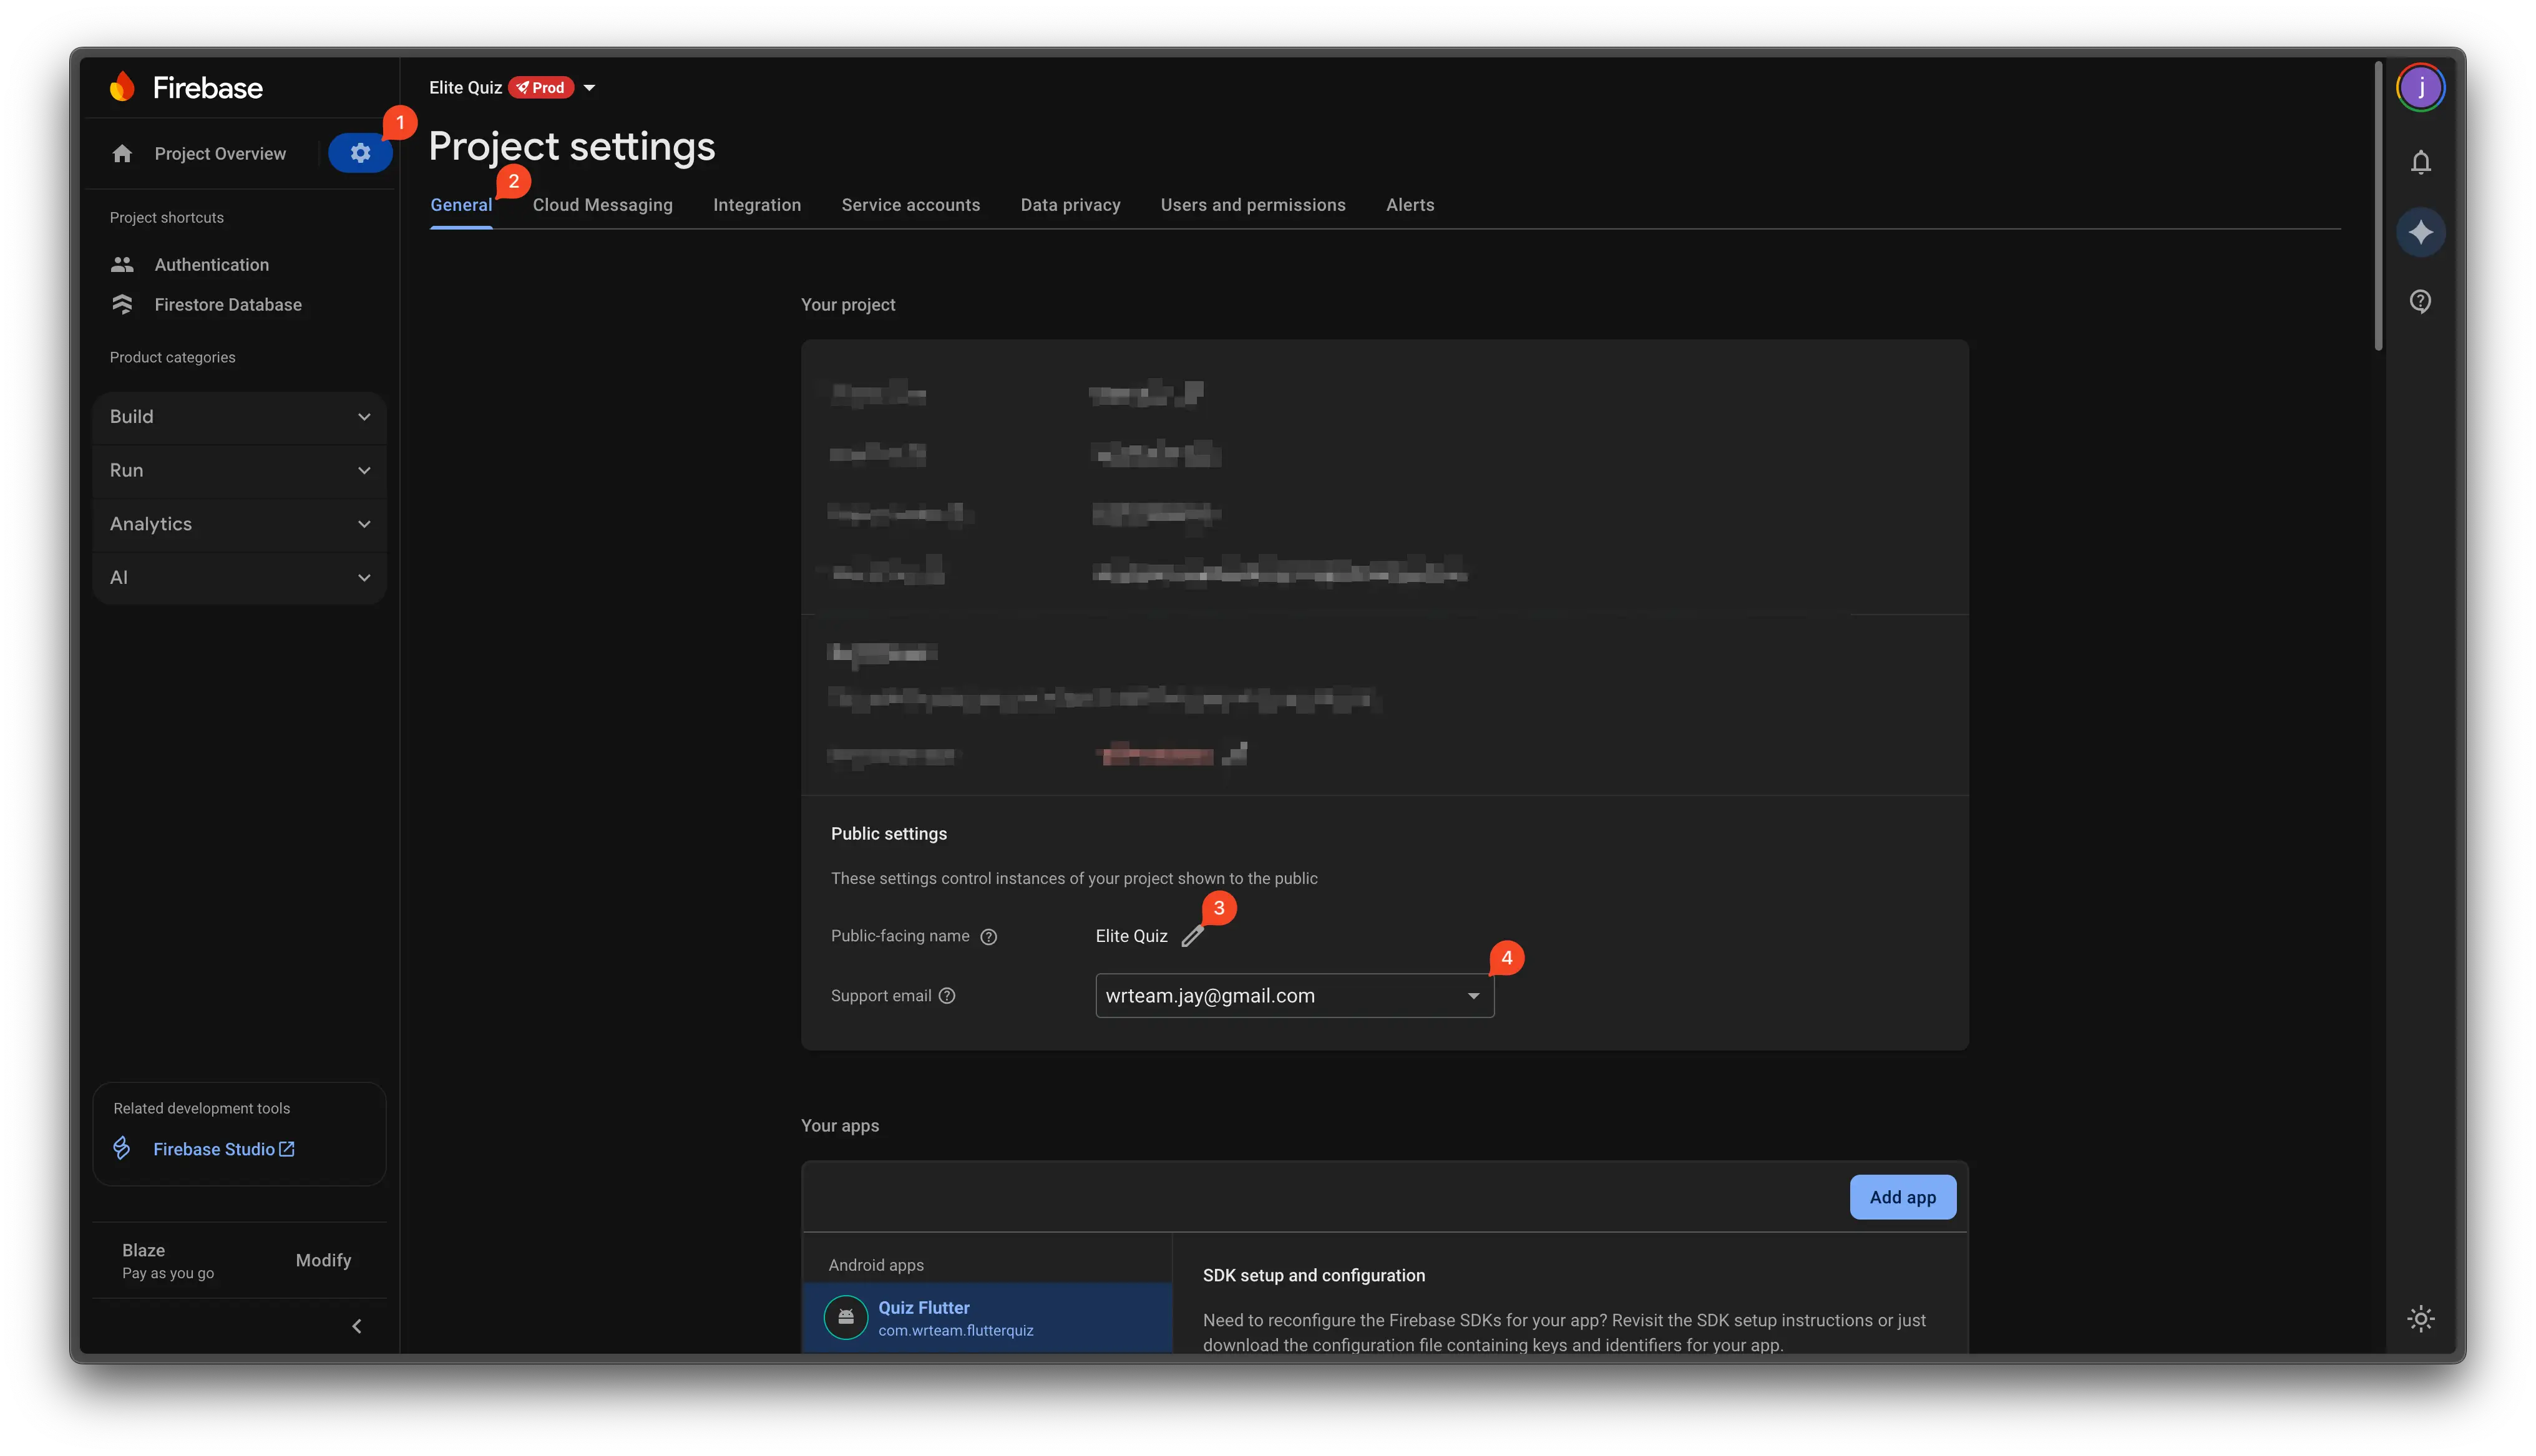
Update Public Settings: Go to Project Settings and configure your Public Settings. The Public-facing name appears in verification emails sent to users, so they'll see your Quiz App name instead of your Firebase project name.
In the Elite Quiz admin panel, go to General Management > Settings > System Configurations. In the Auth Configuration section, turn off any login methods you don’t want users to see. Changes apply to both the Mobile App and the Web App.

Step 4: Set Up Realtime Database
Elite Quiz uses the Firebase Realtime Database for 1v1 Battle and Group Battle. Without it, battles will not work on the Mobile App or the Web App.
Since v3.0.0, battles use the Realtime Database instead of Firestore. You don't need to create a Firestore database or Firestore indexes for v3.
-
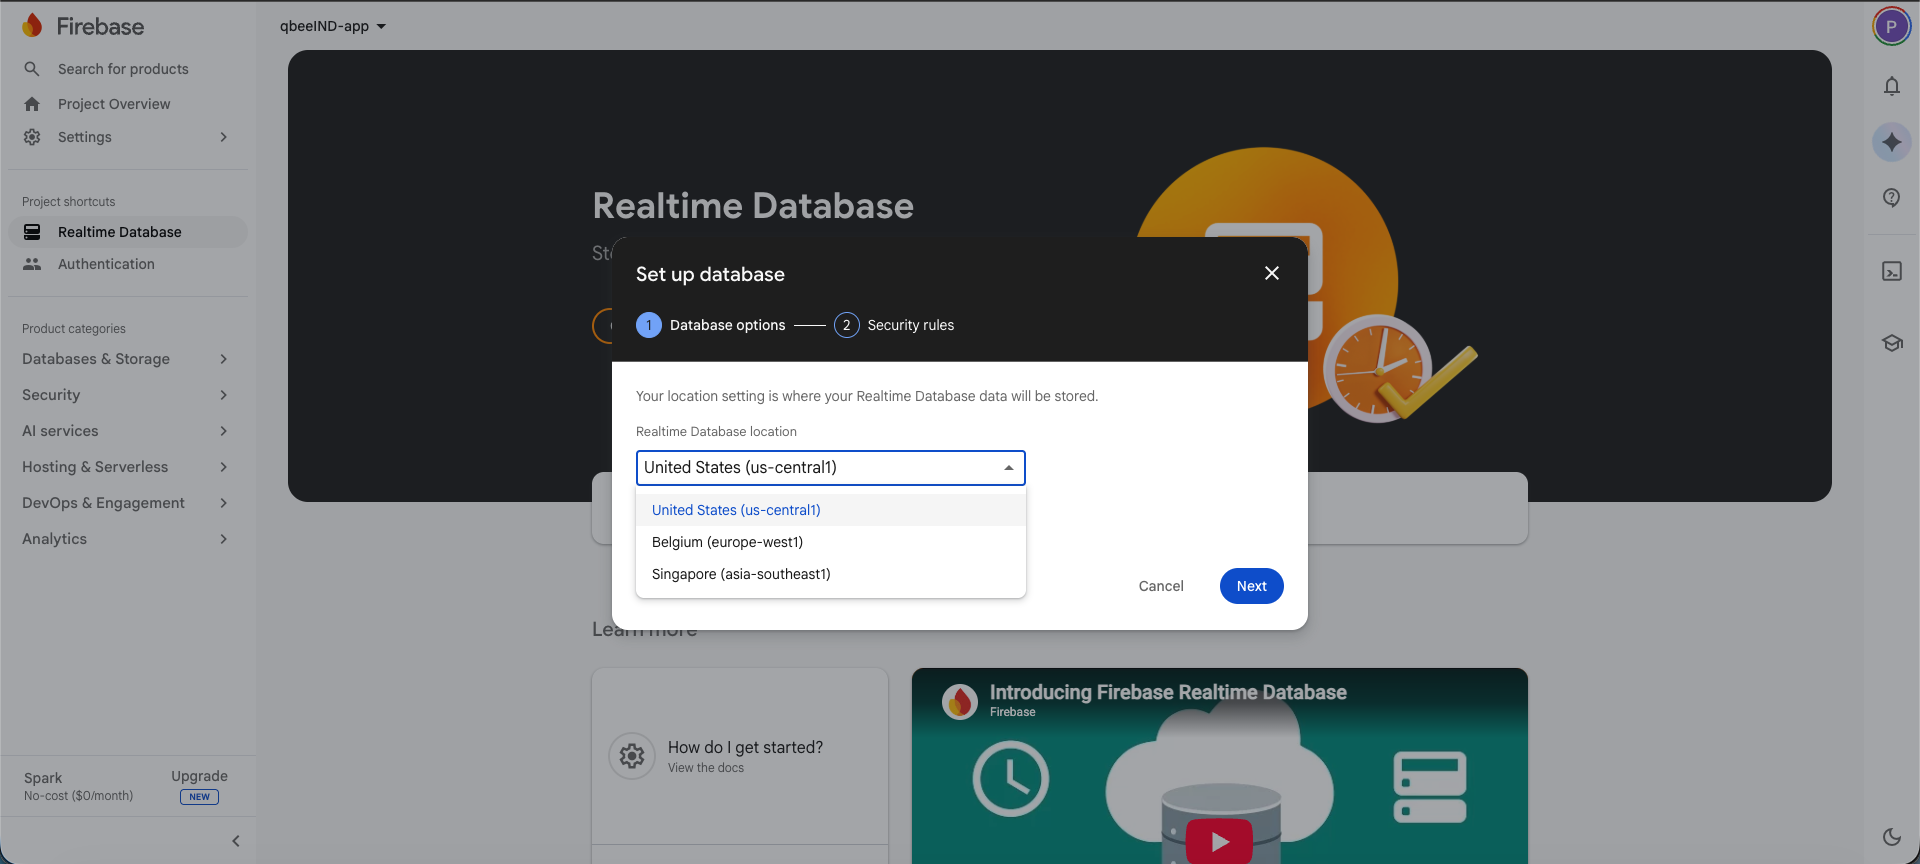
In Firebase, click Build in the left menu, then select Realtime Database (it may also be listed under Databases & Storage).
-
Click Create Database, choose the location closest to your users, and click Next to finish.
-
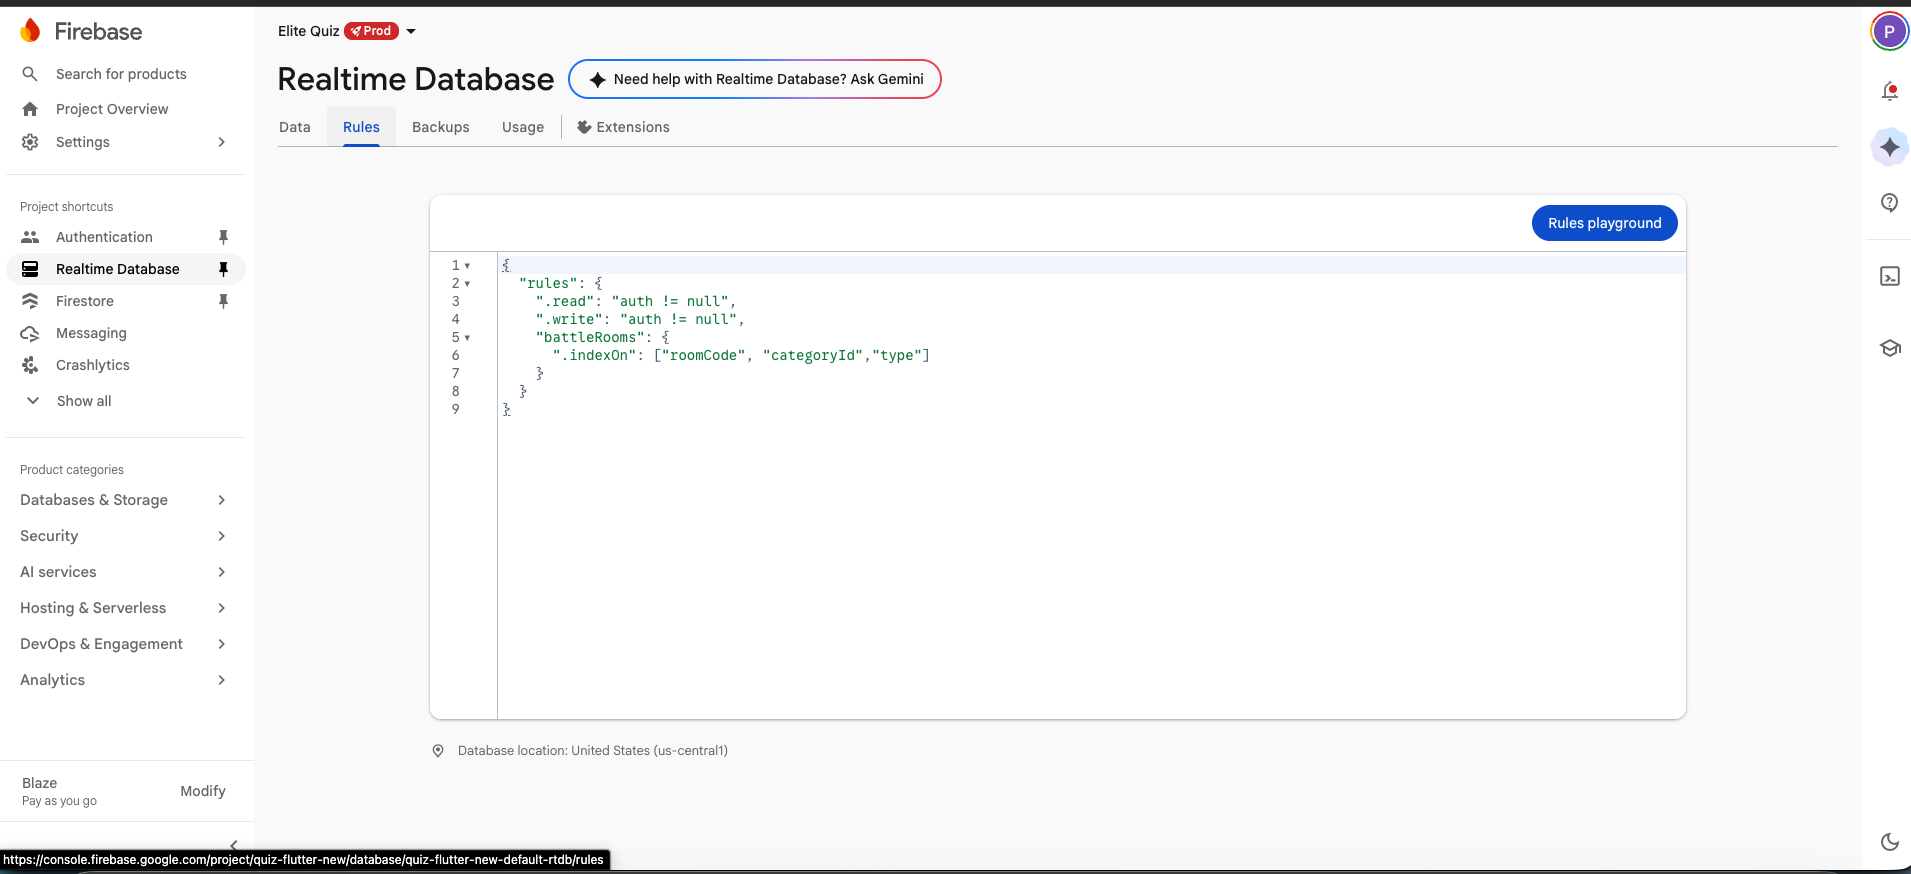
Set Realtime Database Rules:
- Go to the Rules tab.
- Delete any existing rules, paste in the following, and click Publish:
{
  "rules": {
    ".read": "auth != null",
    ".write": "auth != null",
    "battleRooms": {
      ".indexOn": ["roomCode", "categoryId", "type"]
    }
  }
}
Checklist
Before moving on, make sure that:
- Your Firebase project is created.
- Mobile: Android and iOS apps are added, and their config files and SHA-1 fingerprint are set.
- Web: The web app is registered, its config is in Admin Panel > Web Settings > Settings, and your domain is authorized.
- Email/Password, Phone, Google, Apple, and Anonymous sign-in are enabled (Blaze plan for Phone).
- The Realtime Database is created and its rules are published.
You’re done with the Firebase setup! 🎉