Firebase Setup
Overview
Firebase is essential for eBroker app's authentication and notification features. This guide will walk you through setting up Firebase for your app.
Create Firebase Project
- Visit Firebase Console
- Sign in with your Google account
- Click on "Add project" button
- Enter a project name and choose a suitable project ID
- Select your country/region and click "Create Project"
- Tap on the Flutter icon to add Flutter to your Firebase project
- Open your IDE (VS Code, Android Studio, etc.) and run these commands in the terminal:
flutter pub add firebase_core
flutter pub add firebase_auth
- Copy and paste both commands one by one like this:

Important: Make sure to change your package name first before setting up Firebase!
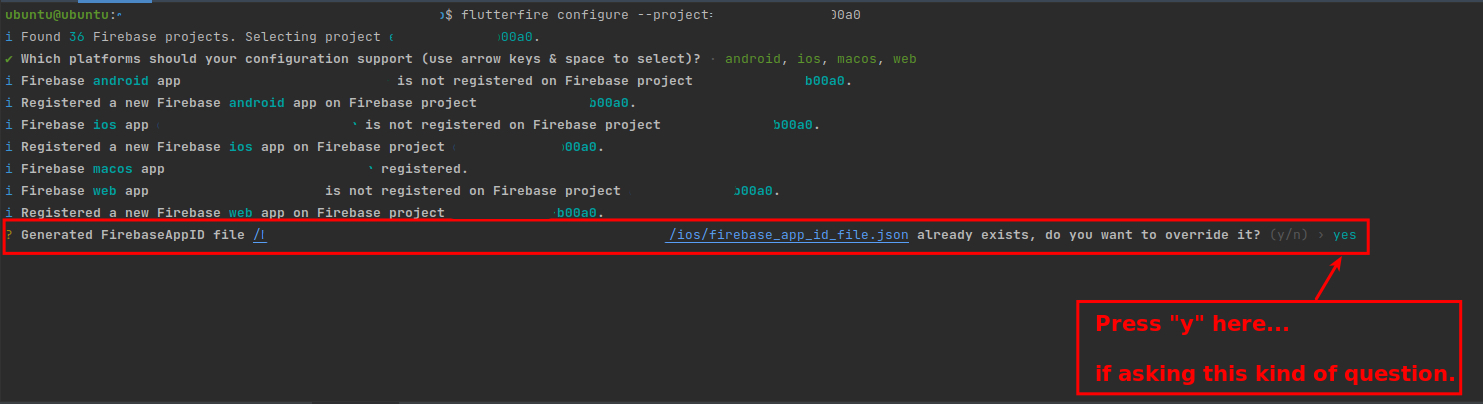
- Select Android, iOS, and Web platforms when prompted
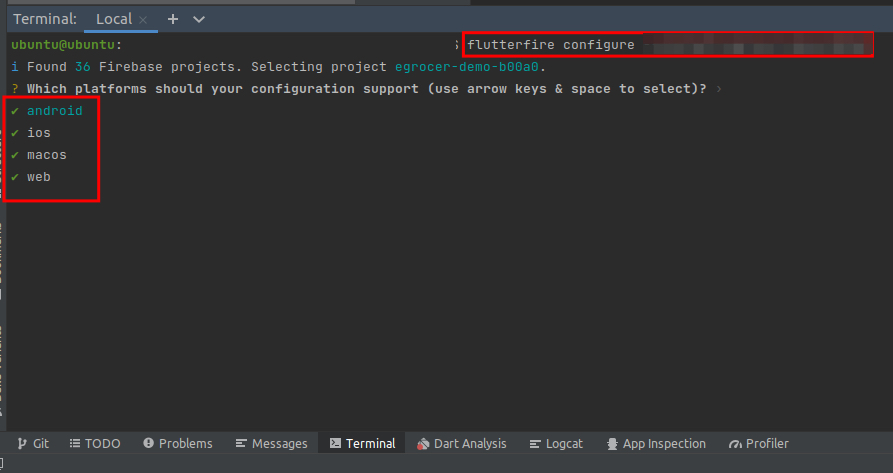
- If asked to override existing Firebase settings, type "yes" and press Enter
Enable Phone Authentication
Phone authentication is critical for the app's login functionality. Follow these steps:
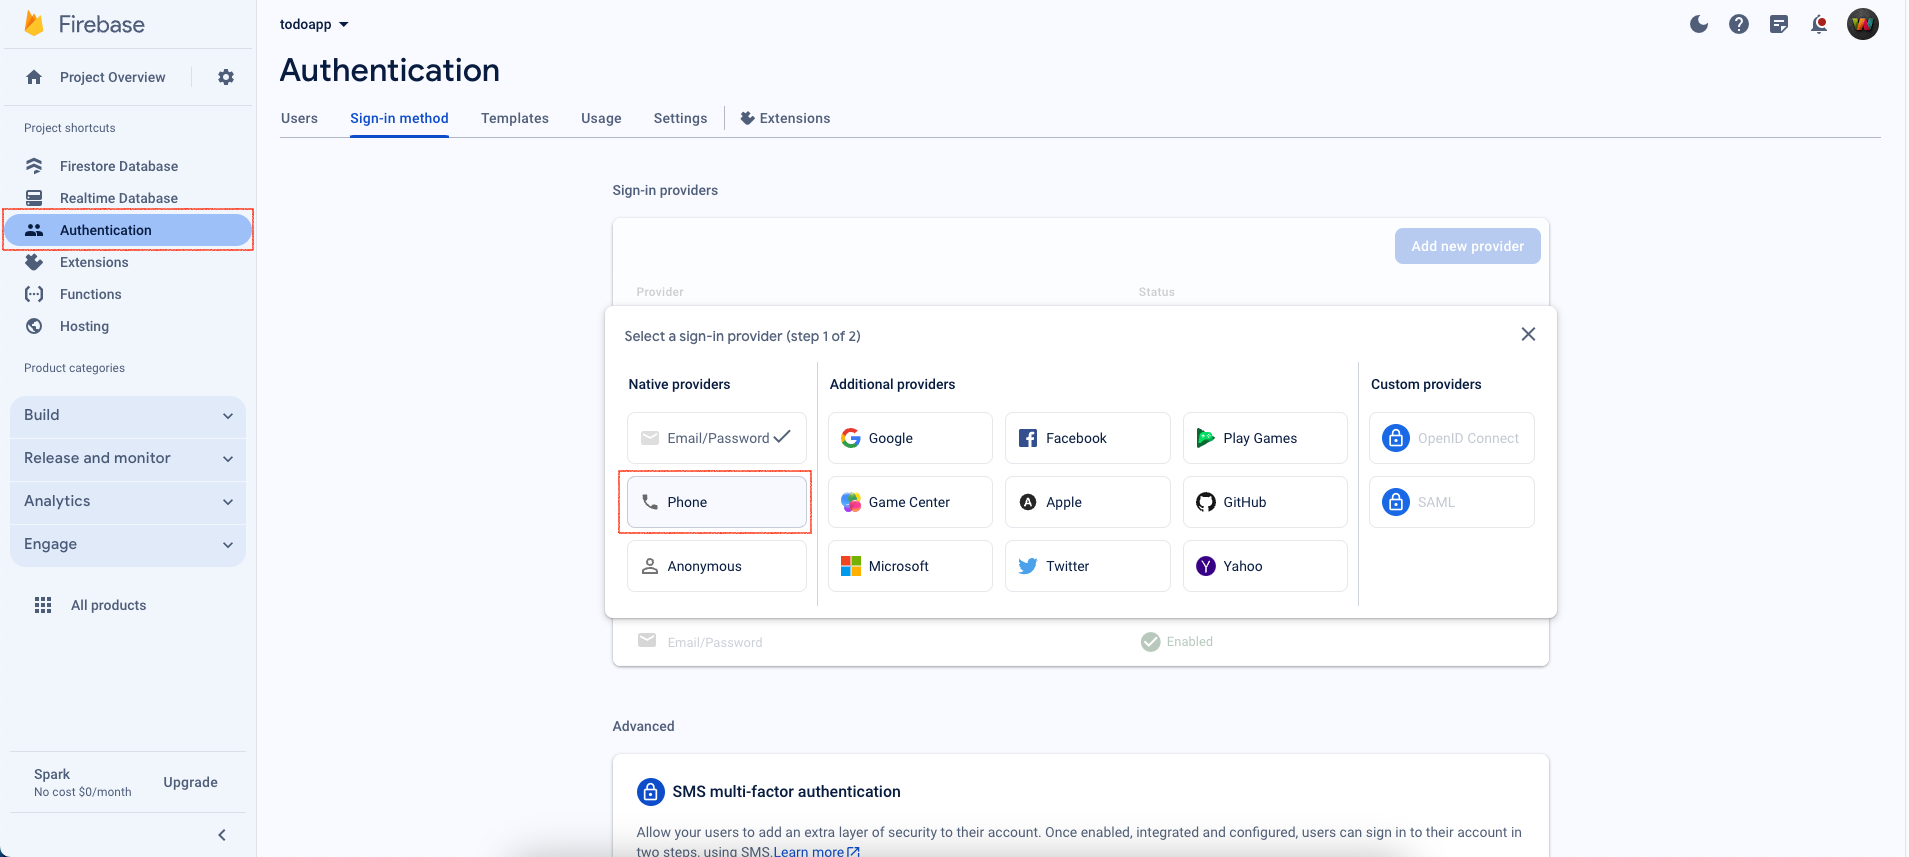
- In the Firebase console, go to the Authentication section
- Turn on phone login as shown below:
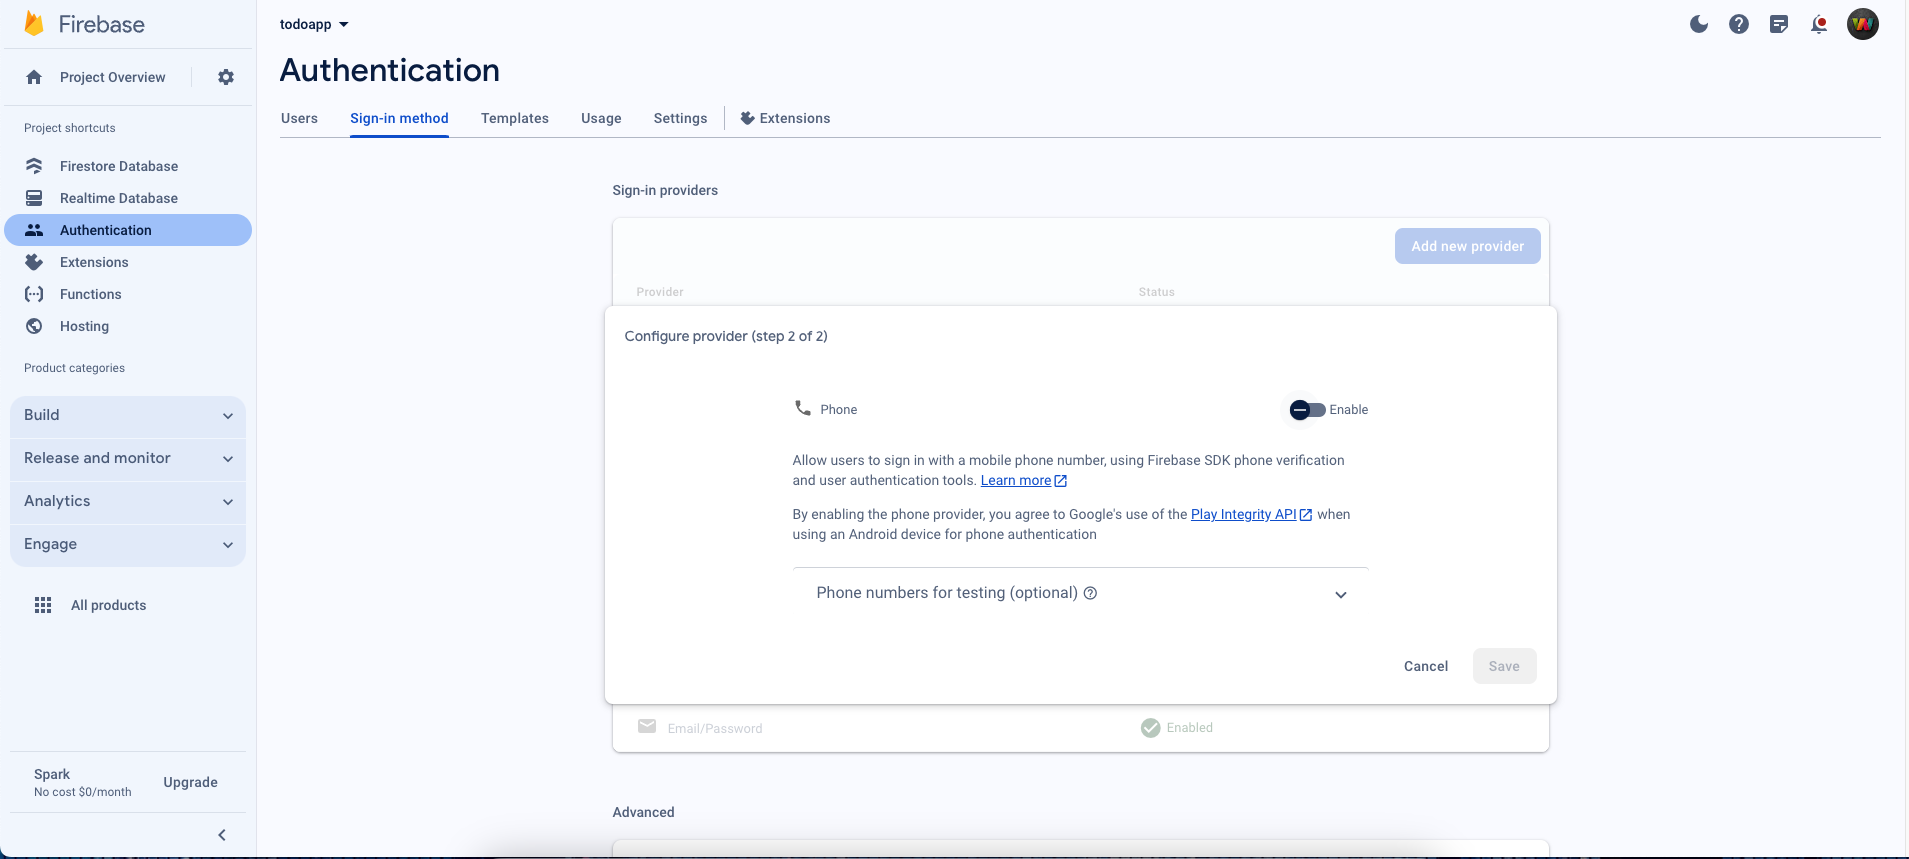
- Enable Firebase phone auth by tapping the switch button:
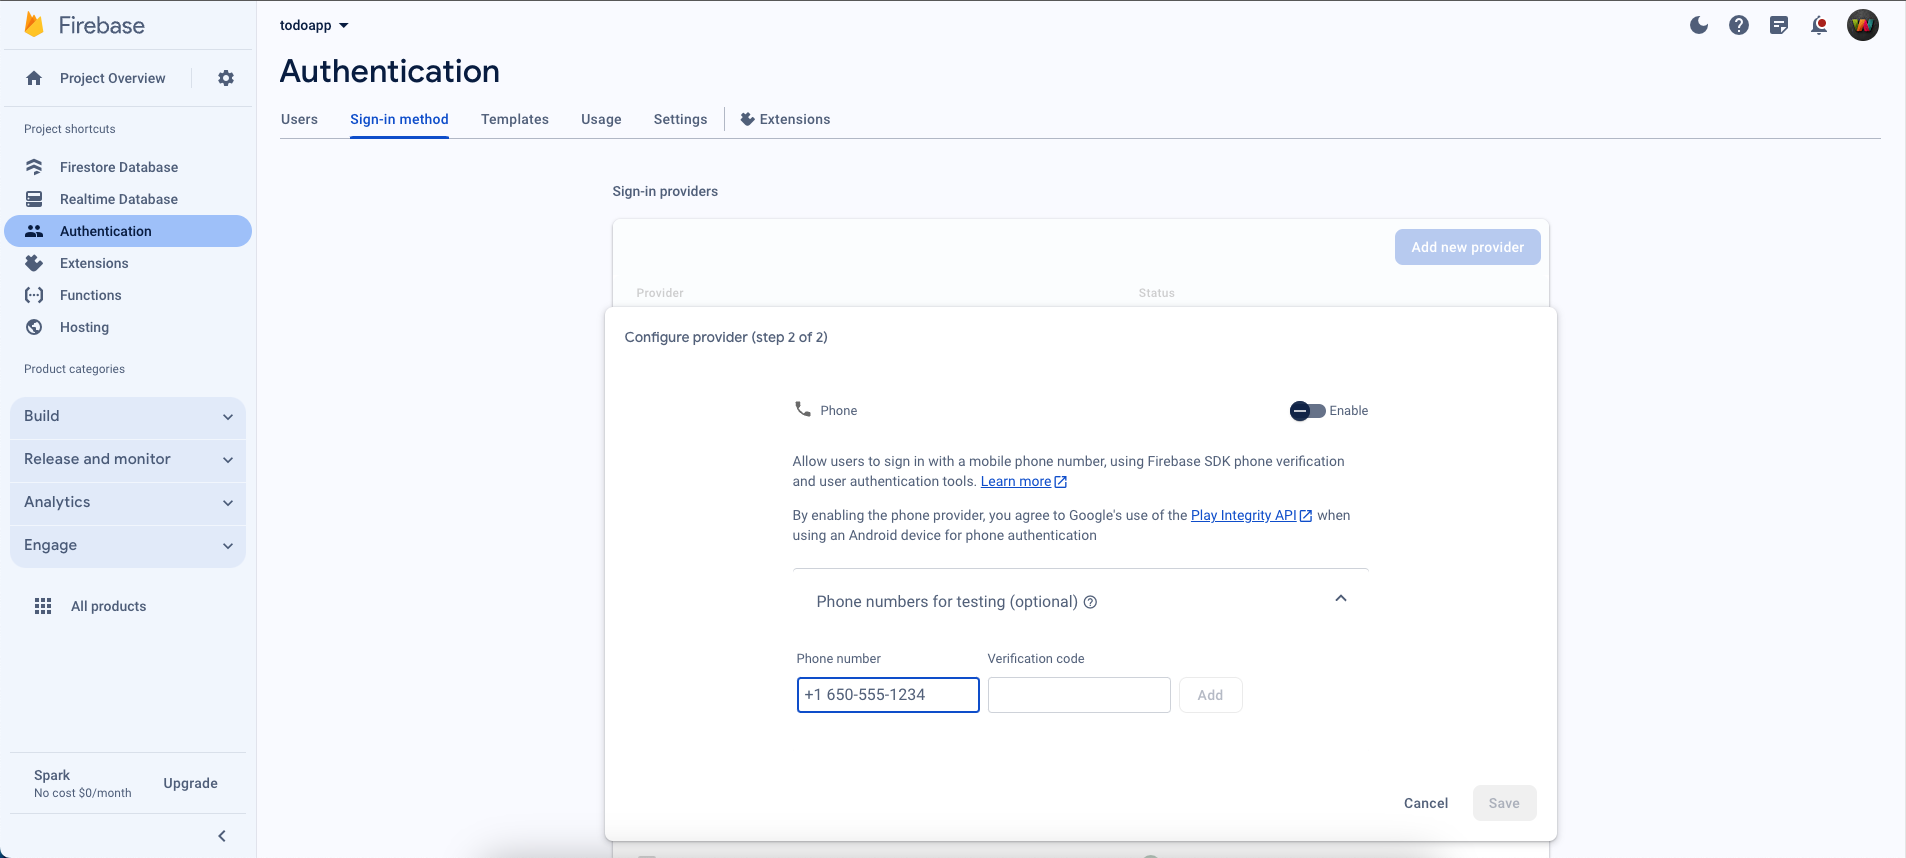
- For testing purposes, add Firebase testing phone numbers to avoid temporary blocks
Create Keystore for App Signing
To release your Android app, you need to create a keystore file (.jks) and configure the key.properties file.
Generate JKS File
- Open your terminal in the project location and run the following command:
keytool -genkey -v -keystore ~/upload-keystore.jks -keyalg RSA -keysize 2048 -validity 10000 -alias upload
-
You'll be prompted to enter the following information:
- Keystore password: Create a strong password and remember it
- Re-enter password: Confirm your password
- First and Last name: Enter your name or company name
- Organizational unit: Enter your department/unit (optional)
- Organization: Enter your company name (optional)
- City or Locality: Enter your city
- State or Province: Enter your state
- Country Code: Enter your two-letter country code (e.g., US, IN, UK)
-
After entering all information, confirm by typing "yes"
-
The keystore file will be created in your home directory (
~/upload-keystore.jks) -
Move the keystore file to your project's
android/appdirectory:
mv ~/upload-keystore.jks android/app/
Create key.properties File
-
Navigate to the
androidfolder in your project -
Create a new file named
key.properties -
Add the following content to the file (replace with your actual values):
storePassword=your_keystore_password
keyPassword=your_key_password
keyAlias=upload
storeFile=upload-keystore.jks
Important Notes:
- Keep your keystore file and passwords secure and never commit them to version control
- Add
key.propertiesto your.gitignorefile- Make a backup of your keystore file - if you lose it, you cannot update your app on Play Store
- The
keyPasswordis typically the same asstorePasswordunless you specified different passwords
Resolving "missing-client-identifier" Issues
When using real phone numbers, you might encounter a "missing-client-identifier" error. To resolve:
- Open your terminal in the project location and run:
cd android
./gradlew signinReport
- Copy the SHA1 and SHA256 keys from the result:

Important: You will see SHA keys for both debug and release variants in the output. You need to add BOTH sets of keys to Firebase for login to work properly in both development and production environments.
- Add these keys to your Firebase project settings:
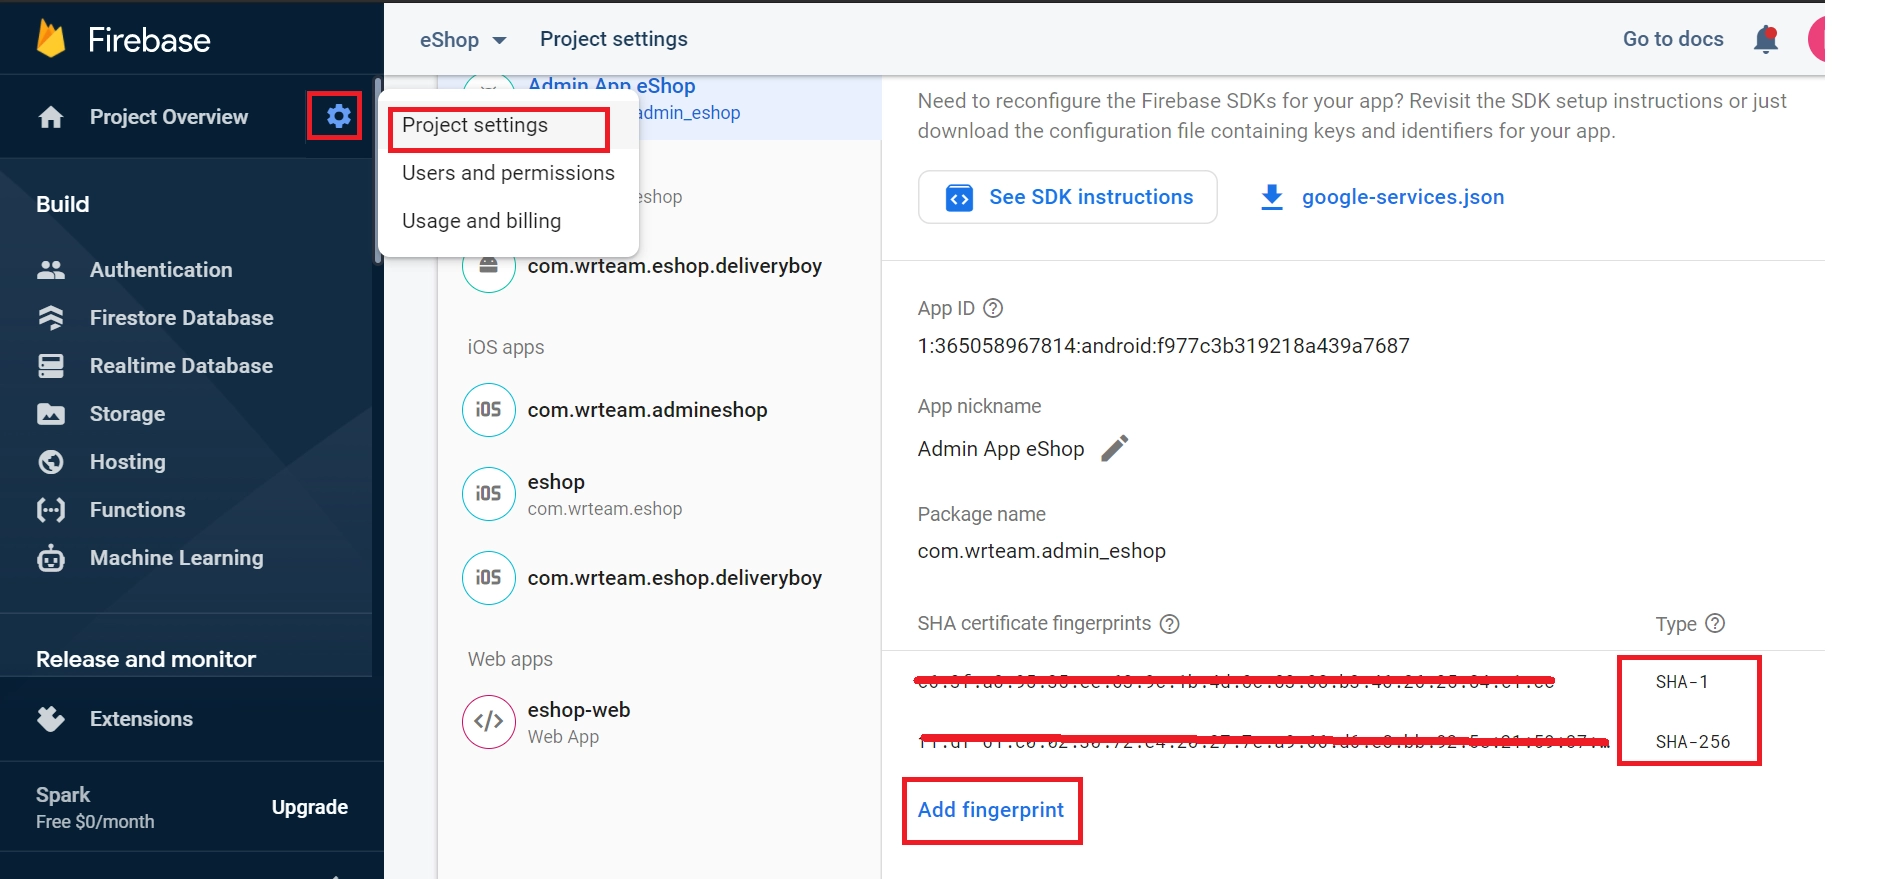
- Make sure to add:
- Debug SHA-1 and SHA-256 (for testing during development)
- Release SHA-1 and SHA-256 (for production app)
iOS Notification Setup
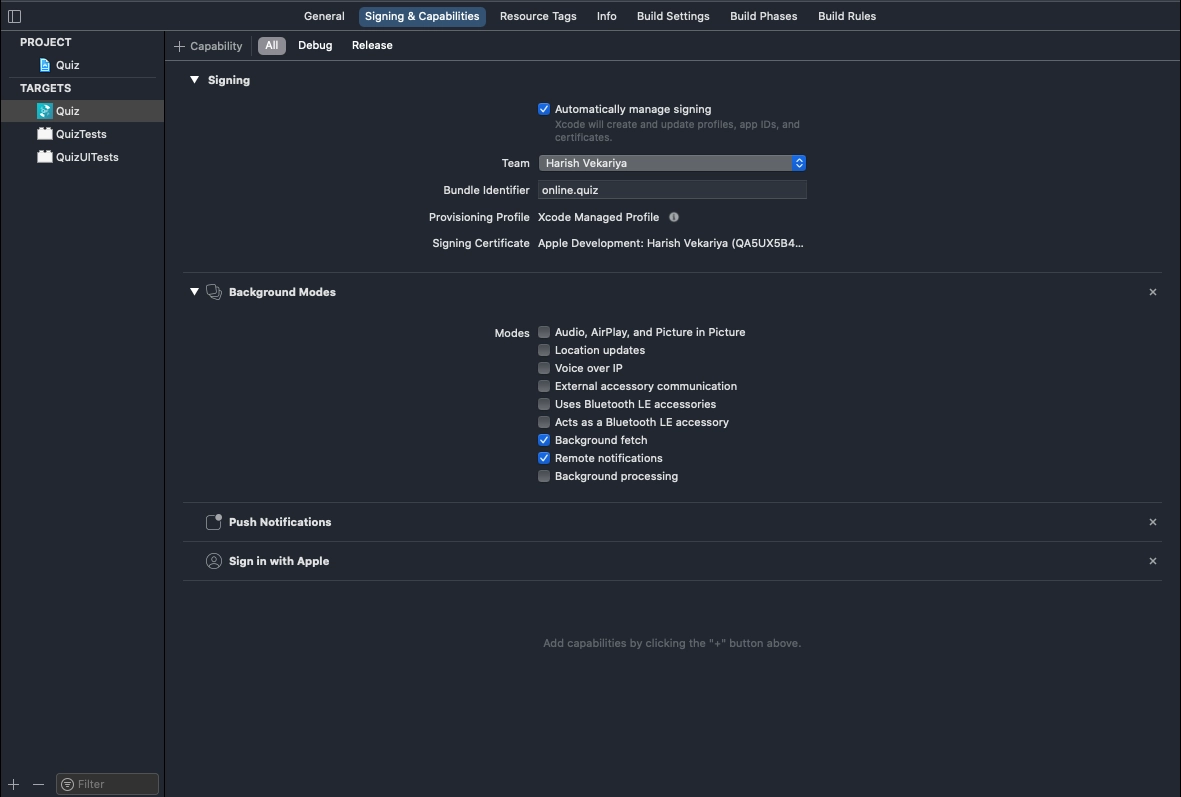
For iOS devices, complete these additional steps:
- In Xcode, open your project
- Select the project icon representing your app
- Select your app's target
- Navigate to the Capabilities tab
- Enable Push Notifications
- Check Remote Notifications and Background Fetch from Enabling Background Modes
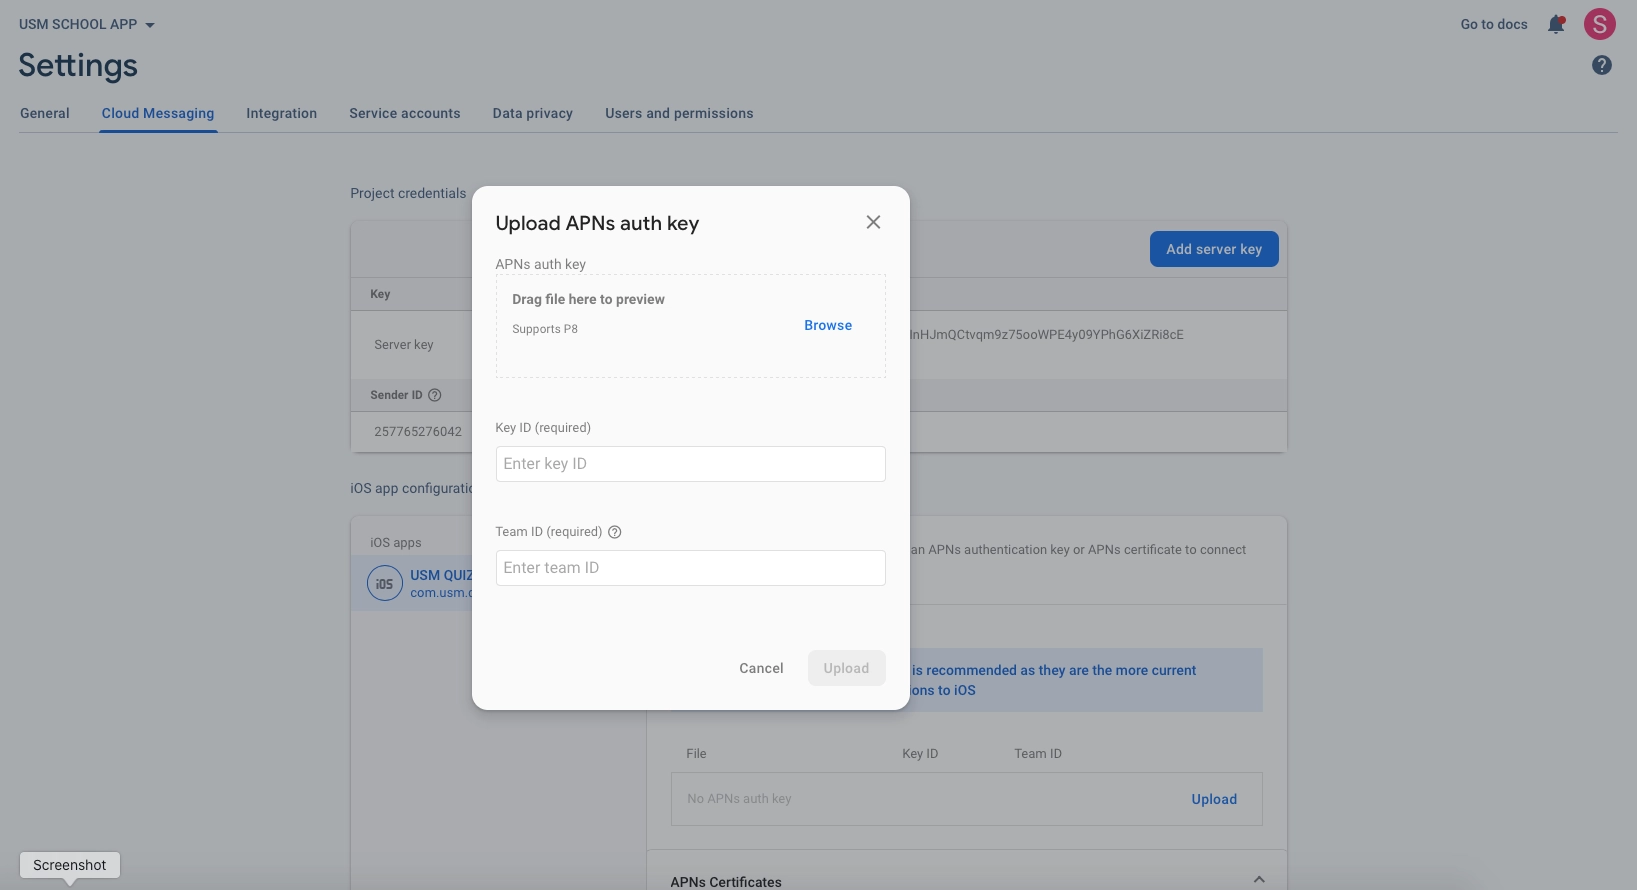
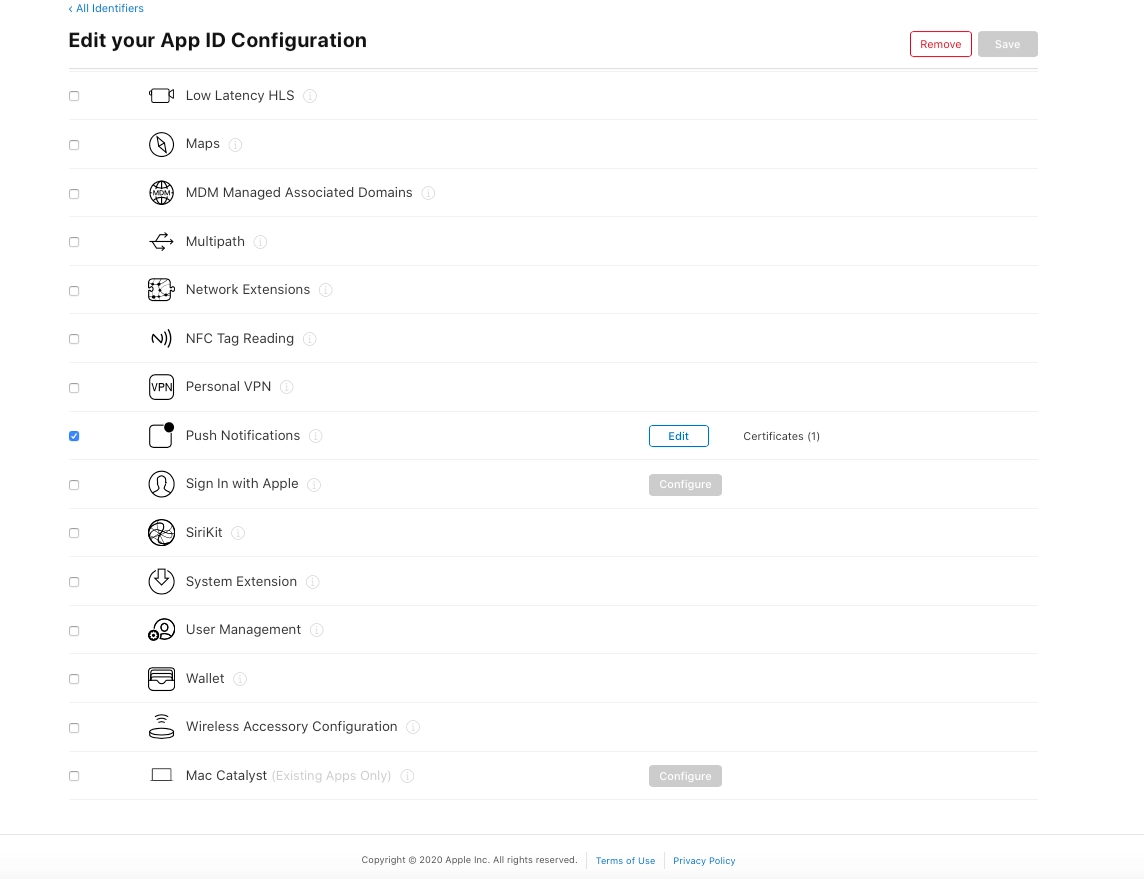
Apple's Push Notification service (APNs) supports two connection types. For token-based (.p8):
- Log in to the Apple Developer Portal
- Navigate to Certificates, IDs & Profiles > Identifiers > App IDs
- Check Capabilities > Push Notifications
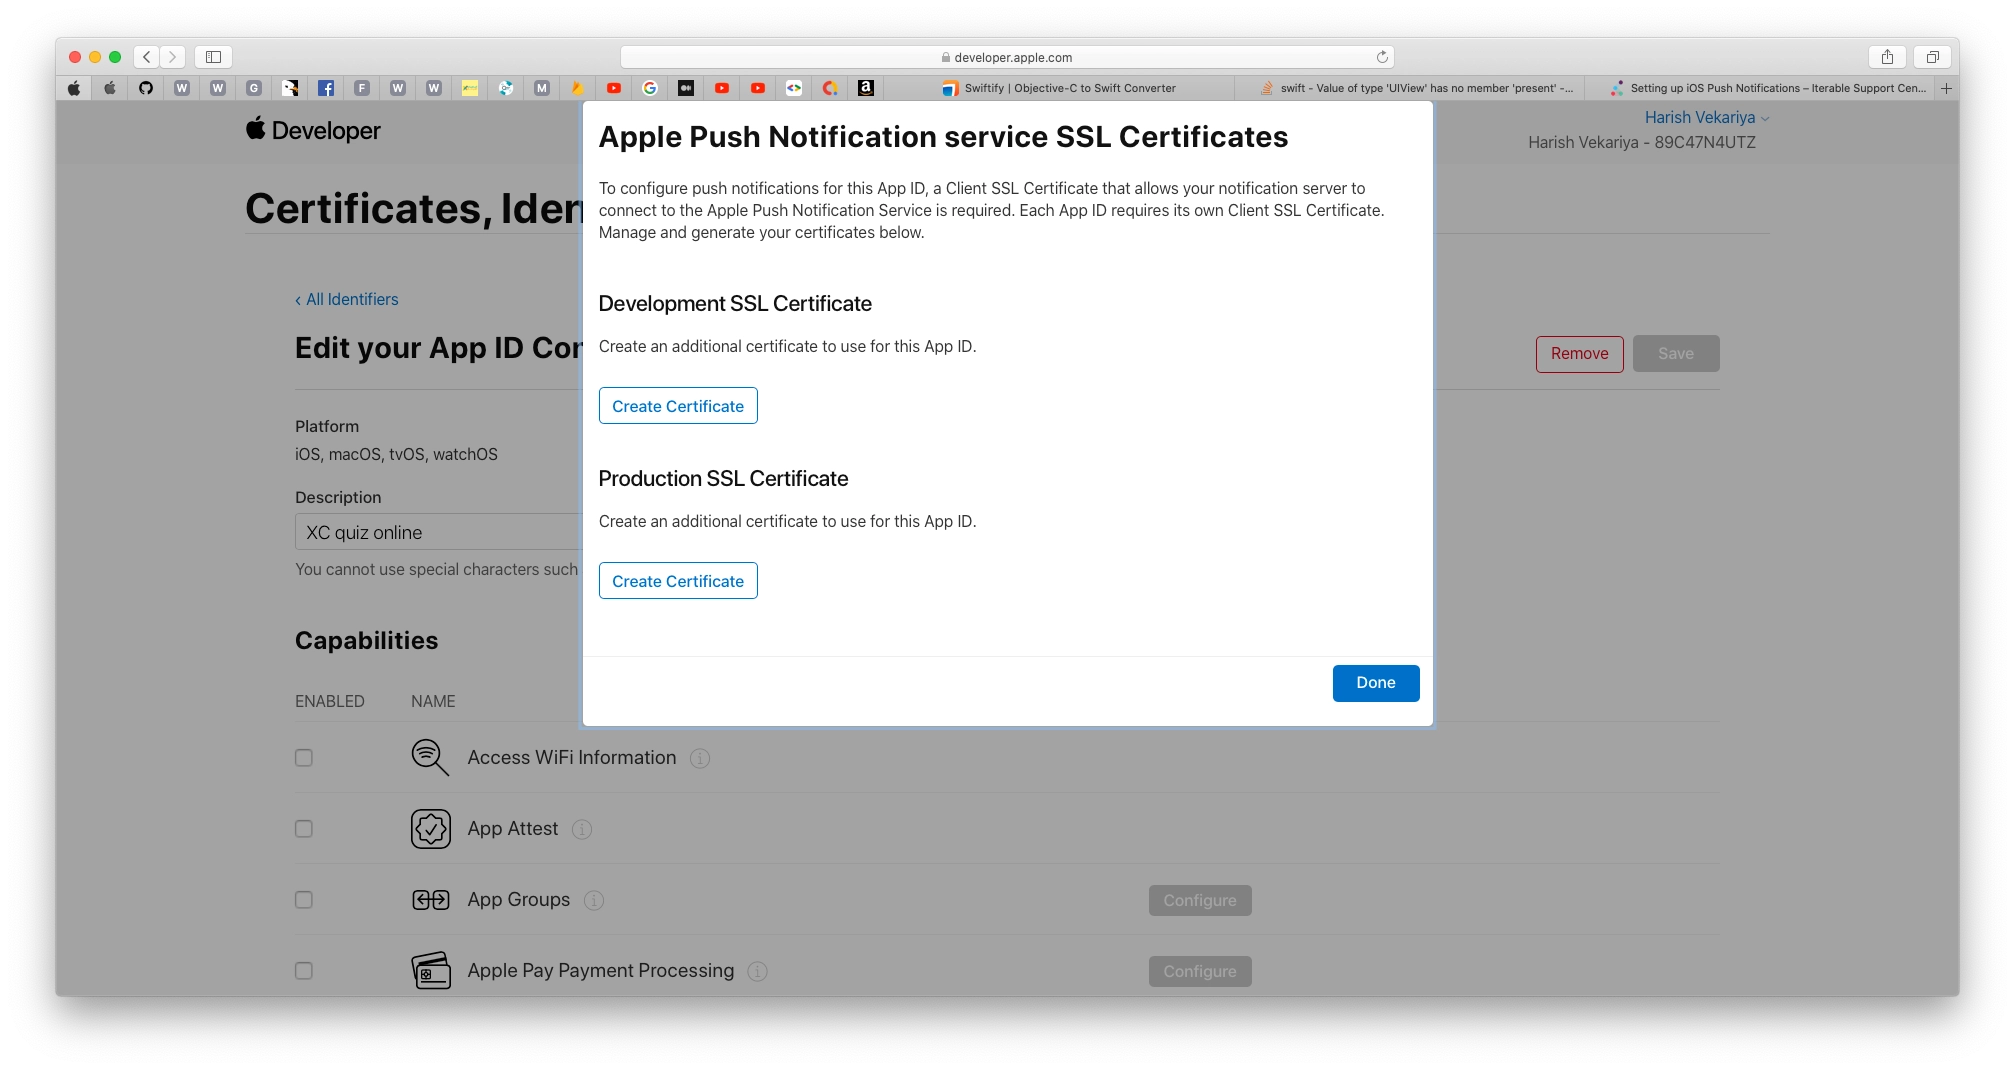
- Navigate to Keys Section and add a Universal key for Notifications
- Download the .p8 file and keep it safe (it can only be downloaded once)
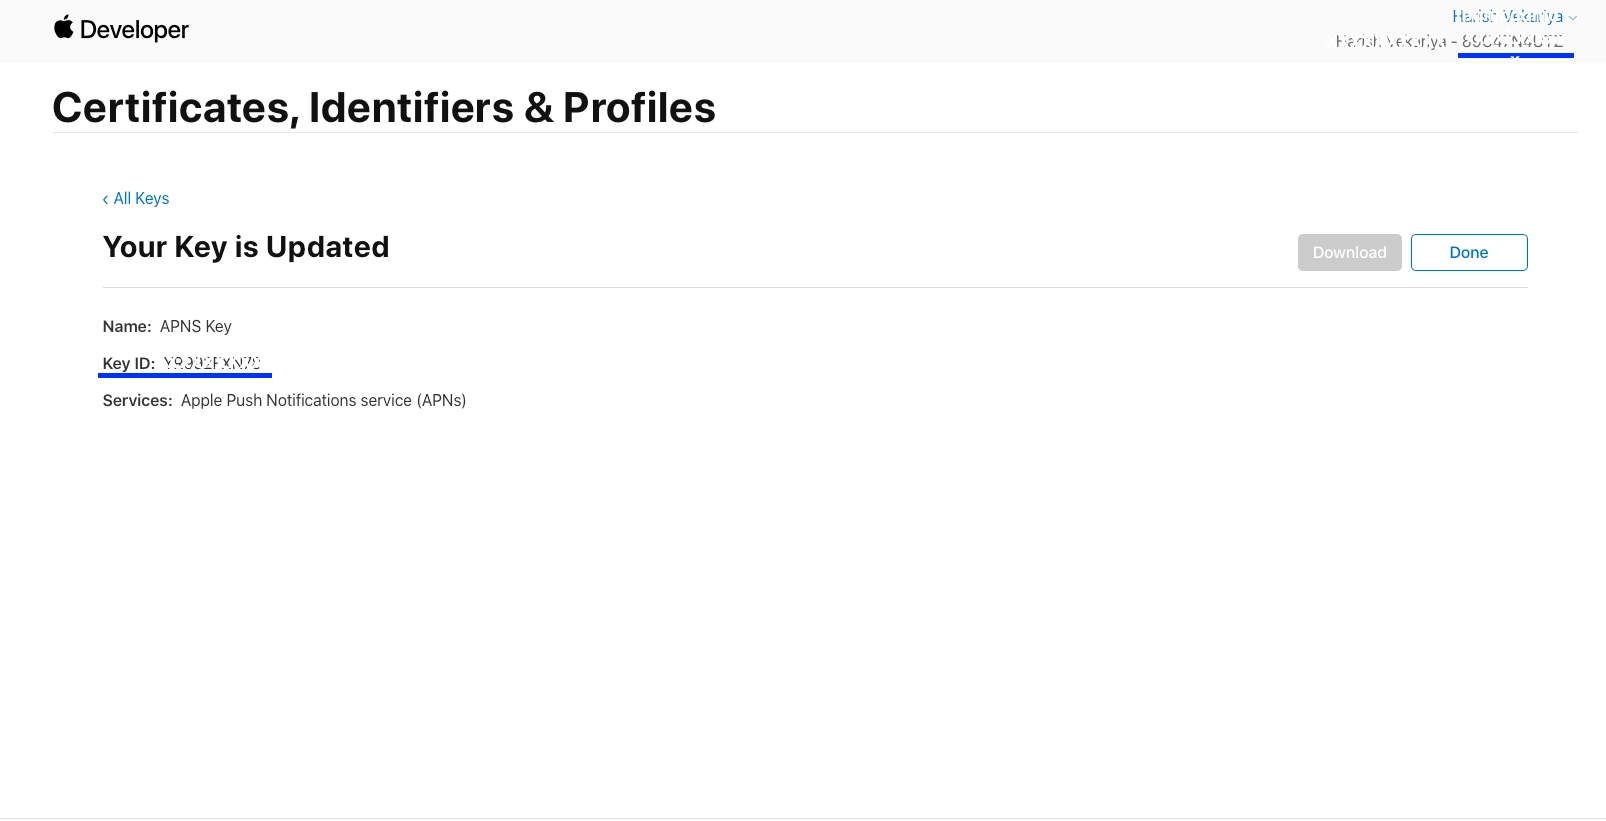
- Add this .p8 file to Firebase along with your Key ID and Team ID