Setup AdMob
Integrating Google AdMob into your eBroker application allows you to monetize your app through advertisements. This guide explains how to set up AdMob in your application.
Creating AdMob Account
- Create an account on Google AdMob
- Set up three ad units:
- Banner Ad
- Interstitial Ad
- Rewarded Ad
Finding Your App ID
- Visit AdMob Help for detailed instructions
- Get your AdMob App ID from your AdMob dashboard
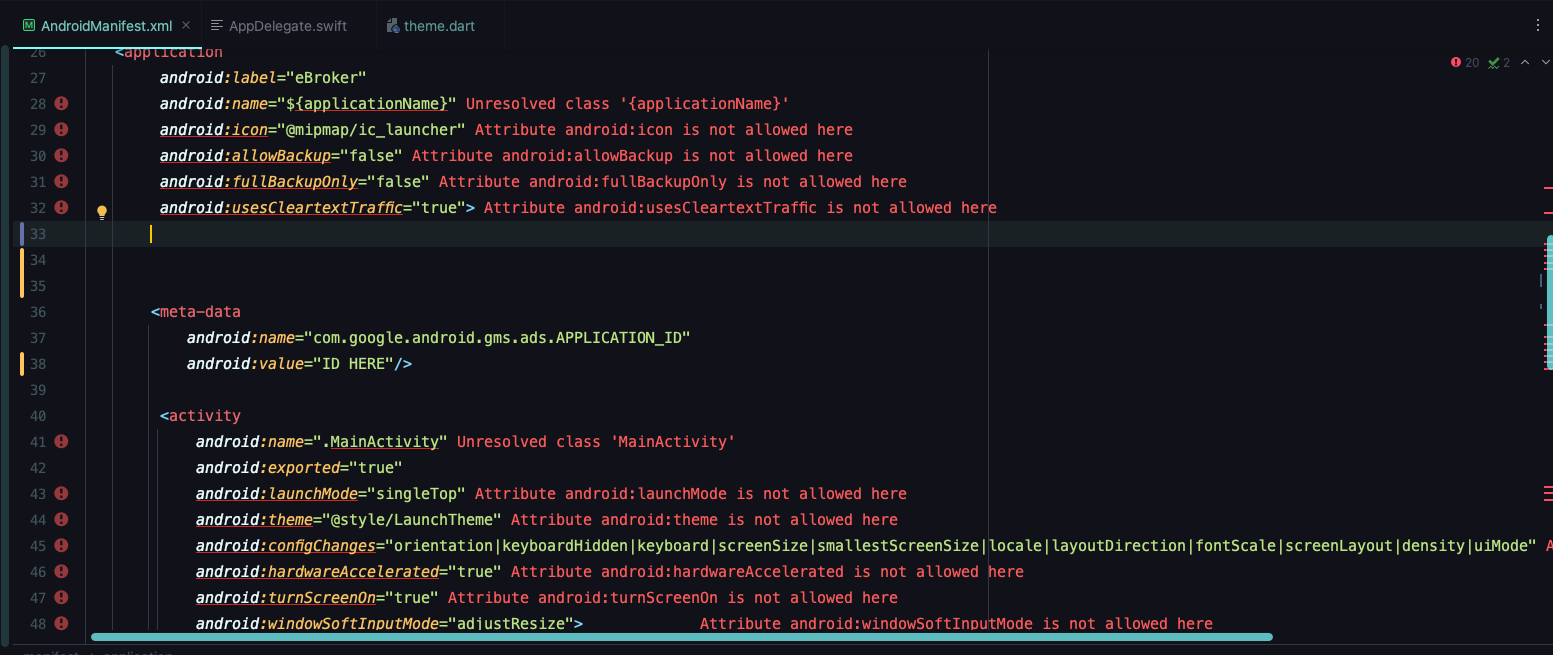
Configuring Android
- Open
android/app/src/main/AndroidManifest.xml - Add your Android App ID in the meta-data section as shown:
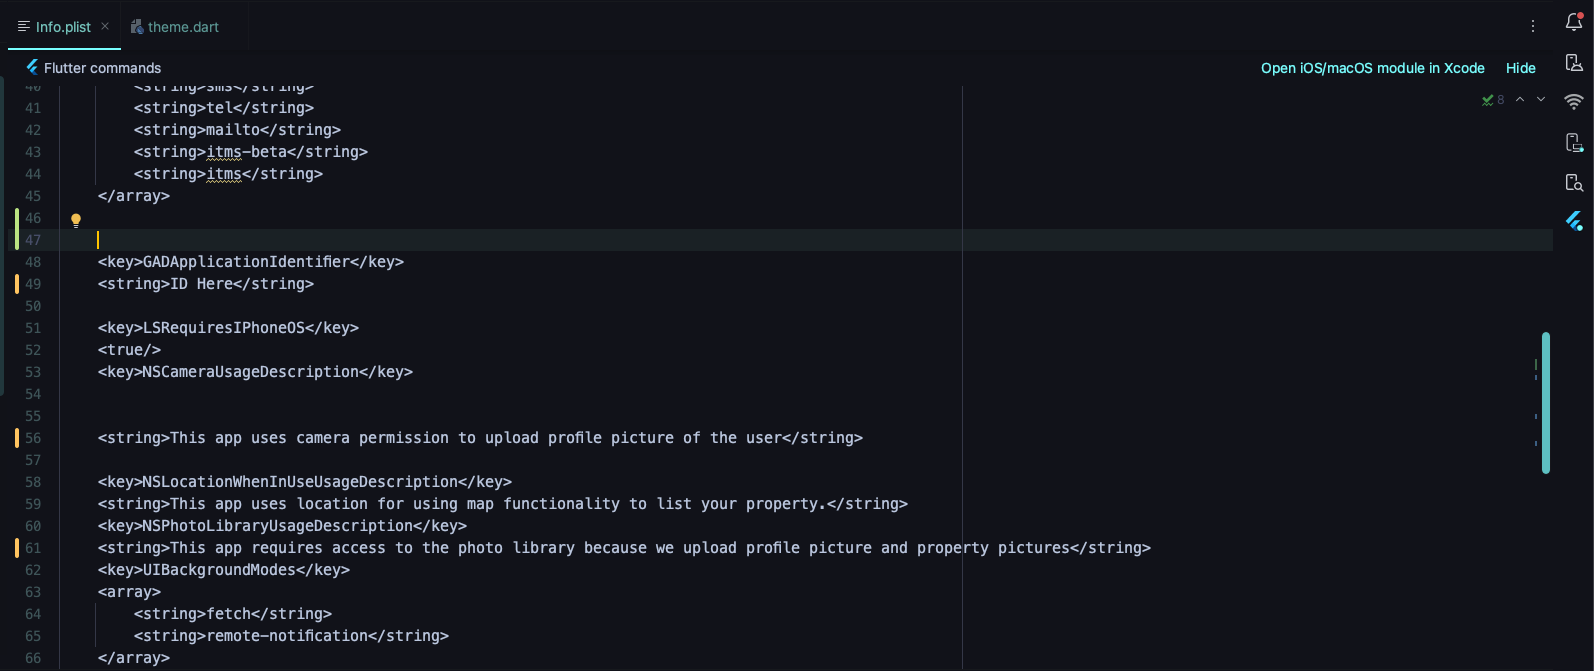
Configuring iOS
- Open
ios/Runner/Info.plist - Add your iOS App ID in the
GADApplicationIdentifierkey:
Admin Panel Configuration
- Open your admin panel
- Navigate to Settings > App Settings
- Find the AdMob section
- Add your Banner and Interstitial Ad IDs:
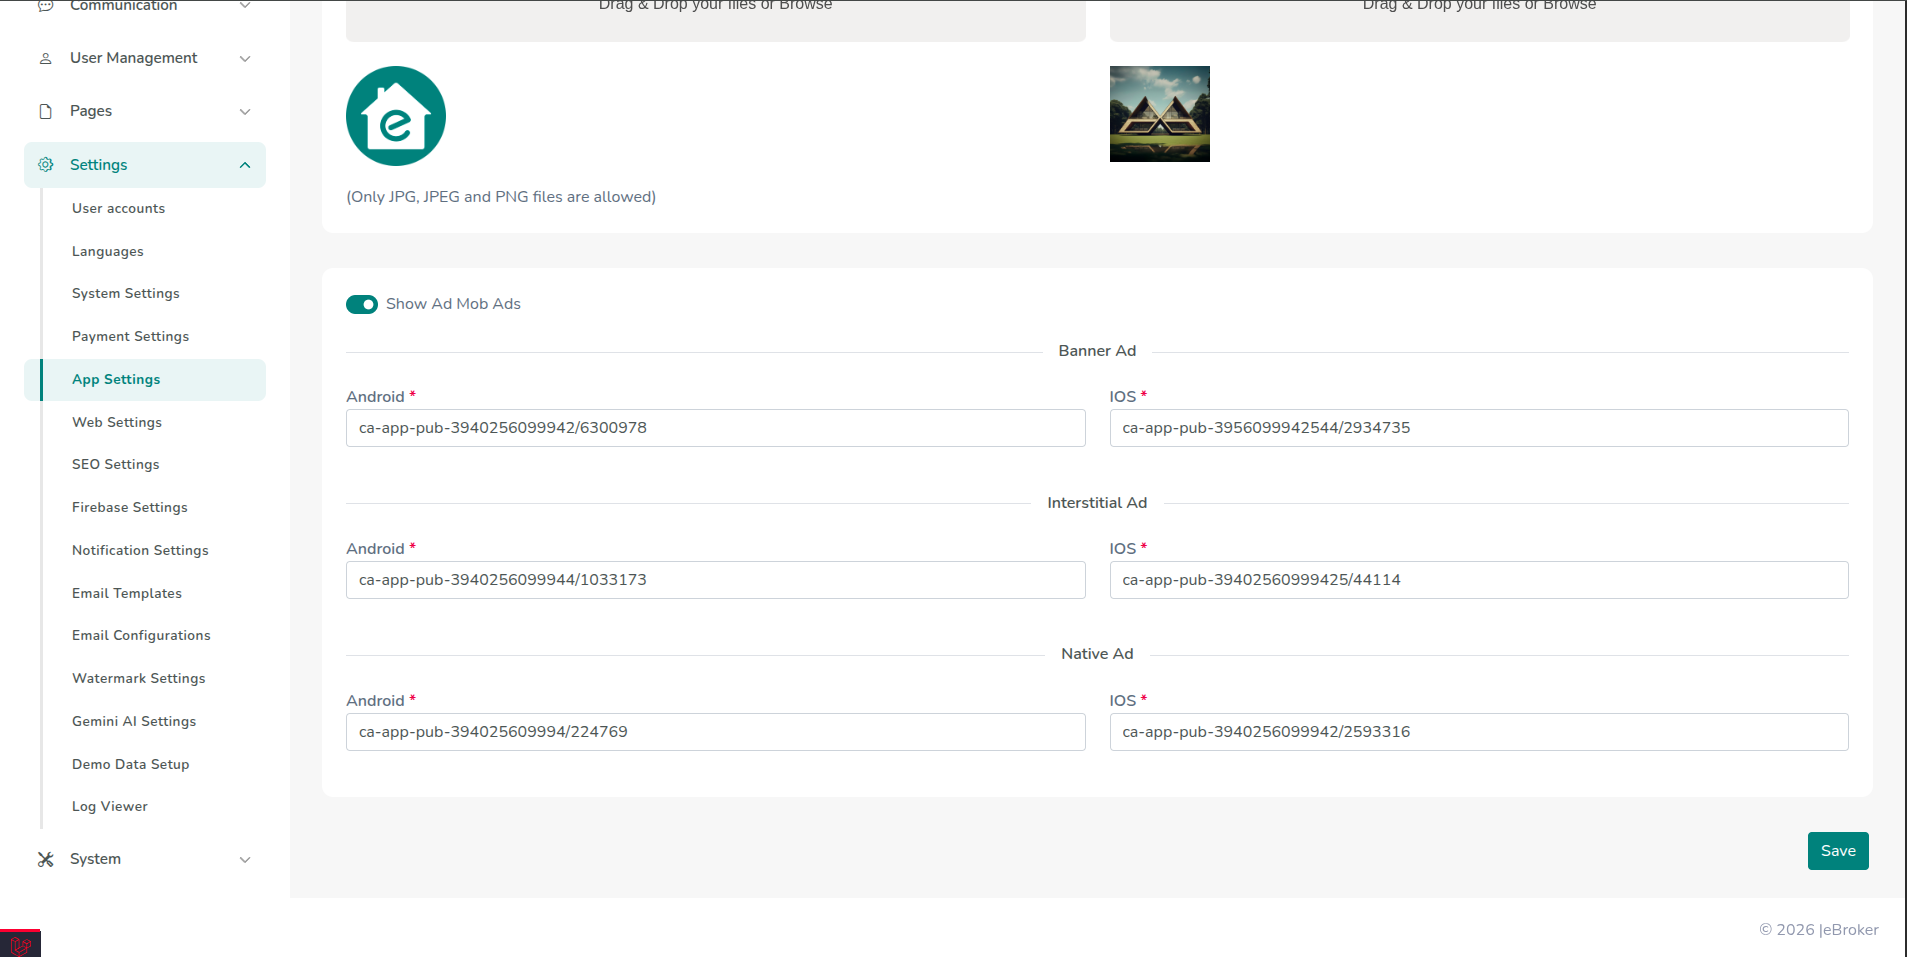
- You can enable or disable ads using the toggle button
Ad Types Explained
Banner Ads
- Rectangular ads displayed at the top or bottom of the screen
- Less intrusive but always visible
- Good for continuous revenue generation
Interstitial Ads
- Full-screen ads that appear at natural transition points
- Higher revenue per impression
- Should be used sparingly to avoid disrupting user experience
Rewarded Ads
- Offer in-app rewards for watching video ads
- Highest engagement and revenue potential
- User-initiated, providing better experience
Testing AdMob Integration
Before launching your app:
- Use AdMob test ad IDs during development
- Test on multiple devices to ensure ads display correctly
- Verify that ads don't interfere with app functionality
- Check that enabling/disabling ads from the admin panel works correctly
AdMob Best Practices
- Don't overload your app with too many ads
- Place ads in positions that won't disrupt user experience
- Comply with Google AdMob policies to avoid account suspension
- Consider user experience when implementing interstitial ads
- Regularly check your AdMob analytics to optimize ad placement and formats