Website Setup Locally
Configure files
Open the download web folder in a code editor like VSCode
.env file configuration
Open the .env file and update the details as specified in the documentation.
- Update the Application Name
In the .env file, locate the line that starts with NEXT_PUBLIC_APPLICATION_NAME= and replace YourAppName with your desired application name. For example:
NEXT_PUBLIC_APPLICATION_NAME="eDemand"
Make sure to keep the NEXT_PUBLIC_APPLICATION_NAME= part unchanged and only update the value after the equals sign.

- Update the Admin URL
In the .env file, locate the line that starts with NEXT_PUBLIC_ADMIN_URL= and replace https://edemand.wrteam.me/api/v1/ with your desired admin URL. For example:
NEXT_PUBLIC_ADMIN_URL="https://edemand.wrteam.me/api/v1/"
Make sure to keep the NEXT_PUBLIC_ADMIN_URL= part unchanged and only update the value after the equals sign.
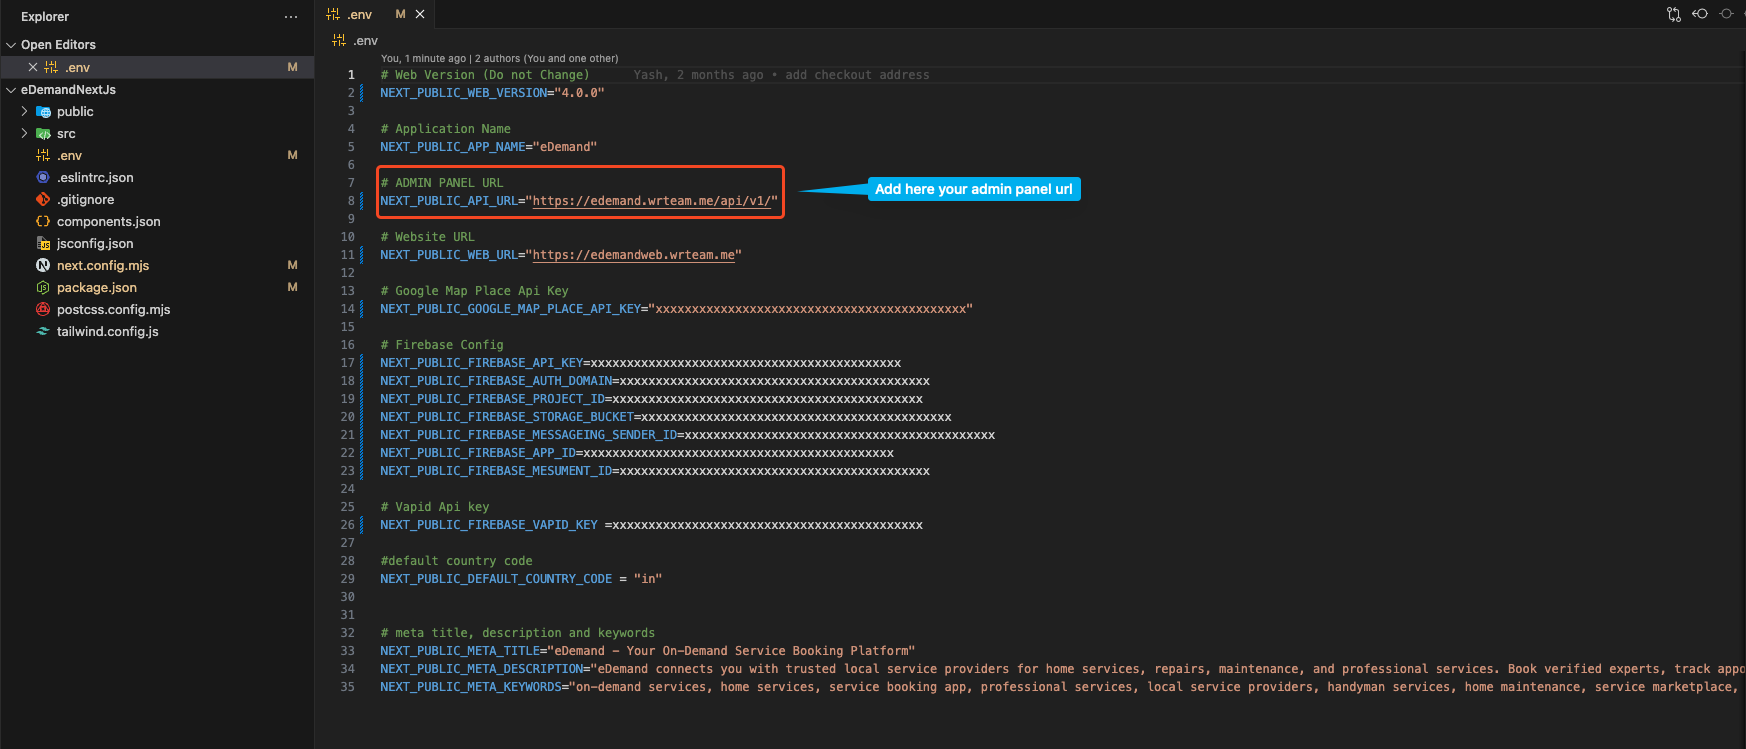
To find the admin URL, follow these steps:
- Go to Admin Panel.
- Navigate to System Settings.
- Select API Key Settings.
- Under Client API Keys, you'll find the API link for Customer App.
This will give you the Admin URL you need.
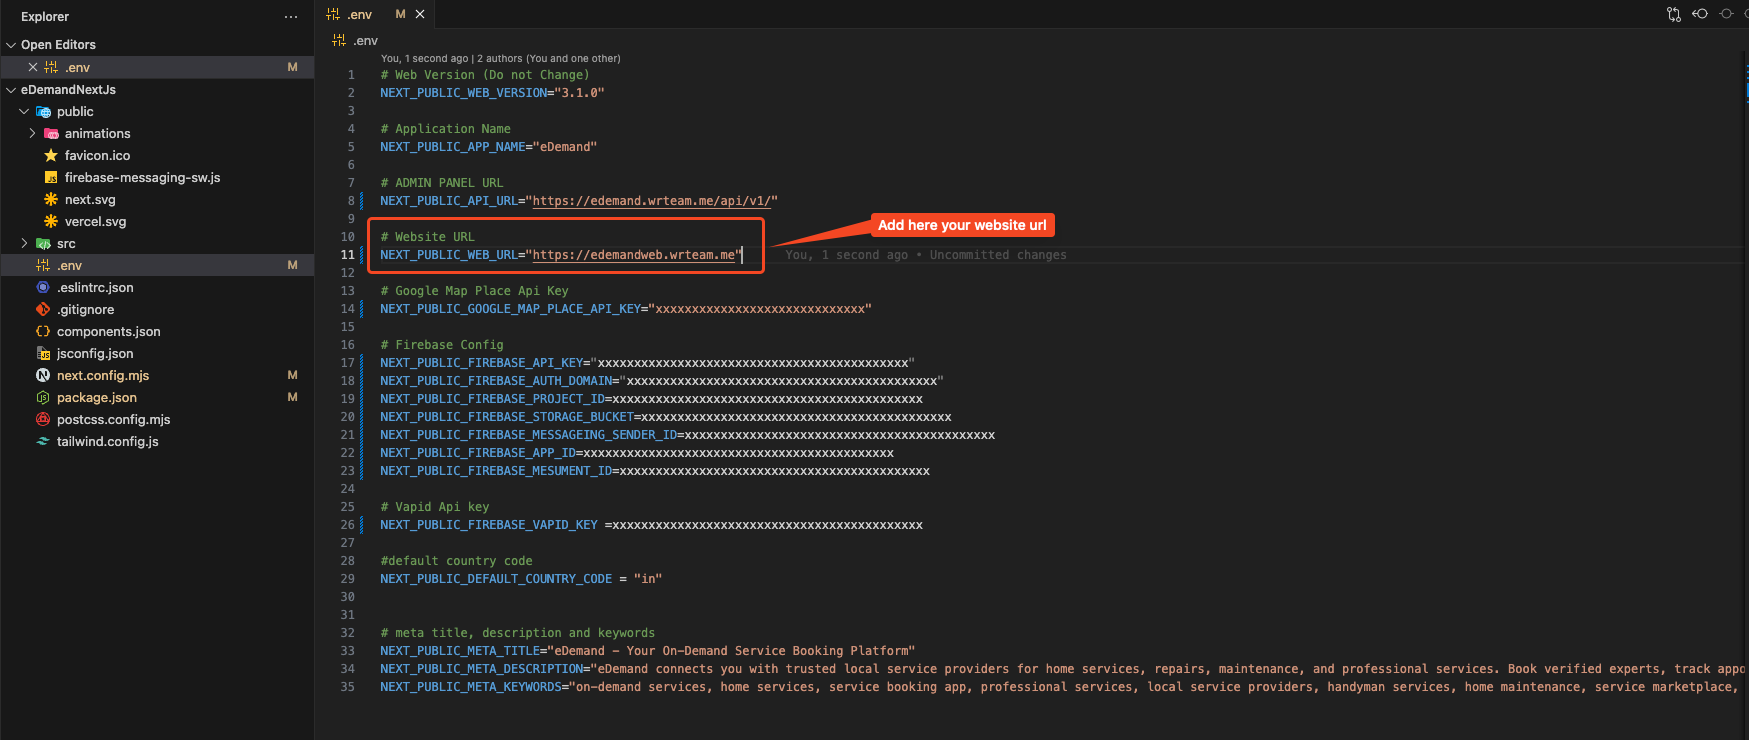
- Update the Website URL
In the .env file, locate the line that starts with NEXT_PUBLIC_WEBSITE_URL= and replace https://edemandweb.wrteam.me/ with your desired website URL. For example:
NEXT_PUBLIC_WEBSITE_URL="https://edemandweb.wrteam.me/"
Make sure to keep the NEXT_PUBLIC_WEBSITE_URL= part unchanged and only update the value after the equals sign.
- Update the Google Map Place API Key
In the .env file, locate the line that starts with NEXT_PUBLIC_GOOGLE_MAP_API_KEY= and replace AIzaxxxxxxxxxxxxxxxxxxxxxxxxxxxx with your desired Google Maps API key. For example:
NEXT_PUBLIC_GOOGLE_MAP_API_KEY="AIzaxxxxxxxxxxxxxxxxxxxxxxxxxxxx"
Make sure to keep the NEXT_PUBLIC_GOOGLE_MAP_API_KEY= part unchanged and only update the value after the equals sign.
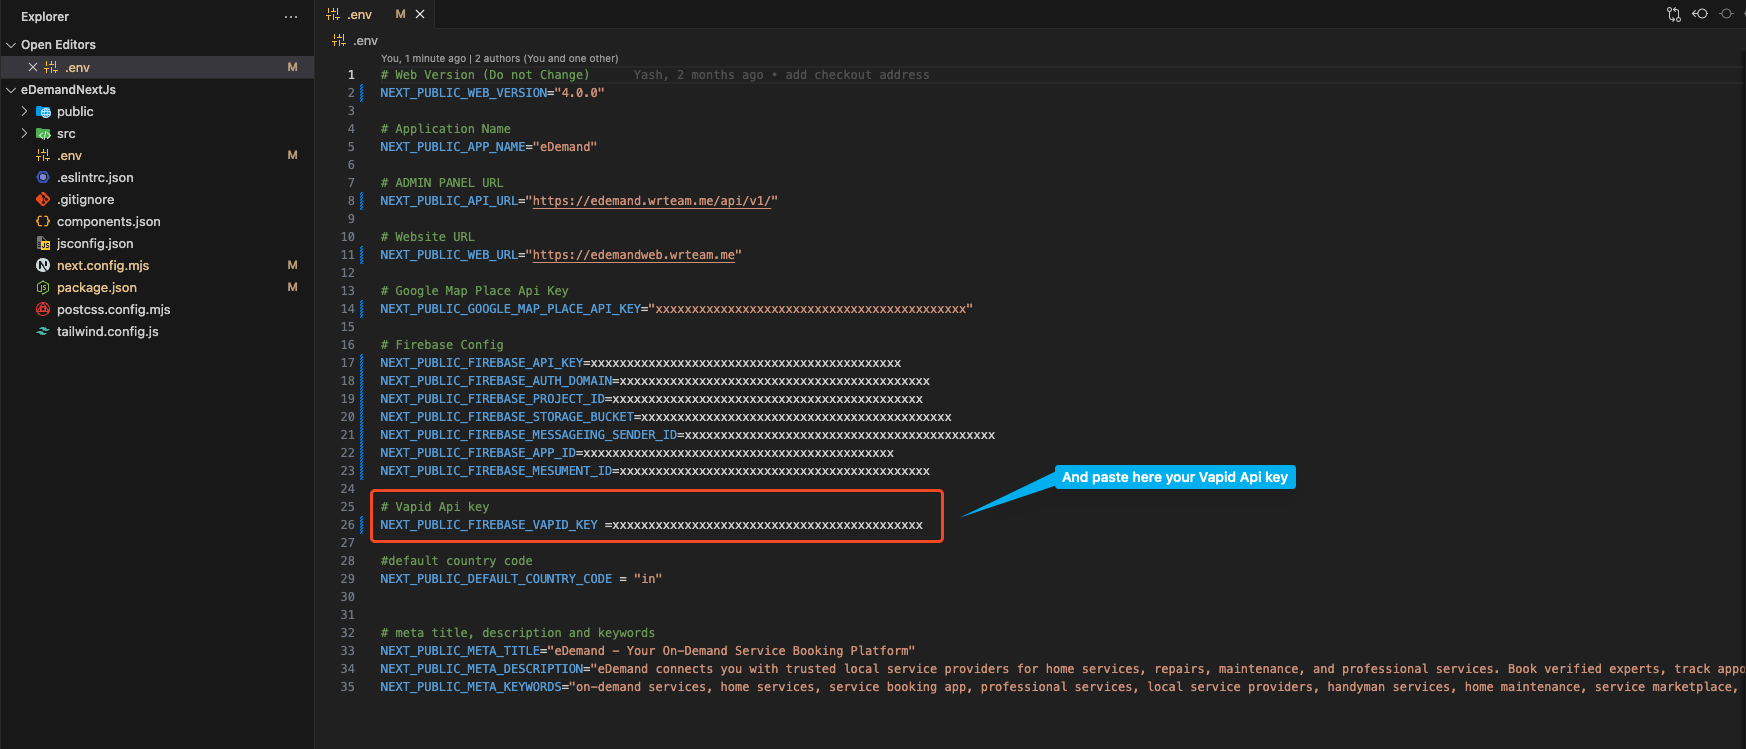
- Update the Firebase Vapid key for notifications
In the .env file, locate the line that starts with NEXT_PUBLIC_FIREBASE_VAPID_KEY= and replace AIzaxxxxxxxxxxxxxxxxxxxxxxxxxxxx with your desired Firebase Vapid key. For example:
NEXT_PUBLIC_FIREBASE_VAPID_KEY=AIzaxxxxxxxxxxxxxxxxxxxxxxxxxxxx
Make sure to keep the NEXT_PUBLIC_FIREBASE_VAPID_KEY= part unchanged and only update the value after the equals sign.
To get the Firebase Vapid Key:
- Go to your Firebase project.
- Navigate to Project Settings.
- In the Cloud Messaging section, go to Web Configuration.
- Under Web Push Certificates, generate a key pair.
- Copy the Vapid Key and paste it into your
.envfile.
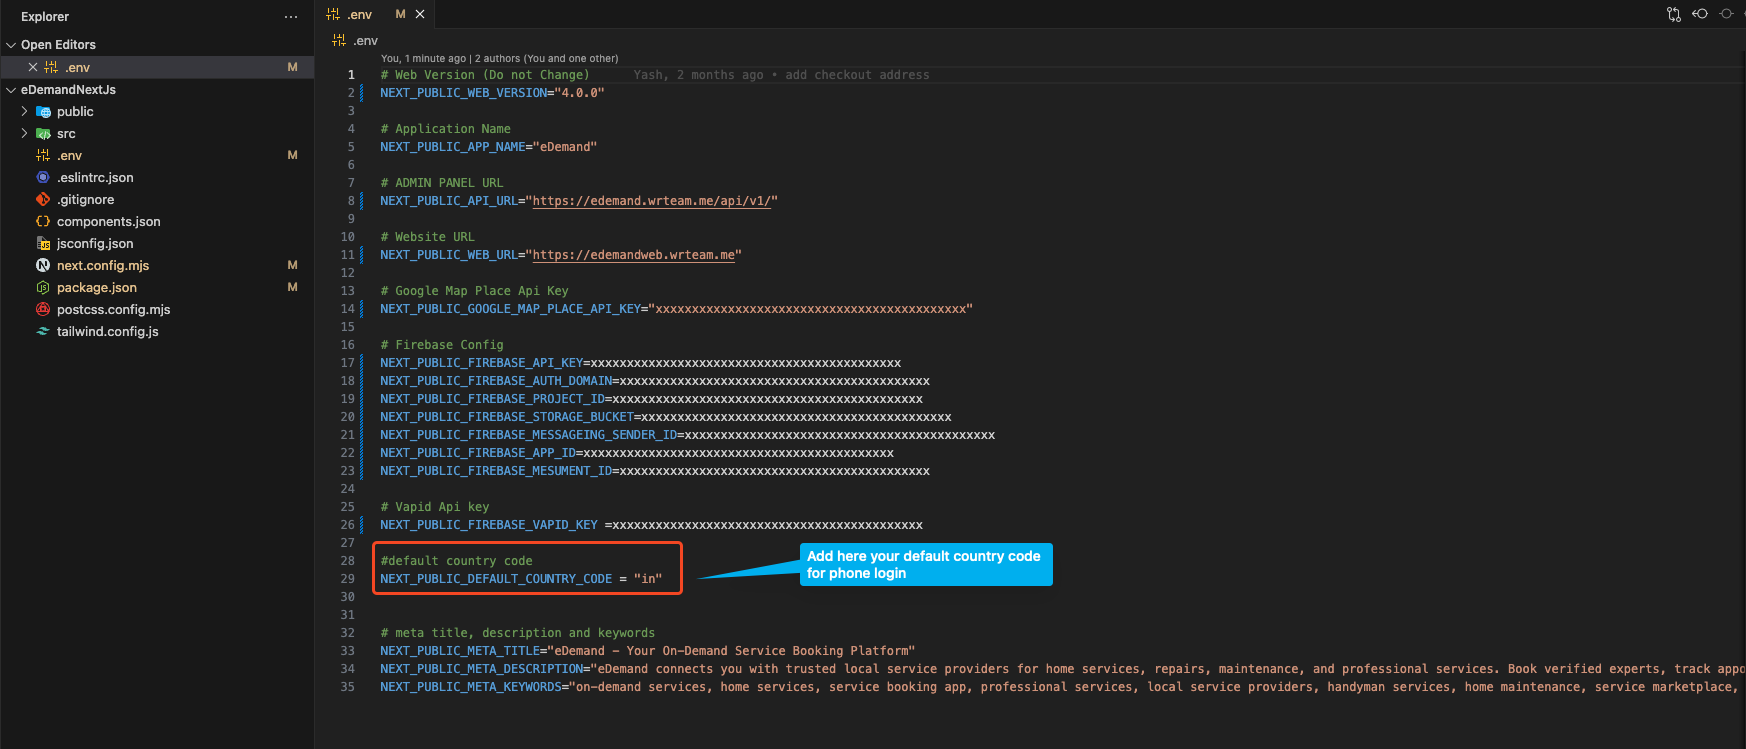
- Update the Default Country Code
here you can find → Default Country List
In the .env file, locate the line that starts with NEXT_PUBLIC_DEFAULT_COUNTRY_CODE= and replace in with your desired default country code. For example:
NEXT_PUBLIC_DEFAULT_COUNTRY_CODE=in
Make sure to keep the NEXT_PUBLIC_DEFAULT_COUNTRY_CODE= part unchanged and only update the value after the equals sign.
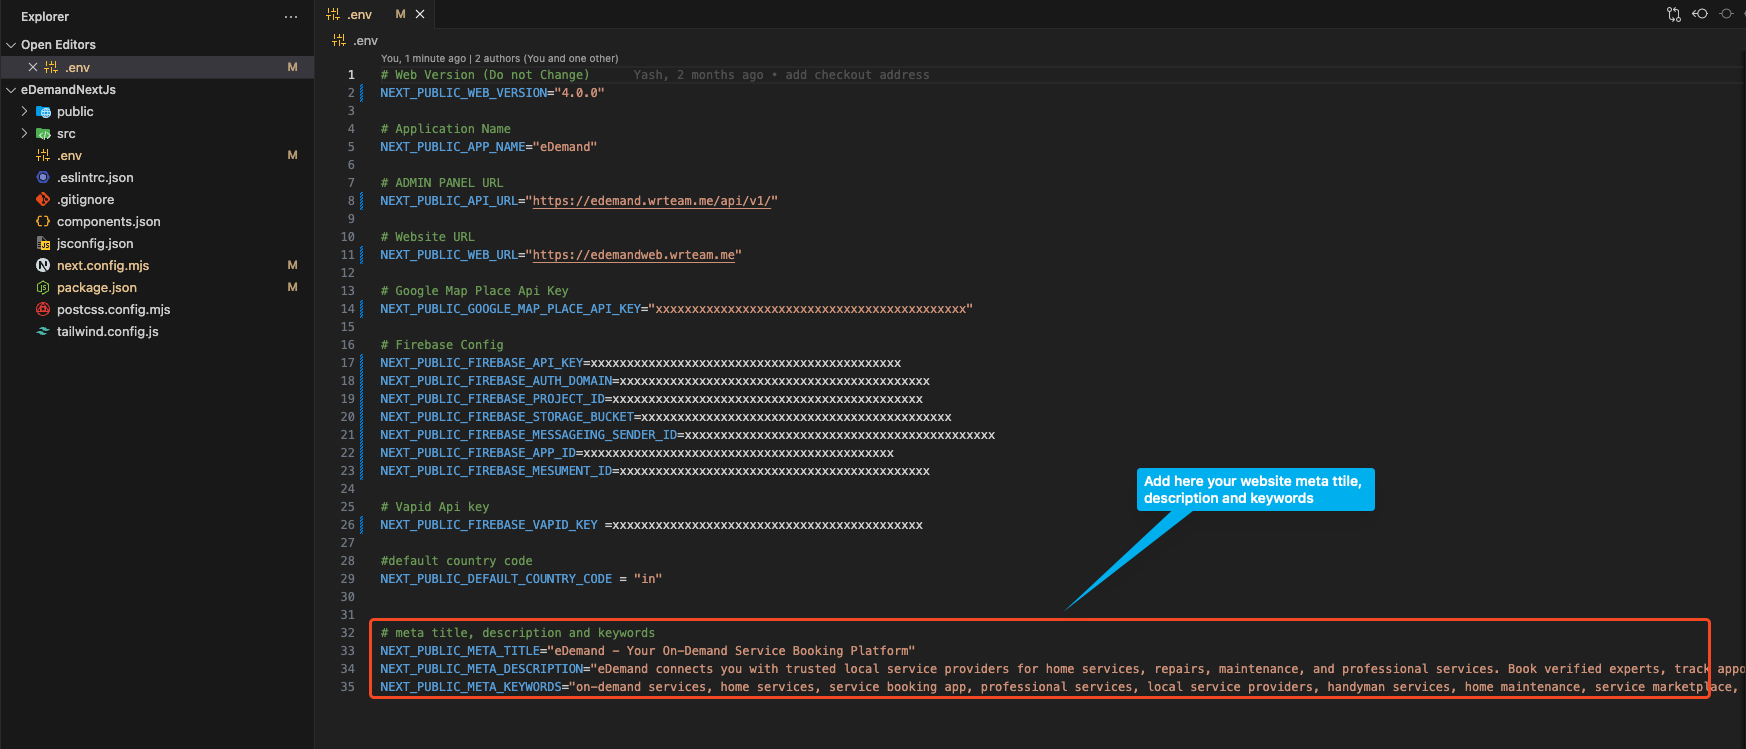
- Update Website Meta Title, Description, and Keywords
In the .env file, locate and update the following lines with your desired meta information:
NEXT_PUBLIC_META_TITLE="eDemand - Your On-Demand Service Booking Platform"
NEXT_PUBLIC_META_DESCRIPTION="eDemand connects you with trusted local service providers for home services, repairs, maintenance, and professional services. Book verified experts, track appointments, and get instant quotes. Your one-stop platform for all service needs."
NEXT_PUBLIC_META_KEYWORDS="on-demand services, home services, service booking app, professional services, local service providers, handyman services, home maintenance, service marketplace, instant booking, expert services, home repair, service professionals, trusted providers, service platform, local experts, service scheduling, verified professionals, service appointments, home improvement services, service booking platform"
Make sure to keep the variable names (NEXT_PUBLIC_META_TITLE=, NEXT_PUBLIC_META_DESCRIPTION=, NEXT_PUBLIC_META_KEYWORDS=) unchanged and only update the values as per your project requirements.