System Configuration
Language Configuration
Get Your Language Codes → Get language codes
Add a New Language
Language management is now handled through the admin panel. Follow these simple steps:
Step 1: Access Language Settings
- Login to Admin Panel: Go to your admin panel dashboard
- Navigate to Languages: Click on System Settings > Language Settings
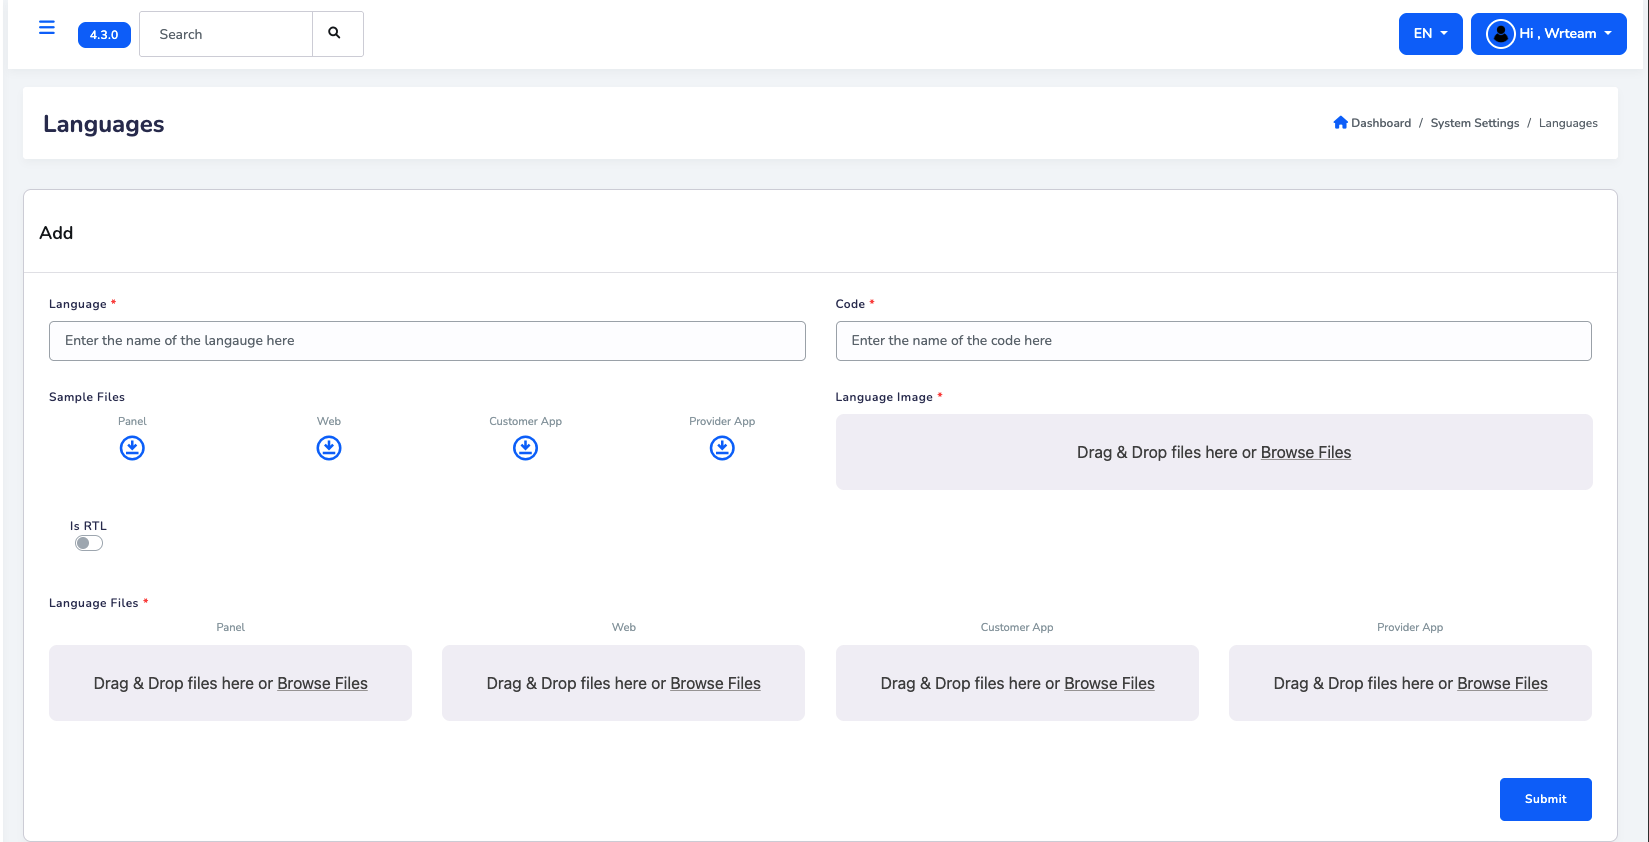
Step 2: Fill Language Details
In the "Add" section, complete the following fields:
- Language Name: Enter the full name (e.g., "Spanish", "French", "German")
- Language Code: Enter the 2-letter code (e.g., "es", "fr", "de")
- RTL Support: Toggle "Is RTL" if the language reads right-to-left (like Arabic, Hebrew)
- Language Flag: Upload a flag image for the language
Step 3: Upload Translation Files
Upload the translation files for each platform:
- Panel: Upload admin panel translation file
- Web: Upload website translation file
- Customer App: Upload customer app translation file
- Provider App: Upload provider app translation file
You can download sample files first to understand the format, then create your own translation files.
Step 4: Submit
Click the Submit button to add the new language.
Step 5: Set as Default (Optional)
From the language list below, you can set any language as the default:
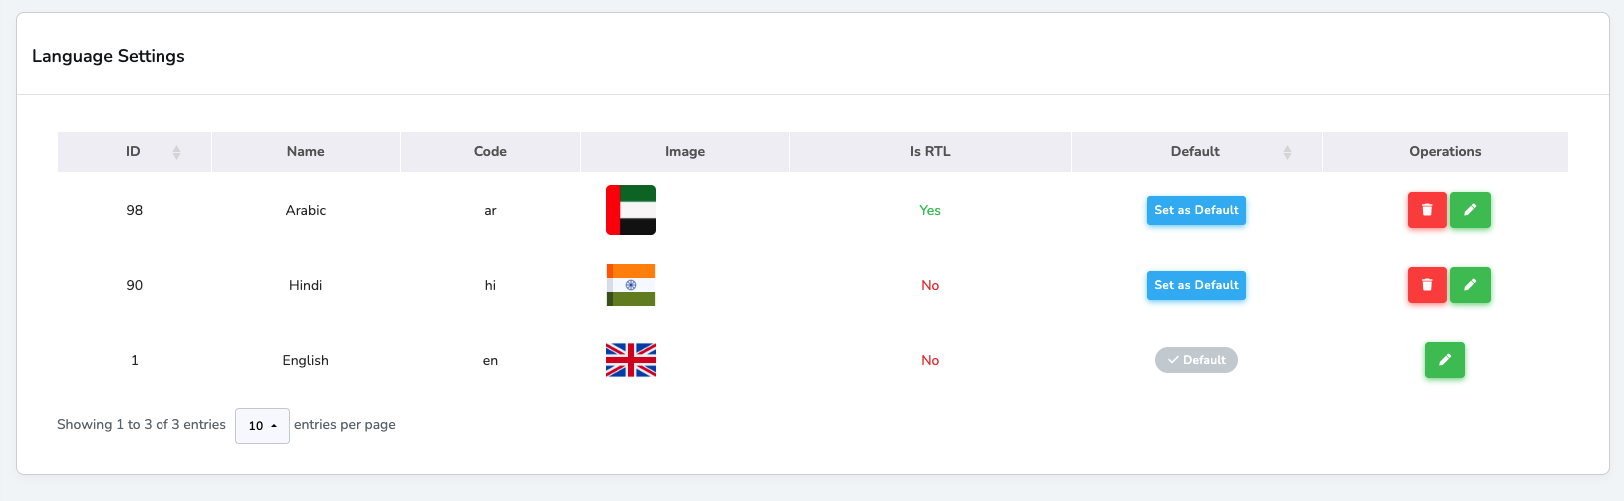
- Find your language in the table
- Click "Set as Default" button in the Default column
- The language will be marked with ✓ Default
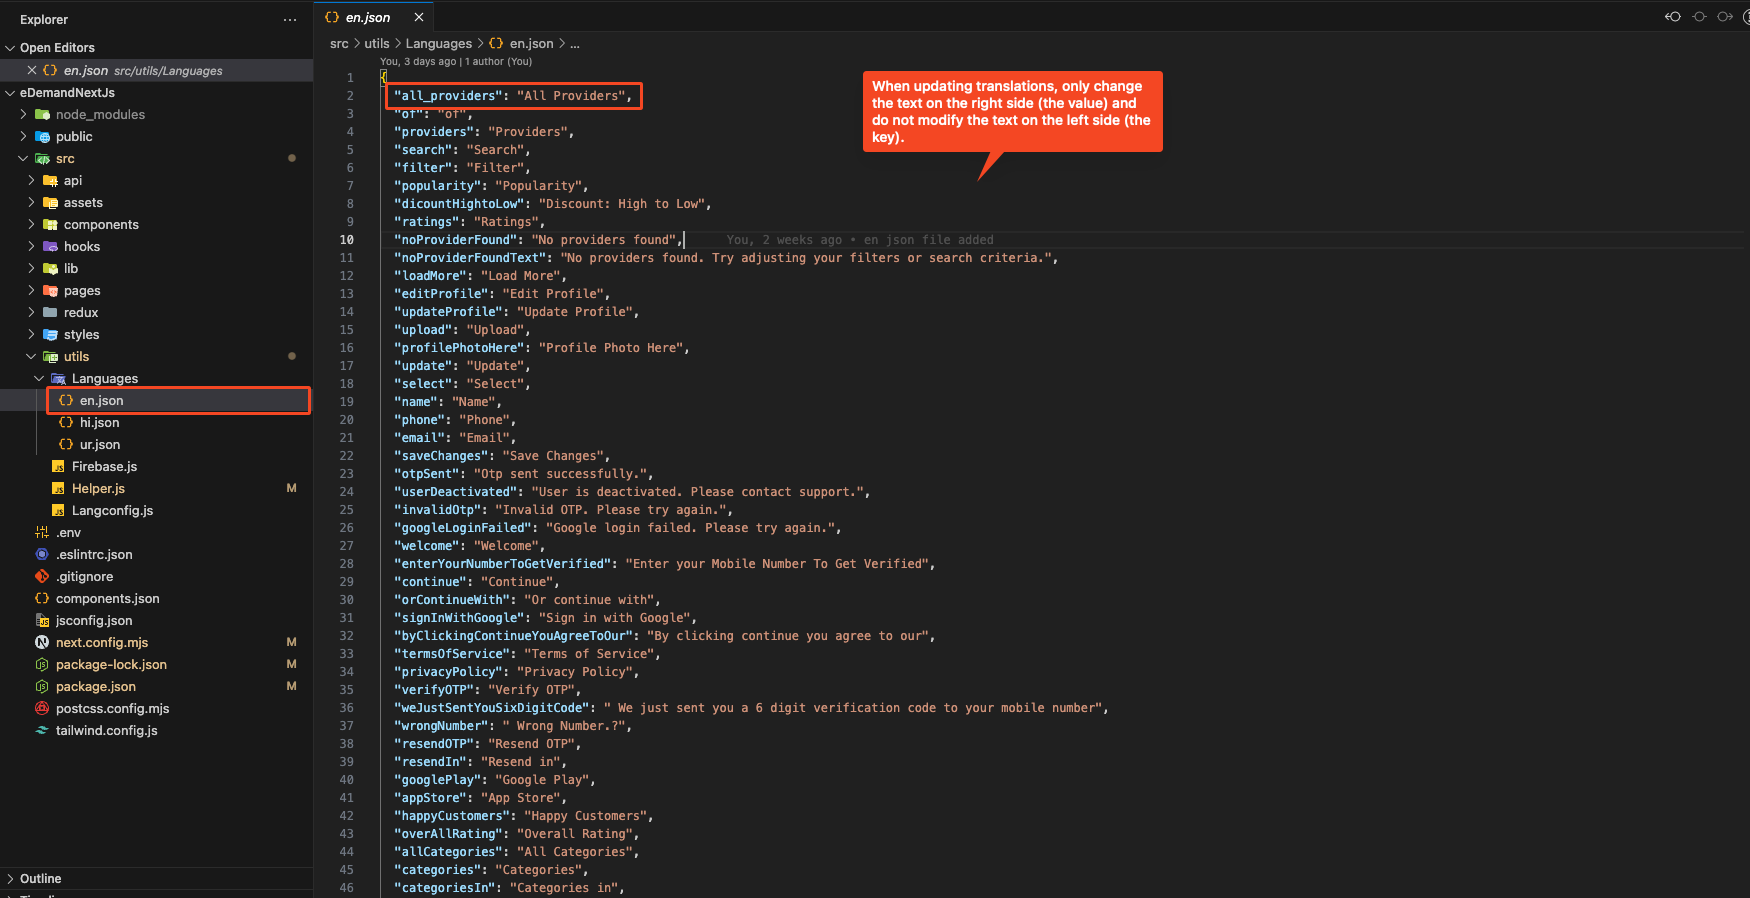
When updating translations, only change the text on the right side (the value) and do not modify the text on the left side (the key).
✅ Correct way to update:
"all_providers": "All Providers"
❌ Incorrect way (Do NOT change the key):
"all_providers_updated": "All Providers" // ❌ Incorrect!
Change Theme Color
Theme colors can now be configured directly from the Admin Panel — no code changes required.
Steps to Update Theme Colors
- Log in to the Admin Panel
- Navigate to Settings > Web Settings
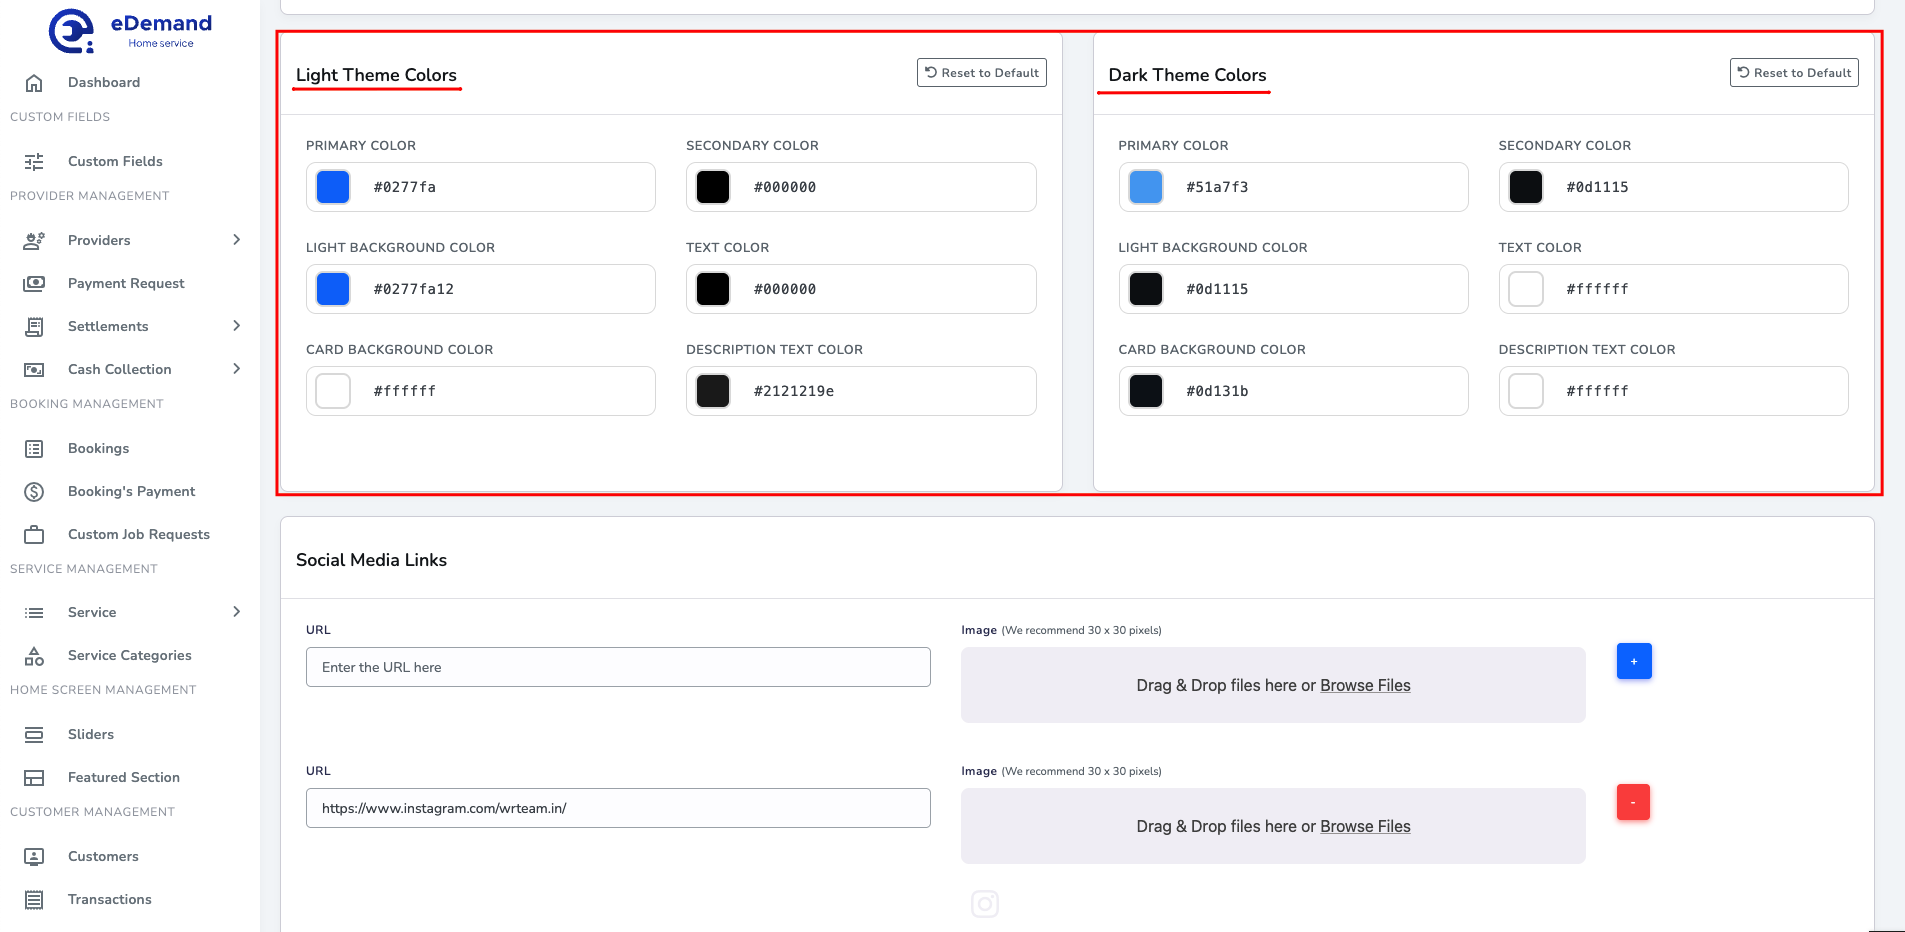
- Scroll down to find the Theme Color cards
- You will see separate sections for Light Theme Colors and Dark Theme Colors, each containing:
- Primary Color
- Secondary Color
- Light Background Color
- Text Color
- Card Background Color
- Description Text Color
- Click on any color swatch to pick a new color
- Use the Reset to Default button to restore the original theme colors
- Save your changes
Both Light and Dark theme colors can be customized independently. After saving, reload the website to see the updated theme colors applied.
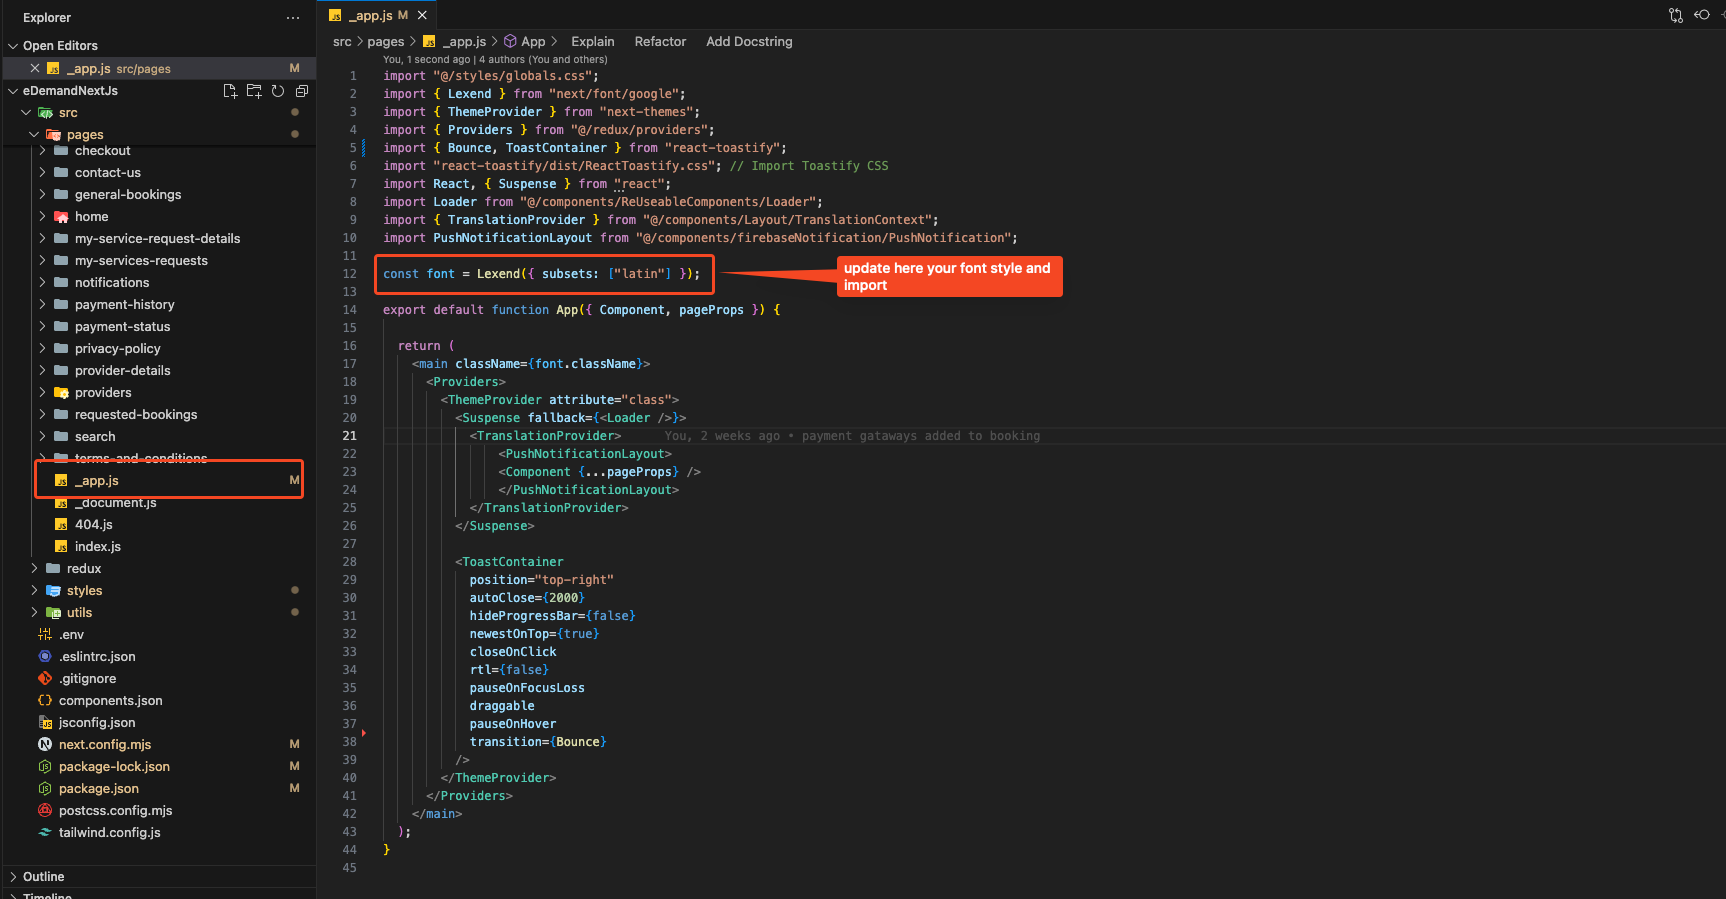
Change Font style
-
Go to: src -> pages -> app.js