Map API Key and Place API
For location features to work properly in your app, you need to set up Google Maps and Places API. Follow these steps:
Since version 1.7.0: the app, admin panel, and web application use Places API (New) instead of the legacy Places API. If you're setting this up for the first time, just follow the steps below as written. If you're upgrading from an older version, see Upgrading from the legacy Places API at the end of this page.
Setting up Google Cloud Console
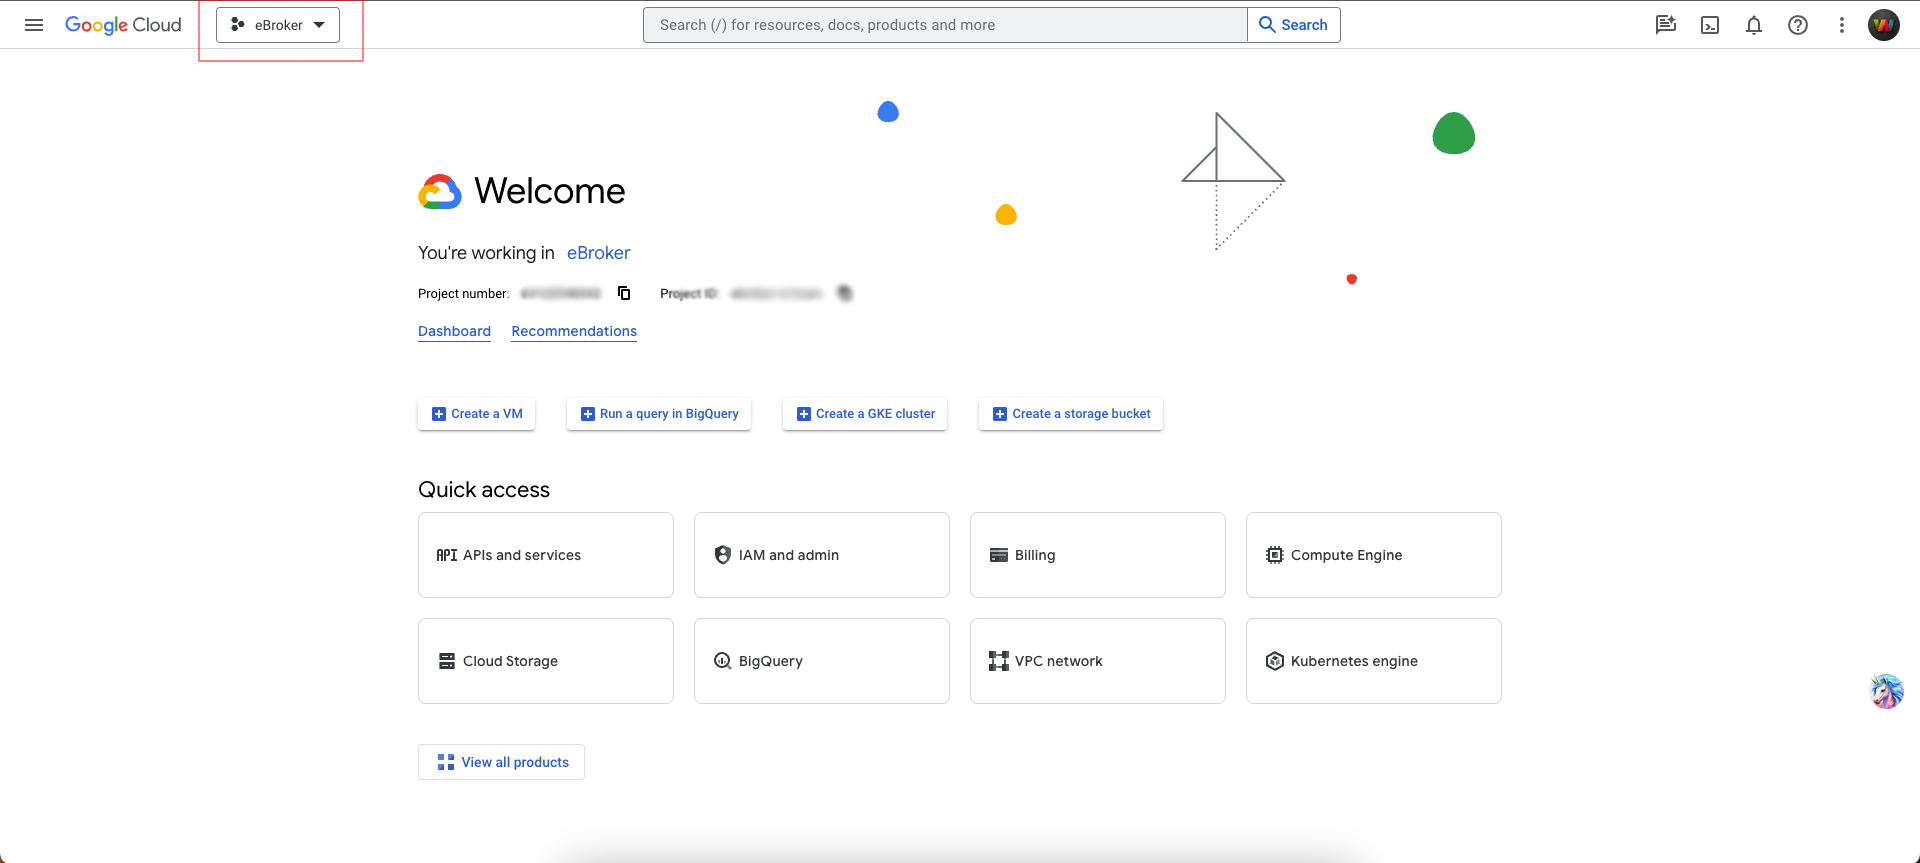
- Open Google Cloud Console
- Select your project
-
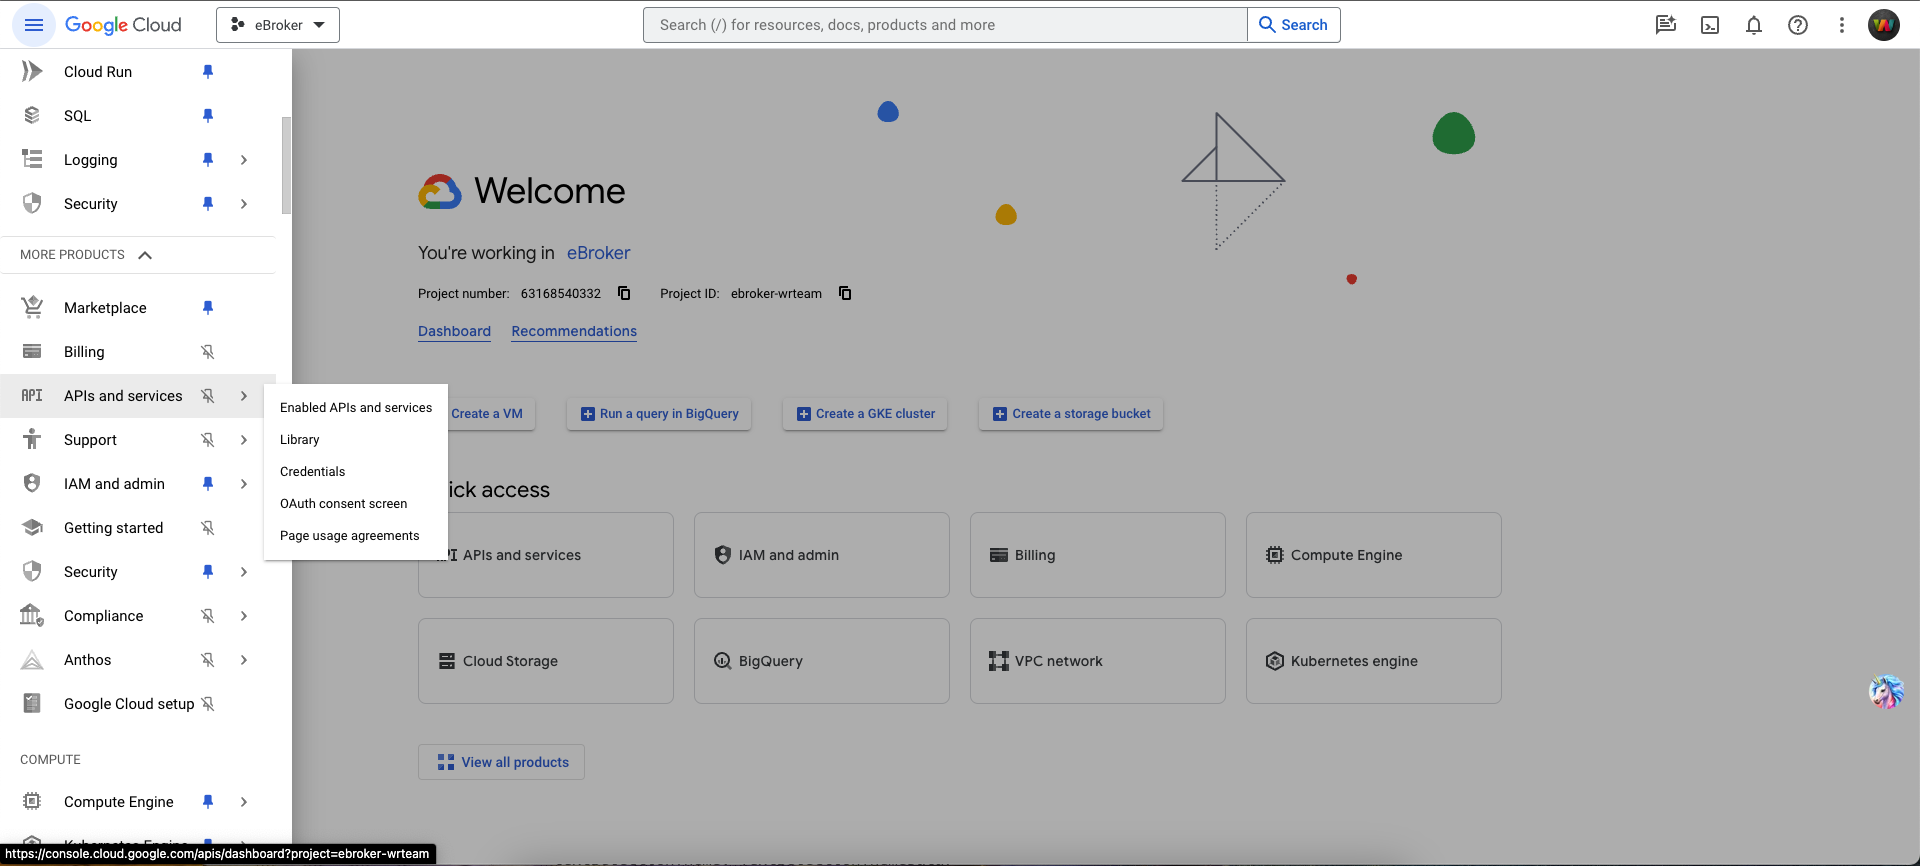
Enable the following APIs from "Enable API and Services":
- Geocoding API
- Places API (New)
- Geolocation APIs
- Maps SDK for Android
- Maps SDK for iOS
- Maps JavaScript API
Note: "Places API (New)" is a separate entry from the legacy "Places API" in the API library — search for it by that exact name and enable it.
API key options and restrictions
You can use either a restricted two-key setup (recommended) or a single unrestricted key (simpler but less secure):
-
Option A — Restricted (recommended):
- Create API Key 1 (server key) with these APIs enabled: Places API (New), Geocoding API, Geolocation API.
- Restrict API Key 1 by your server IP address(es), add ipv4 and ipv6(if exists) addresses.
- Create API Key 2 (web key) with this API enabled: Maps JavaScript API.
- Restrict API Key 2 by your website URL (HTTP referrer).
-
Option B — Single key (not recommended for production):
- Create one API key with all four APIs enabled: Places API (New), Geocoding API, Geolocation API, Maps JavaScript API.
- Do not apply restrictions.
Setting Up Places API (New)
For the Places API (New) to work (which enables location search functionality):
-
Enable billing on your Google Cloud project
Note: This is mandatory for Places API (New) to work
-
Copy your API key from Google Cloud Console
-
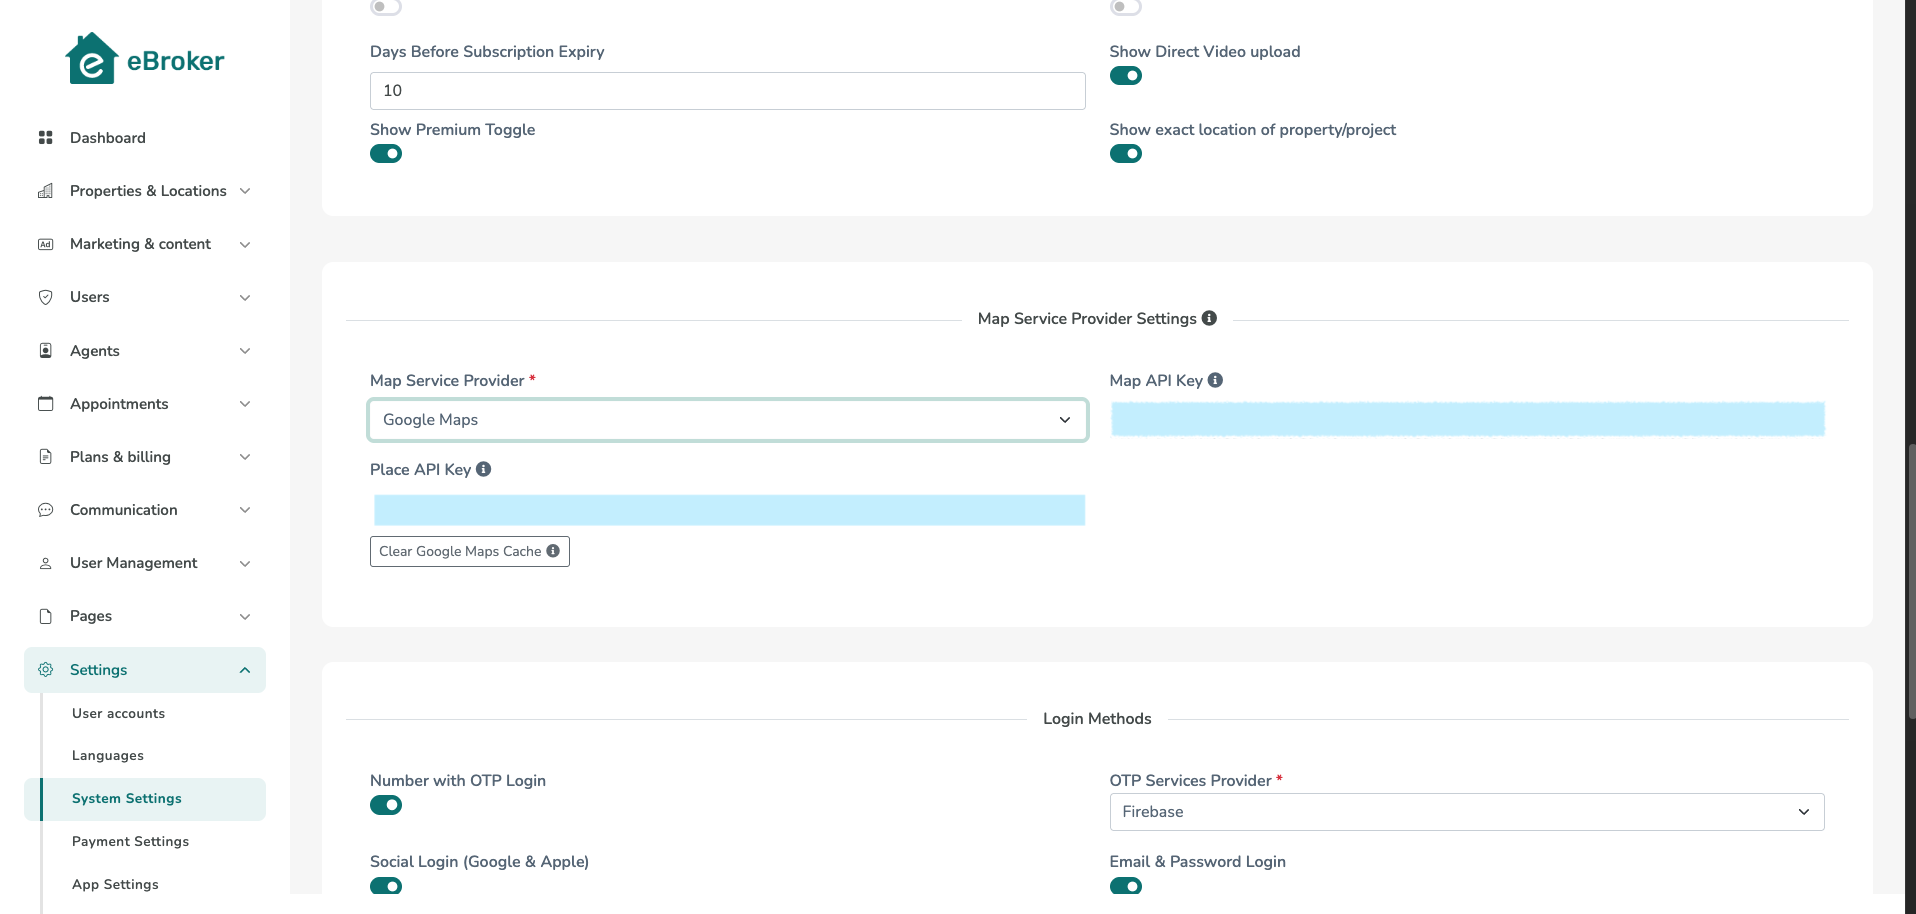
Open your admin panel and go to System Settings
-
Paste the key(s) as per your chosen option and save
Note:
- If you used the restricted setup (Option A): use the IP-restricted server key in the "Places API" field, and the referrer-restricted web key in the "Map API Key" field.
- If you used a single key (Option B): use the same key in both the "Map API Key" and the "Places API" fields.
- The admin panel field is still labeled "Places API" — no field name changed. The key you enter there is now validated against Places API (New) rather than the legacy Places API.
Important: Without enabling a billing account, location search will not work in the app, admin panel, or web application.
Upgrading from the legacy Places API
If your project was set up before version 1.7.0 and already has the legacy "Places API" enabled with a working key, you need to switch it over:
- In Google Cloud Console, open "Enable API and Services" and enable Places API (New) on the same project.
- Your existing API key(s) do not need to be regenerated — the same key works for Places API (New) once it's enabled, since Google API keys are scoped to a project, not to a single API. If your key is restricted to a specific API list, add Places API (New) to that list.
- No changes are needed in the admin panel — the "Places API" field keeps the same key you already saved.
- Once you've confirmed location search still works, you can disable the legacy "Places API" in Google Cloud Console to avoid keeping an unused API enabled. This step is optional.
See the changelog for the full 1.7.0 release notes.