Analytics and Advertising Setup
This guide explains how to set up Microsoft Clarity, Google Analytics, and Google AdSense for your eDemand web application.
Microsoft Clarity Setup
Step 1: Get Your Clarity Project ID
-
Sign up for Microsoft Clarity:
- Visit: https://clarity.microsoft.com/
- Sign in with your Microsoft account (or create one)
-
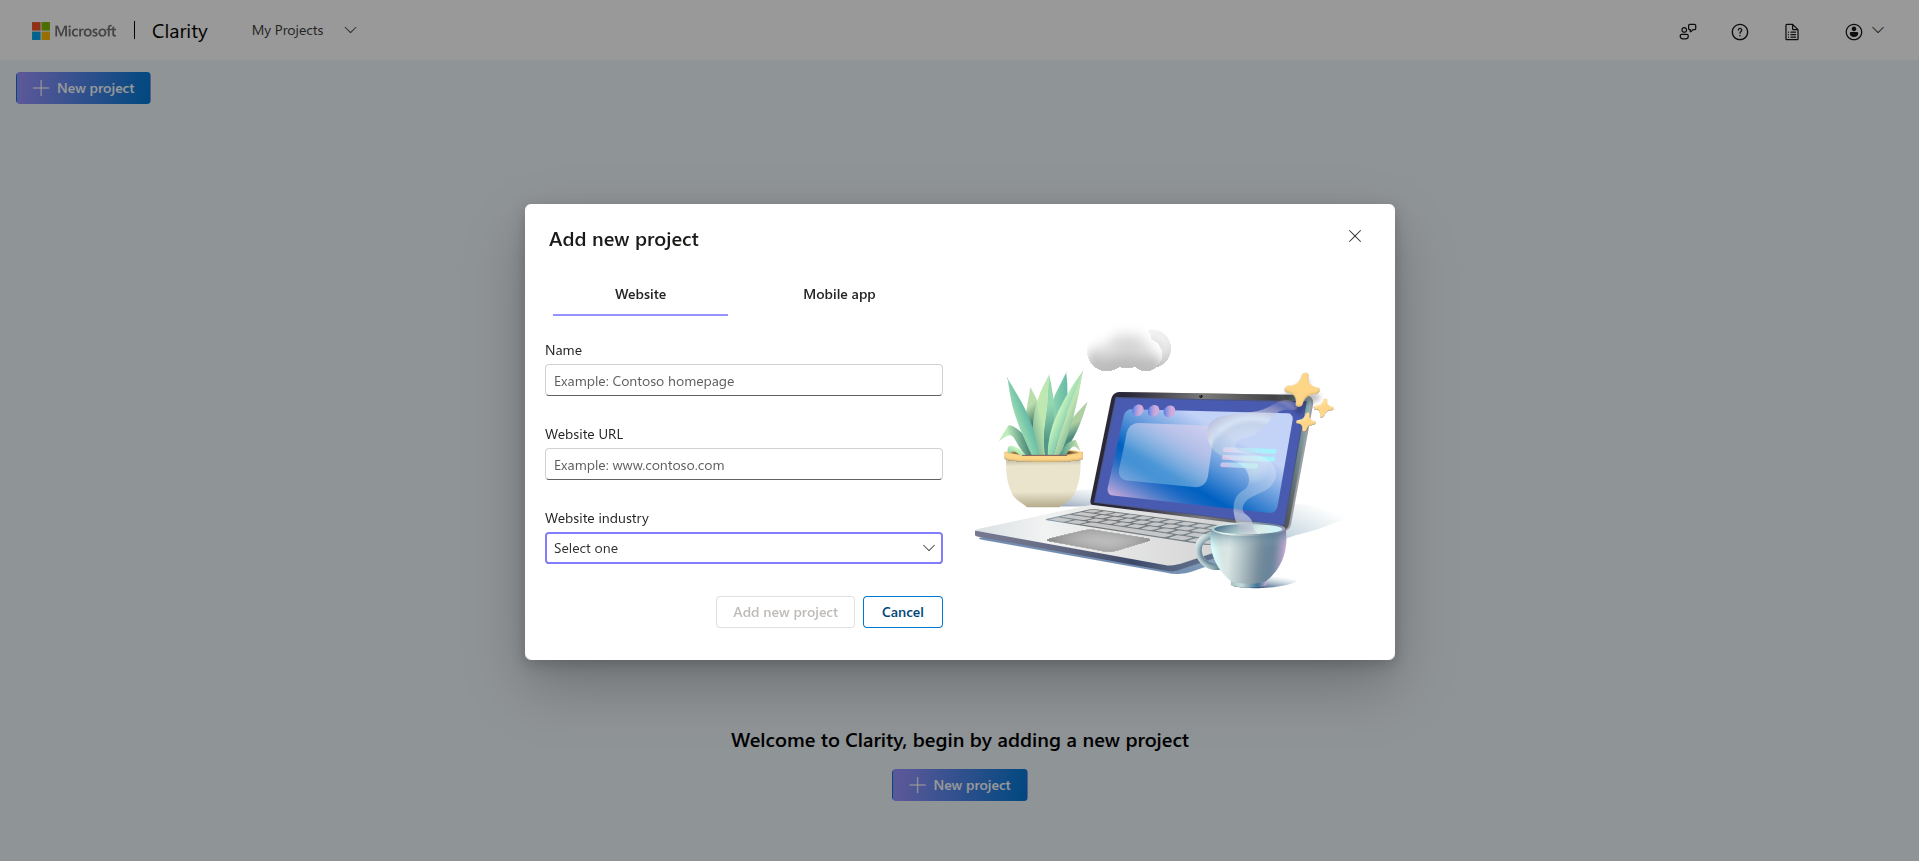
Create a new project:
- Click "Add New Project"
- Enter your website name
- Enter your website URL
- Select your country/region
- Click "Create"
-
Get your Project ID:
- After creating the project, you'll see a tracking code snippet
- Your Project ID is the string at the end of the script URL
- Example:
u5frguc1k8(fromhttps://www.clarity.ms/tag/u5frguc1k8)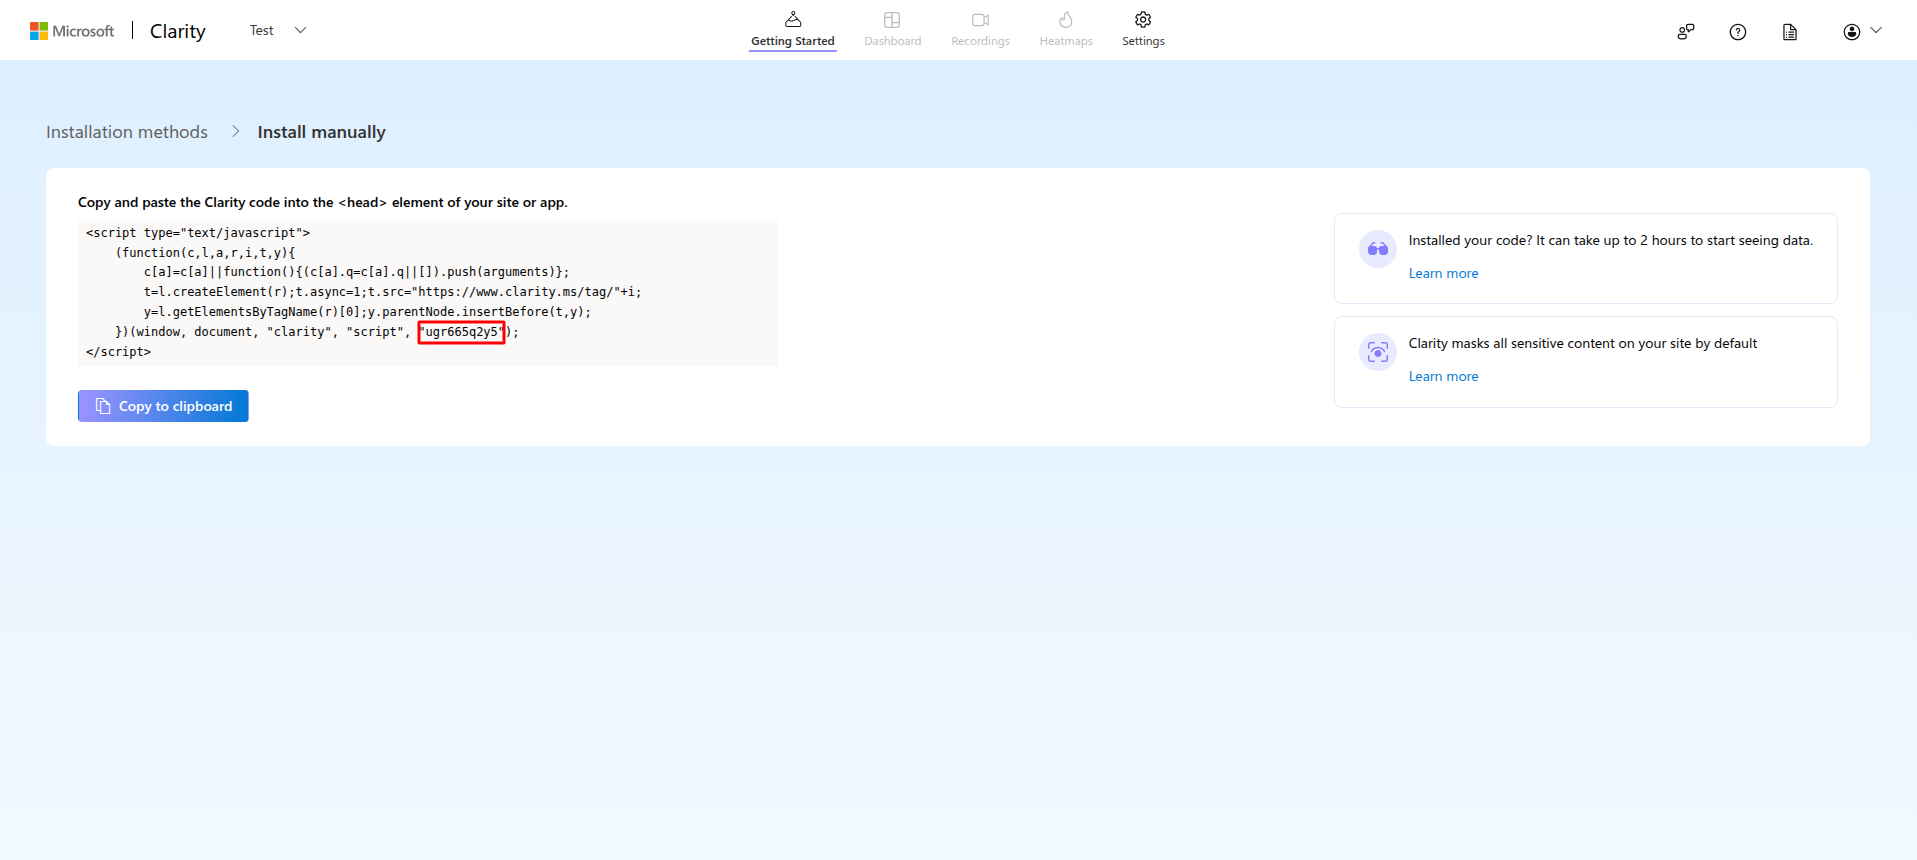
Step 2: Add Clarity to Your Code
- Open
src/pages/_document.js
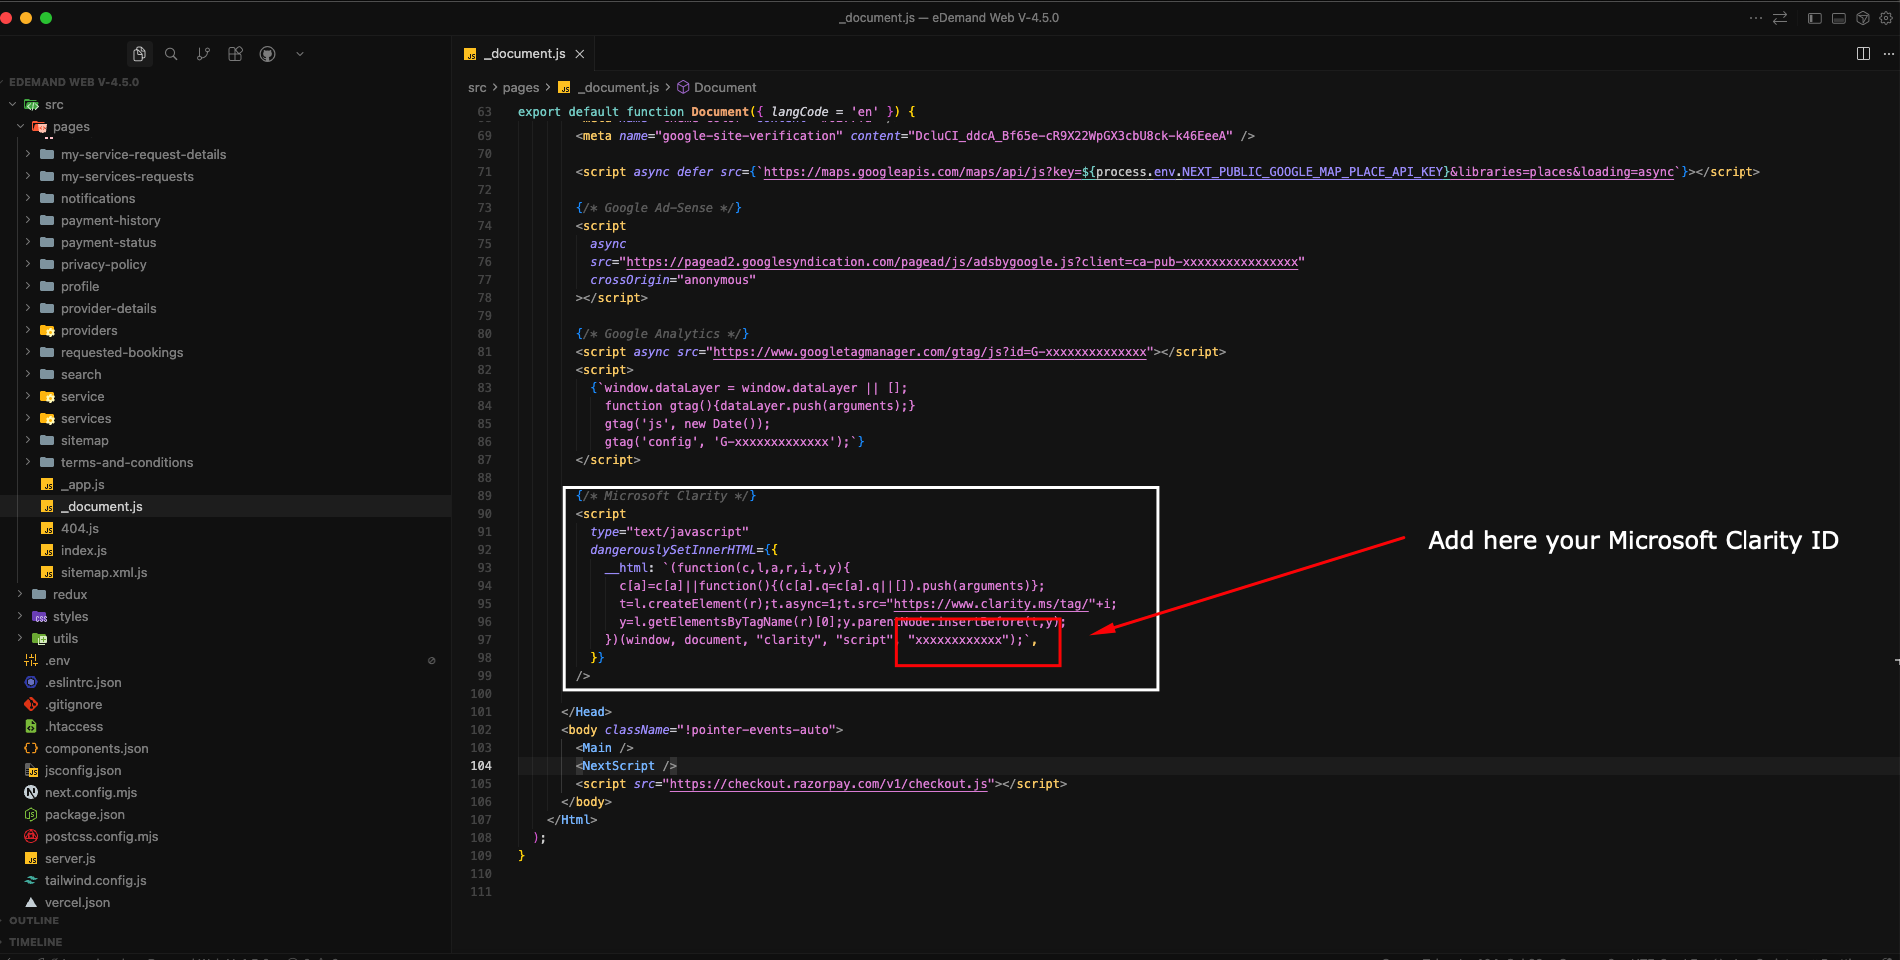
-
Find the Microsoft Clarity section and locate the script block
-
Replace the Project ID with your own:
{
  /* Microsoft Clarity */
}
<script
  type="text/javascript"
  dangerouslySetInnerHTML={{
    __html: `(function(c,l,a,r,i,t,y){
      c[a]=c[a]||function(){(c[a].q=c[a].q||[]).push(arguments)};
      t=l.createElement(r);t.async=1;t.src="https://www.clarity.ms/tag/"+i;
      y=l.getElementsByTagName(r)[0];y.parentNode.insertBefore(t,y);
    })(window, document, "clarity", "script", "YOUR_PROJECT_ID_HERE");`,
  }}
/>;
Replace YOUR_PROJECT_ID_HERE with your actual Clarity Project ID.
Google Analytics Setup
Step 1: Get Your Google Analytics Tracking ID
-
Sign up for Google Analytics:
- Visit: https://analytics.google.com/
- Sign in with your Google account
-
Create a new property:
- Click "Admin" (gear icon)
- Under "Property", click "Create Property"
- Enter property name (e.g., "eDemand Website")
- Select timezone and currency
- Click "Next"
-
Set up data stream:
- Select "Web" platform
- Enter your website URL
- Enter a stream name
- Click "Create stream"
-
Get your Measurement ID:
- After creating the stream, you'll see your Measurement ID
- Format:
G-XXXXXXXXXX(e.g.,G-J4RWHNVBG0) - Copy this ID
Step 2: Add Google Analytics to Your Code
- Open
src/pages/_document.js
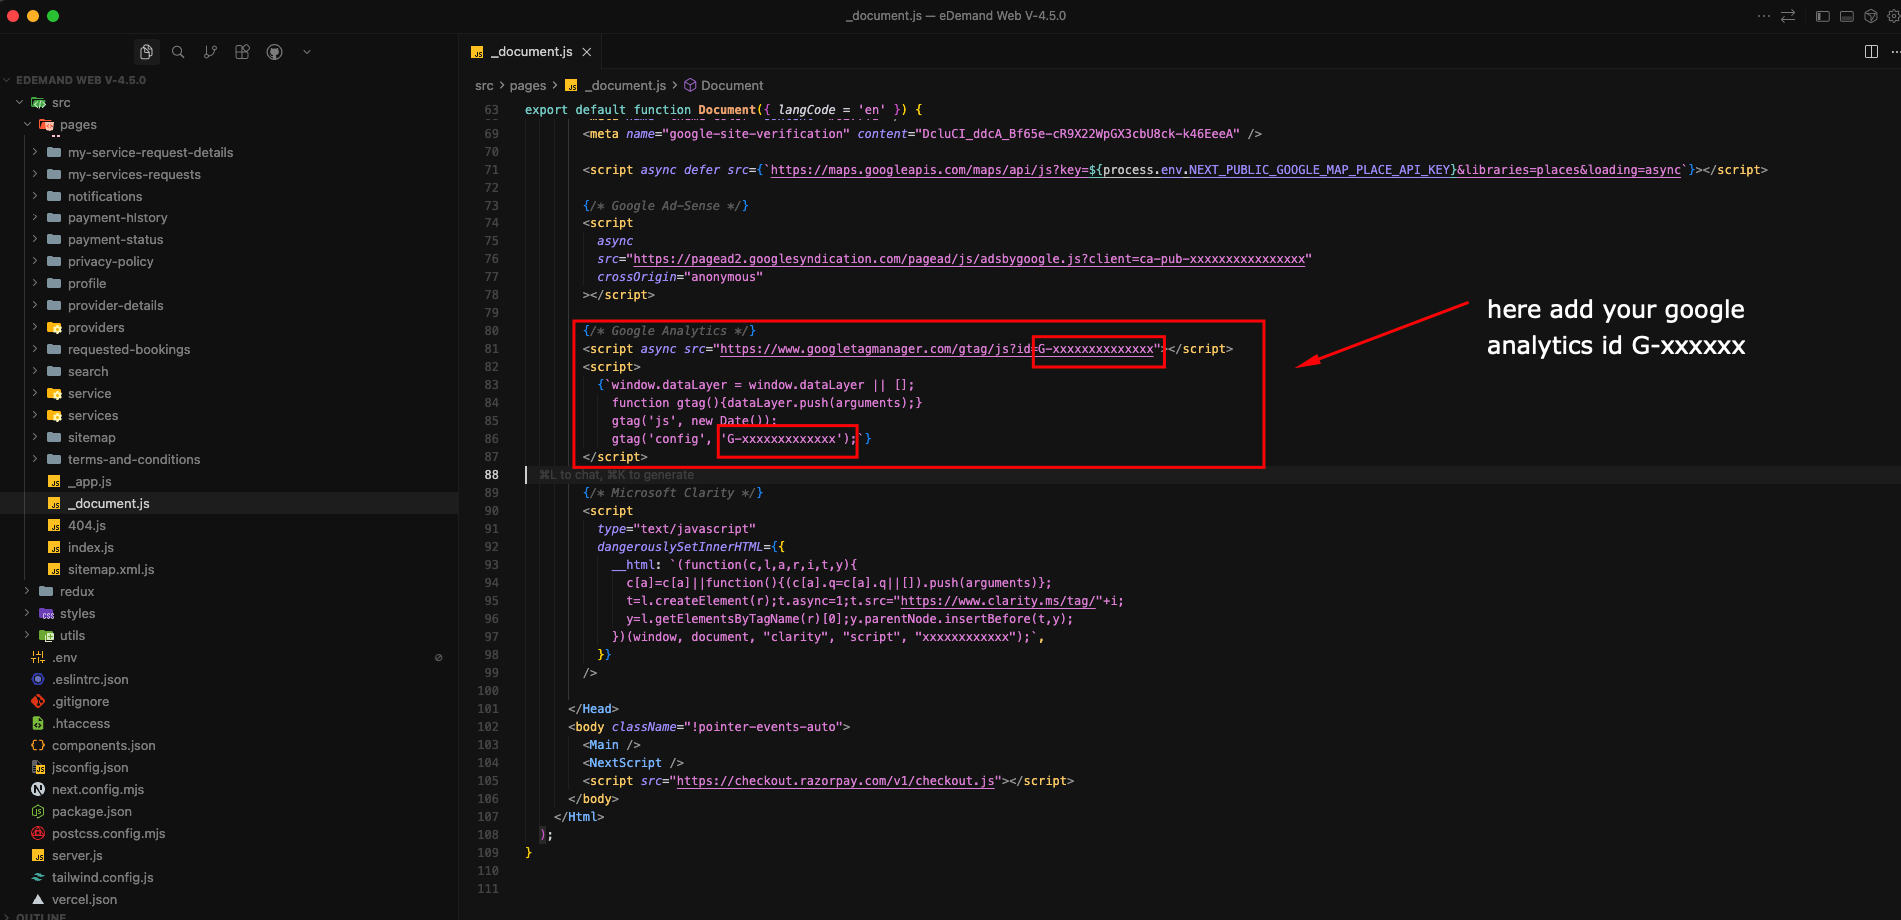
-
Find the Google Analytics section and locate the gtag script block
-
Replace the Tracking ID with your own:
{/* Google Analytics */}
<script async src="https://www.googletagmanager.com/gtag/js?id=YOUR_TRACKING_ID"></script>
<script>
  {`window.dataLayer = window.dataLayer || [];
    function gtag(){dataLayer.push(arguments);}
    gtag('js', new Date());
    gtag('config', 'YOUR_TRACKING_ID');`}
</script>
Replace YOUR_TRACKING_ID with your actual Google Analytics Measurement ID (e.g., G-J4RWHNVBG0).
Google AdSense Setup
Step 1: Get Your AdSense Publisher ID
-
Sign up for Google AdSense:
- Visit: https://www.google.com/adsense/
- Sign in with your Google account
-
Add your website:
- Click "Add site"
- Enter your website URL
- Click "Continue"
-
Complete the setup:
- Choose your country
- Enter payment information
- Submit for review (approval can take 1-14 days)
-
Get your Publisher ID:
- After approval, go to "Account" → "Account information"
- Your Publisher ID format:
ca-pub-XXXXXXXXXX - Example:
ca-pub-5187122762138955
Step 2: Add AdSense to Your Code
-
Open
src/pages/_document.js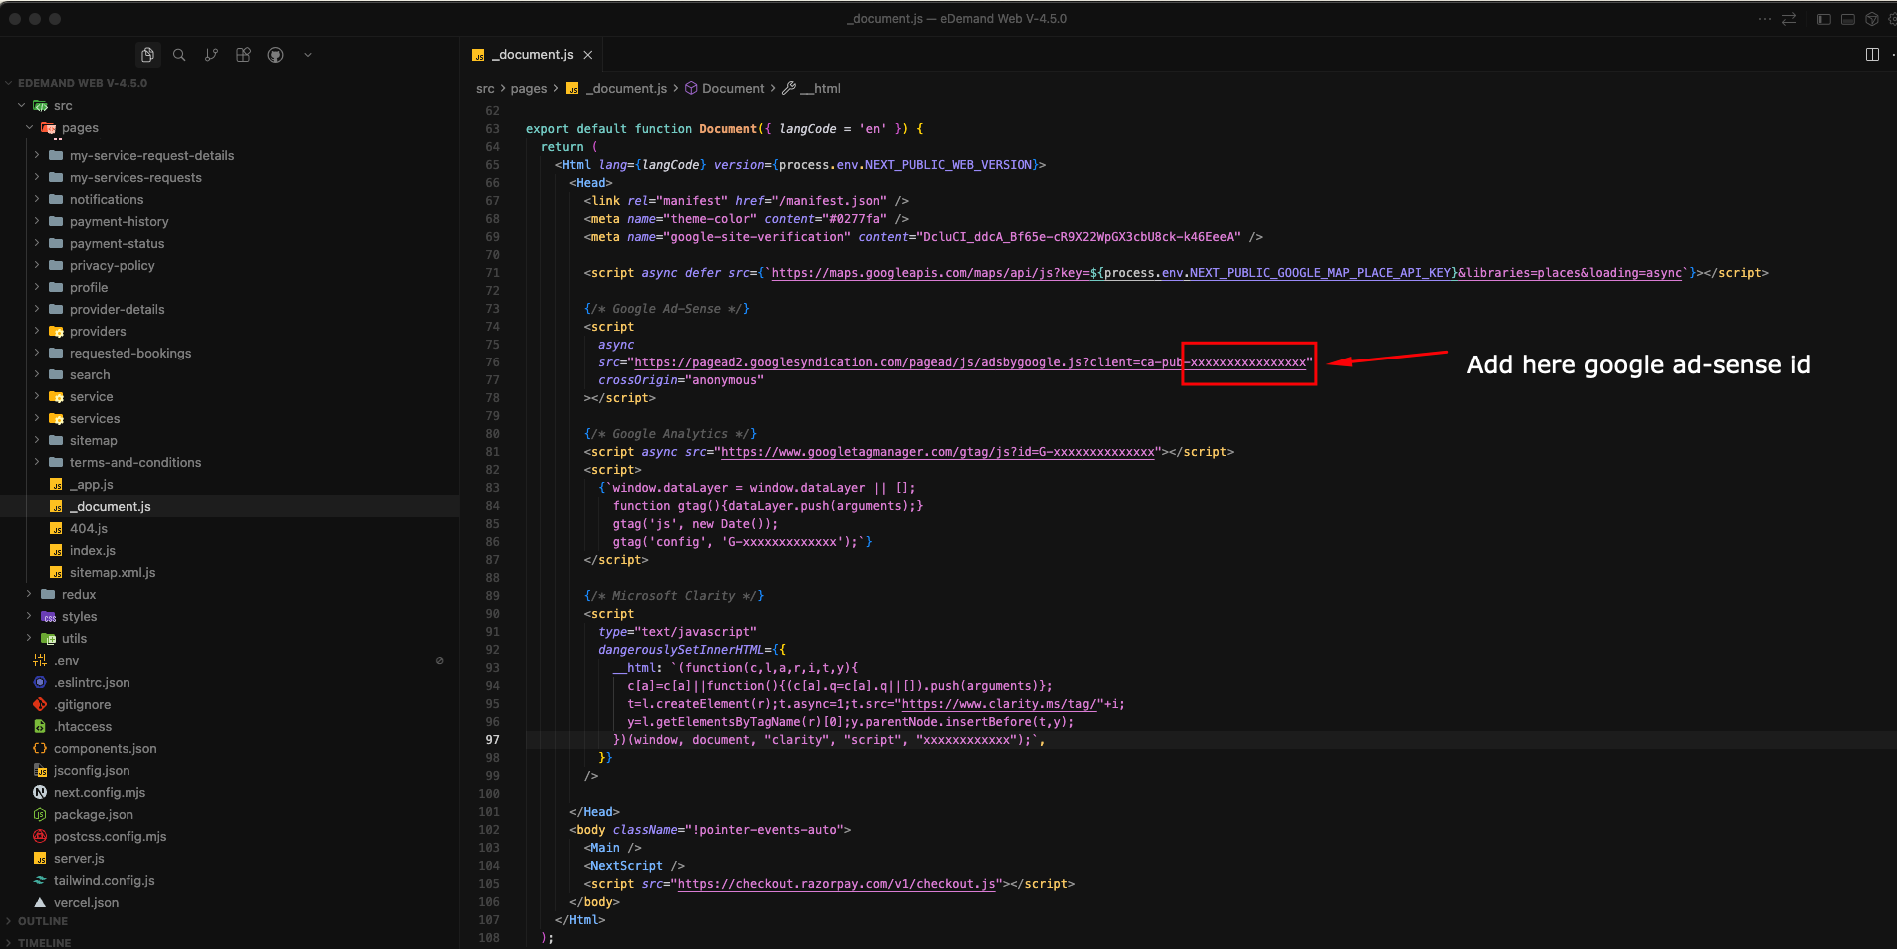
-
Find the Google AdSense section and locate the pagead script block
-
Replace the Publisher ID with your own:
{
  /* Google AdSense */
}
<script
  async
  src="https://pagead2.googlesyndication.com/pagead/js/adsbygoogle.js?client=YOUR_PUBLISHER_ID"
  crossOrigin="anonymous"
></script>;
Replace YOUR_PUBLISHER_ID with your actual AdSense Publisher ID (e.g., ca-pub-5187122762138955).
Step 3: Enable Auto Ads (Optional)
After adding the AdSense script, you can enable Auto Ads:
- Go to AdSense dashboard
- Click "Ads" → "Overview"
- Enable "Auto ads"
- Google will automatically place ads on your site