Google AdSense Integration
Integrating Google AdSense with your eBroker web application allows you to monetize your website by displaying targeted advertisements. Follow these steps to set up Google AdSense.
Setting Up Google AdSense
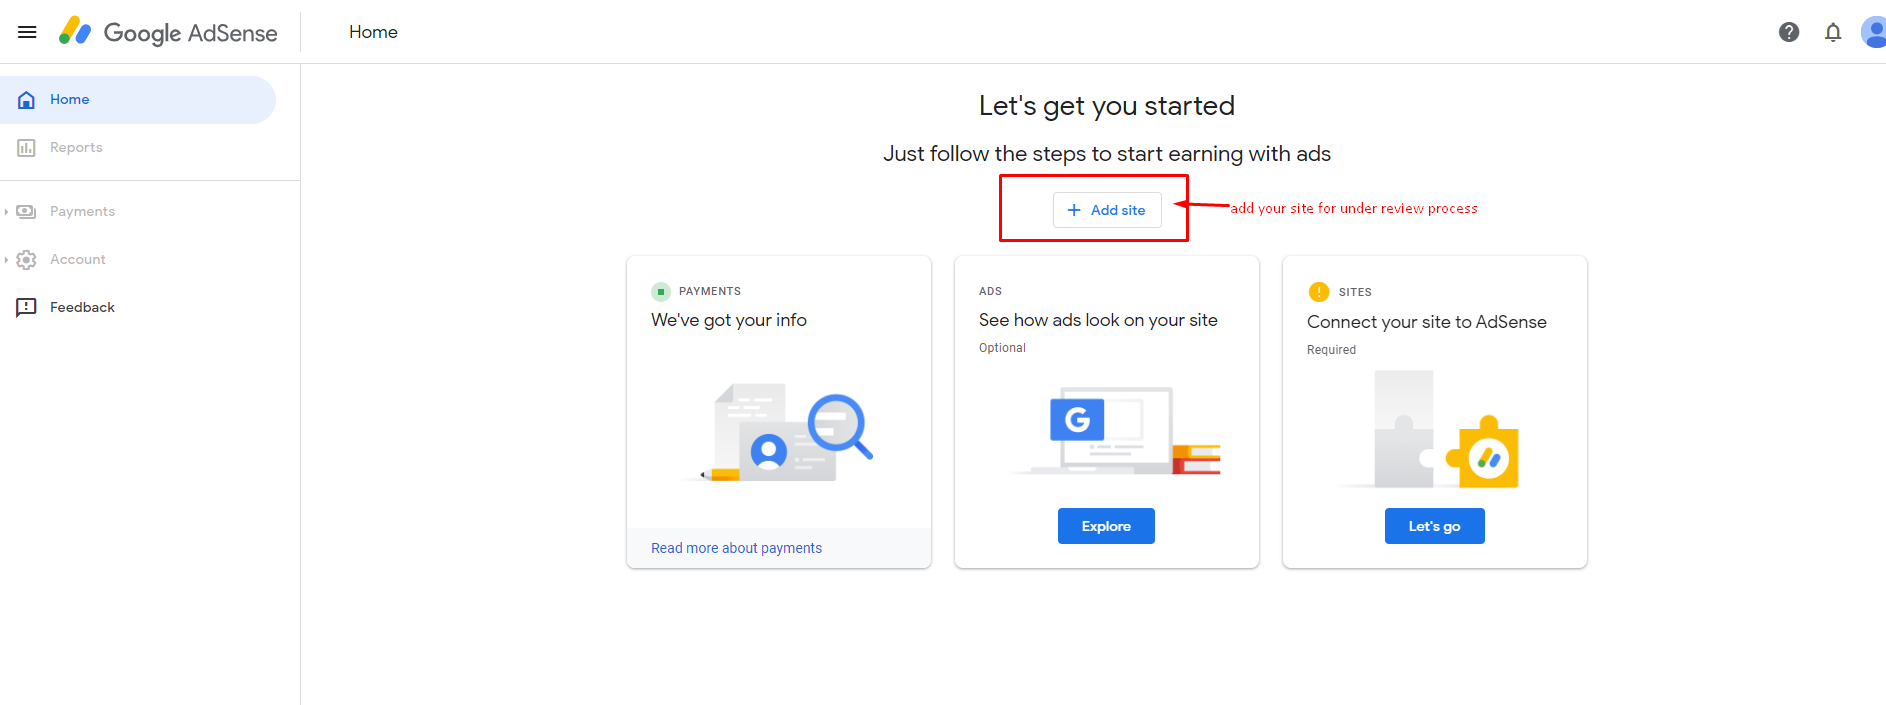
- Go to Google AdSense and sign in with your Google account
- Click on "Add site" and enter your website URL
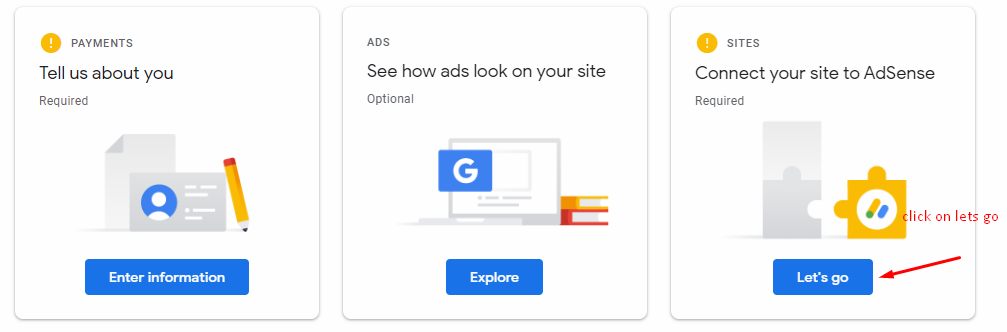
- Click the "Let's Go" button to proceed
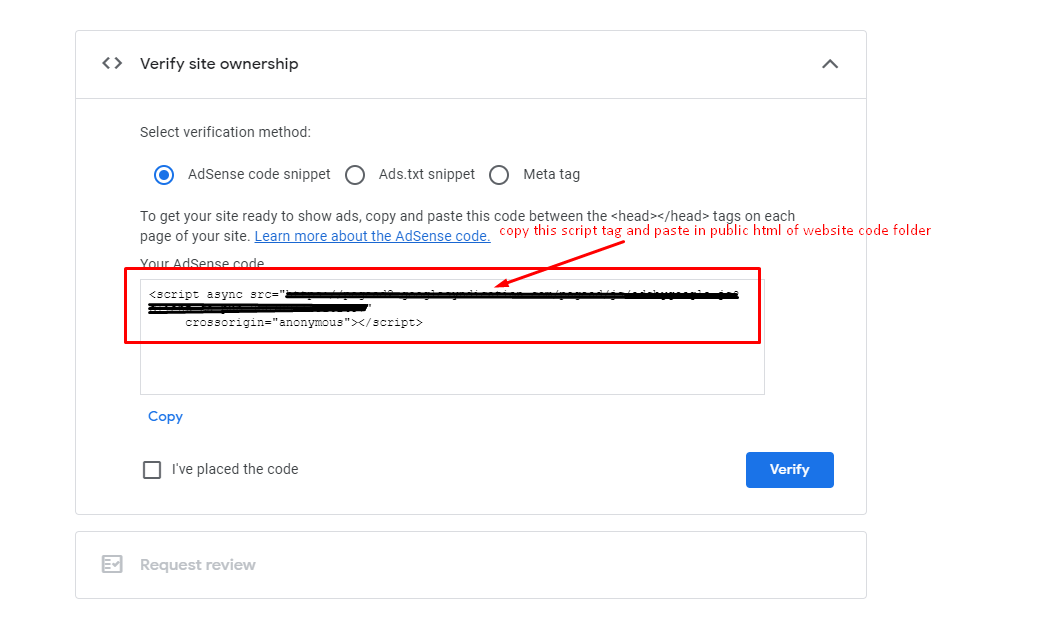
- Copy the provided AdSense script code
Adding the AdSense Script to Your Website
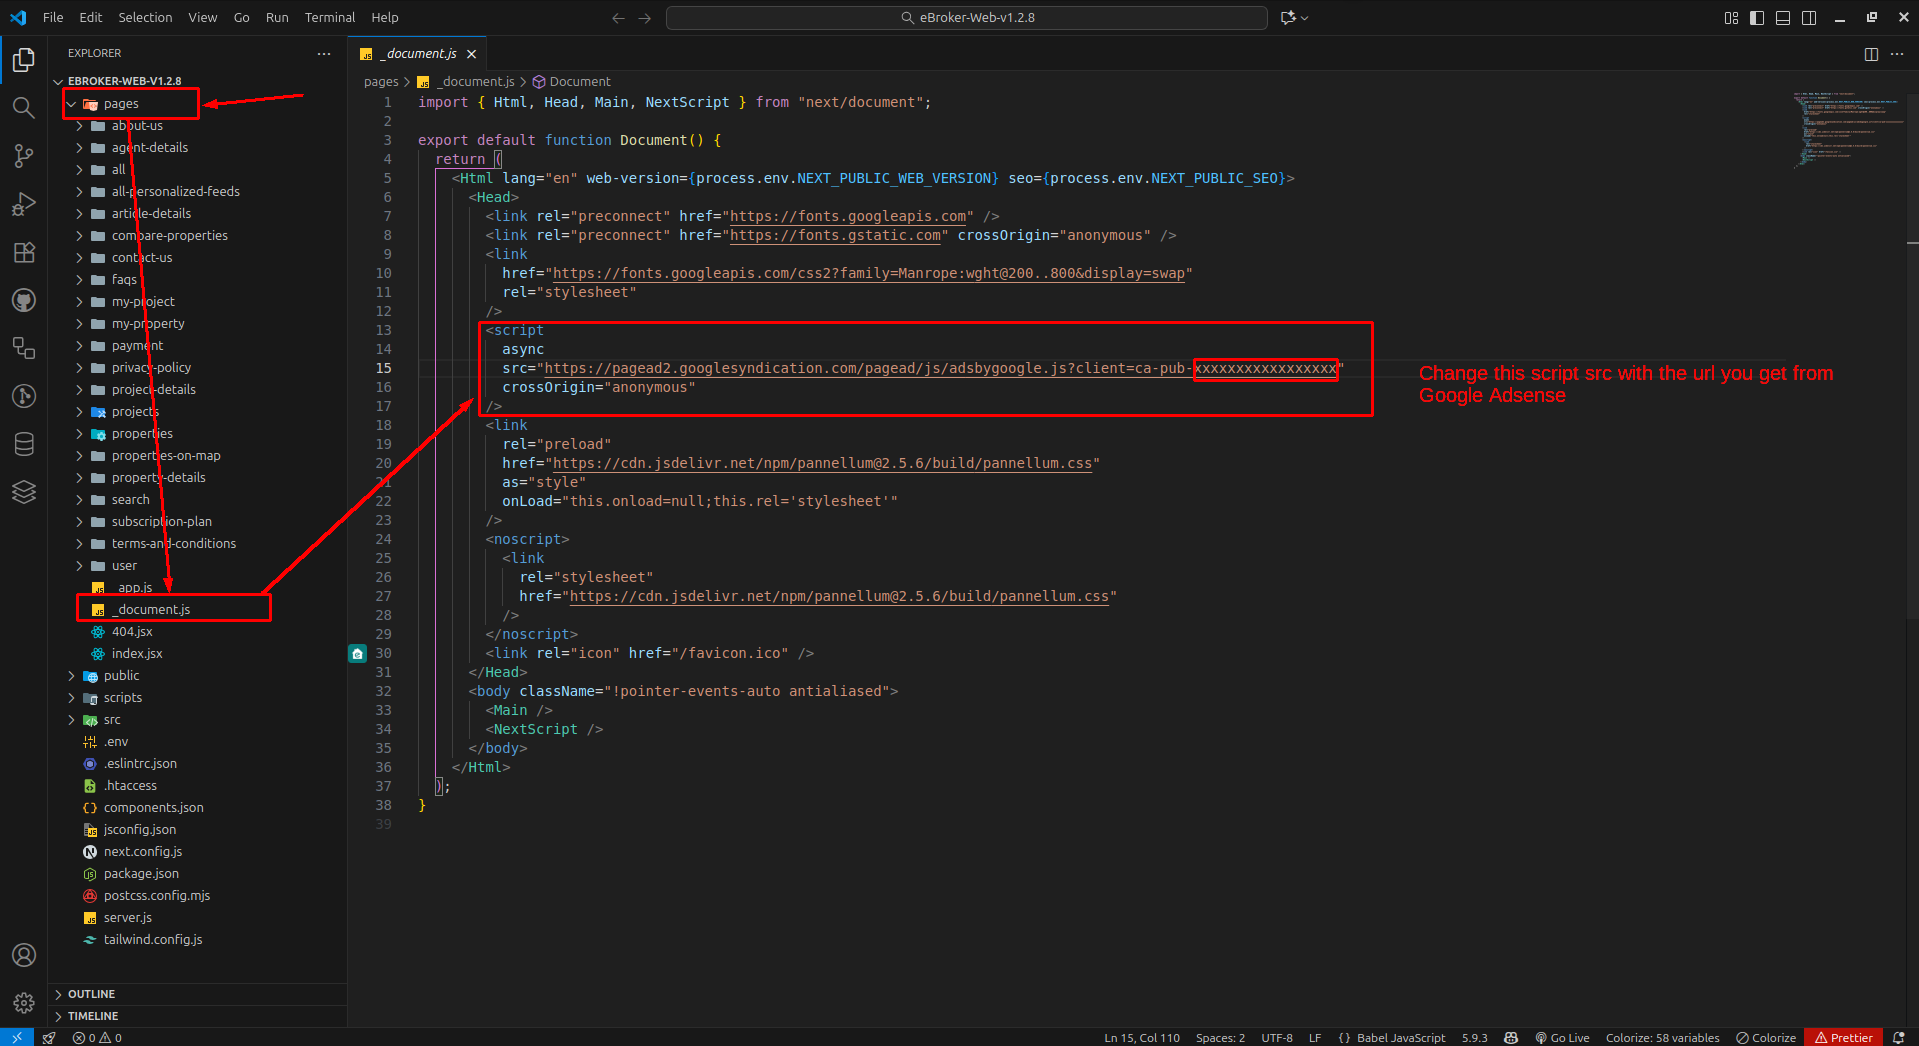
- Navigate to your project's source files
- Open the
pages→_document.jsfile - Add the AdSense script code to the appropriate section
Building and Deploying
After adding the AdSense script:
- Run the command
npm run exportifNEXT_PUBLIC_SEO=falsein your .env file to build your project - Upload the generated files to your server
- Return to Google AdSense and click the "Verify" button

Waiting for Approval
After verification, your site will enter a review process:
- Google will review your website to ensure it complies with AdSense policies
- During this time, you'll see a "Getting ready" message
- Your site will not display ads until it has been approved

The review process typically takes a few days to a couple of weeks.
Placing Ad Units
Once your site is approved:
- Create ad units in your Google AdSense dashboard
- Get the ad code for each unit
- Place these codes in strategic locations on your website
Best Practices
For effective AdSense integration:
- Don't overload your pages with too many ads
- Place ads in positions that generate engagement without disrupting user experience
- Follow all Google AdSense policies to avoid account suspension
- Regularly check your AdSense dashboard for performance metrics and optimization tips