Sitemap Setup
A sitemap helps search engines discover and index all the pages on your website efficiently. This guide explains how to set up a sitemap for your eBroker web application.
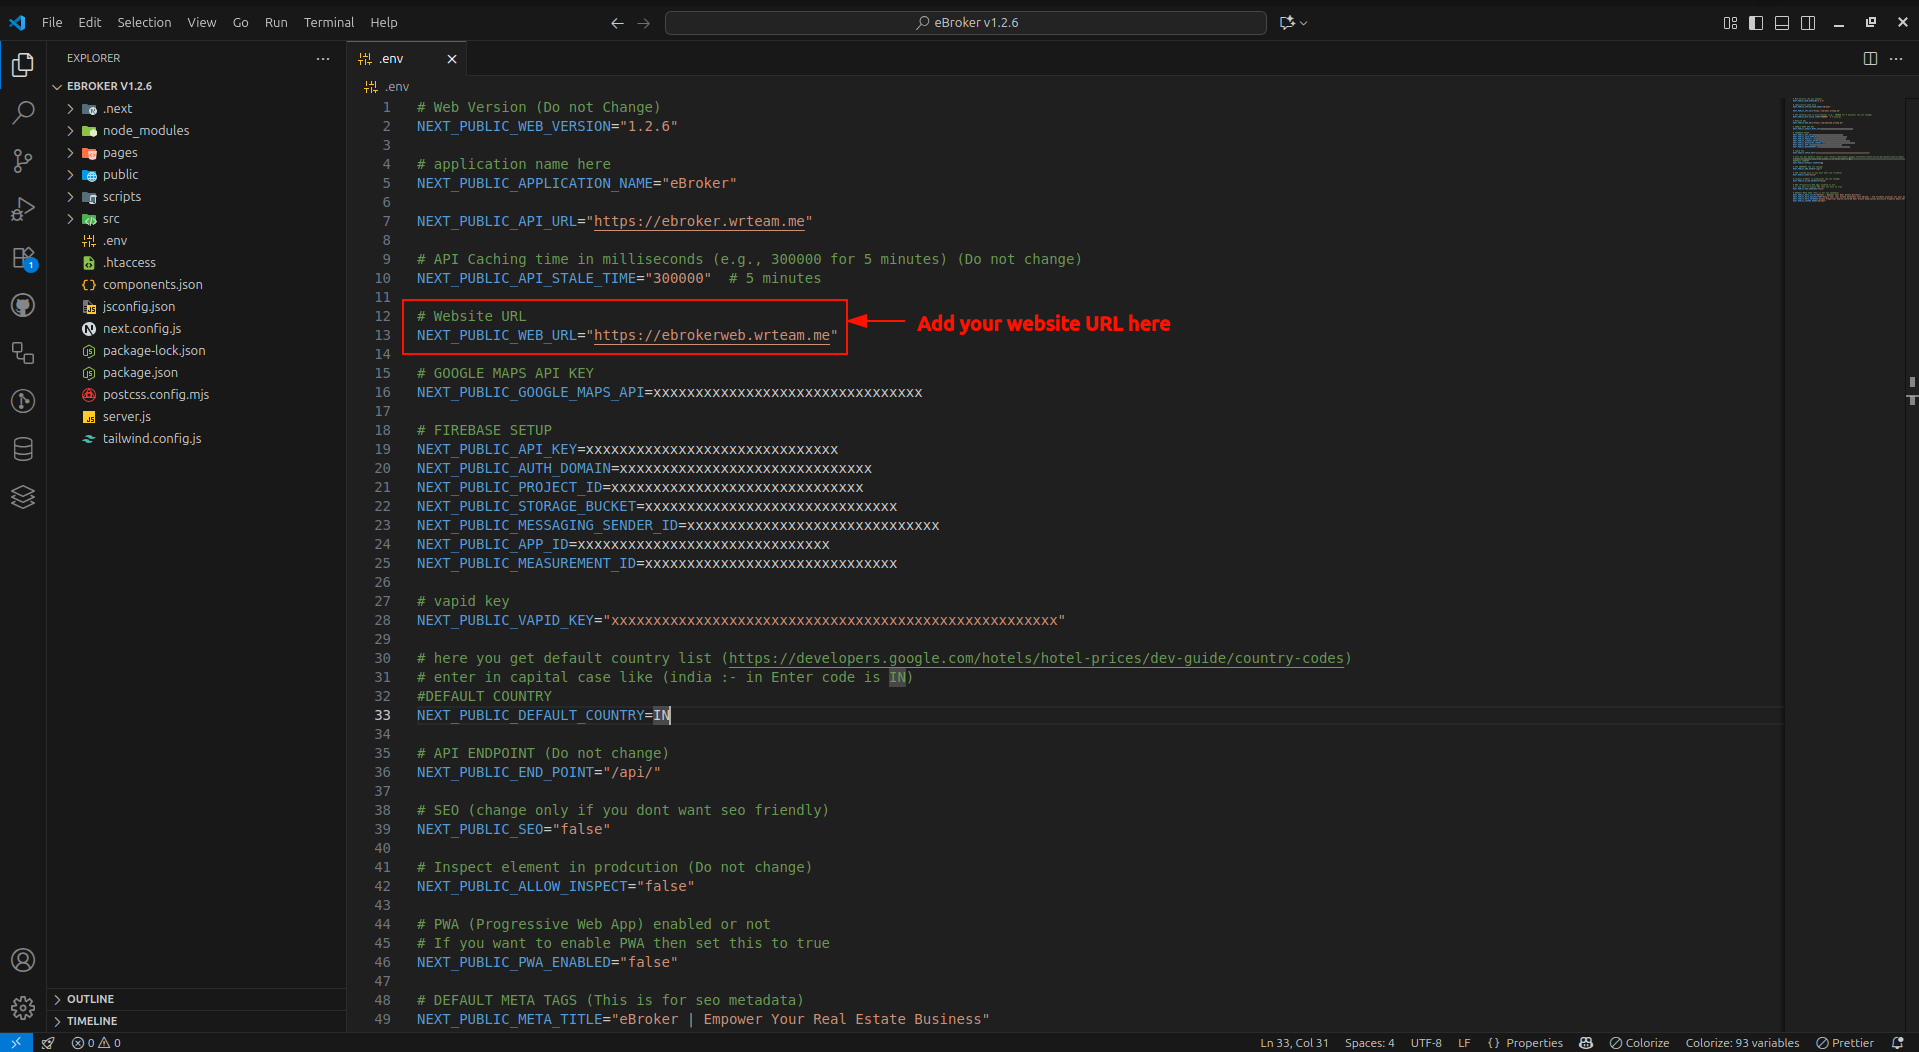
Configuring Your Domain for Sitemap
- Open the
.envfile in your project's root directory - Add your web domain or subdomain URL to the appropriate variable
Generating the Sitemap
Sitemap will generate automatically when you're making the build for deployment i.e. when you run command npm run export with NEXT_PUBLIC_SEO=false or npm run build with NEXT_PUBLIC_SEO=false
For manual sitemap generation of the sitemap for your website:
- Run the following command:
node scripts/sitemap-generator.js
- This will automatically generate a sitemap.xml file in the
publicdirectory
Customizing the Sitemap
If you want to customize the sitemap manually:
- Navigate to the
publicdirectory - Open the
sitemap.xmlfile - Modify the file according to your needs
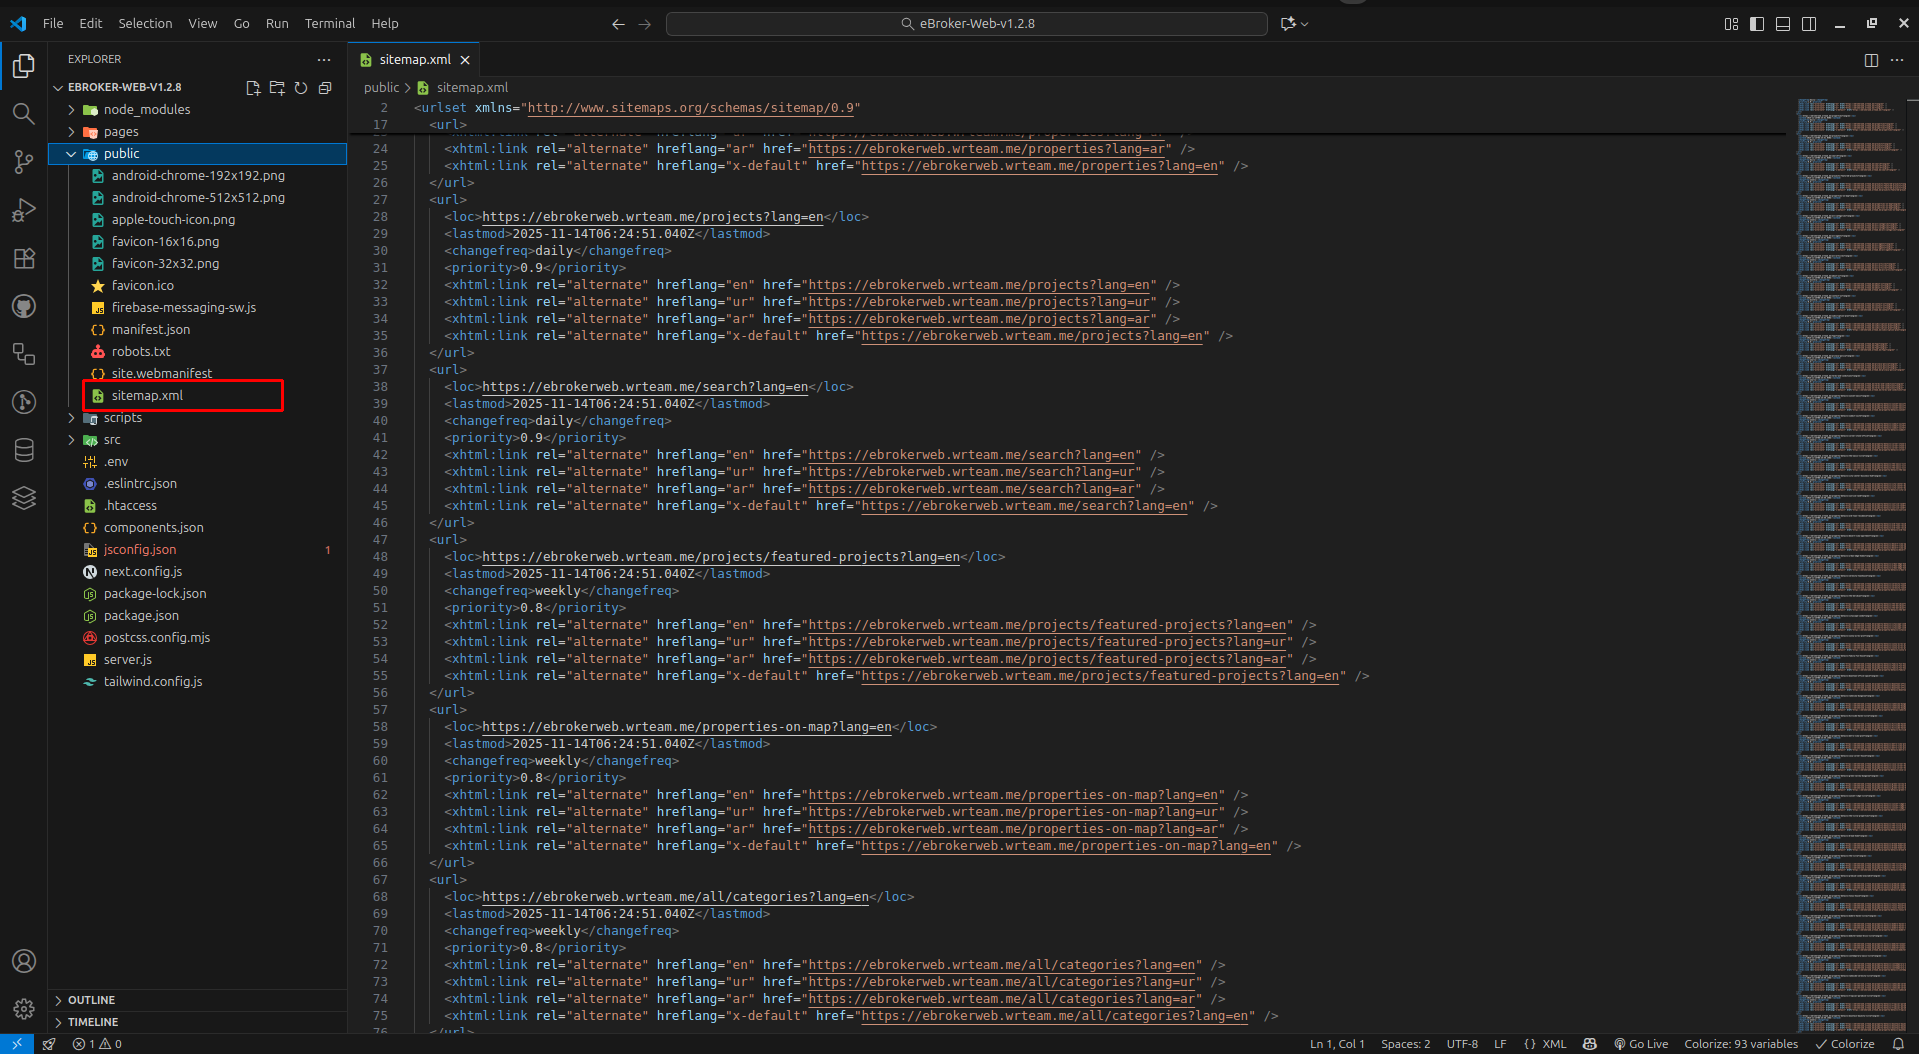
Sitemap Structure
A typical multilingual website sitemap follows this XML structure:
<?xml version="1.0" encoding="UTF-8"?>
<urlset xmlns="http://www.sitemaps.org/schemas/sitemap/0.9"
        xmlns:xhtml="http://www.w3.org/1999/xhtml"
        xmlns:xsi="http://www.w3.org/2001/XMLSchema-instance"
        xsi:schemaLocation="http://www.sitemaps.org/schemas/sitemap/0.9
        http://www.sitemaps.org/schemas/sitemap/0.9/sitemap.xsd">
  <url>
    <loc>https://yourdomain.com/?lang=en</loc>
    <lastmod>2025-11-14T06:24:51.039Z</lastmod>
    <changefreq>daily</changefreq>
    <priority>1.0</priority>
    <xhtml:link rel="alternate" hreflang="en" href="https://yourdomain.com/?lang=en" />
    <xhtml:link rel="alternate" hreflang="ur" href="https://yourdomain.com/?lang=ur" />
    <xhtml:link rel="alternate" hreflang="ar" href="https://yourdomain.com/?lang=ar" />
    <xhtml:link rel="alternate" hreflang="x-default" href="https://yourdomain.com/?lang=en" />
  </url>
   <url>
    <loc>https://yourdomain.com/properties?lang=en</loc>
    <lastmod>2025-11-14T06:24:51.040Z</lastmod>
    <changefreq>daily</changefreq>
    <priority>0.9</priority>
    <xhtml:link rel="alternate" hreflang="en" href="https://yourdomain.com/properties?lang=en" />
    <xhtml:link rel="alternate" hreflang="ur" href="https://yourdomain.com/properties?lang=ur" />
    <xhtml:link rel="alternate" hreflang="ar" href="https://yourdomain.com/properties?lang=ar" />
    <xhtml:link rel="alternate" hreflang="x-default" href="https://yourdomain.com/properties?lang=en" />
  </url>
  <!-- Additional URLs -->
</urlset>
Submitting Your Sitemap to Search Engines
After creating your sitemap:
- Deploy your website with the sitemap.xml file
- Submit your sitemap URL to search engines through their webmaster tools:
- Google Search Console: https://search.google.com/search-console
- Bing Webmaster Tools: https://www.bing.com/webmasters
- Yandex Webmaster: https://webmaster.yandex.com
Best Practices
For an effective sitemap:
- Keep it up to date with your latest content
- Include all important pages you want indexed
- Set appropriate priority and change frequency values
- Keep the file size under 50MB and fewer than 50,000 URLs (create multiple sitemaps if needed)
- Make sure the URLs in your sitemap actually exist and return 200 status codes