Web Logo Setup
Customizing your web logo is essential for establishing brand identity on your eBroker web application. This guide explains how to set up different logos for your site.
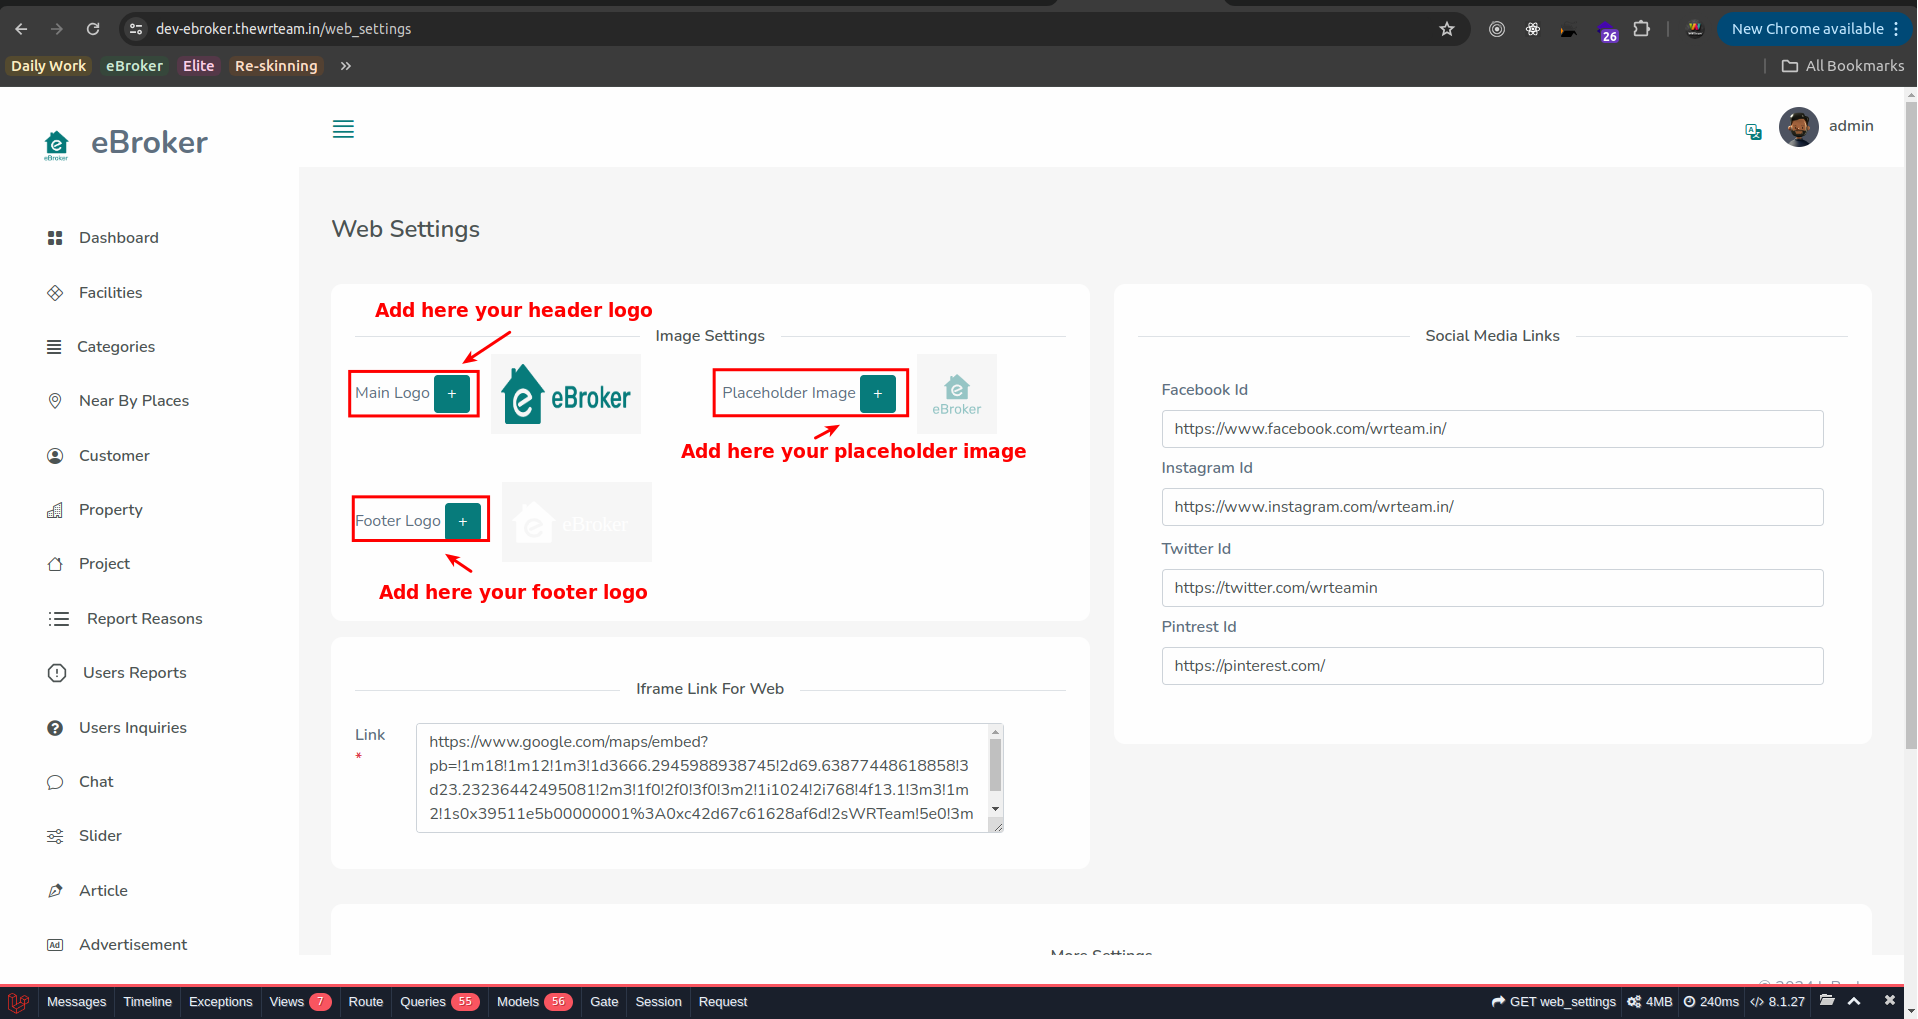
Setting Up Web Logos
- Log in to your admin panel
- Navigate to Settings → Web settings → Image Settings
- You can customize three different logo types:
- Main Logo: Appears in the header/navigation bar
- Footer Logo: Displayed in the website footer
- Placeholder Image: Used when no other image is available

Logo Specifications
For optimal display, follow these guidelines when preparing your logo files:
Main Logo
- Format: WebP (preferred for best performance), PNG or SVG (preferred for best quality)
- Recommended size: 176px wide, 56px height
- Transparent background recommended
Footer Logo
- Format: WebP or PNG or SVG
- Usually a white/light version of your logo for dark footer backgrounds
- Transparent background
Placeholder Image
- Format: WebP or PNG or JPG
- Used when property images or other content images are unavailable
- Should contain your branding
Uploading Your Logos
For each logo type:
- Click on the corresponding upload button
- Select your logo file from your computer
- Crop or adjust as needed in the upload interface
- Save your changes
Testing Your Logos
After uploading your logos:
- Visit your website's front end
- Check how the main logo appears in the navigation bar
- Scroll to the bottom to verify the footer logo
- Navigate to different pages to ensure consistent display
- Check the logos on both desktop and mobile views
If you notice any sizing or alignment issues, you may need to adjust your logo files and upload them again.