Payment Gateway Settings
eDemand supports multiple payment gateways.
Follow the steps below to connect each gateway to your admin panel.
Use the right-side navigation to quickly jump to a specific gateway:
- Stripe
- Razorpay
- Paystack
- PayPal
- Flutterwave
- Xendit
- Cashfree
Stripe
Stripe – Get API keys
-
Open the Stripe dashboard.
Go to https://dashboard.stripe.com/login and sign in to your Stripe account.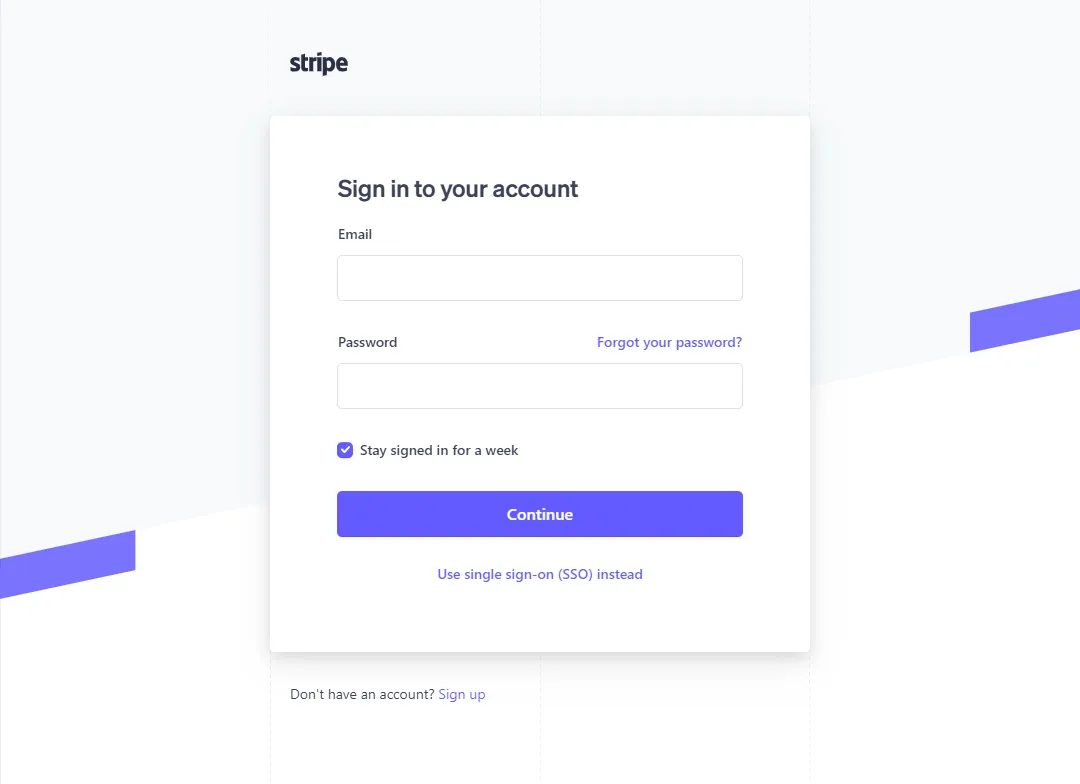
-
Open the Developers section.
Click Developers in the top navigation bar.
-
Go to API keys.
In the left sidebar, click API keys.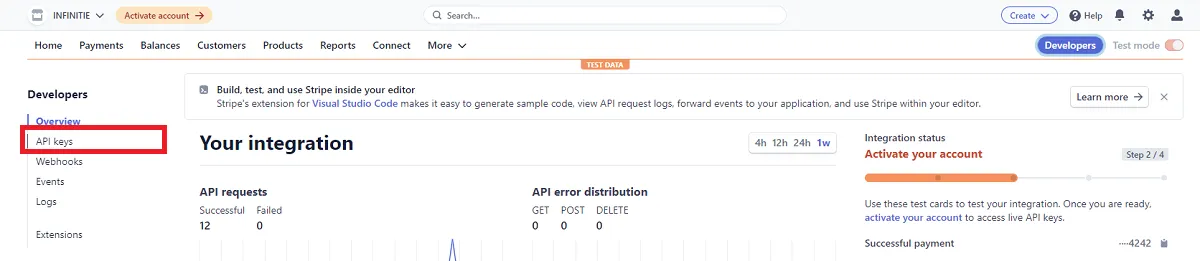
-
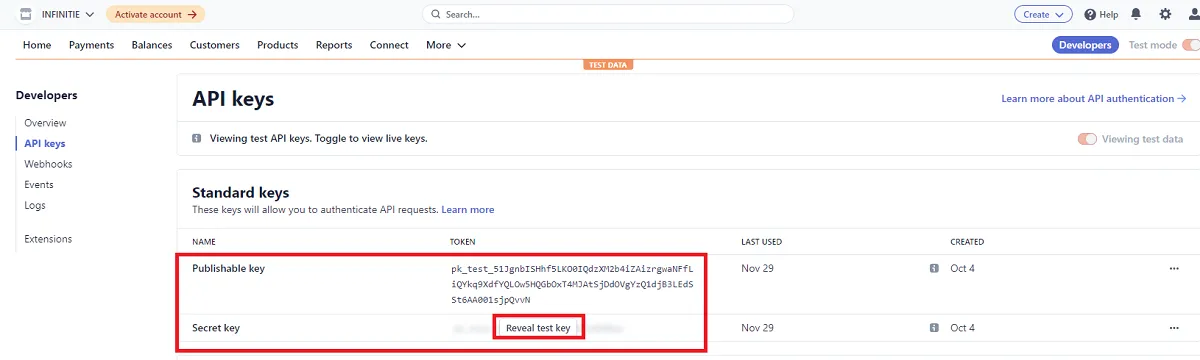
Copy your keys.
Click Reveal key and copy:- Publishable key
- Secret key
Stripe – Add keys in eDemand
-
Open eDemand admin panel.
Go to Settings → Payment Gateway Settings. -
Paste Stripe credentials.
Paste the Publishable key and Secret key into the Stripe section.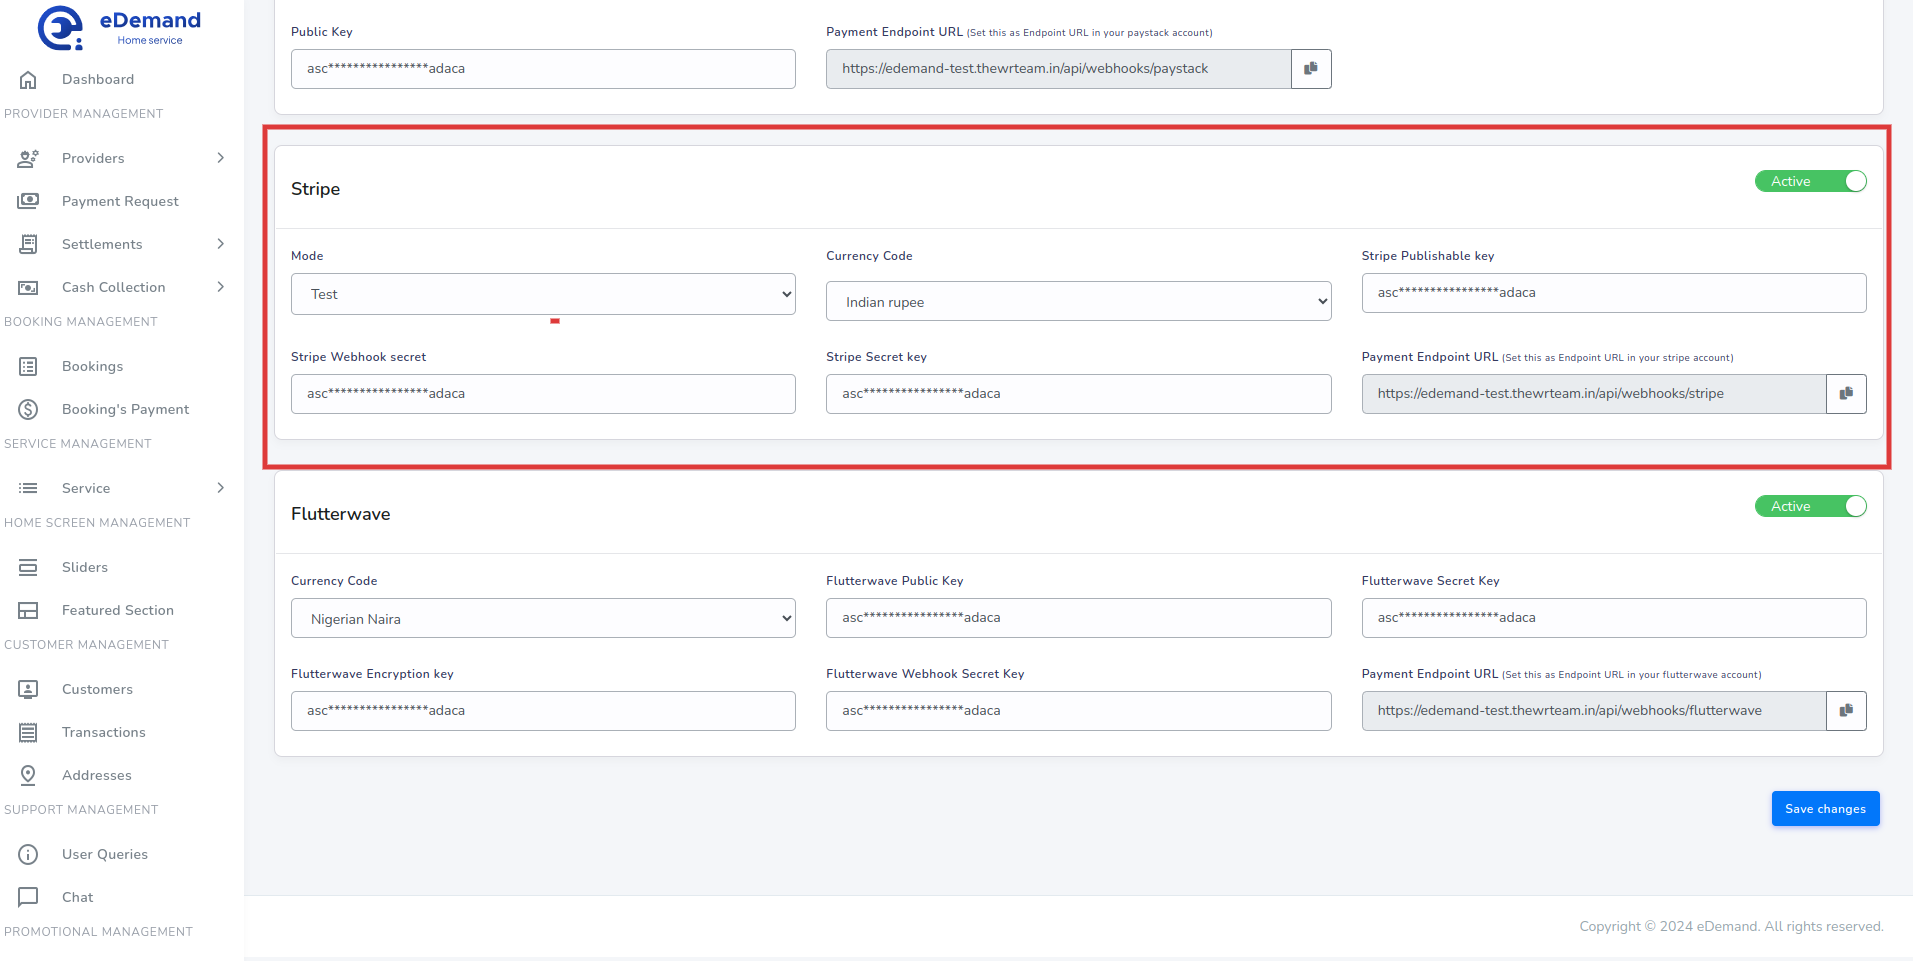
Stripe – Webhook setup
-
Set the Stripe webhook.

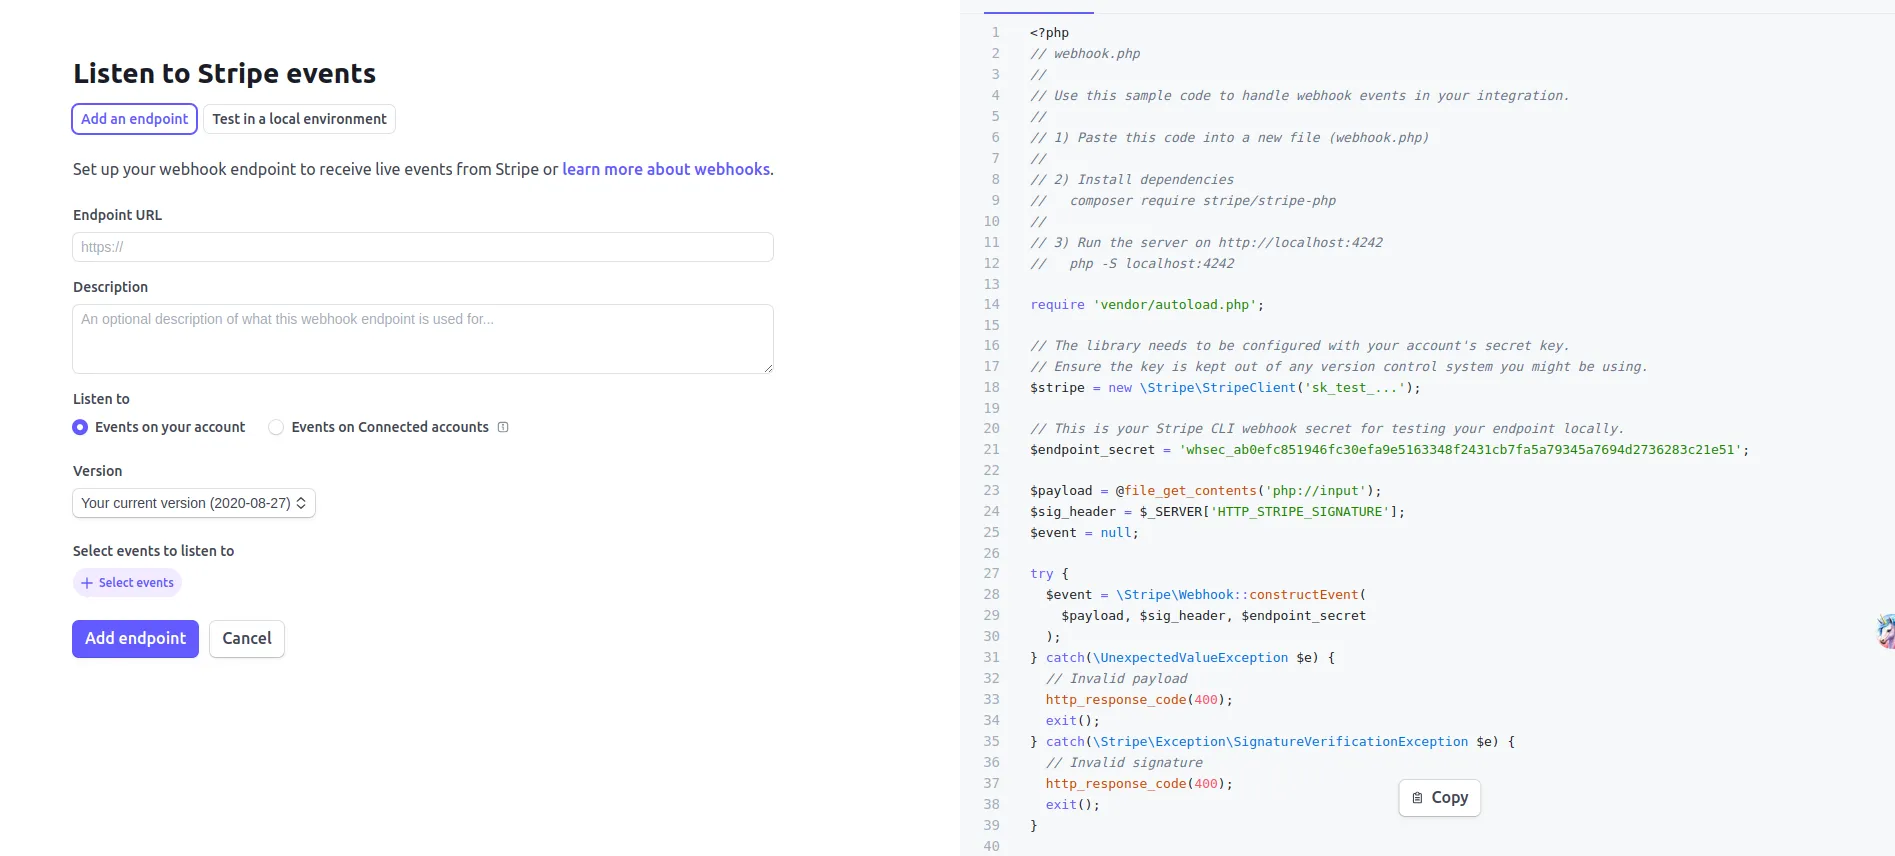
Make sure the webhook URL matches the one shown in your eDemand admin panel.
Razorpay
Razorpay – Get API keys
-
Open the Razorpay dashboard.
Go to https://dashboard.razorpay.com/app/dashboard and sign in.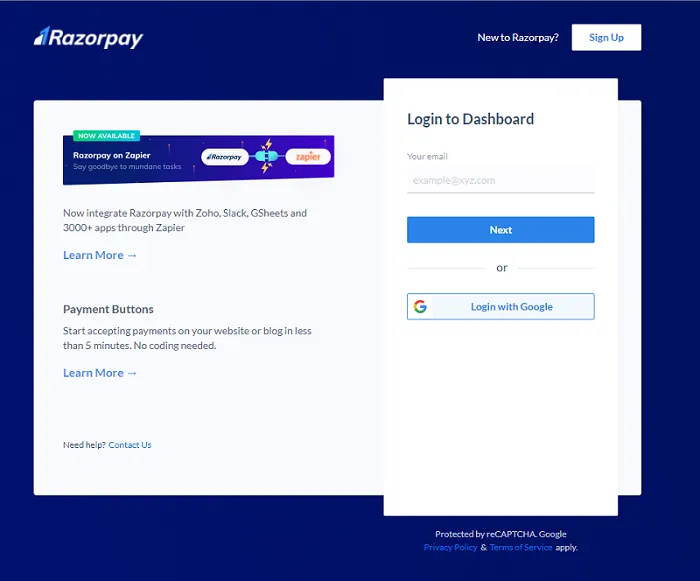
-
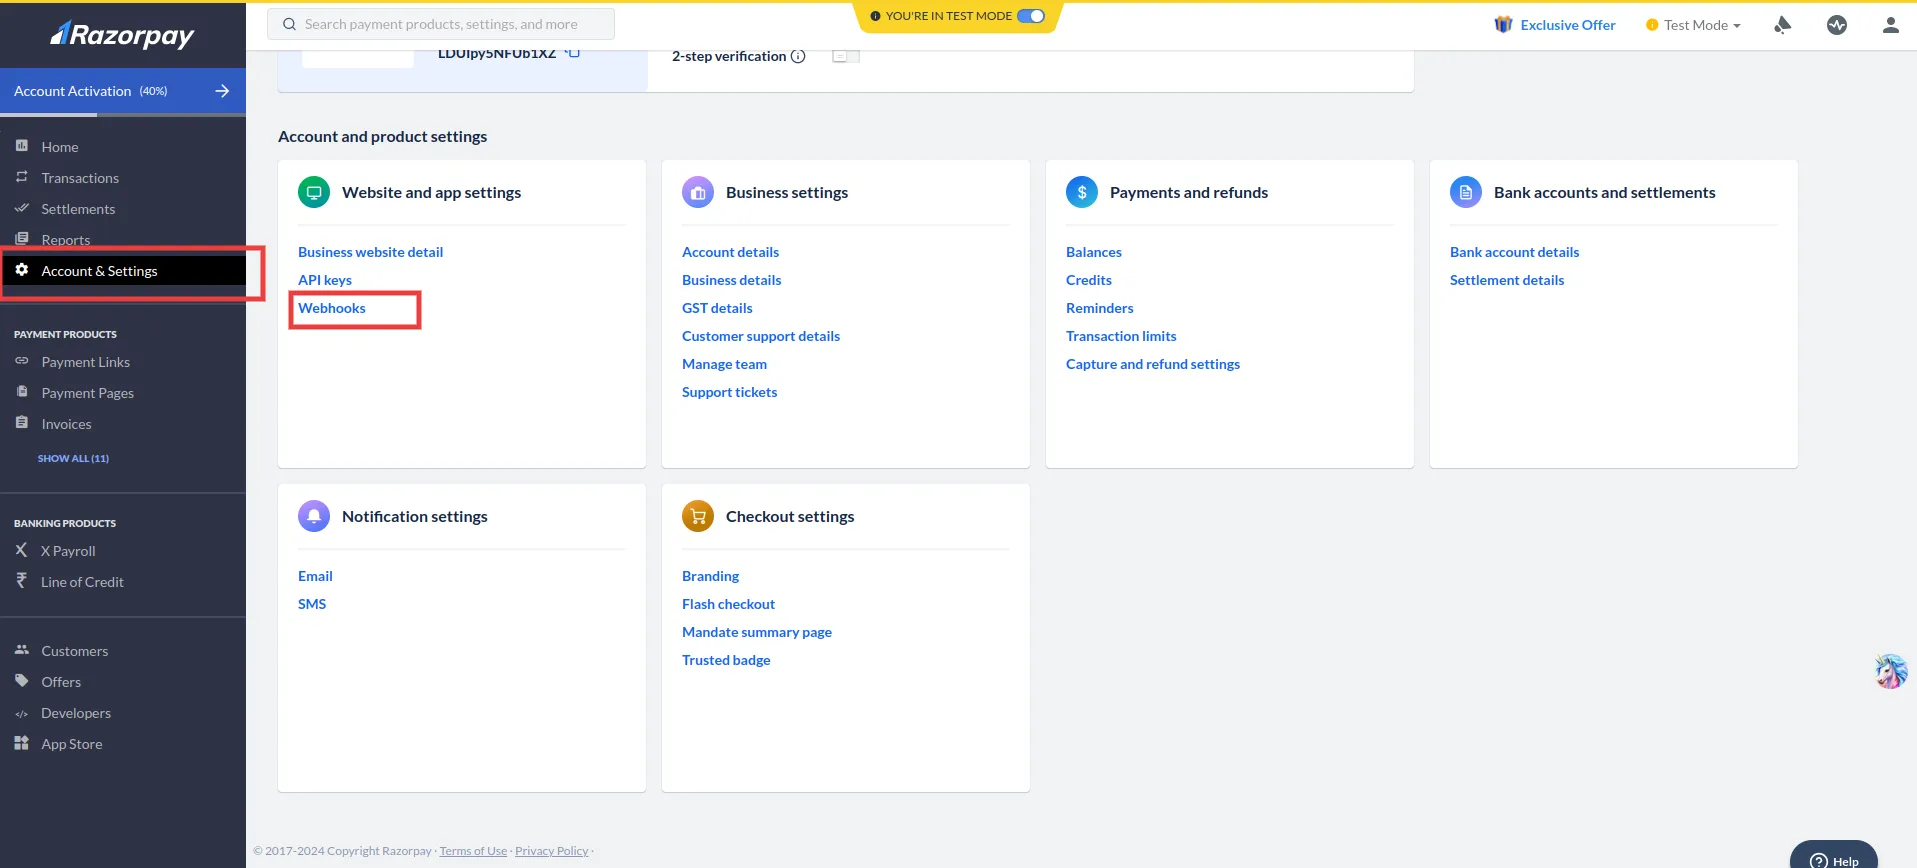
Open Settings.
Click Settings.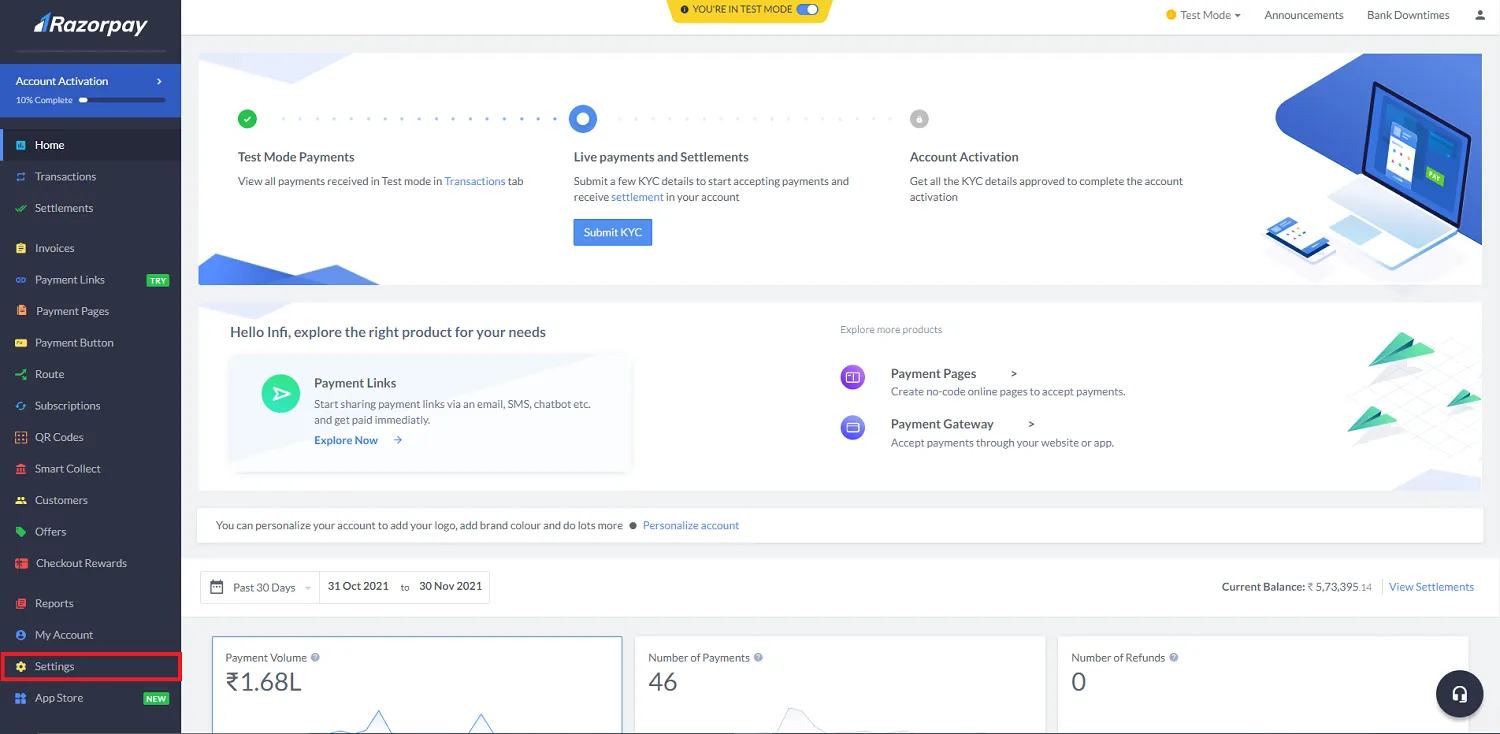
-
Go to API keys.
Click API Keys.
-
Generate and copy keys.
Click Generate Key (or Regenerate Key) and copy the keys shown.
Razorpay – Add keys in eDemand
-
Open eDemand admin panel.
Go to Settings → Payment Gateway Settings. -
Paste Razorpay credentials.
Paste the Razorpay keys into the Razorpay section.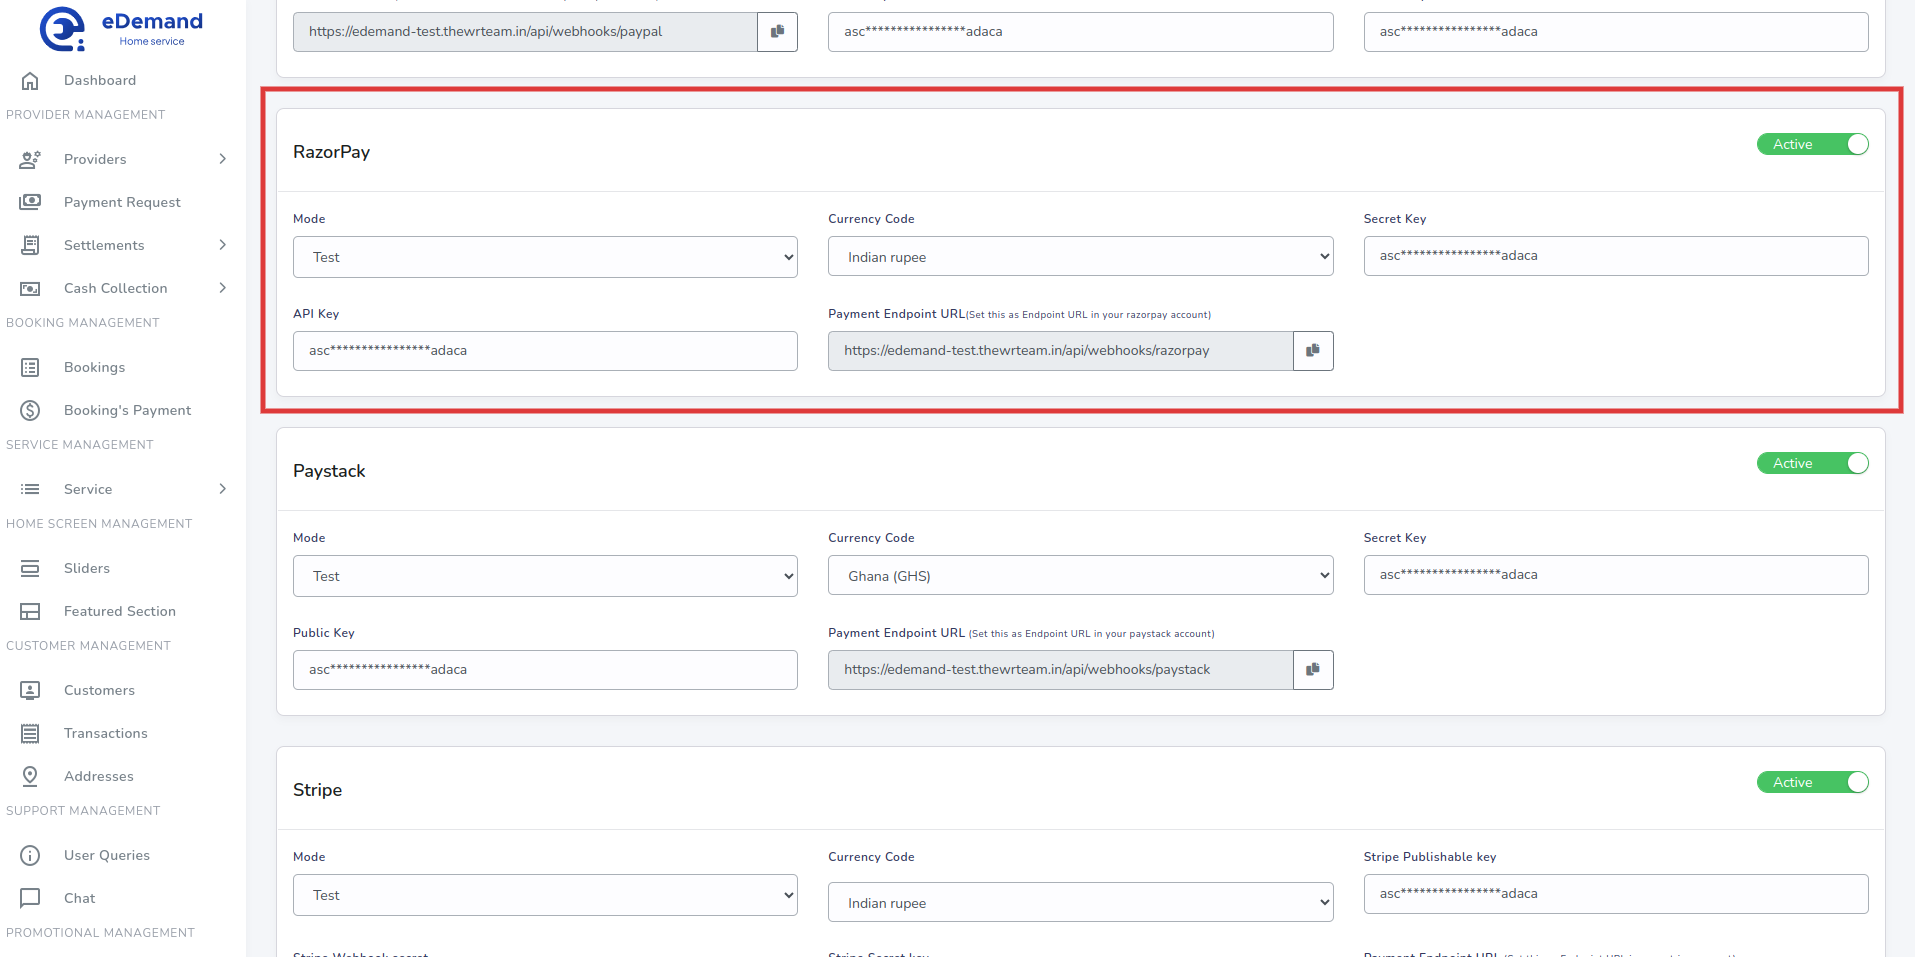
Razorpay – Webhook setup
-
Set the Razorpay webhook.
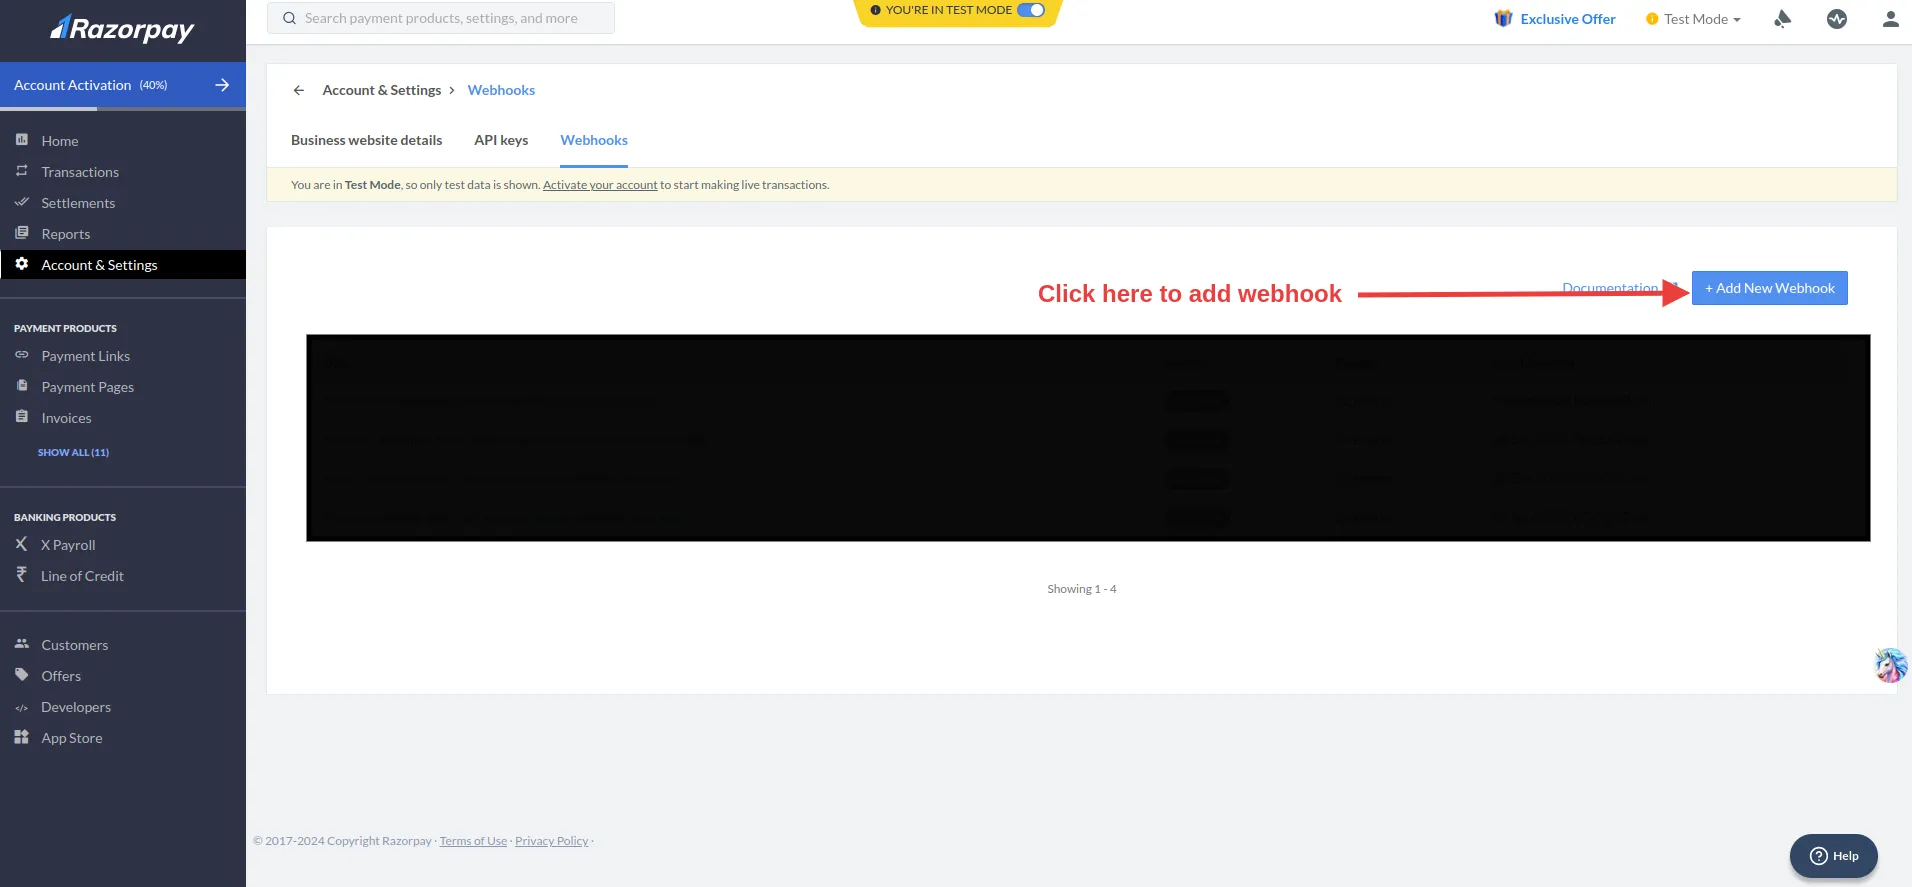
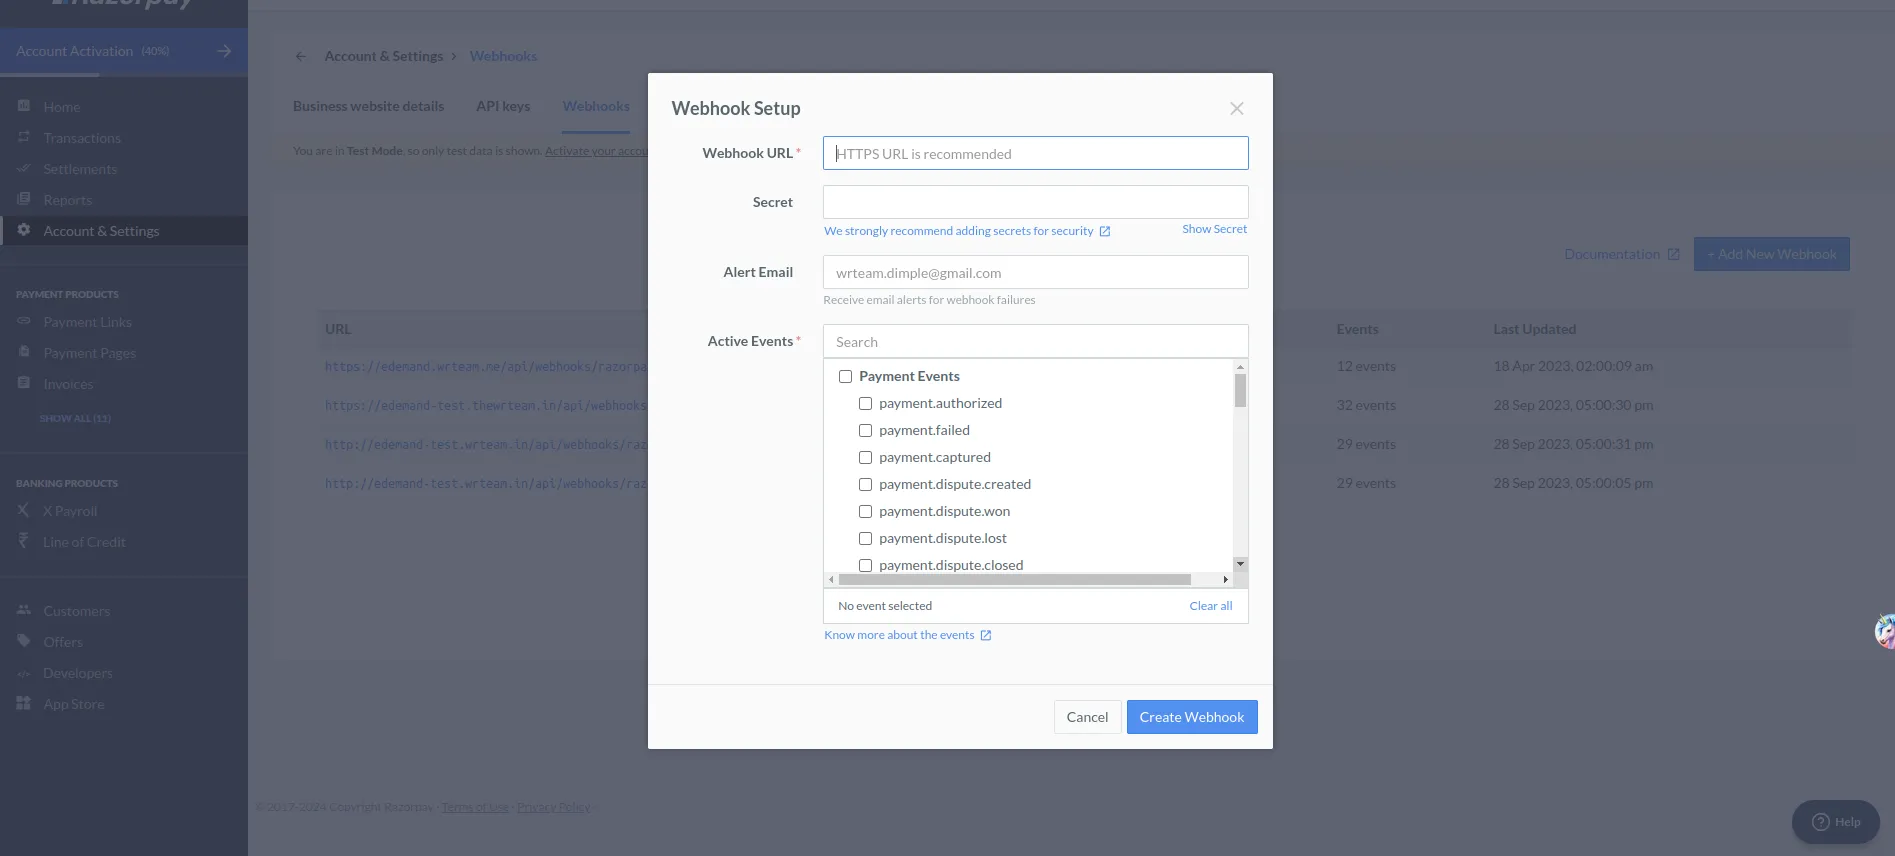
Use the webhook URL provided in your eDemand admin panel and ensure required events are enabled.
Paystack
Paystack – Get API keys
-
Open the Paystack dashboard.
Go to https://dashboard.paystack.com/ and sign in.
-
Open API Keys & Webhooks.
Go to Settings → API Keys & Webhooks.
-
Copy your credentials.
Copy the keys shown in the API Keys section.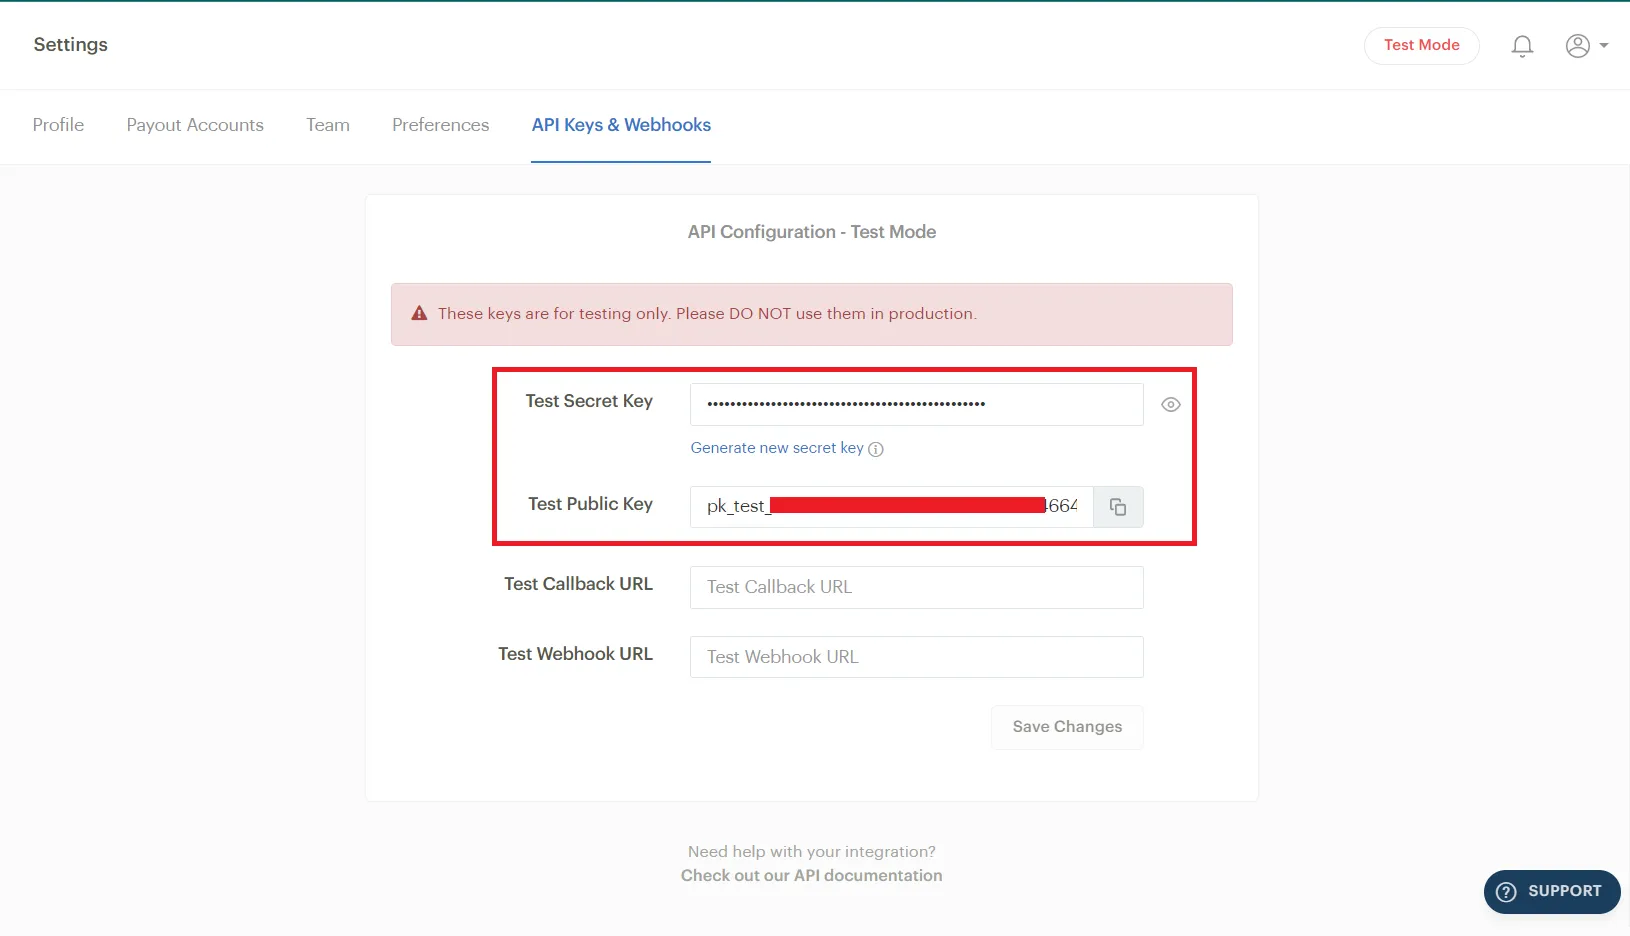
Paystack – Add keys in eDemand
-
Open eDemand admin panel.
Go to Settings → Payment Gateway Settings. -
Paste Paystack credentials.
Paste the Paystack keys into the Paystack section.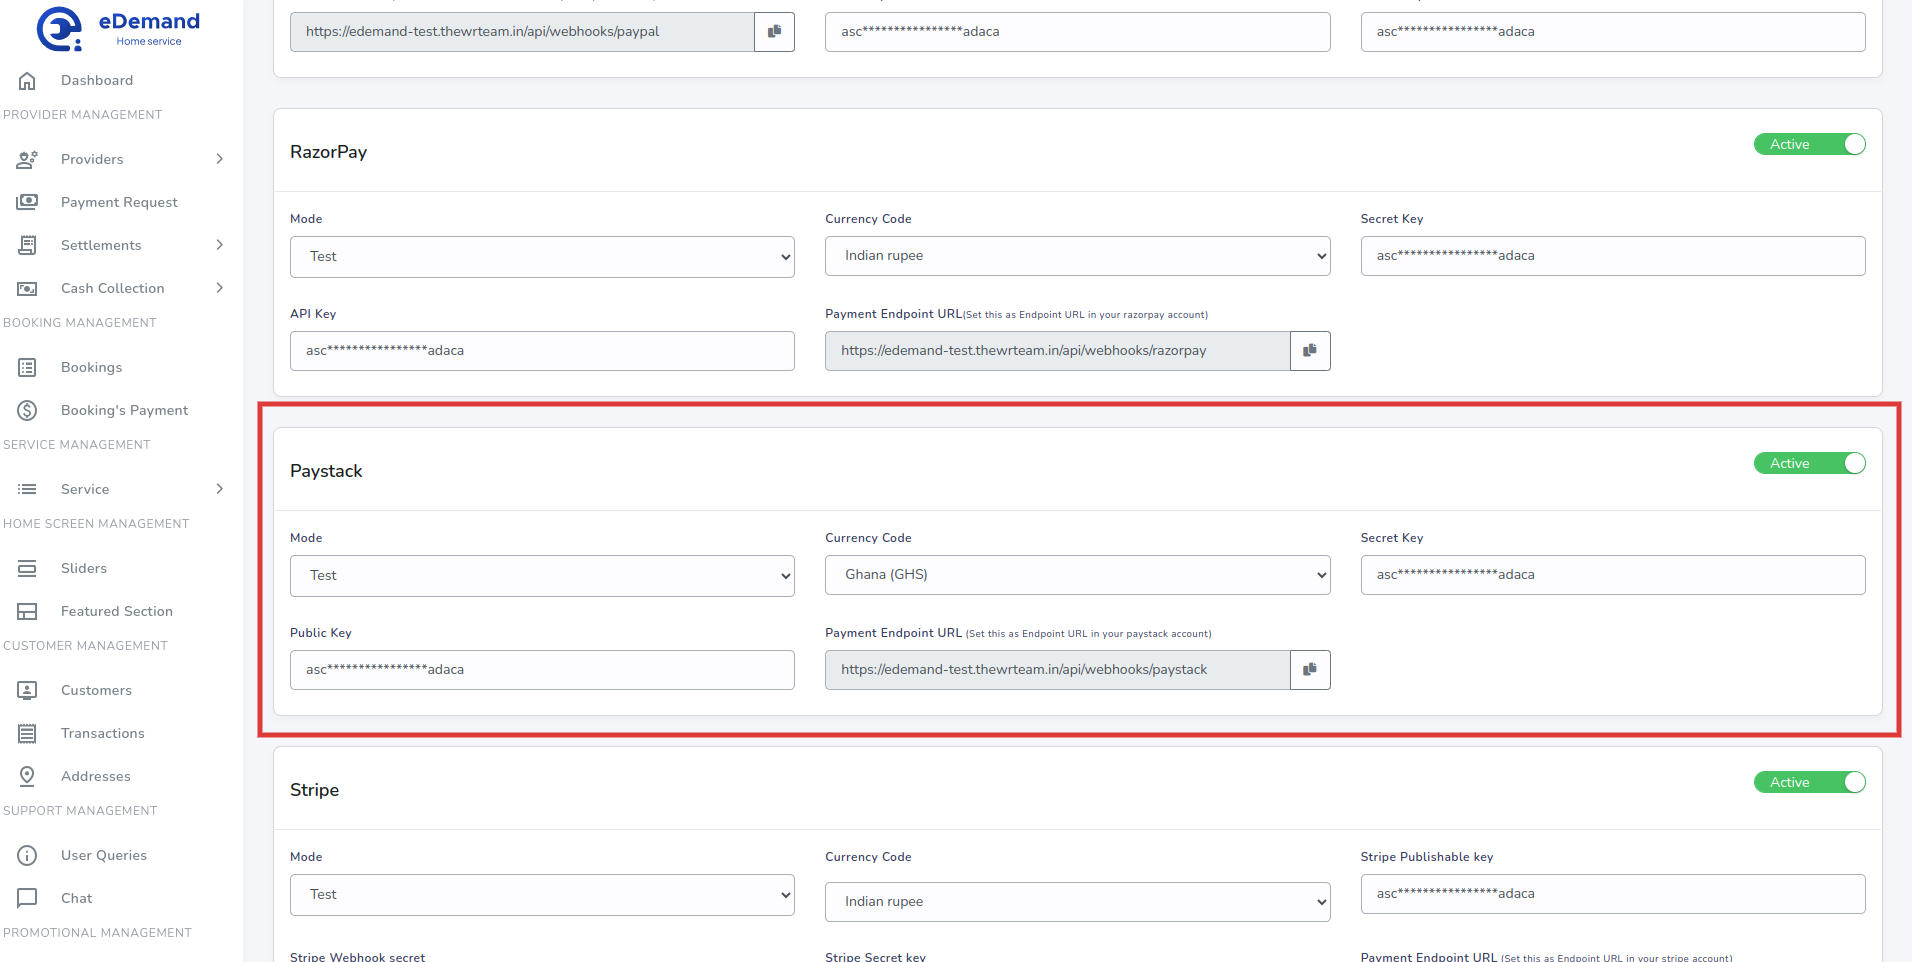
Paystack – Webhook setup
-
Set the Paystack webhook.

Use the webhook URL from your eDemand admin panel and save the configuration in Paystack.
PayPal
PayPal – Find your business email
-
Login to the PayPal dashboard.
-
Open Account Owner Information.
Go to Account Settings → Account Owner Information. -
Open the email section.
Click Update in the email section.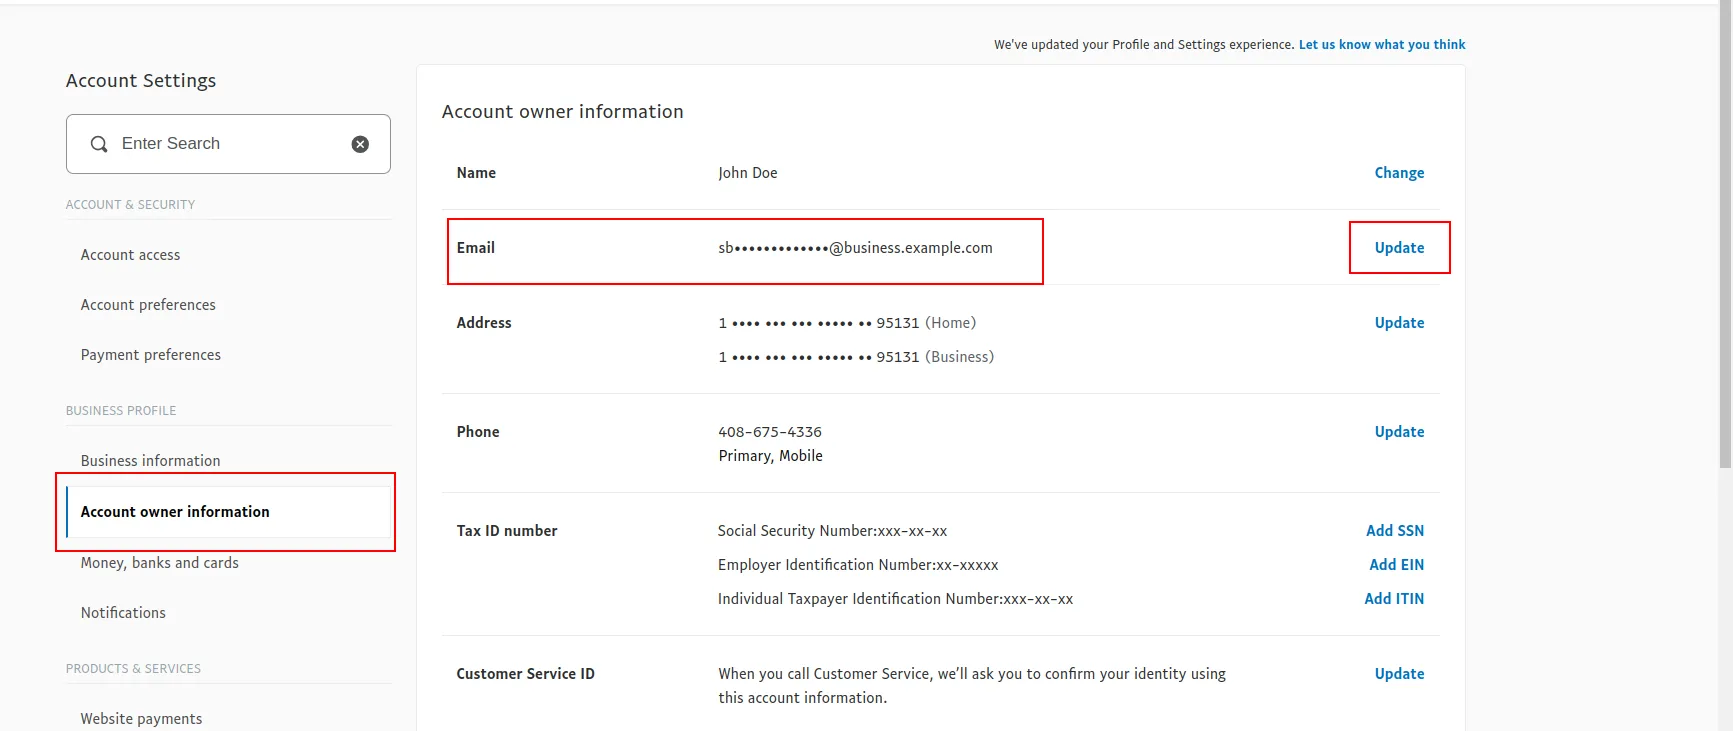
-
Copy your business email.
This is your PayPal business email.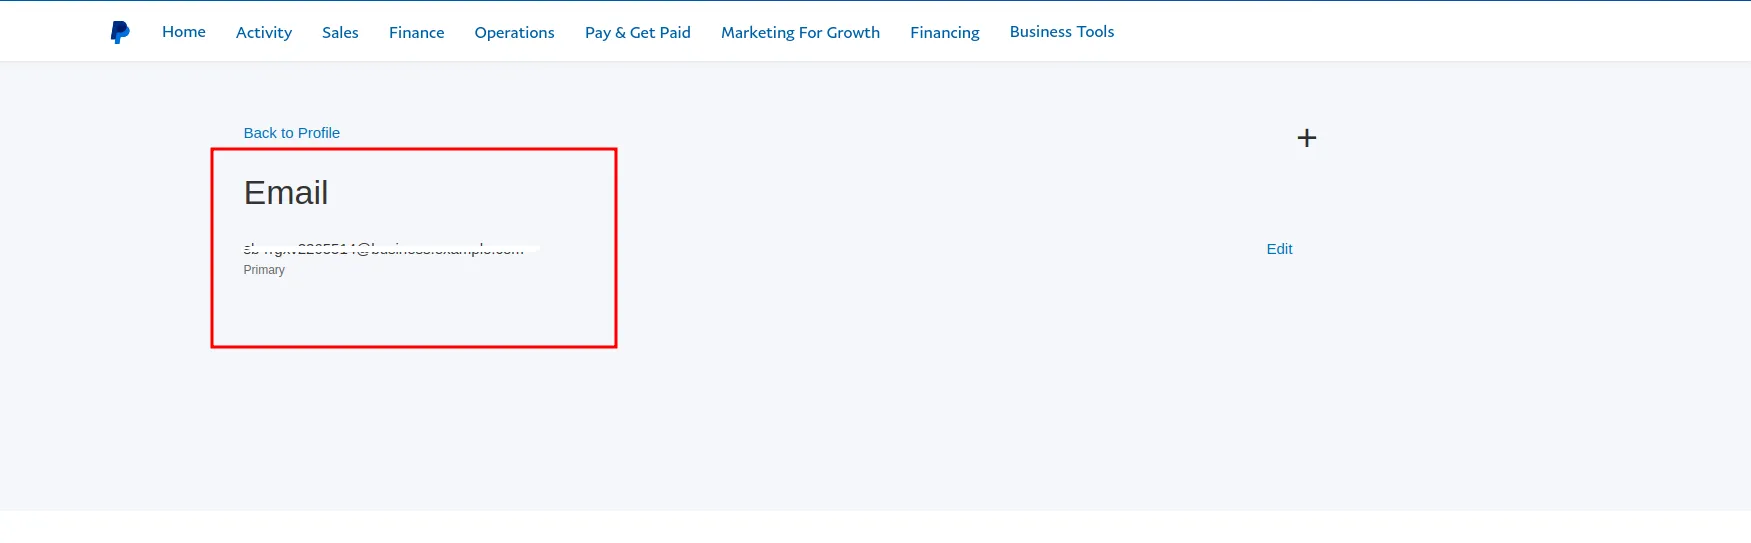
PayPal – Add credentials in eDemand
-
Open eDemand admin panel.
Go to Settings → Payment Gateway Settings. -
Paste PayPal credentials.
Enter your PayPal business email and any other required PayPal fields.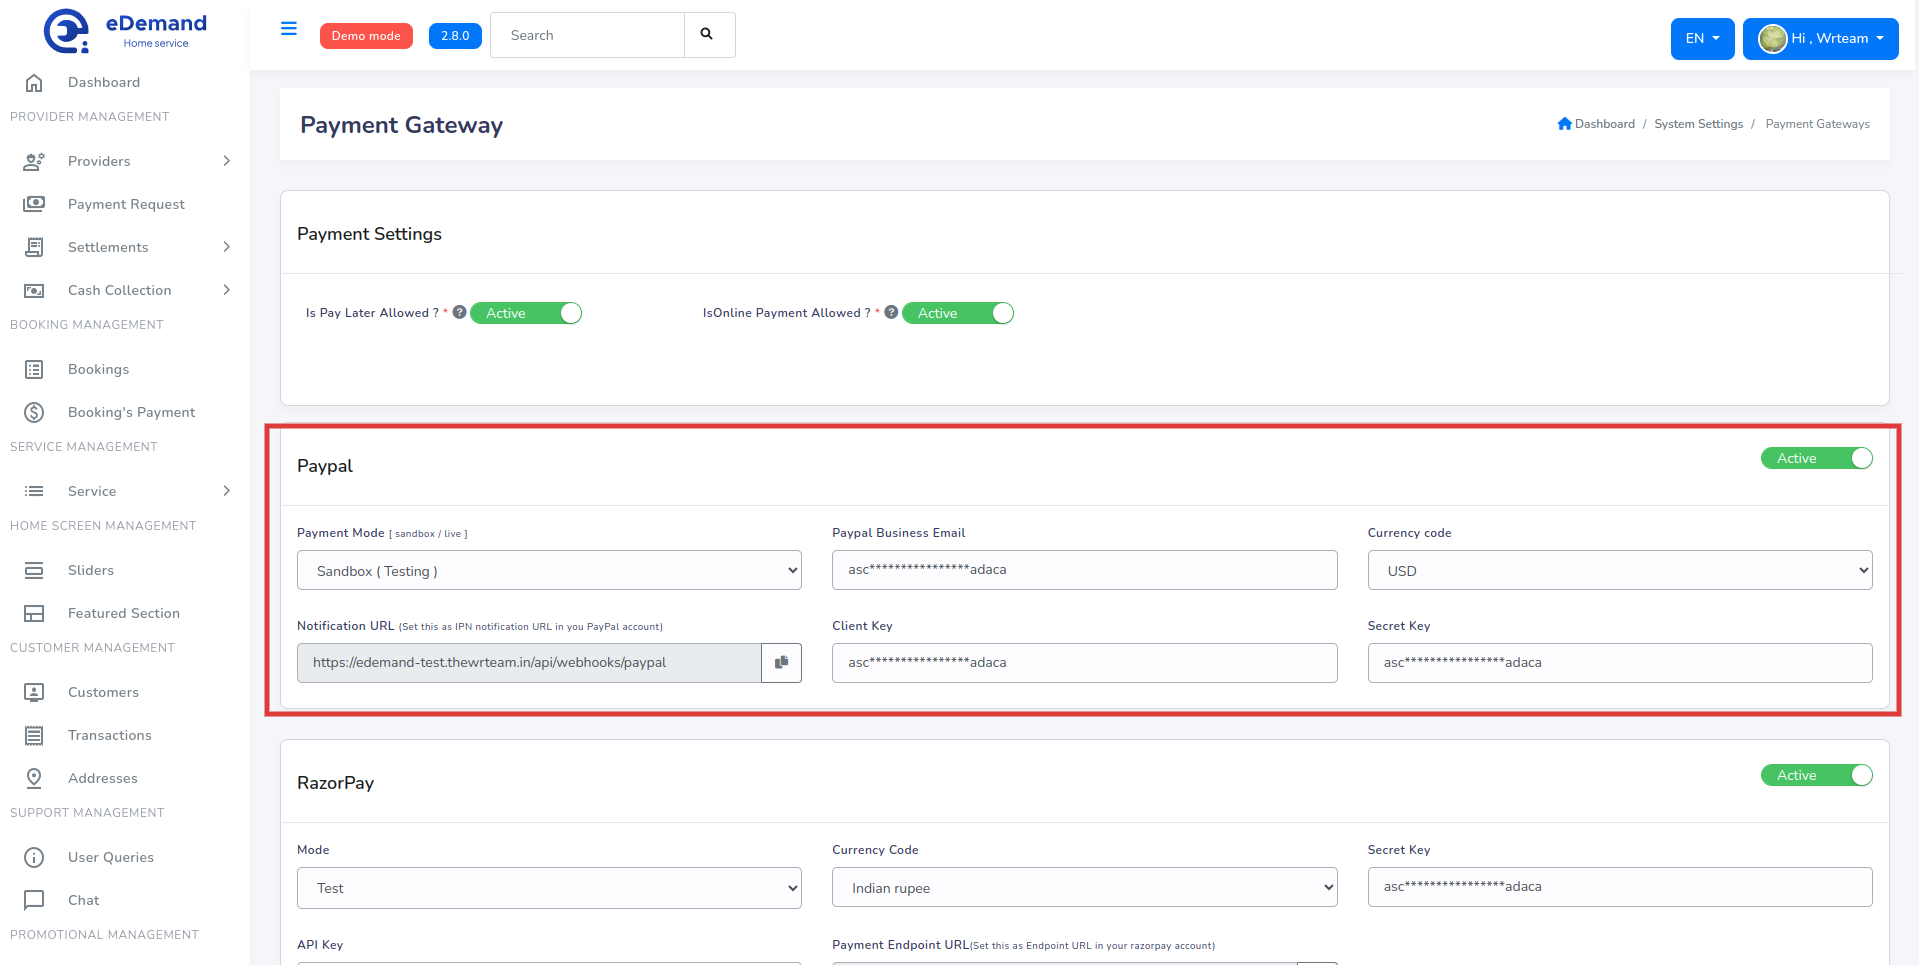
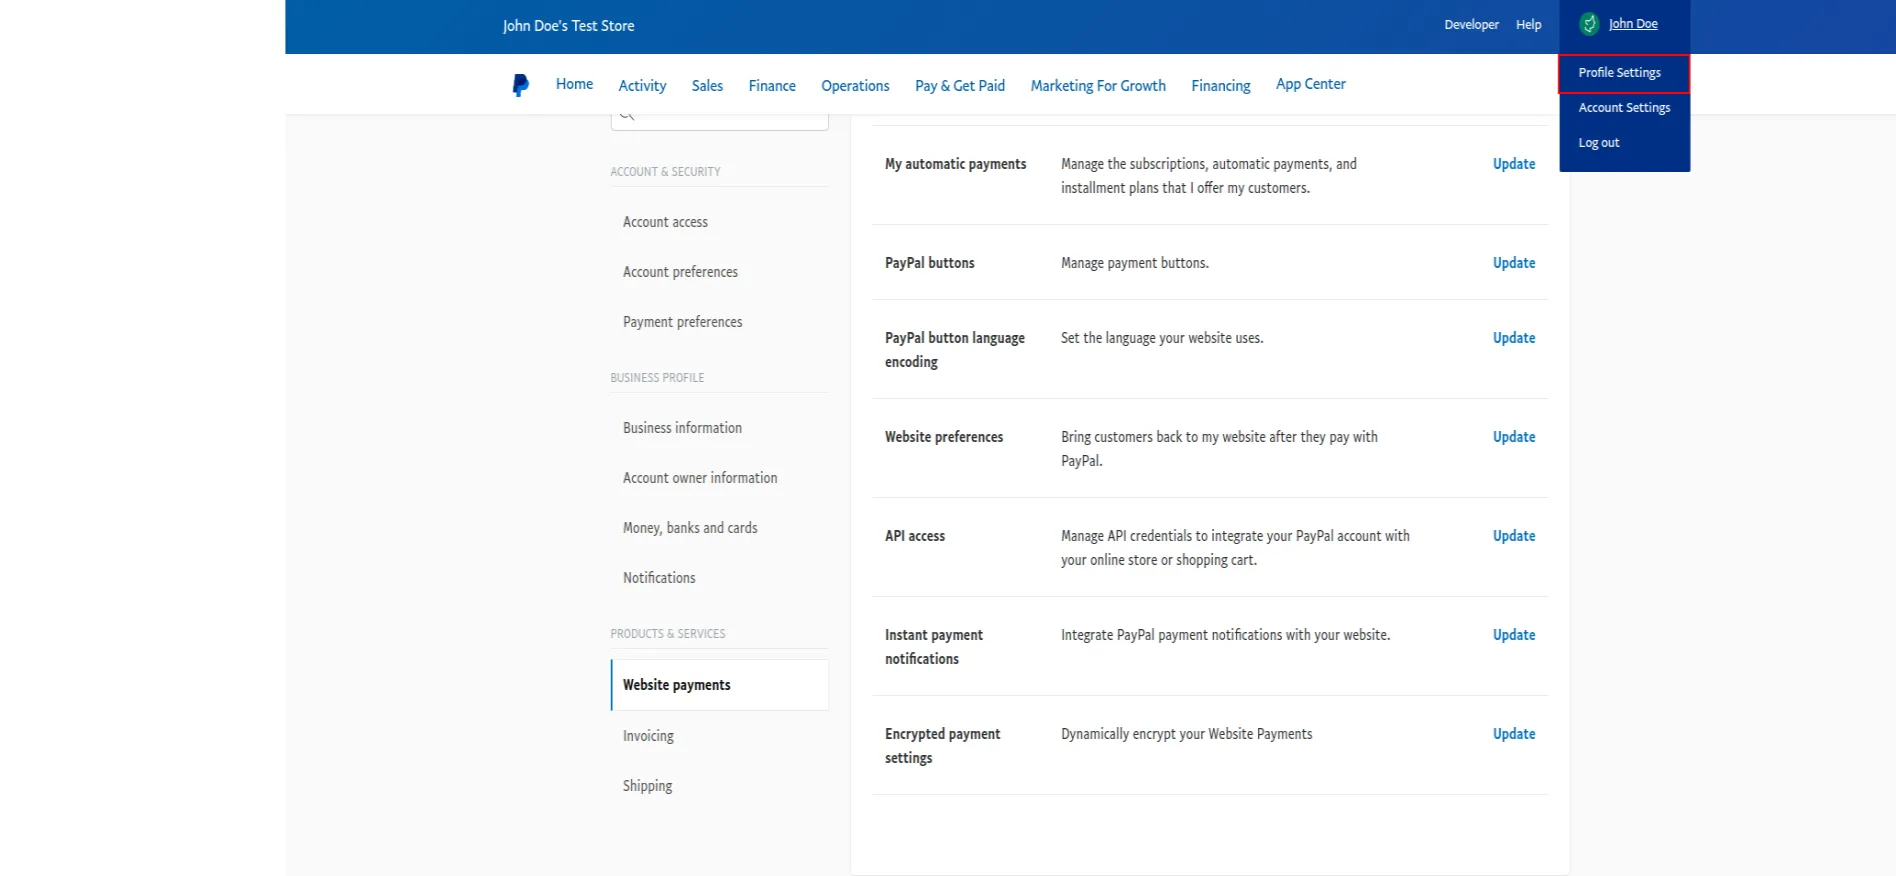
PayPal – Webhook (IPN) settings
-
Login to the PayPal dashboard.
-
Open Profile Settings.
-
Go to Instant Payment Notification (IPN).
Navigate to Website Payments → Instant payment notification.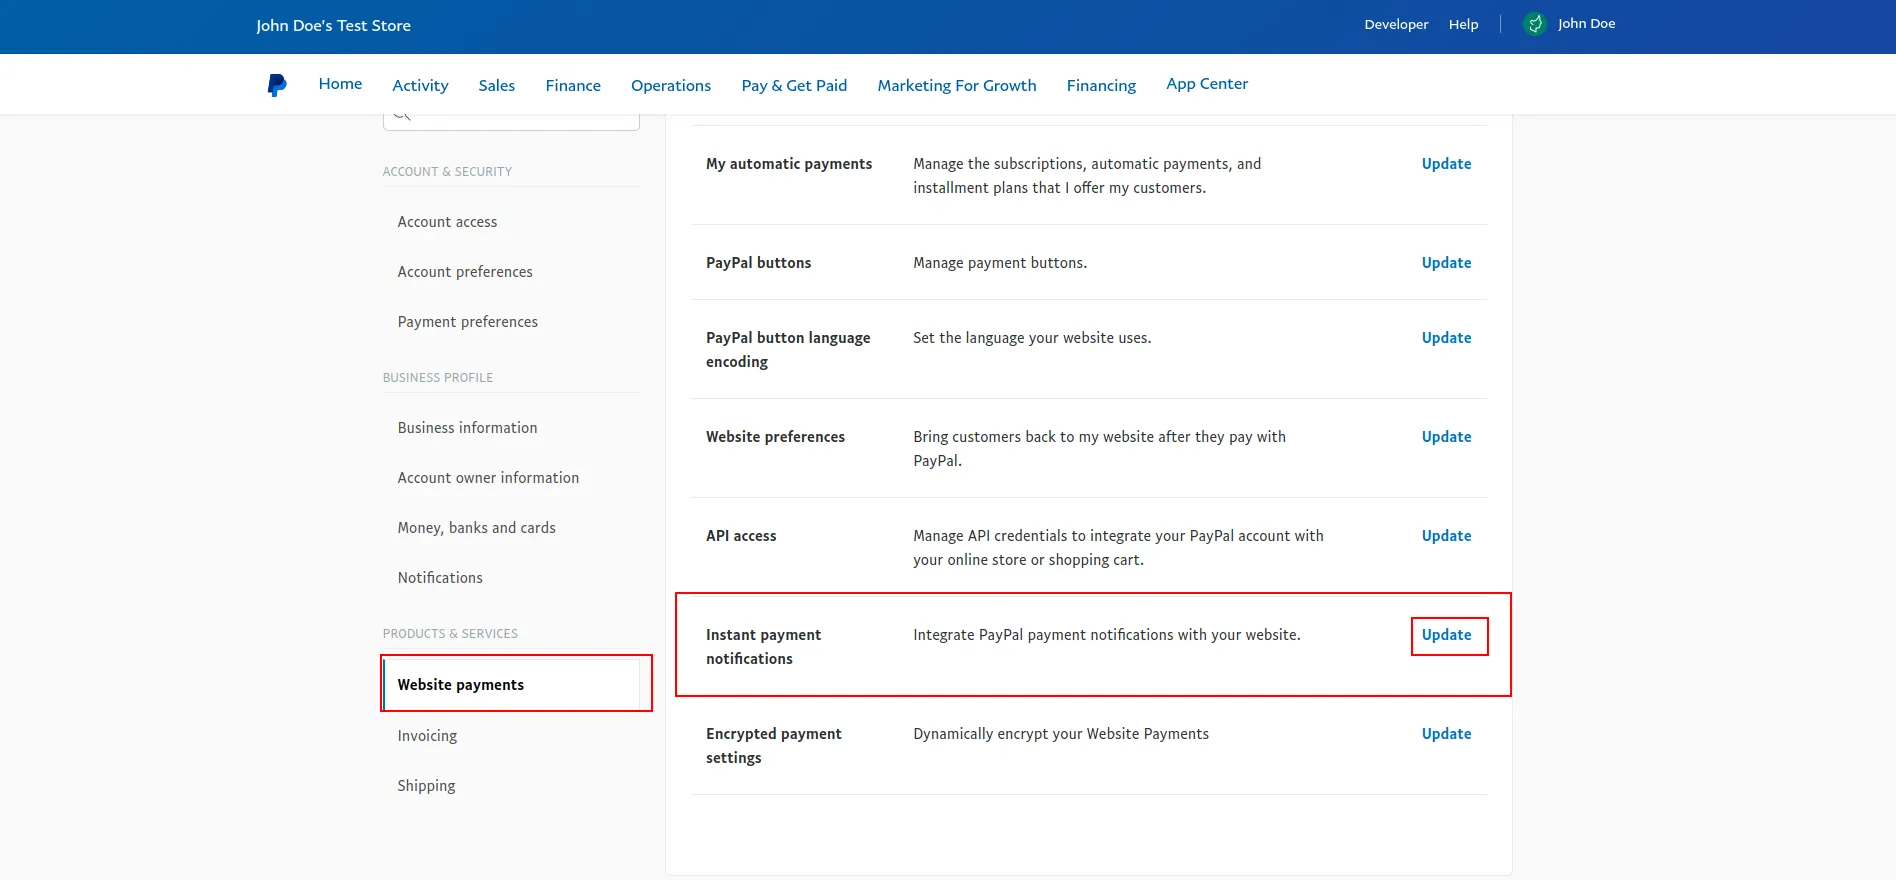
-
Edit IPN settings.
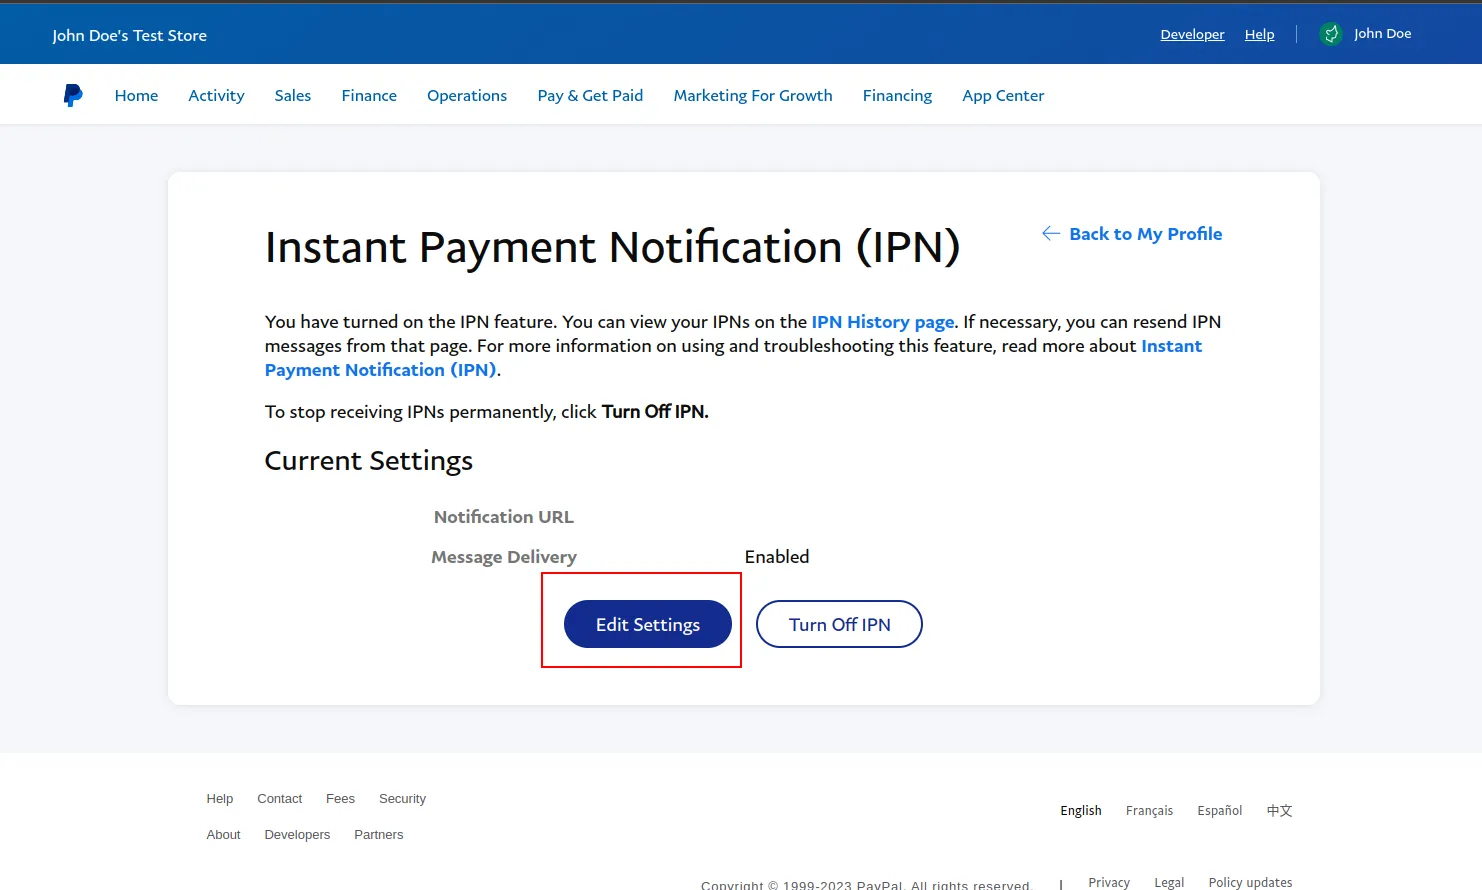
-
Paste the webhook URL from eDemand.
Copy the PayPal webhook / IPN URL from Admin panel → Settings → System Settings and paste it here.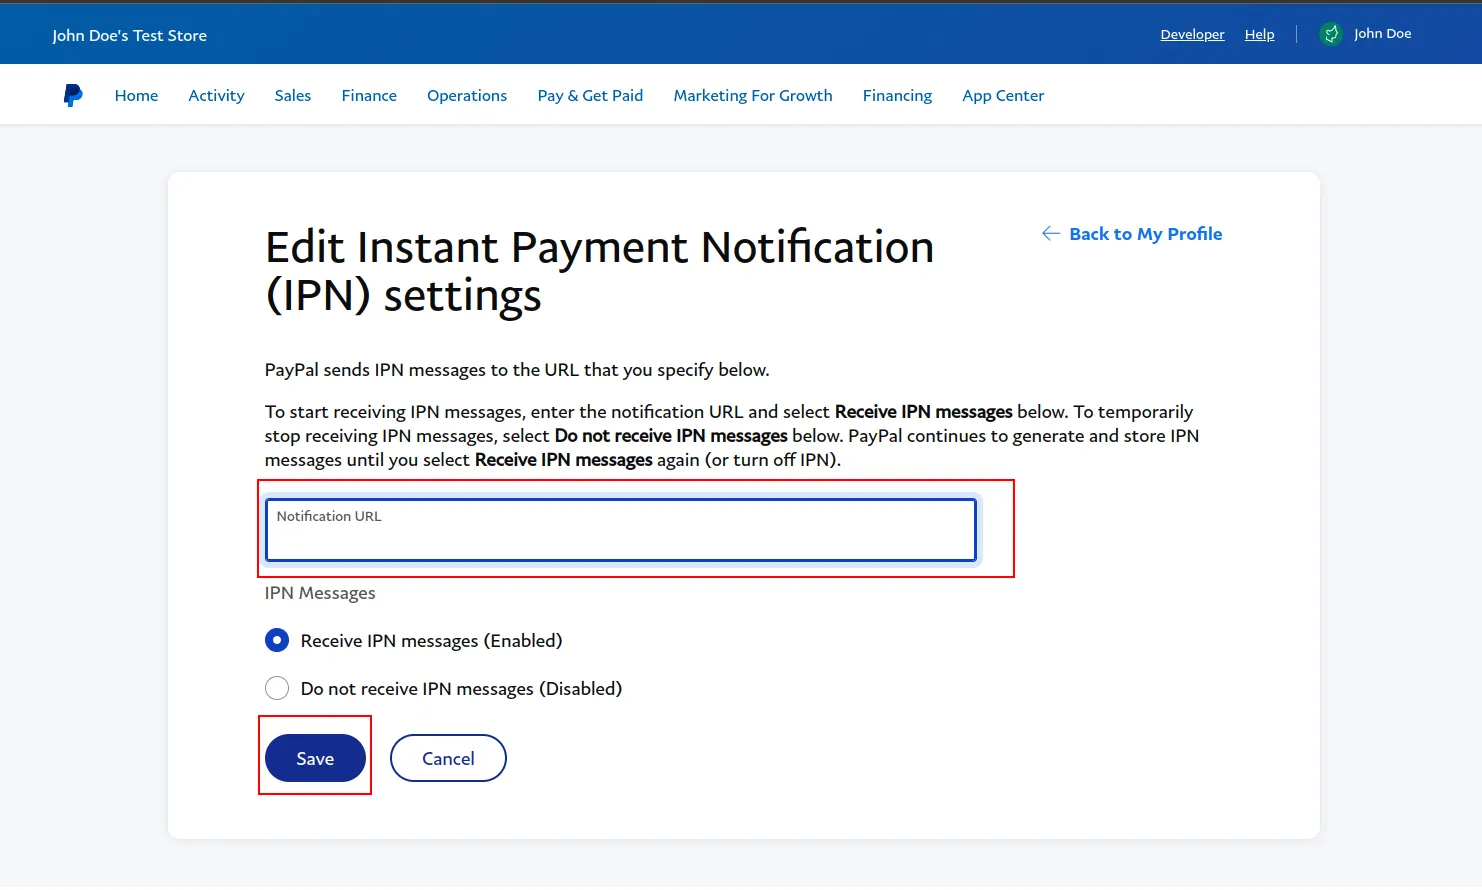
Save your changes in PayPal.
Flutterwave
Flutterwave – Get API keys
-
Open Flutterwave.
Go to https://flutterwave.com/ and sign in to your Flutterwave account. -
Open API keys.
Go to Developers → API Keys. -
Copy your credentials.
Copy the public and secret keys shown.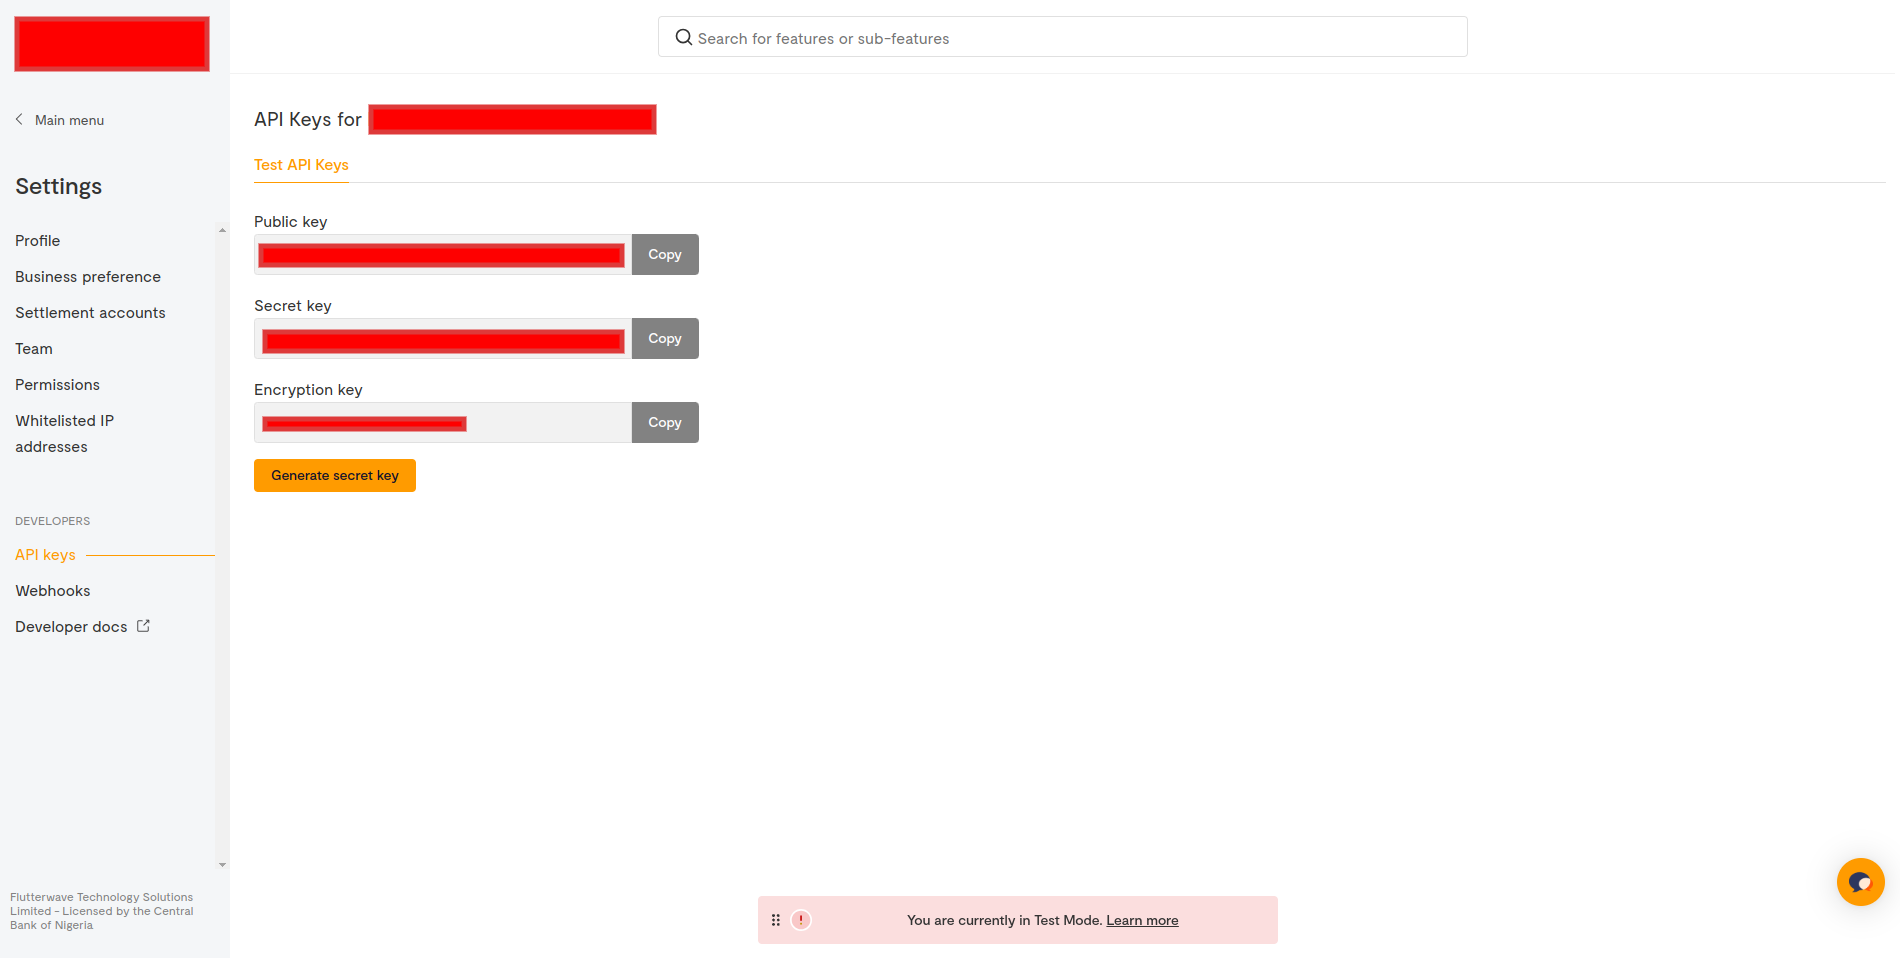
Flutterwave – Webhook setup
-
Set the Flutterwave webhook.
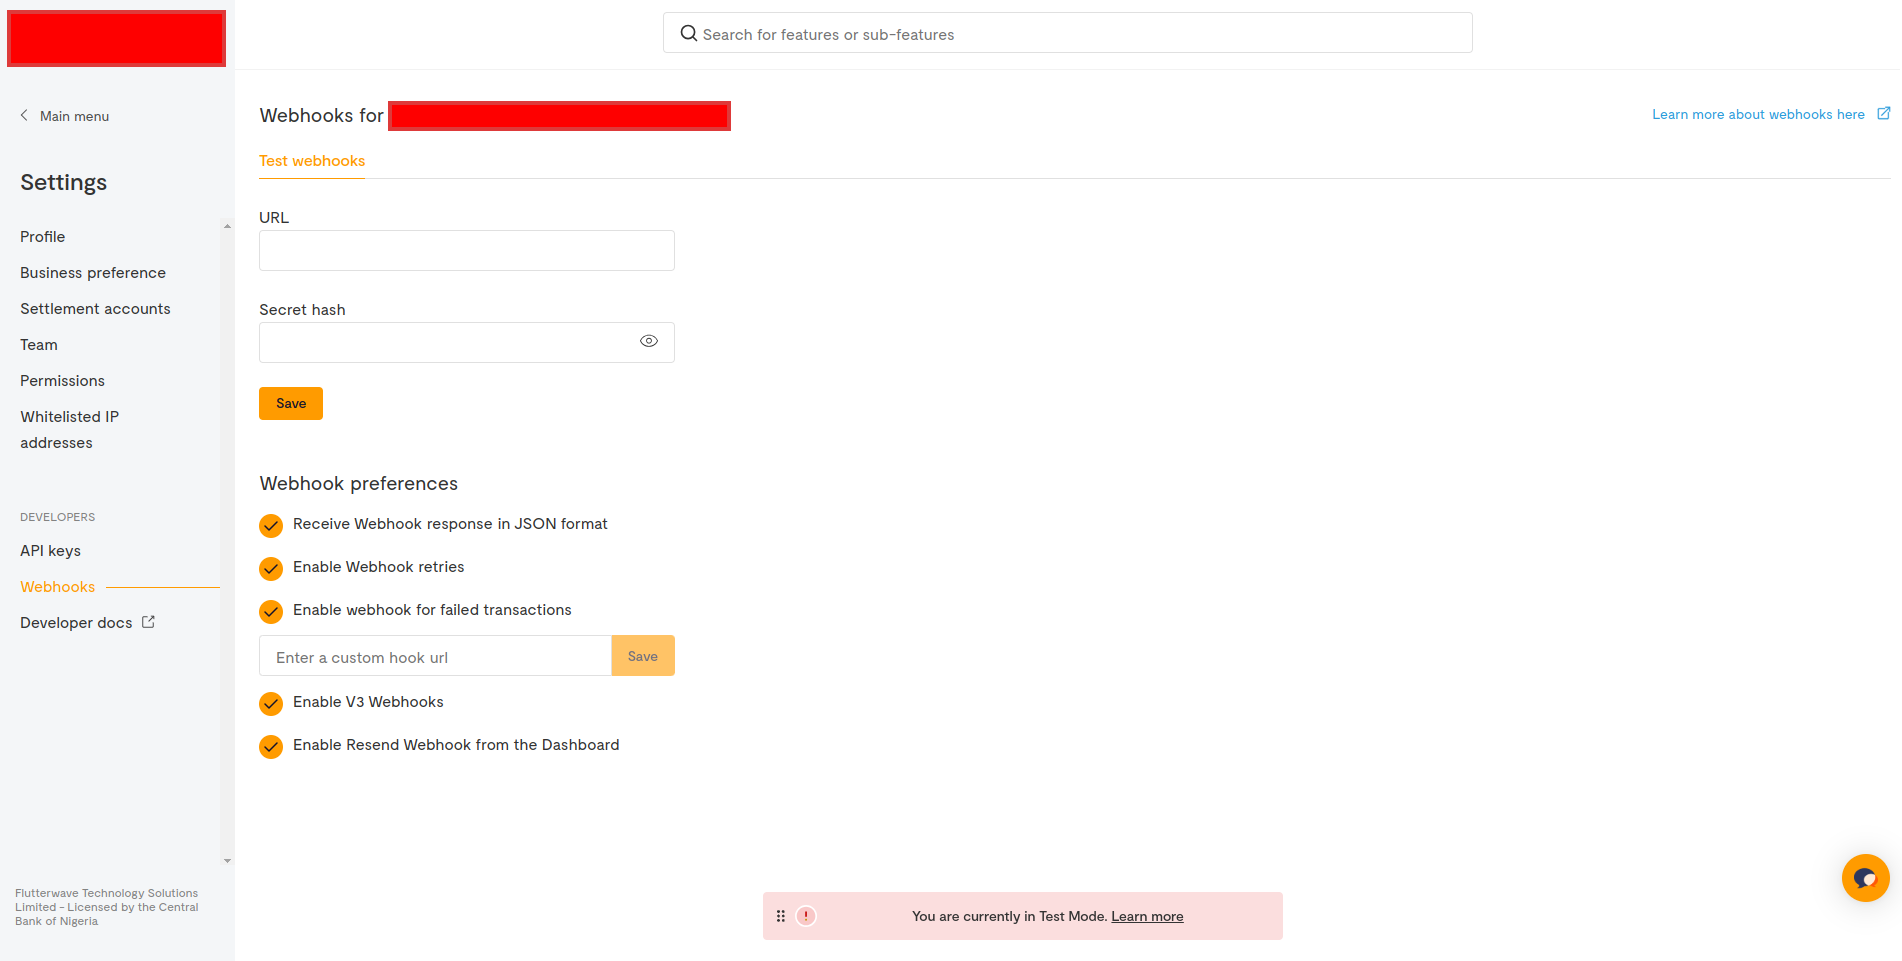
Use the webhook URL shown in your eDemand admin panel.
Flutterwave – Add keys in eDemand
-
Open eDemand admin panel.
Go to Settings → Payment Gateway Settings. -
Paste Flutterwave credentials.
Paste the Flutterwave keys into the Flutterwave section.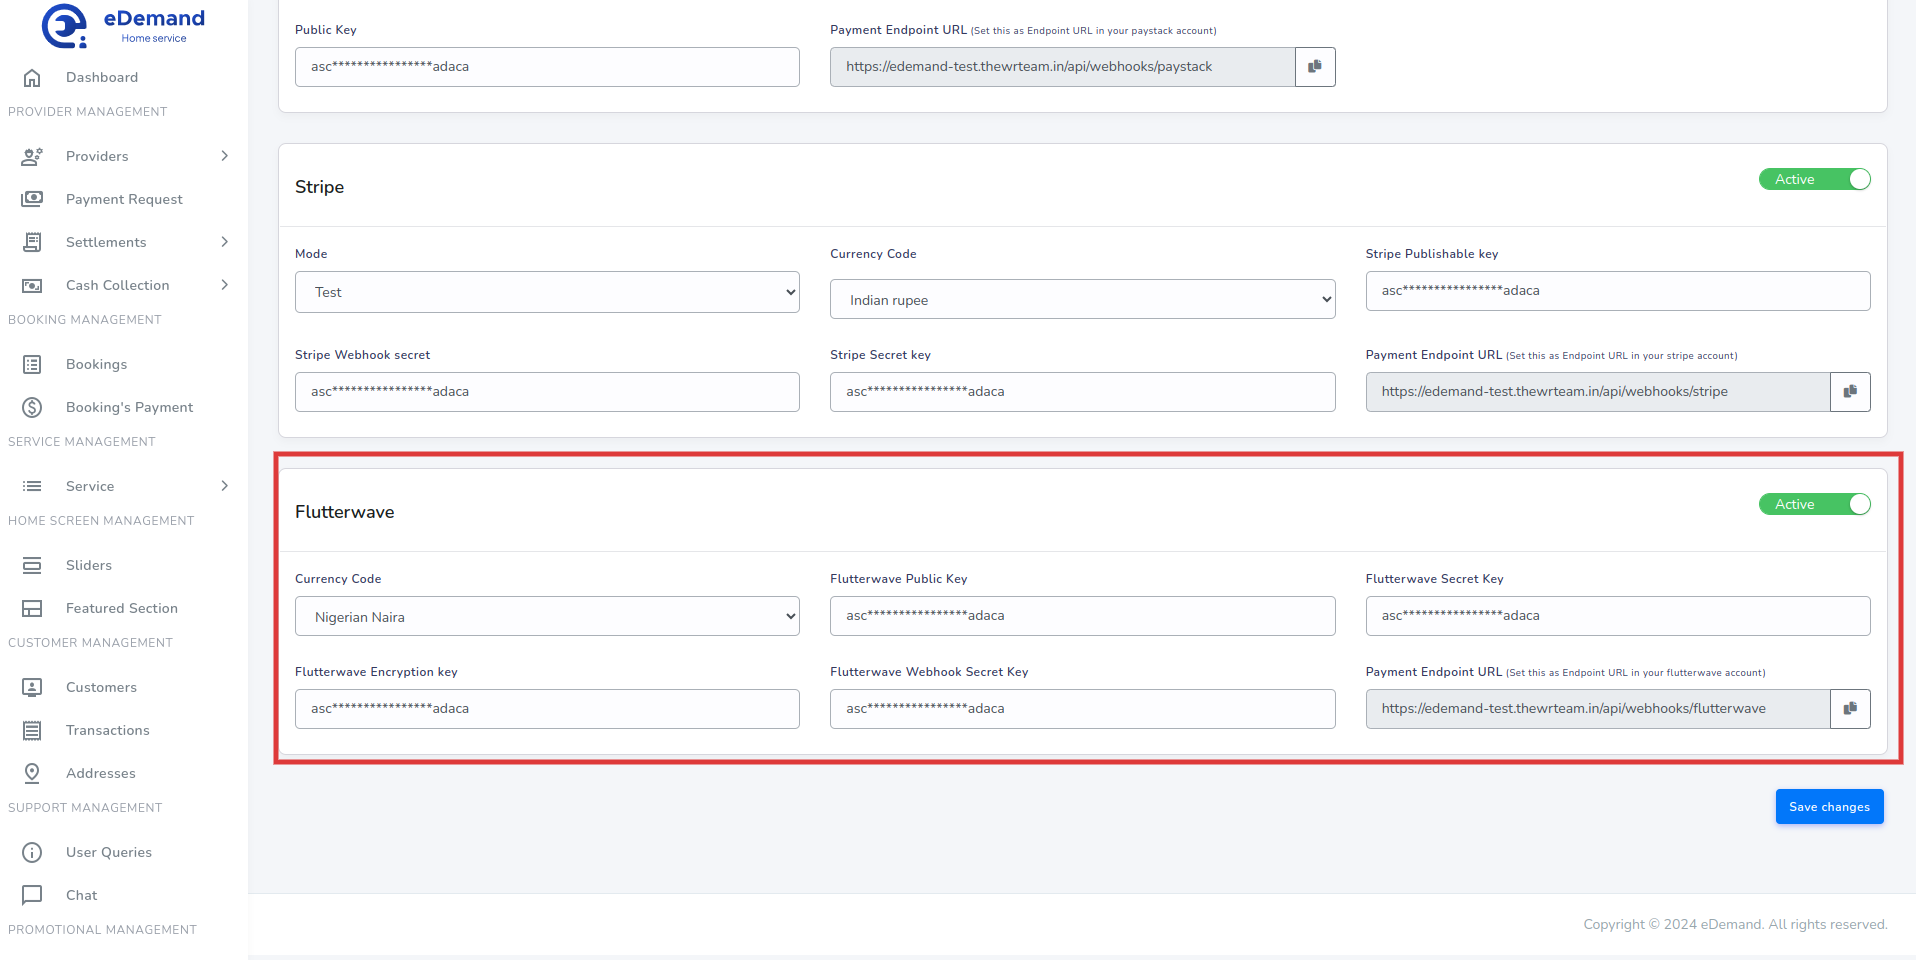
Xendit
Xendit allows only one webhook configuration per account.
If you use the same Xendit account for multiple projects or environments, make sure the webhook URL is set to your eDemand production site, or payments and status updates may not reach the correct system.
Xendit – Get API keys
-
Open the Xendit dashboard.
Go to https://dashboard.xendit.co/ and sign in to your Xendit account.
-
Open the API keys section.
Open the Settings → Developers area and go to API Keys.
On this screen, click Generate secret key to create a new secret key.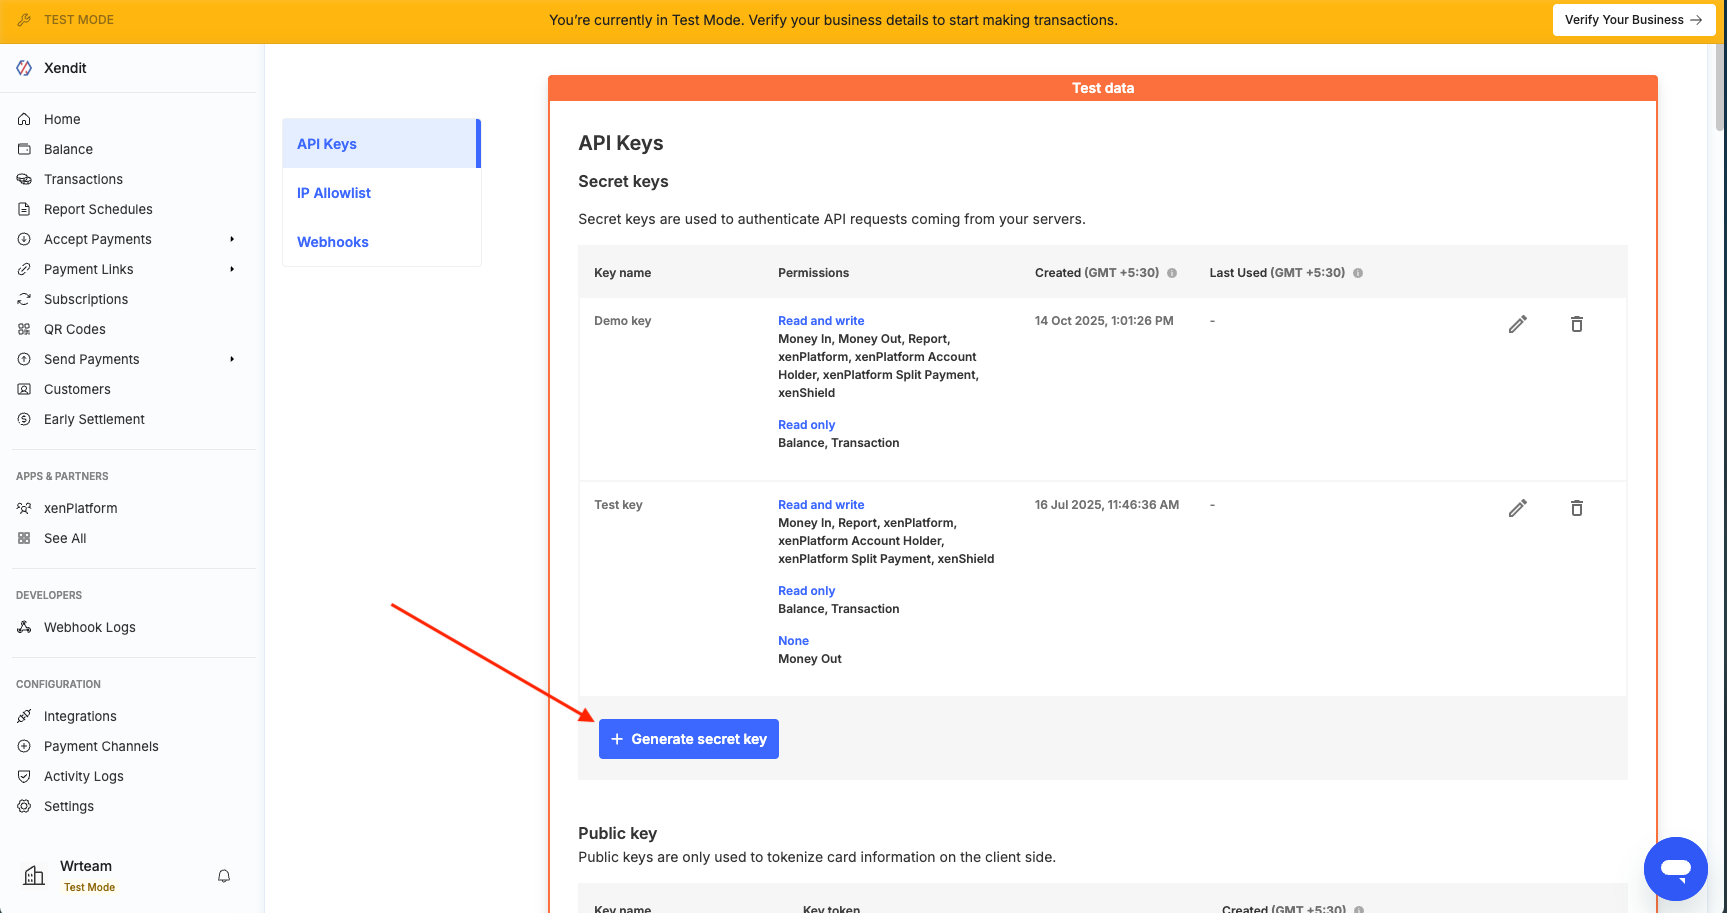
-
Set permissions and copy your secret key.
In the permissions popup:- Enable write permission wherever available.
- Use read permission where write is not available.
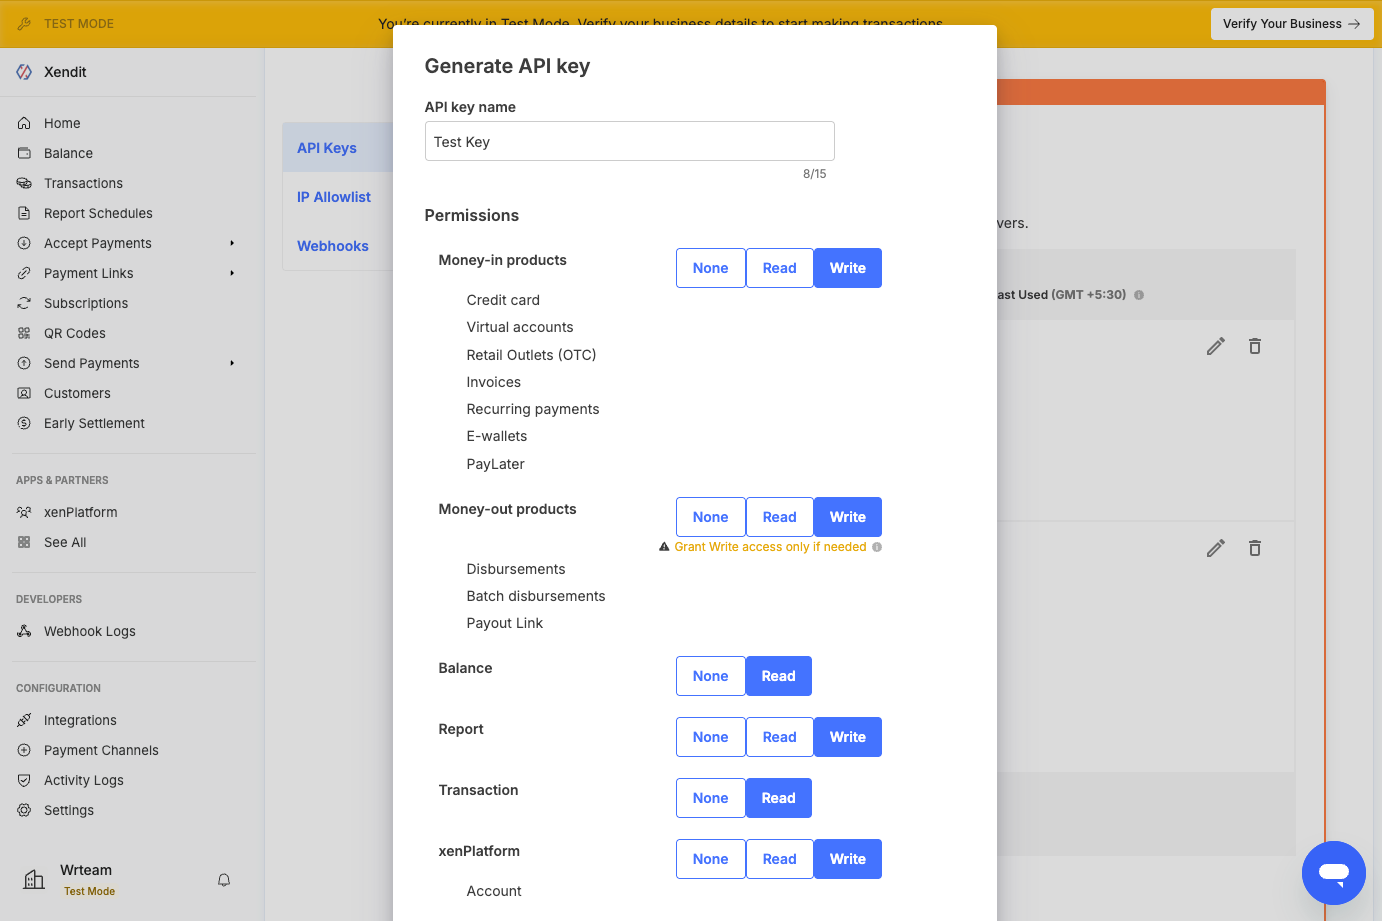
Then copy the generated key and store it safely.
Xendit will not show this secret key again.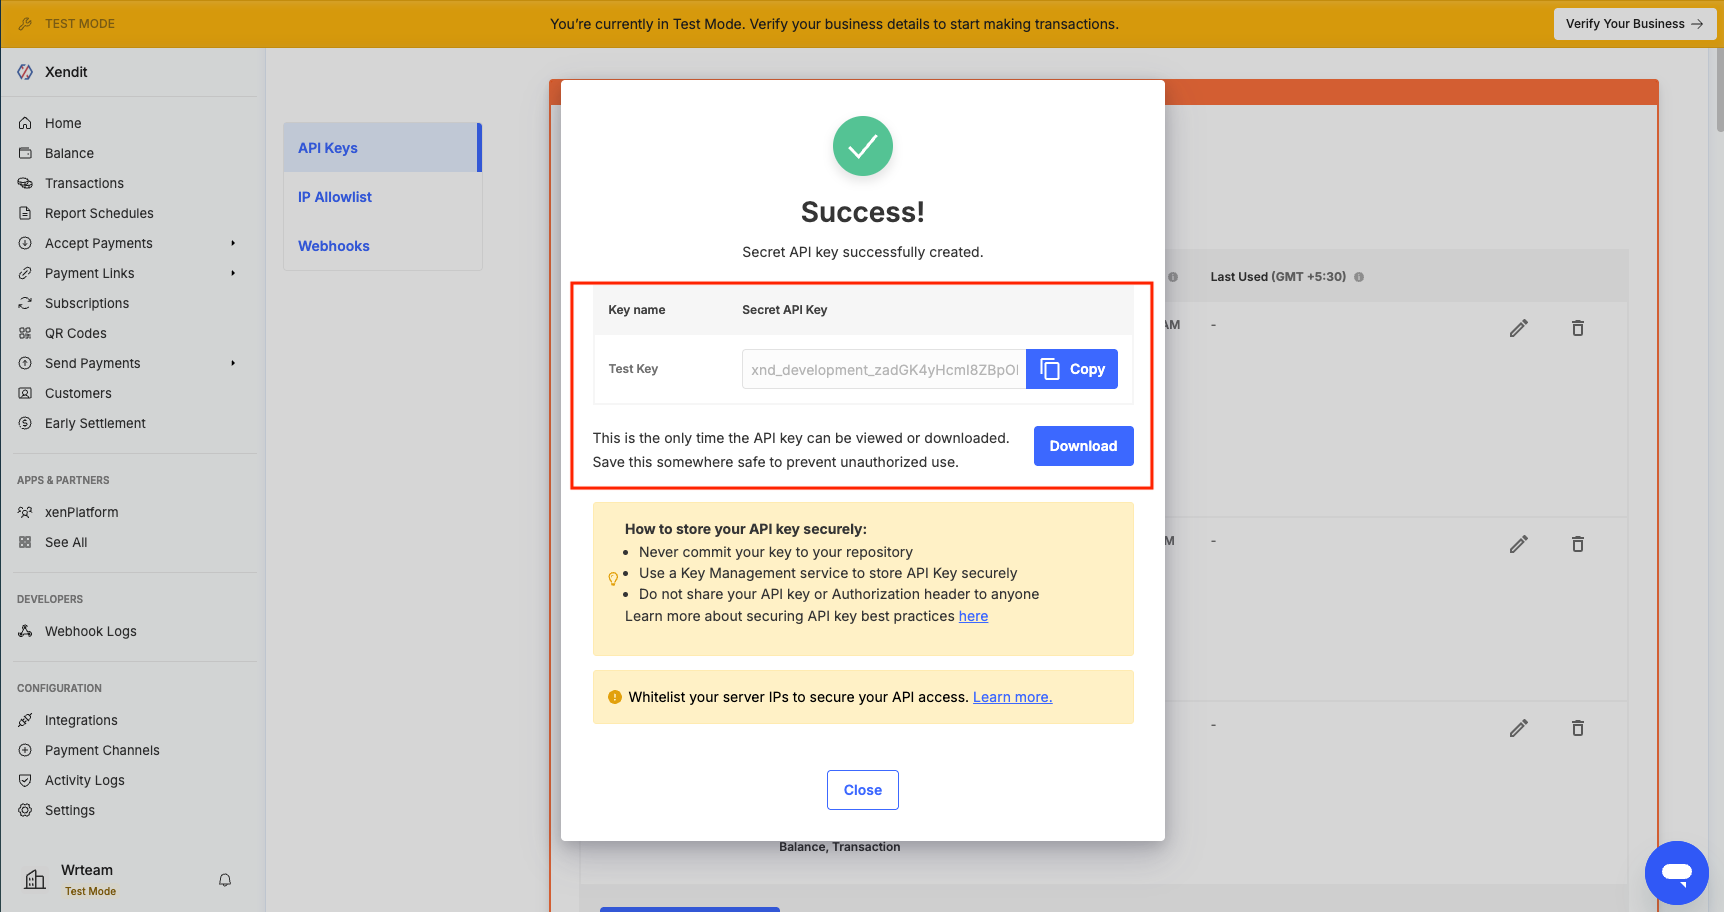
Xendit – Add keys in eDemand
-
Open eDemand admin panel.
Go to Settings → Payment Gateway Settings. -
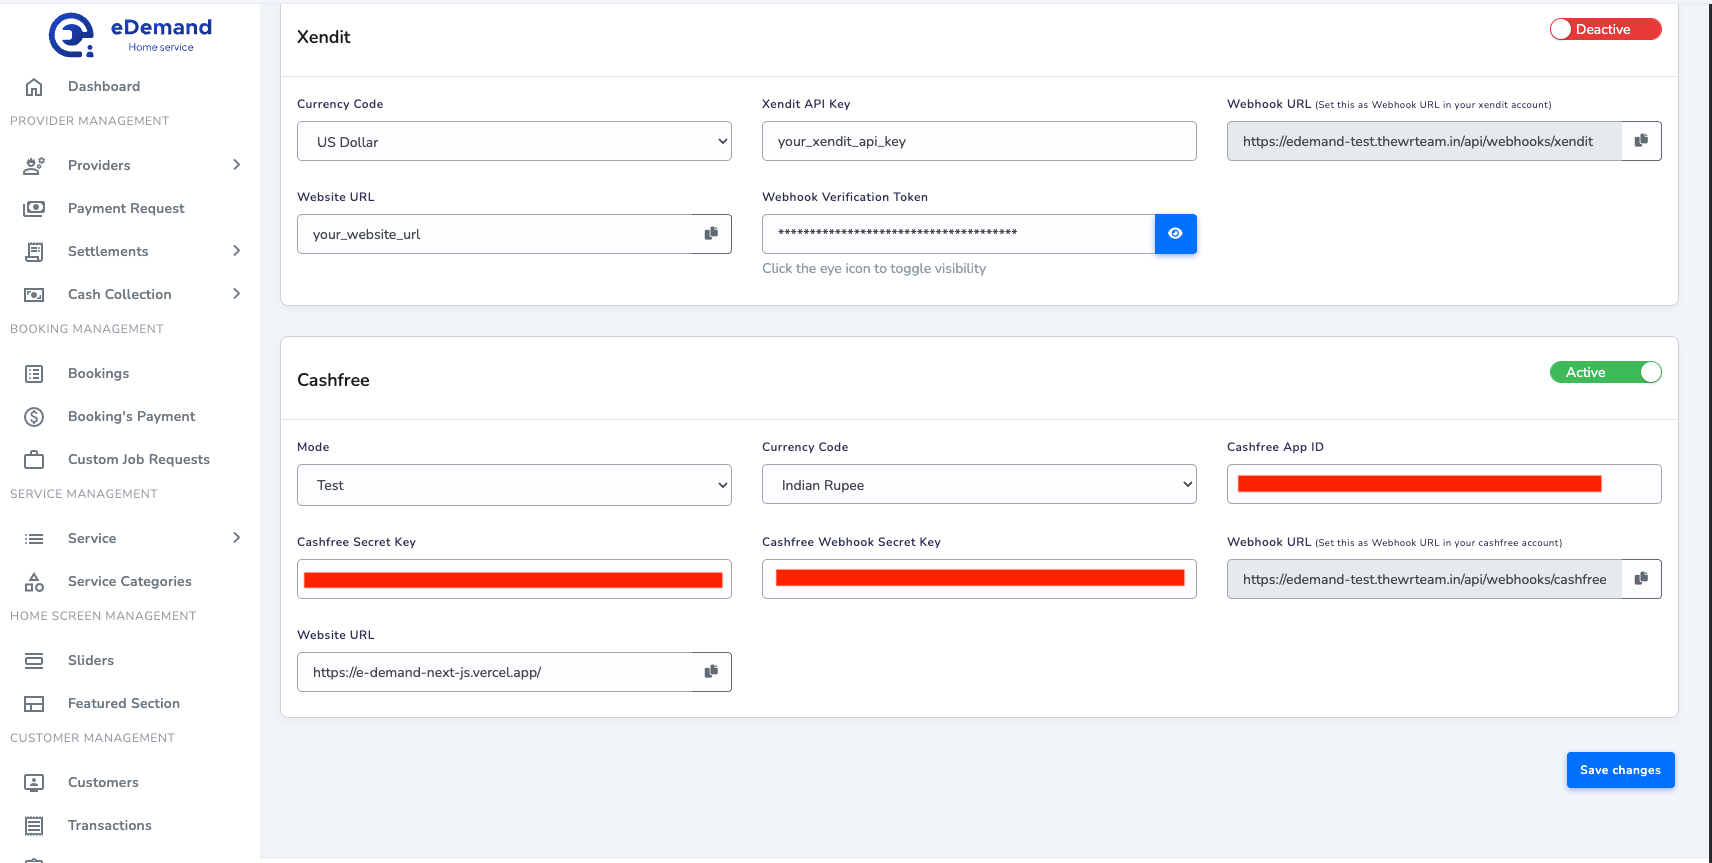
Paste Xendit credentials.
Paste the copied secret key into the Xendit section of the payment gateway settings.
Xendit – Webhook / callback URL setup
-
Set your website URL.
Add your live website domain (for example,https://yourdomain.com) so it matches the URL where your eDemand site is hosted. -
Find the webhook URL in eDemand.
In the eDemand admin panel, note the Webhook URL shown in the Xendit payment gateway configuration. -
Configure webhook in Xendit.
In the Xendit dashboard, open Webhooks in the sidebar.- Copy the Webhook verification token and paste it into the Xendit payment gateway settings in the eDemand admin panel.
- Scroll down and add the eDemand webhook URL for the following events (the text in brackets is the section name in the Webhooks screen where you must set the URL):
- Refund finalized (section: Direct Debit)
- Invoice paid (section: Invoices)
- Refund Request Succeeded and Refund Request Failed (section: Unified Refunds)
- eWallet Payment Status (section: E‑Wallets)
- QR code paid & QR code refunded (section: QR codes)
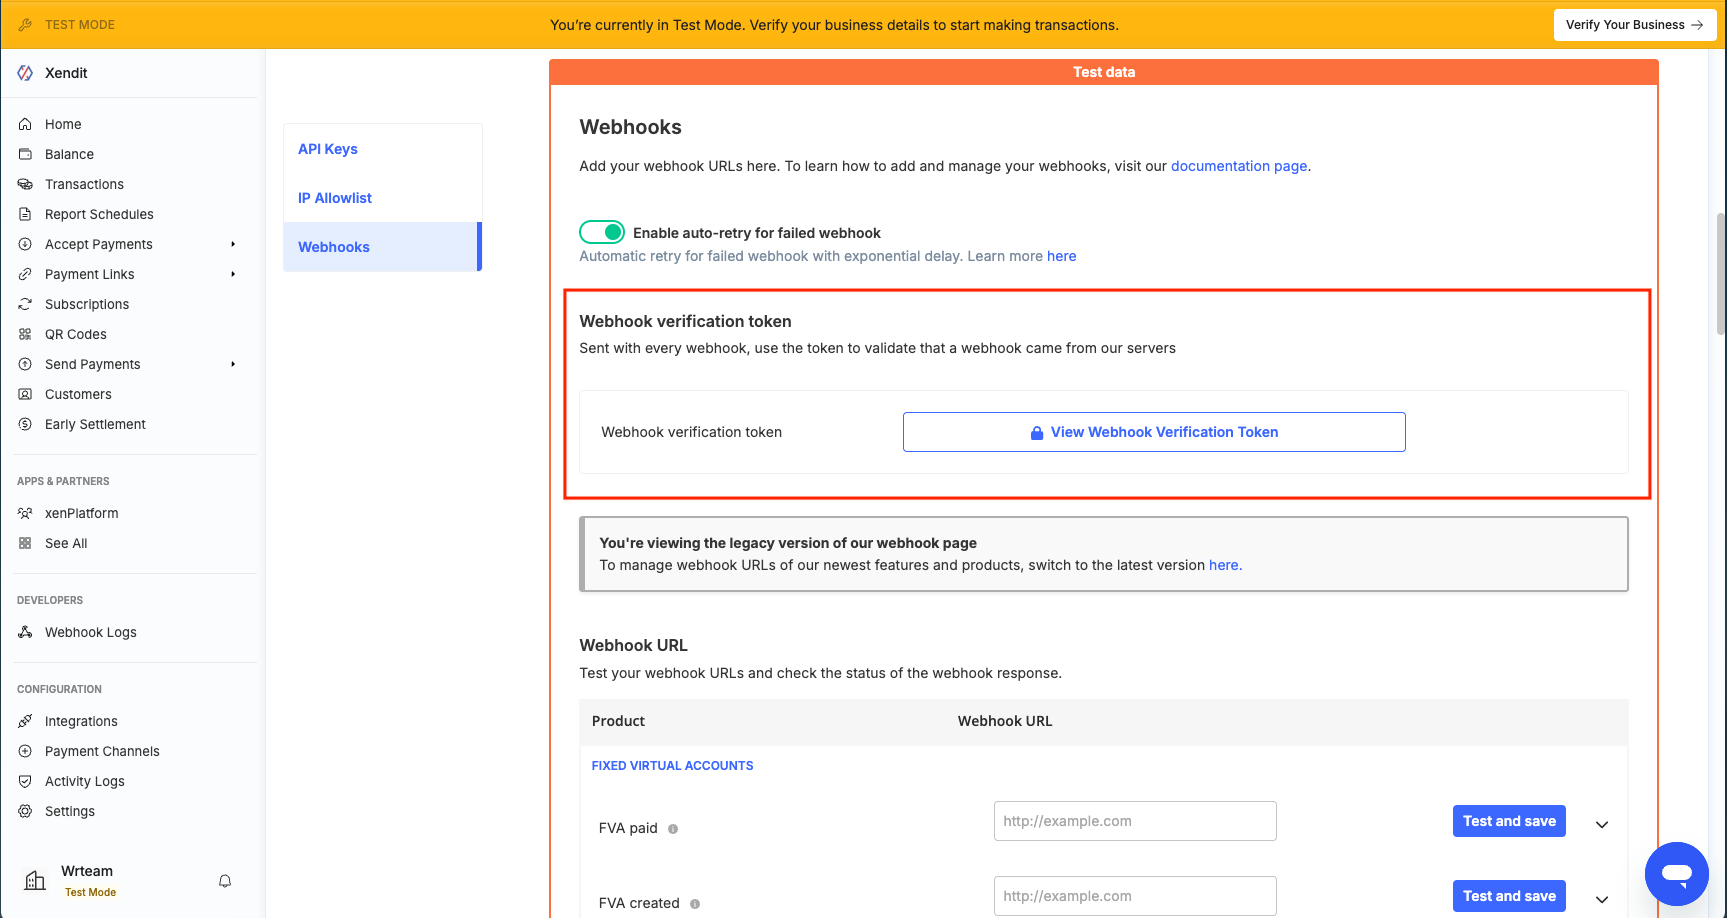
Save your settings in Xendit to ensure payments and status updates are correctly sent back to eDemand.
Cashfree
Cashfree – Get API keys
-
Open the Cashfree dashboard.
Go to https://merchant.cashfree.com/ and sign in to your Cashfree account.
-
Go to API keys / credentials.
In the left sidebar, open the Developers -> API Keys section. -
Generate (or view) keys.
Generate or view your Client ID and Client Secret (or App ID and Secret Key, depending on your account type).
Keep these values safe and do not share them publicly.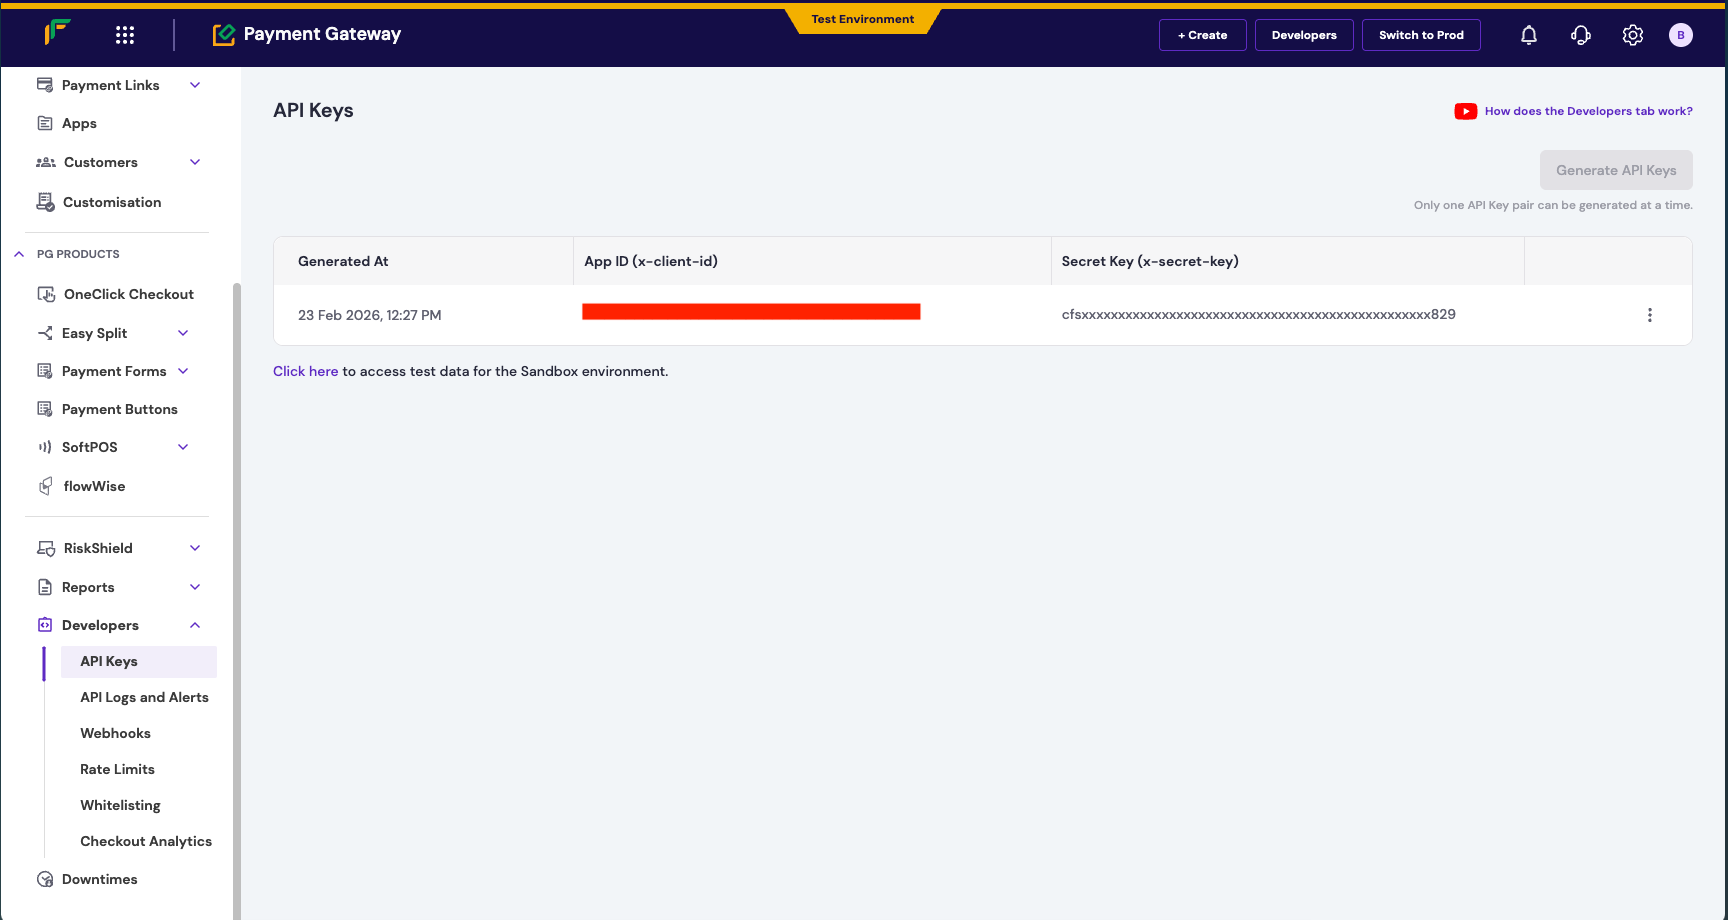
Cashfree – Add keys in eDemand
-
Open eDemand admin panel.
Go to Settings → Payment Gateway Settings. -
Paste Cashfree credentials.
In the Cashfree section:- Paste the Client ID / App ID.
- Paste the Client Secret / Secret Key.
- Select the correct mode (Sandbox / Test or Live) matching the environment of your Cashfree account.
Cashfree – Webhook / callback URL setup
-
Find the Cashfree webhook URL in eDemand.
In the eDemand admin panel, under the Cashfree payment gateway configuration, copy the Webhook URL shown there. -
Configure webhook in Cashfree.
In the Cashfree dashboard:- Open the Developers -> Webhooks section.
- Paste the webhook URL you copied from eDemand and click on test.
- Once test passes, click continue.
- Enable all events related to payment success / failure, refunds, and any other status updates required for your integration.
- The Client Secret / Secret Key you generated earlier will be used as the webhook secret.
-
Save changes.
Save the webhook configuration in Cashfree and ensure the same environment (Test/Live) is used in both Cashfree and your eDemand payment settings so that payment notifications are delivered correctly.