Google Analytics 4 (GA4) Setup
Google Analytics 4 (GA4) lets you track visitor behavior, traffic sources, and engagement on your eBroker web application. Follow these steps to create a GA4 property and connect it to your website.
Creating a Google Analytics Account
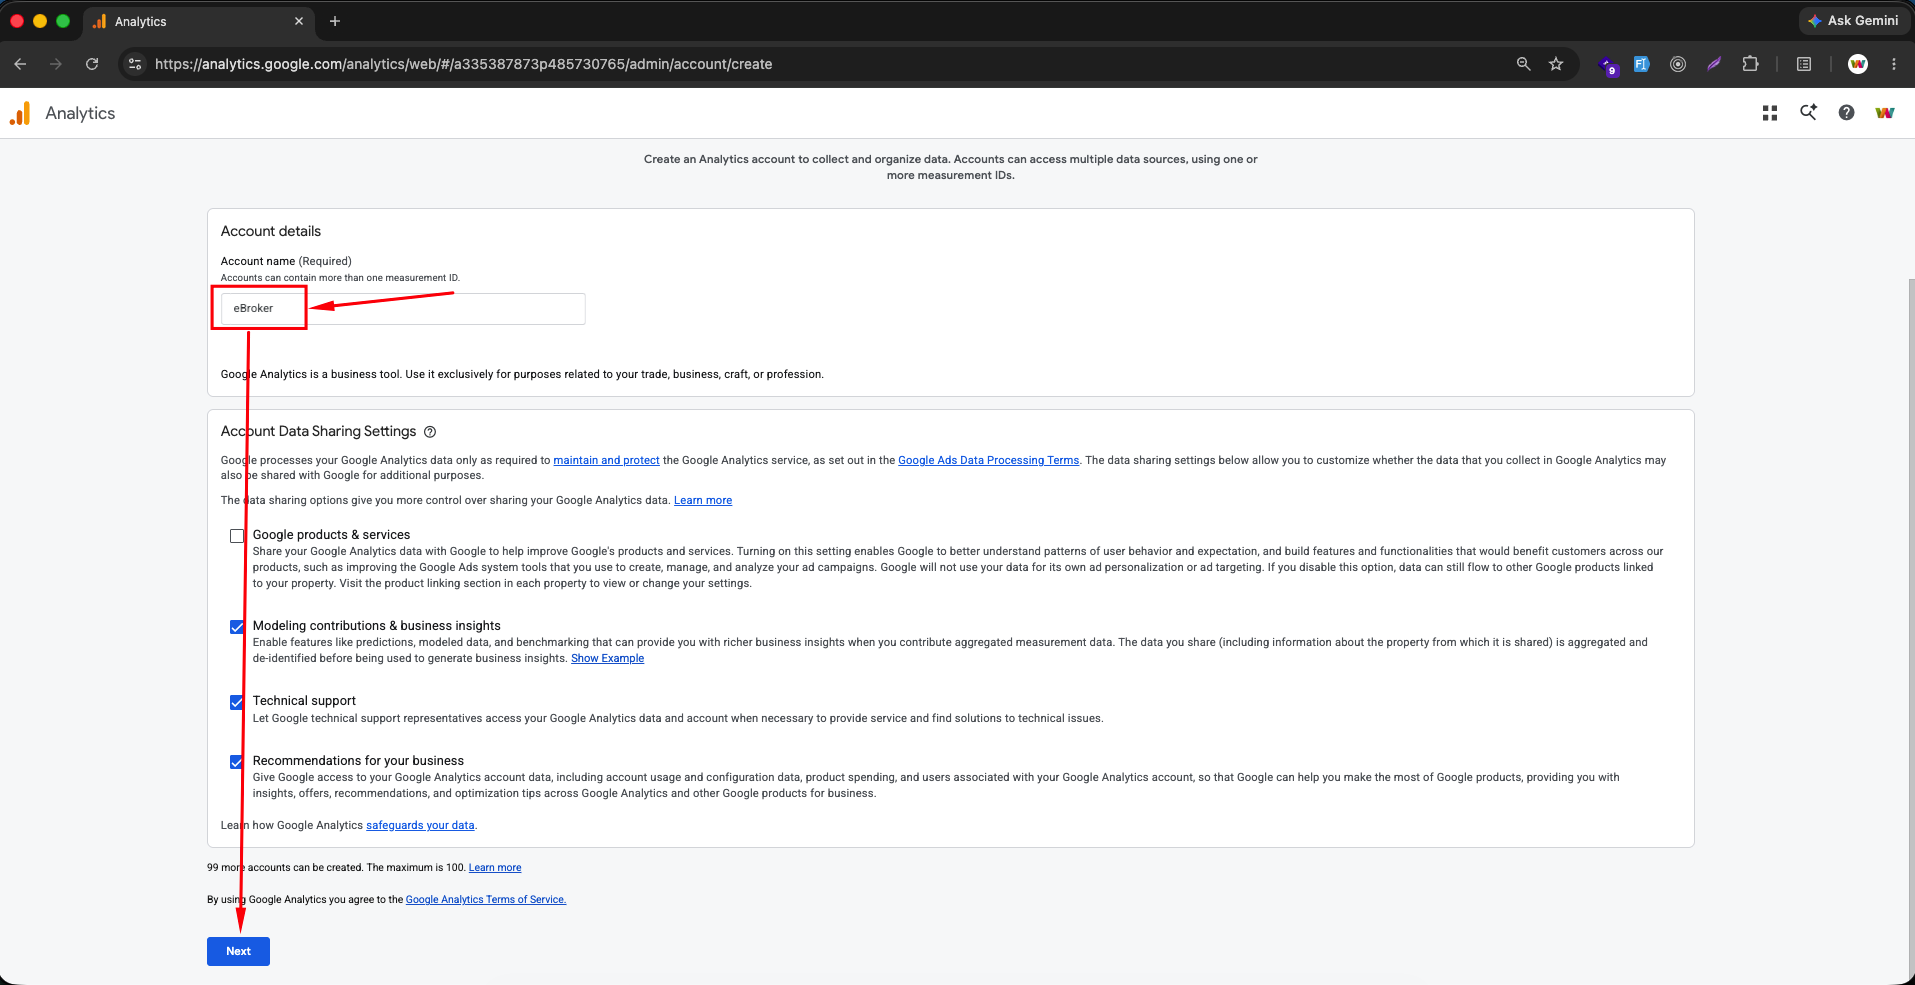
- Go to Google Analytics and sign in with your Google account
- Enter an account name (e.g. your company or brand name)
Creating a Property
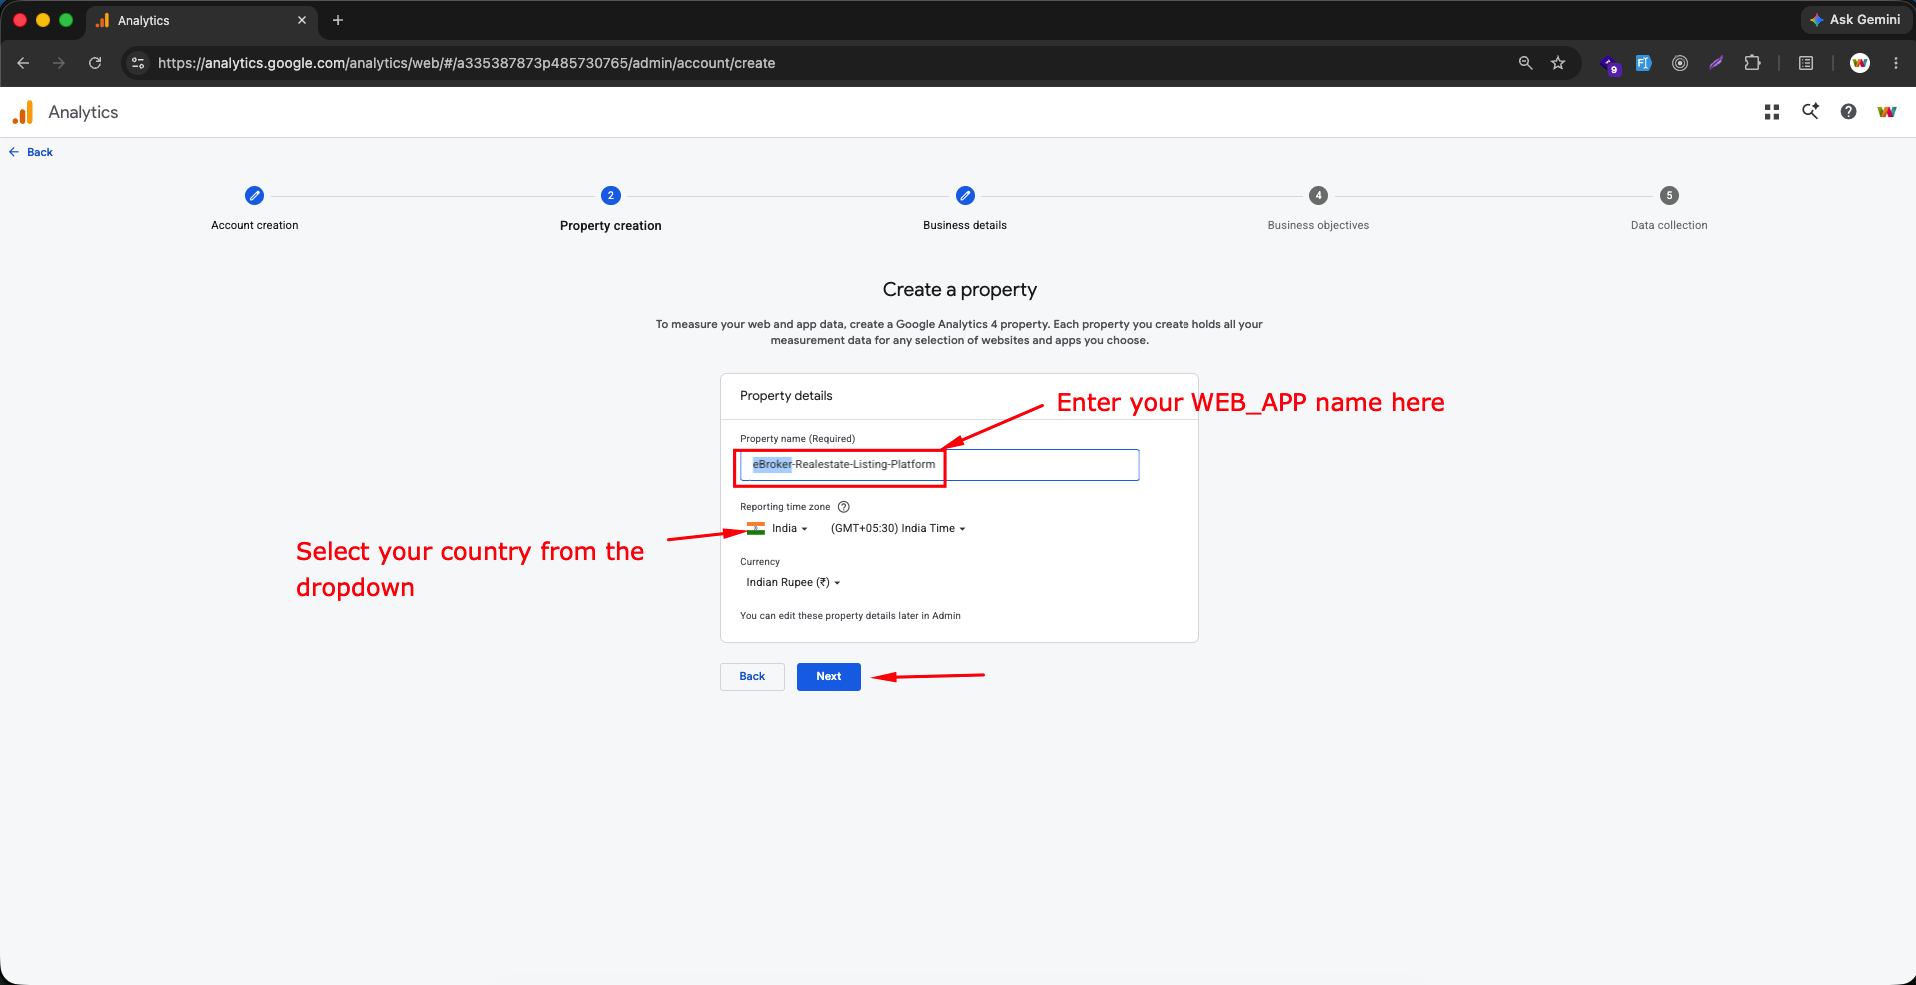
- Enter a property name for your web app
- Select your reporting time zone and currency
Adding Business Details
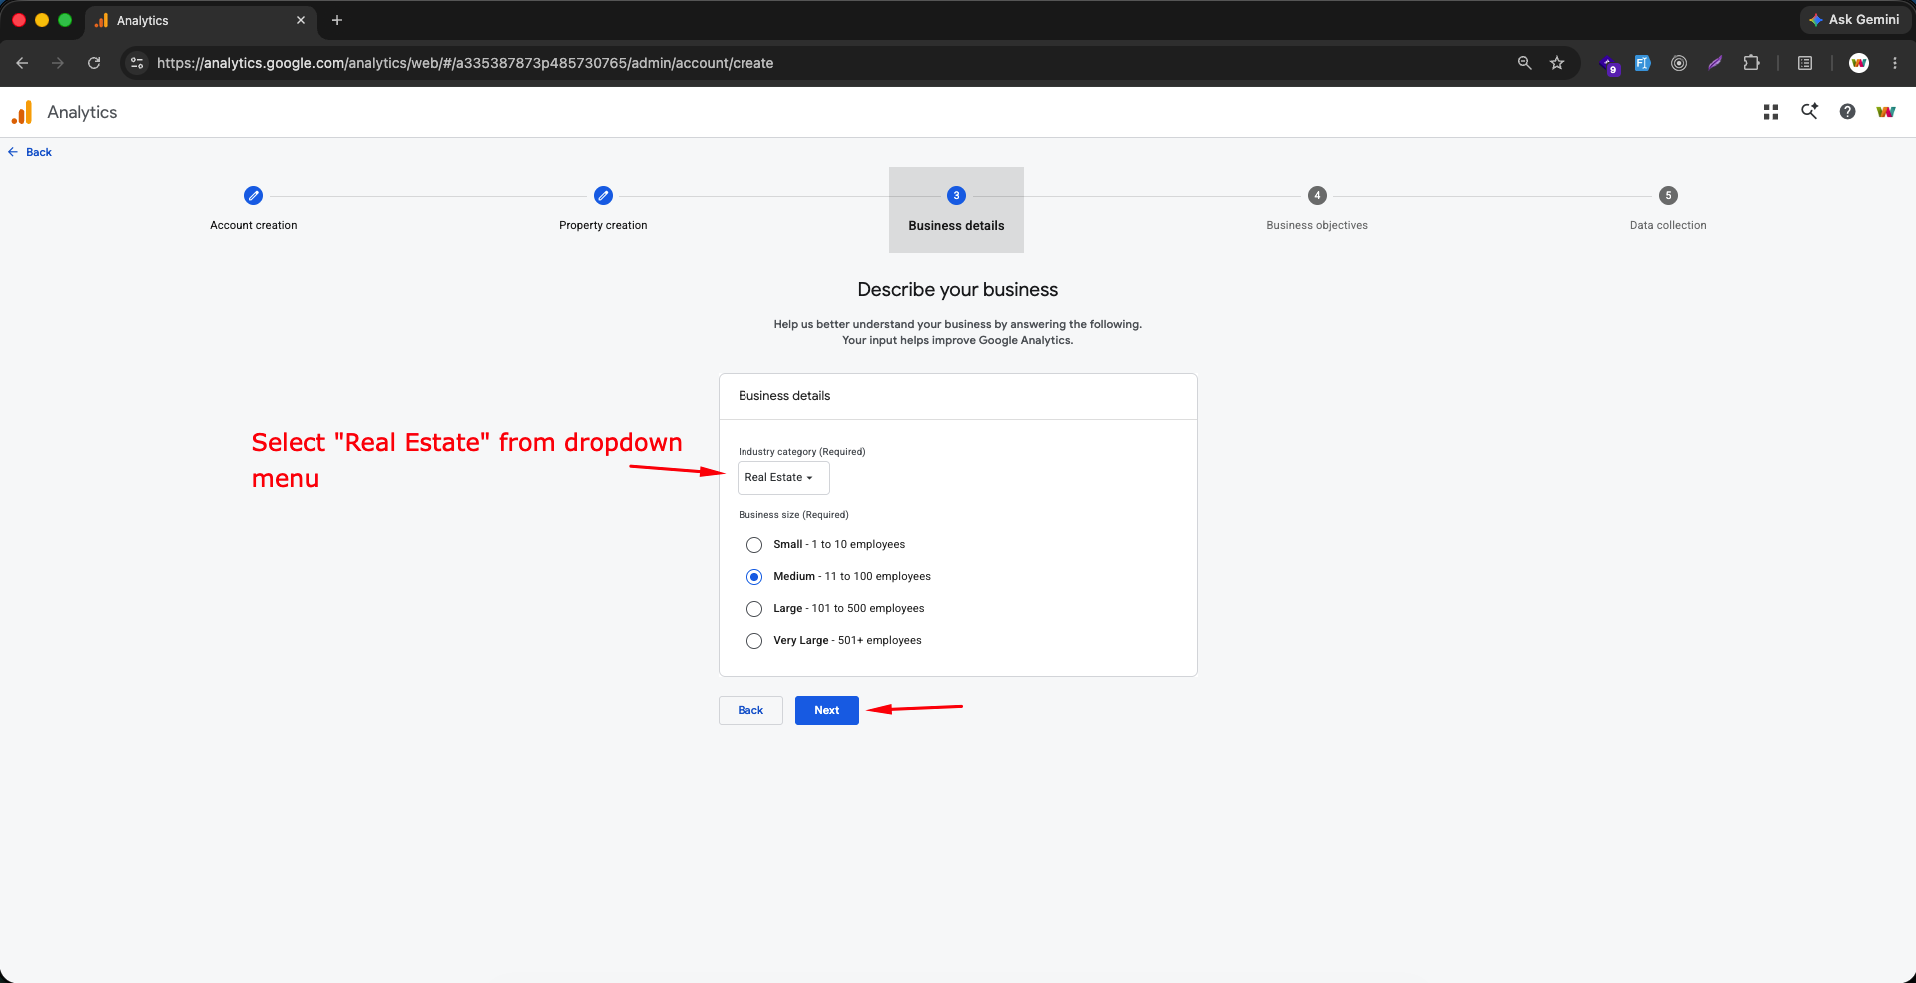
- Select Real Estate from the industry category dropdown
- Choose your business size
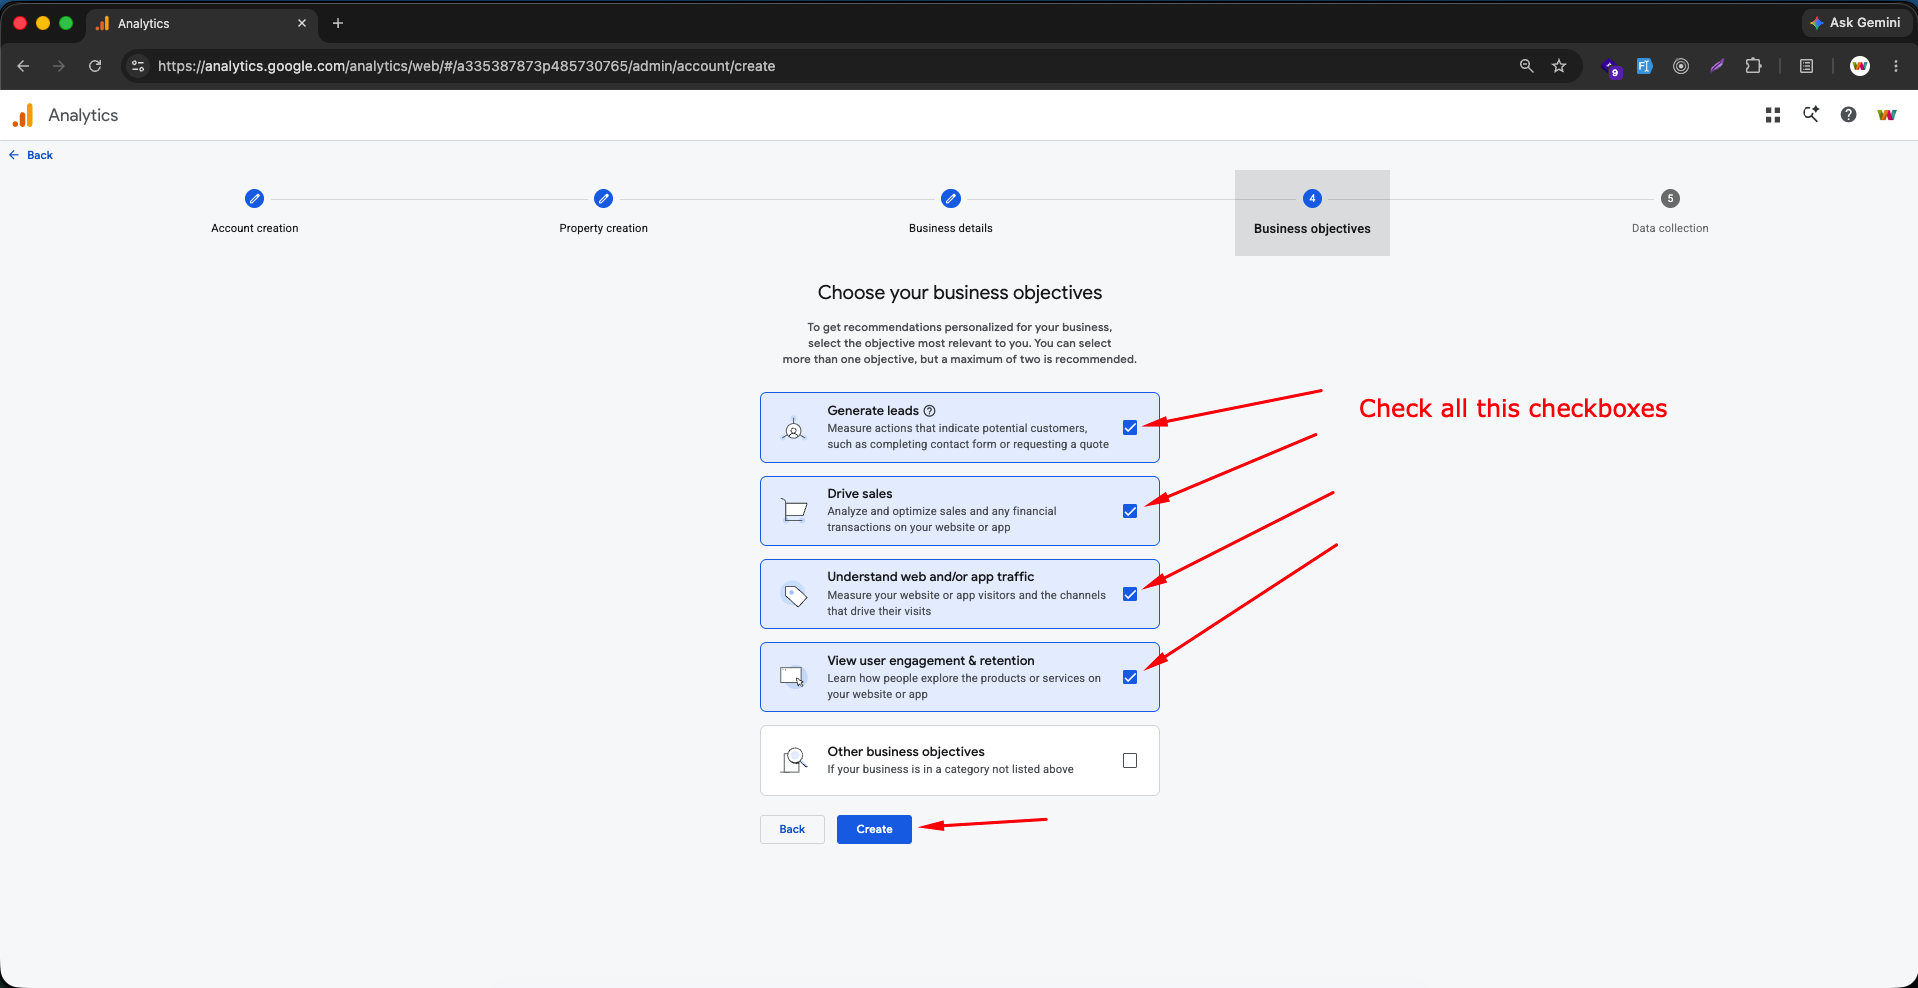
Choosing Business Objectives
Select the objectives that best match your goals, such as Generate leads, Drive sales, Understand web and/or app traffic, and View user engagement & retention
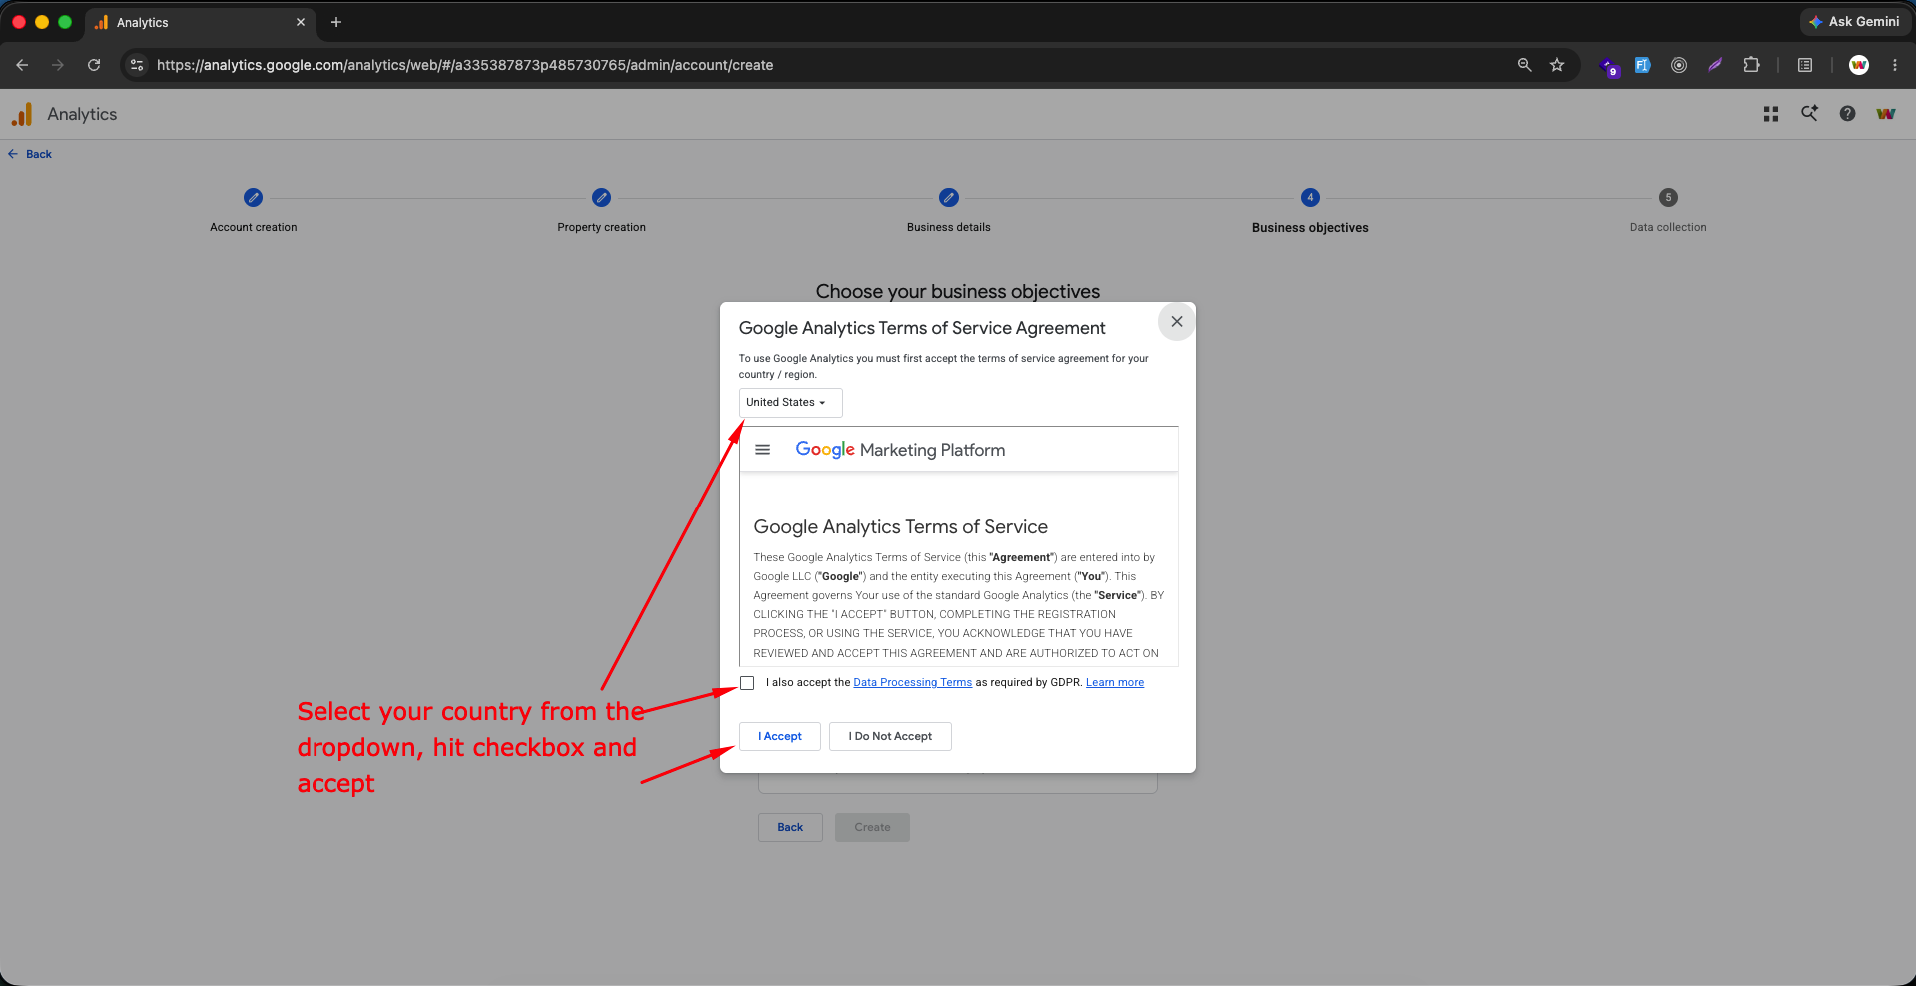
Accepting the Terms of Service
- Select your country/region from the dropdown
- Check the box to accept the Data Processing Terms
- Click I Accept
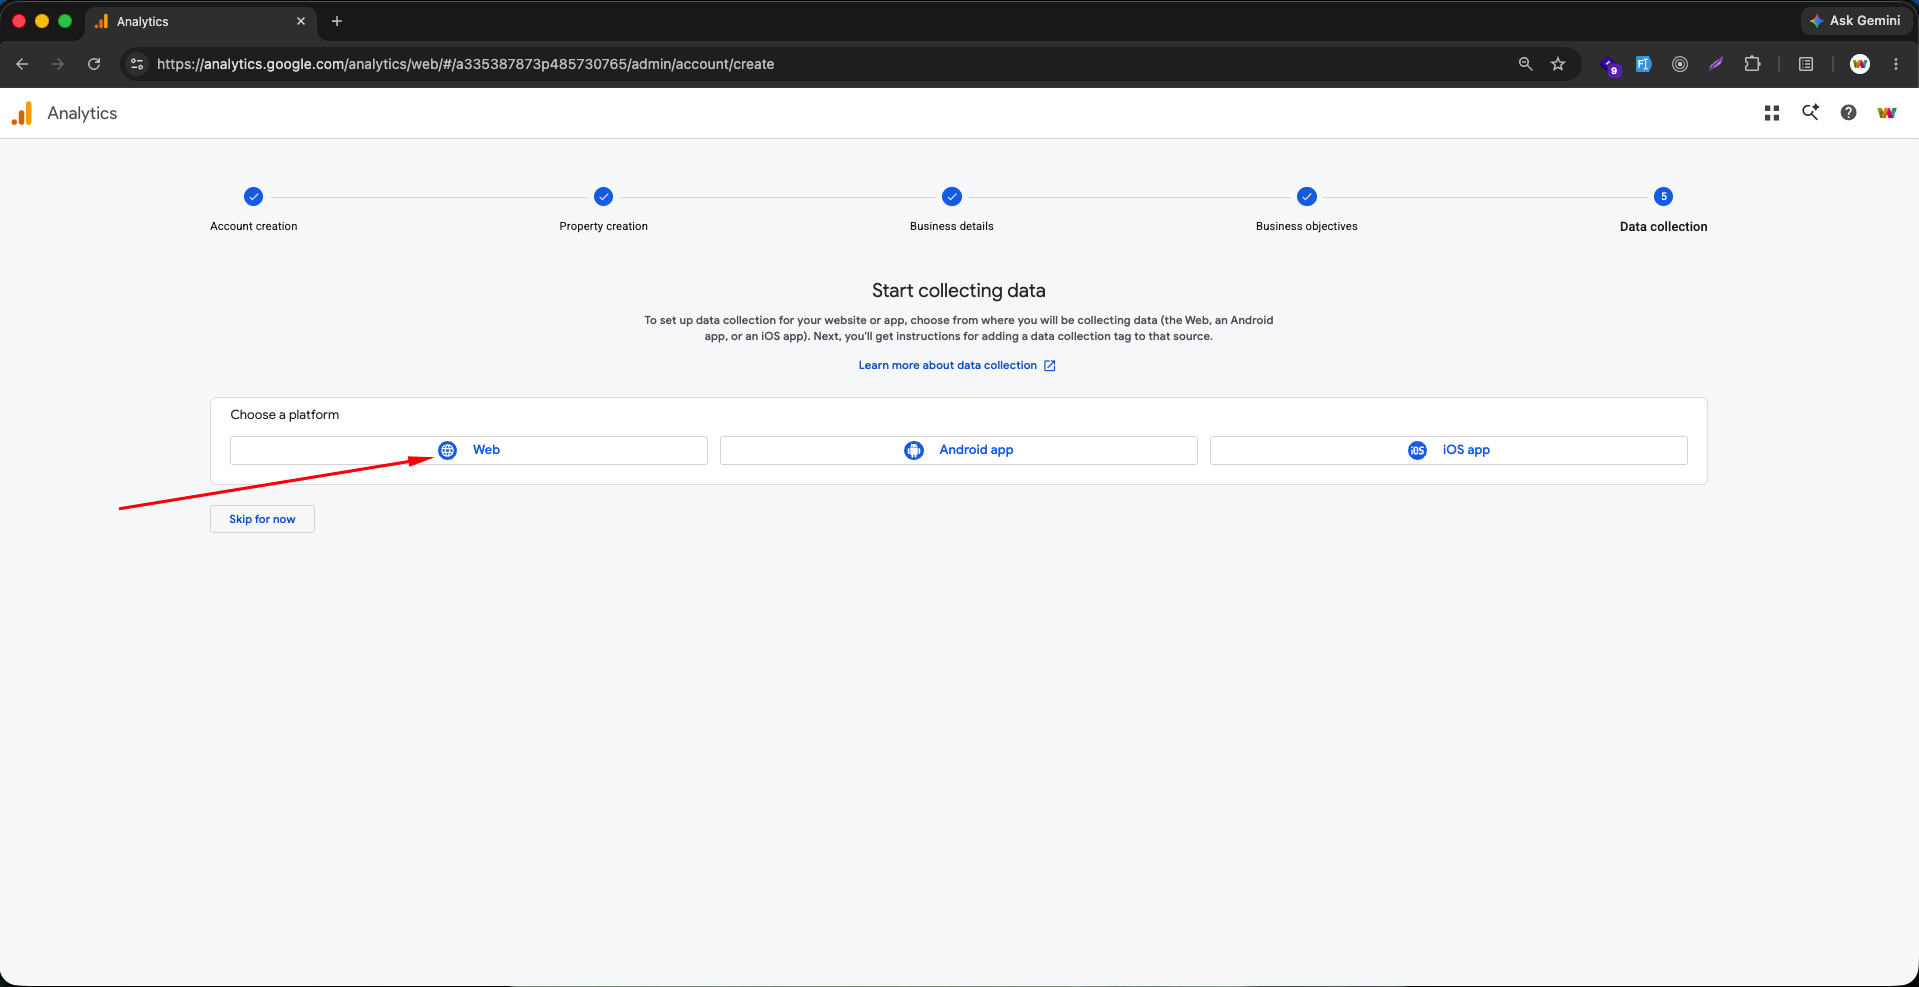
Setting Up Data Collection
- Choose Web as the platform to start collecting data
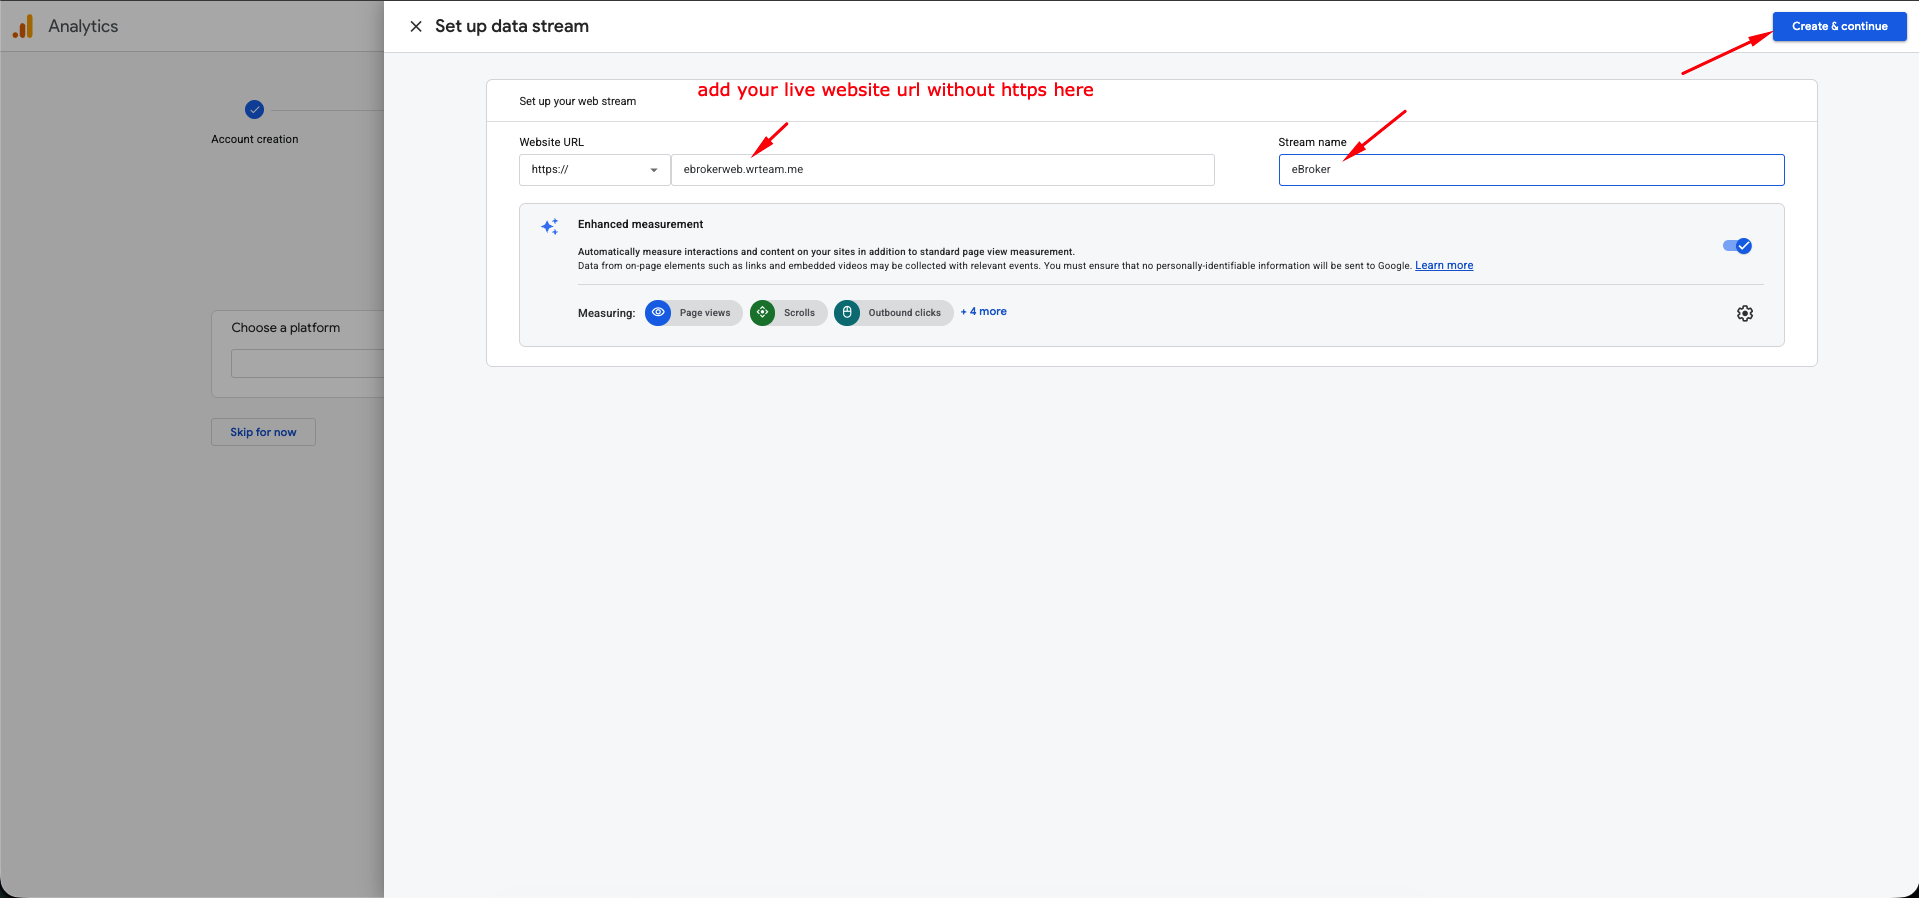
- Enter your live website URL (without
https://) in the Website URL field - Enter a stream name and click Create & continue
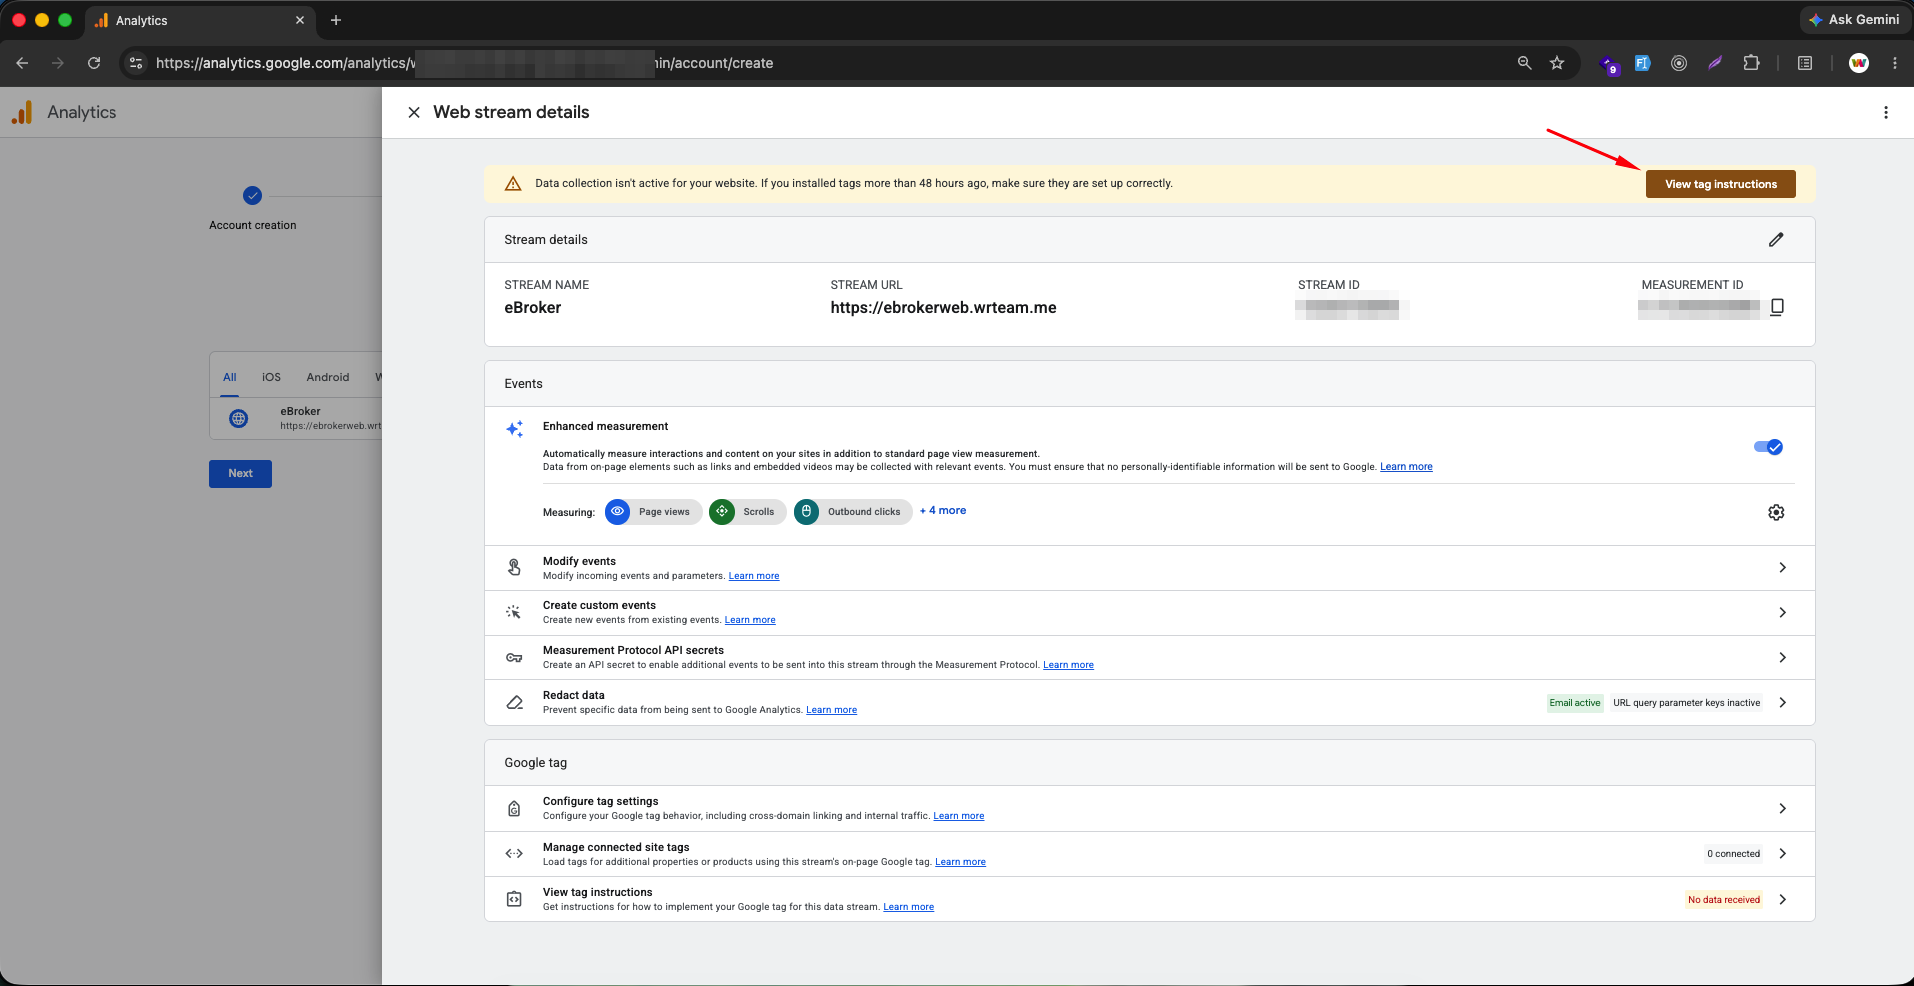
Getting Your Measurement ID
Once the data stream is created, note the Measurement ID (starts with G-) shown in the stream details
Getting the Google Tag
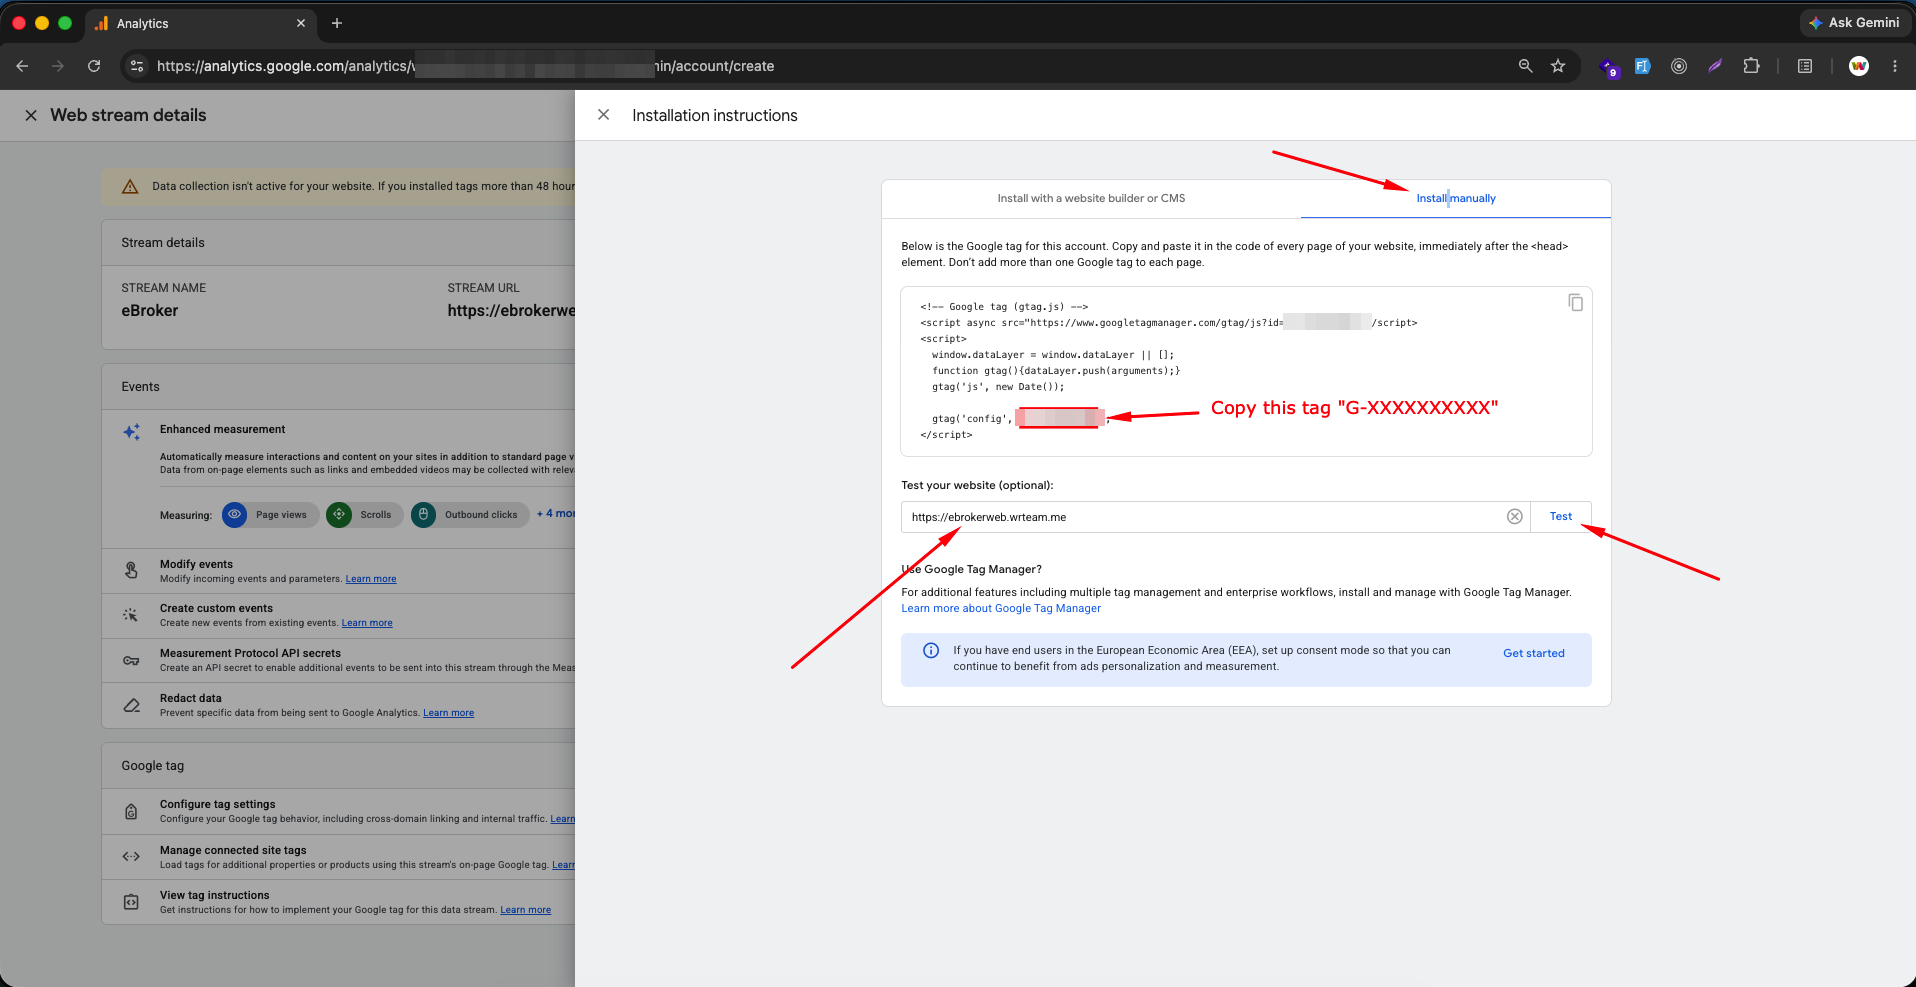
- Click View tag instructions and select the Install manually tab
- Copy the Google tag script, and note the Measurement ID (
G-XXXXXXXXXX) highlighted inside it
Adding the Measurement ID to Your Website
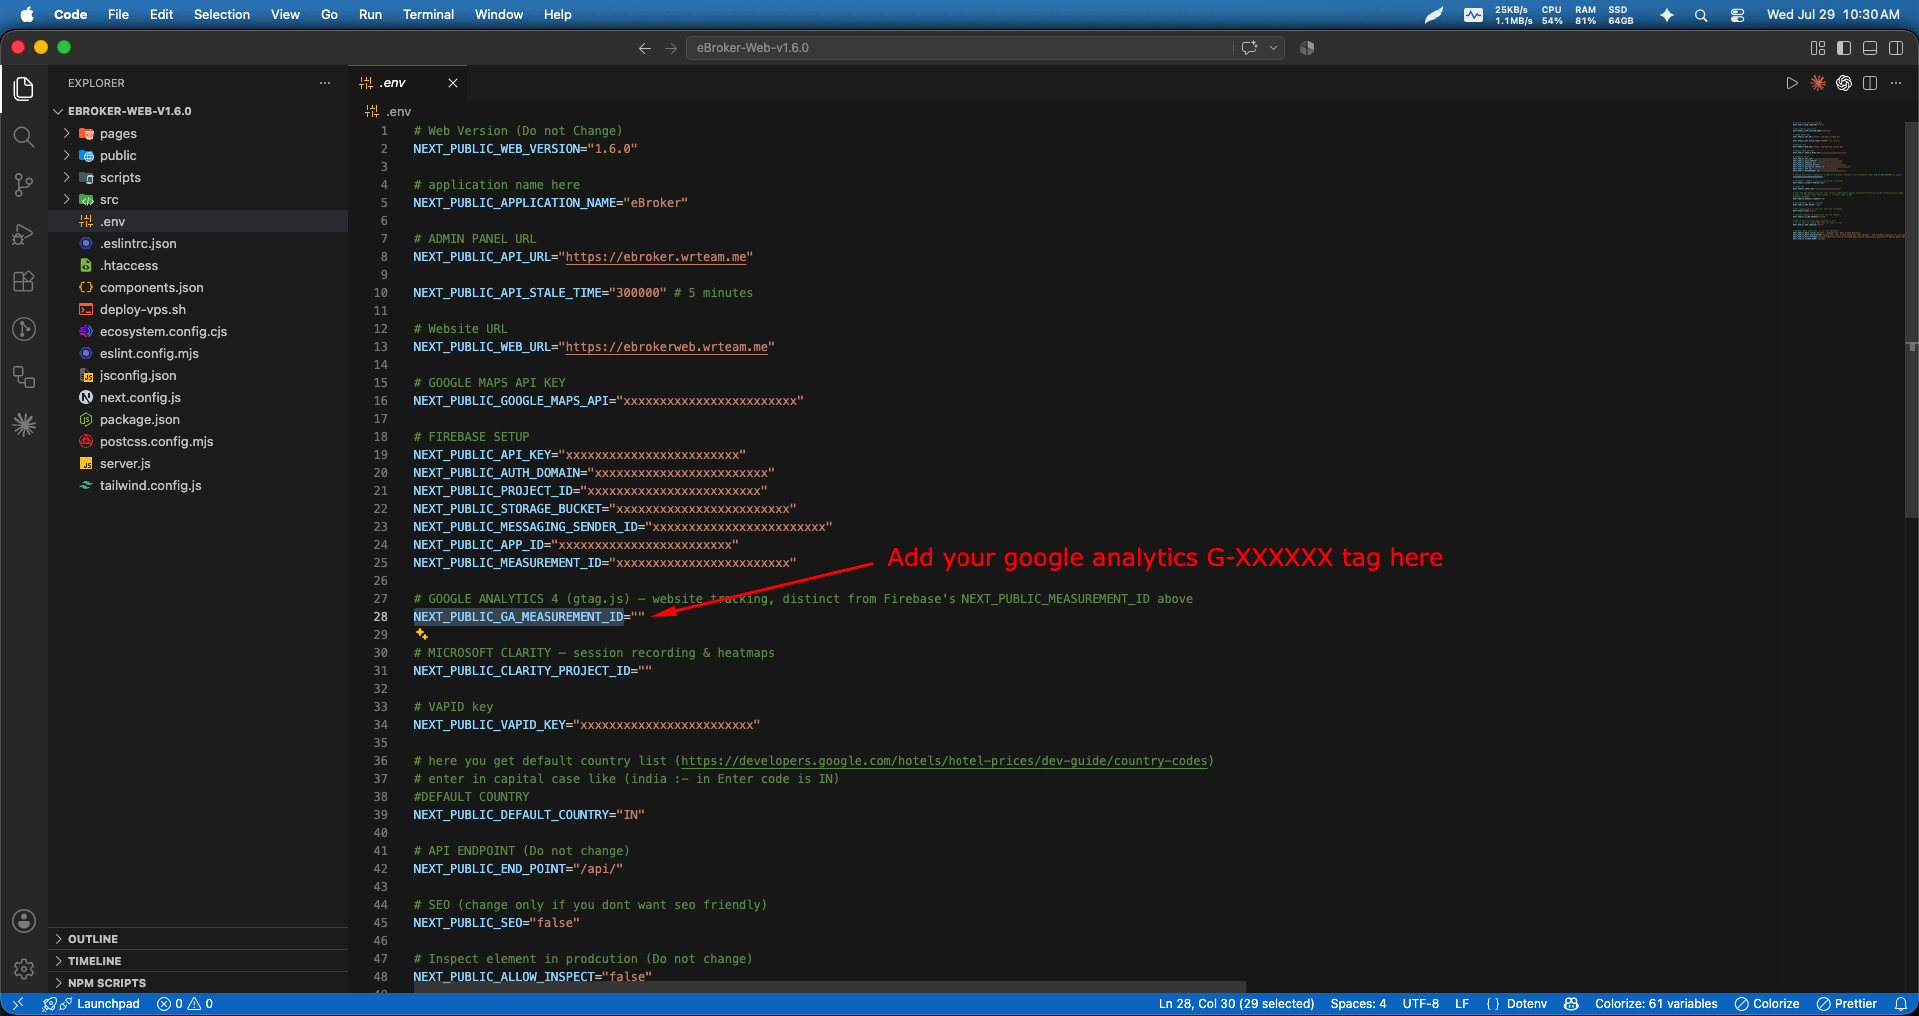
- Open the
.envfile in your project's root directory - Add your Measurement ID (
G-XXXXXXXXXX) to theNEXT_PUBLIC_GA_MEASUREMENT_IDvariable
# GOOGLE ANALYTICS 4 (gtag.js) — website tracking, distinct from Firebase's NEXT_PUBLIC_MEASUREMENT_ID above
NEXT_PUBLIC_GA_MEASUREMENT_ID=""
Building and Deploying
- Run the appropriate build command based on your
NEXT_PUBLIC_SEOvalue in the.envfile (see Running the Project) - Upload the generated files to your server
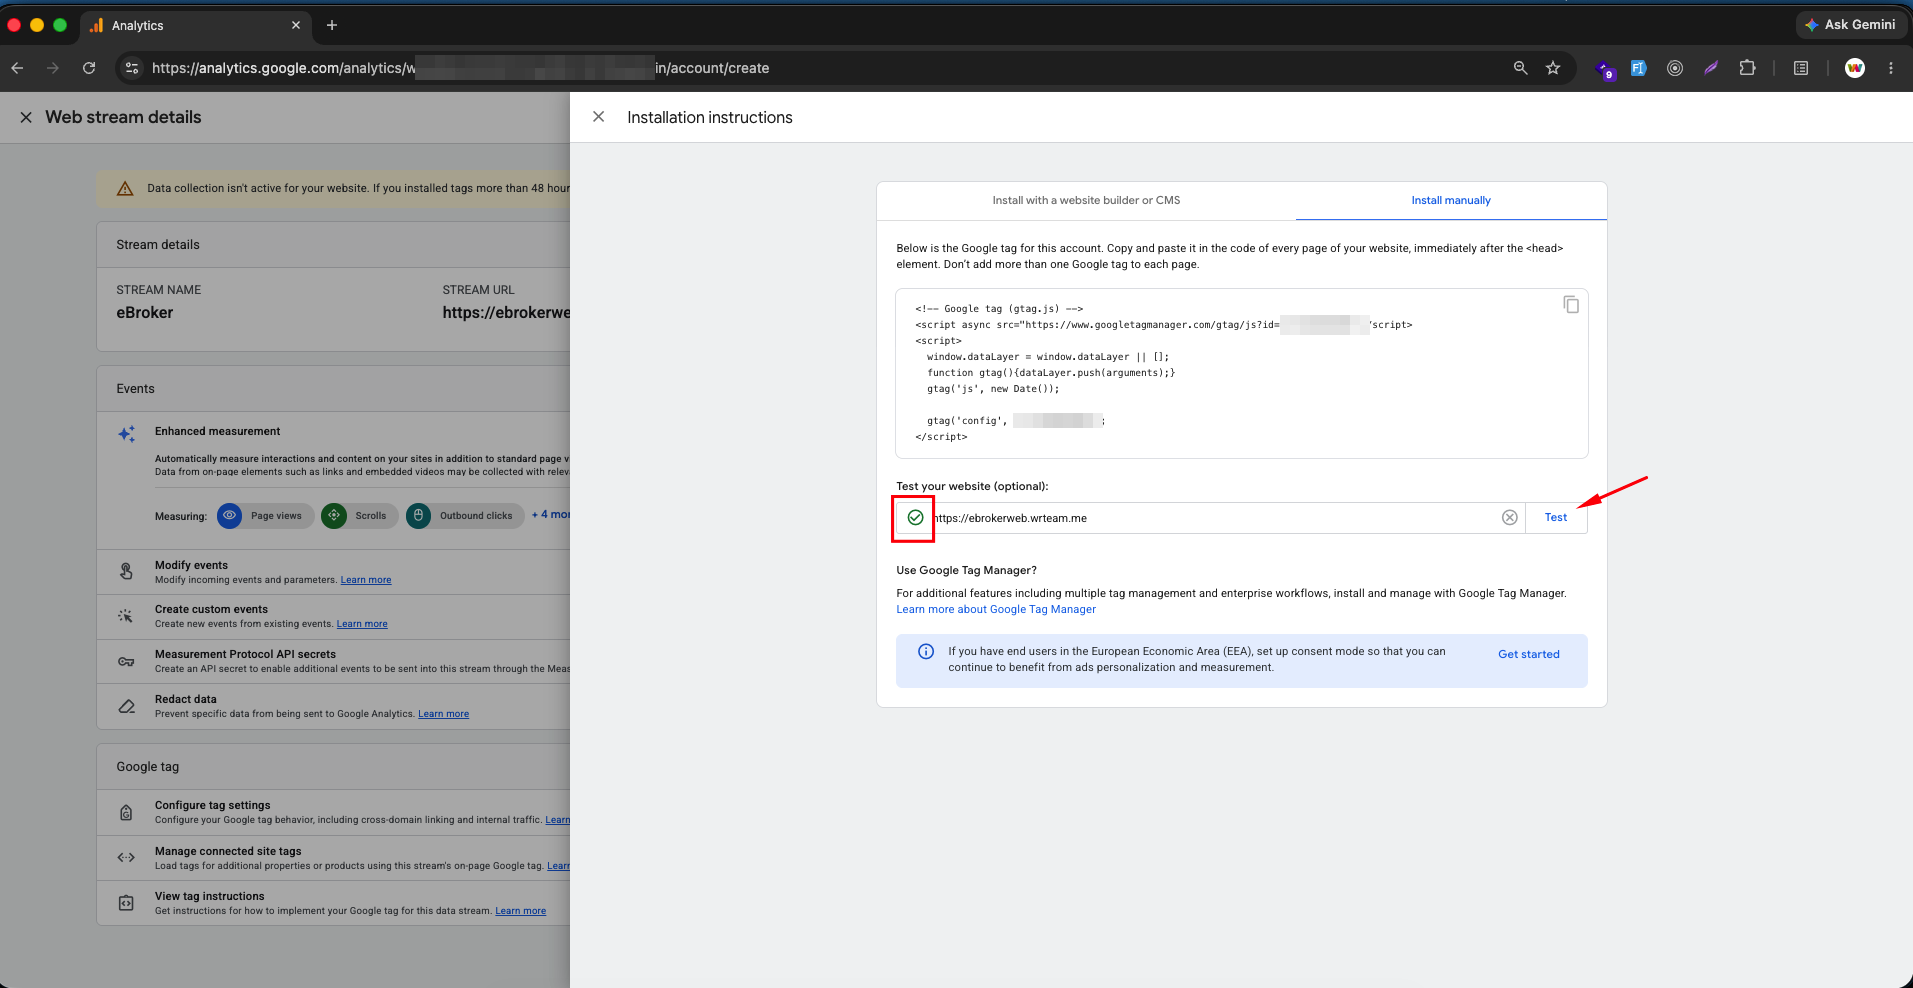
- Return to Google Analytics and enter your live website URL in the Test your website field, then click Test to verify the tag is firing correctly
Note: It can take up to 24-48 hours for data to fully appear in your Google Analytics dashboard after installing the tag.
Best Practices
- Do not add more than one Google tag to the same page
- Keep your Measurement ID private and avoid committing it to public repositories
- Regularly check the Google Analytics dashboard to monitor traffic, engagement, and conversions