Microsoft Clarity Setup
Microsoft Clarity is a free analytics tool that provides session recordings, heatmaps, and AI-driven insights into how visitors use your eBroker web application. Follow these steps to set up Clarity for your website.
Creating a Microsoft Clarity Account
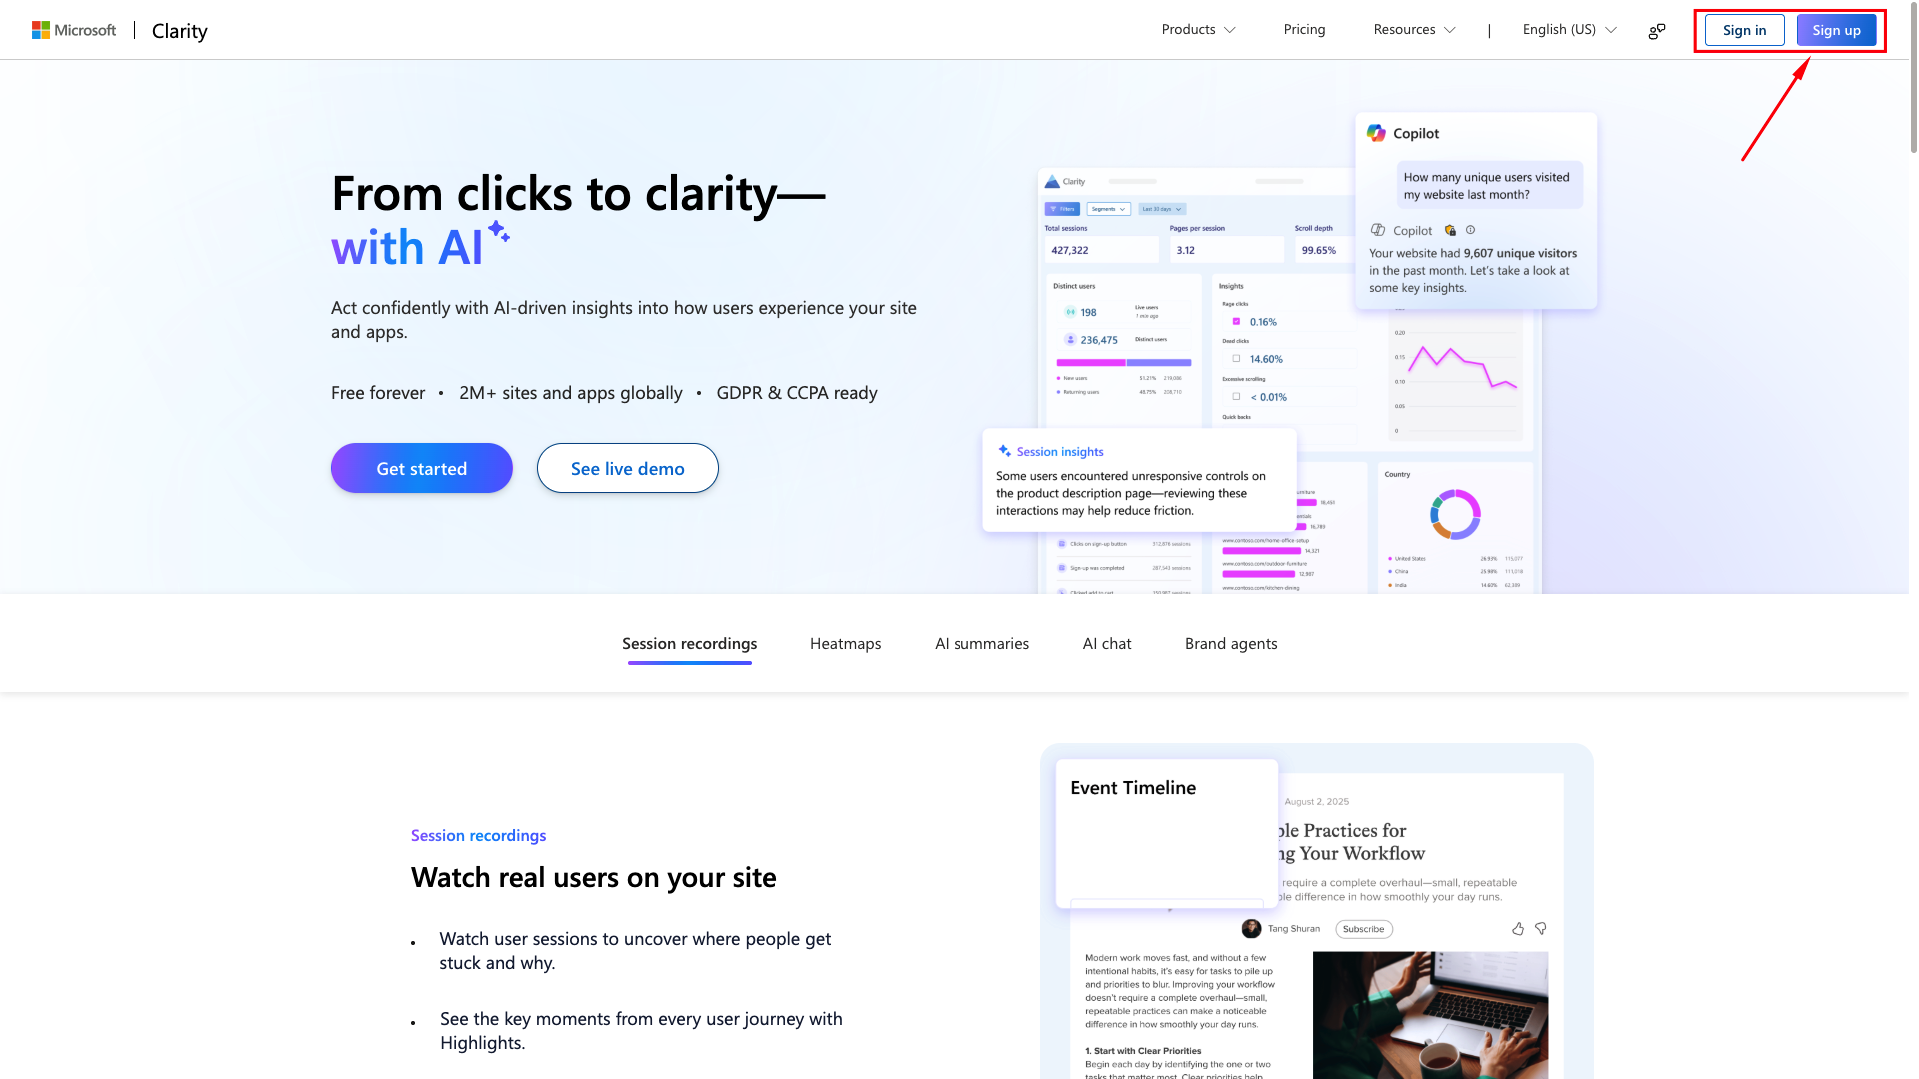
- Go to Microsoft Clarity and click Sign up
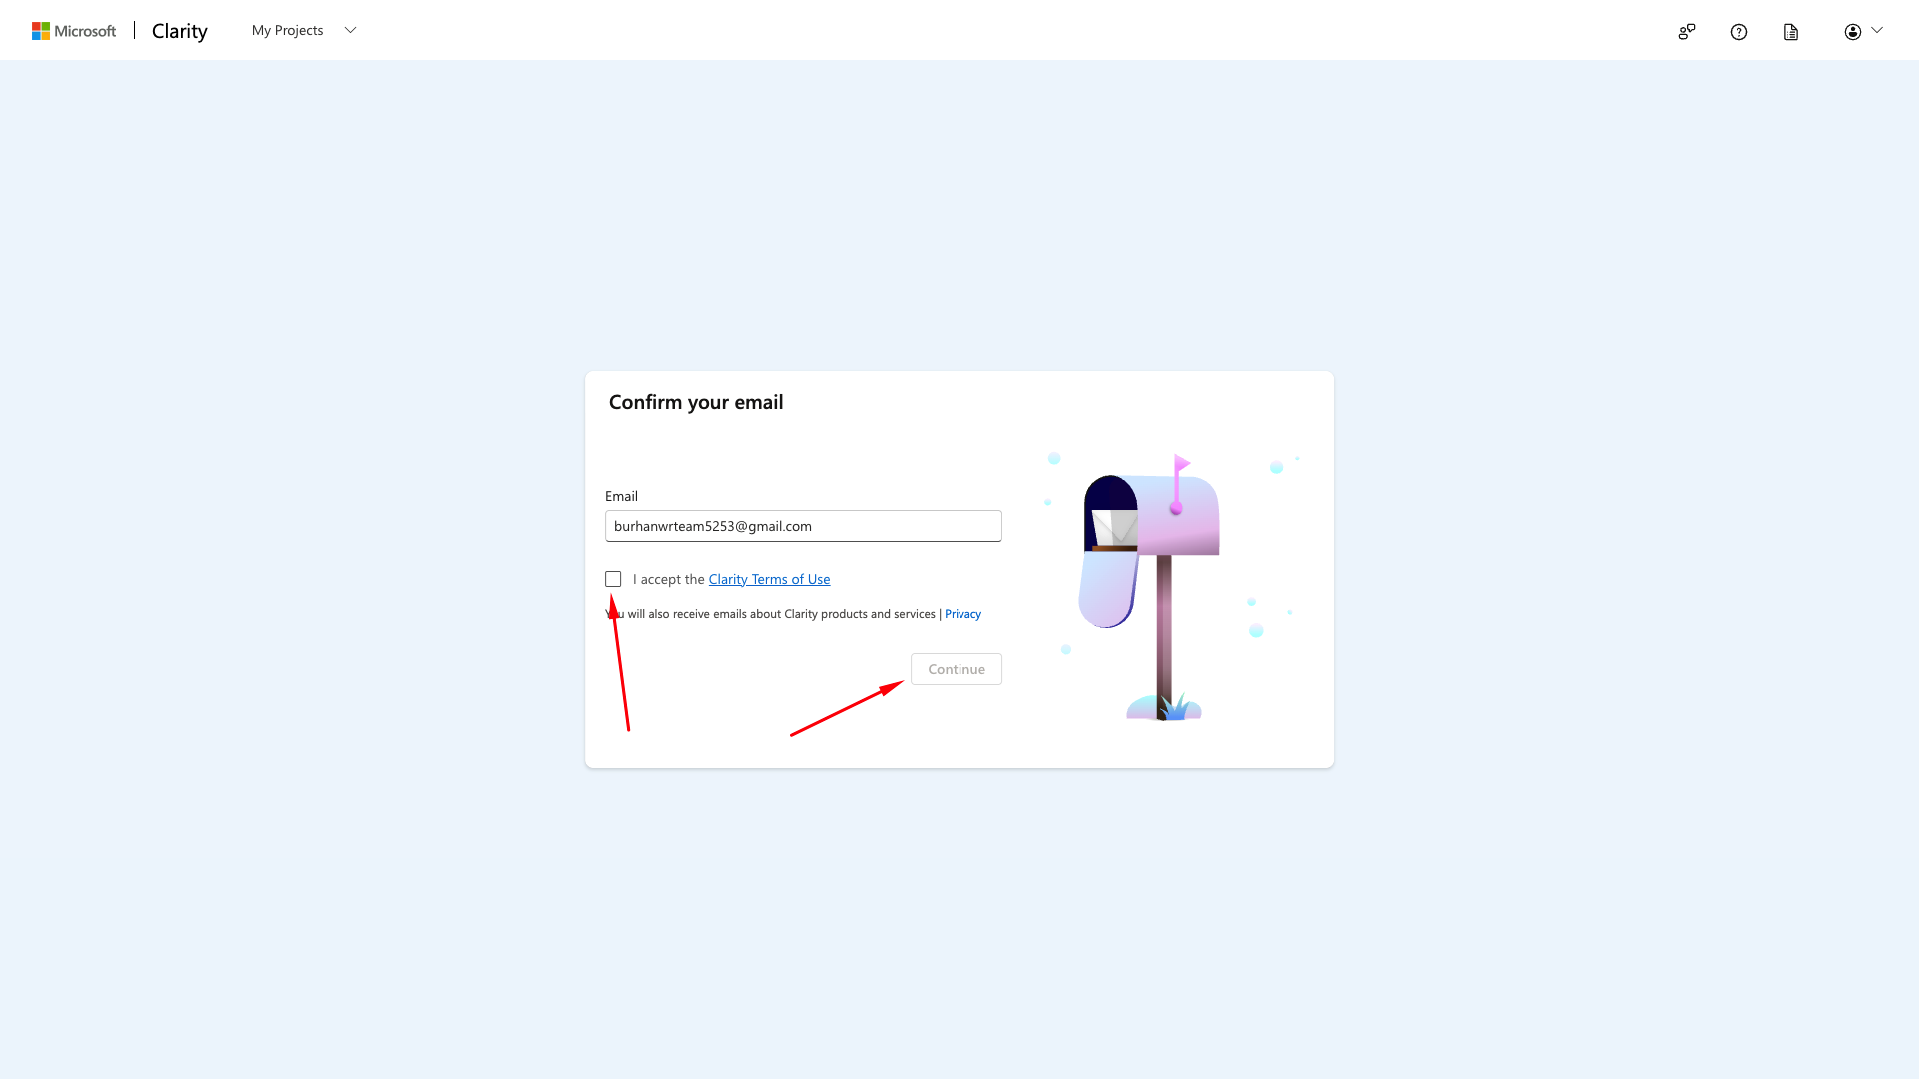
- Confirm your email address
- Check the box to accept the Clarity Terms of Use and click Continue
Creating a Clarity Project
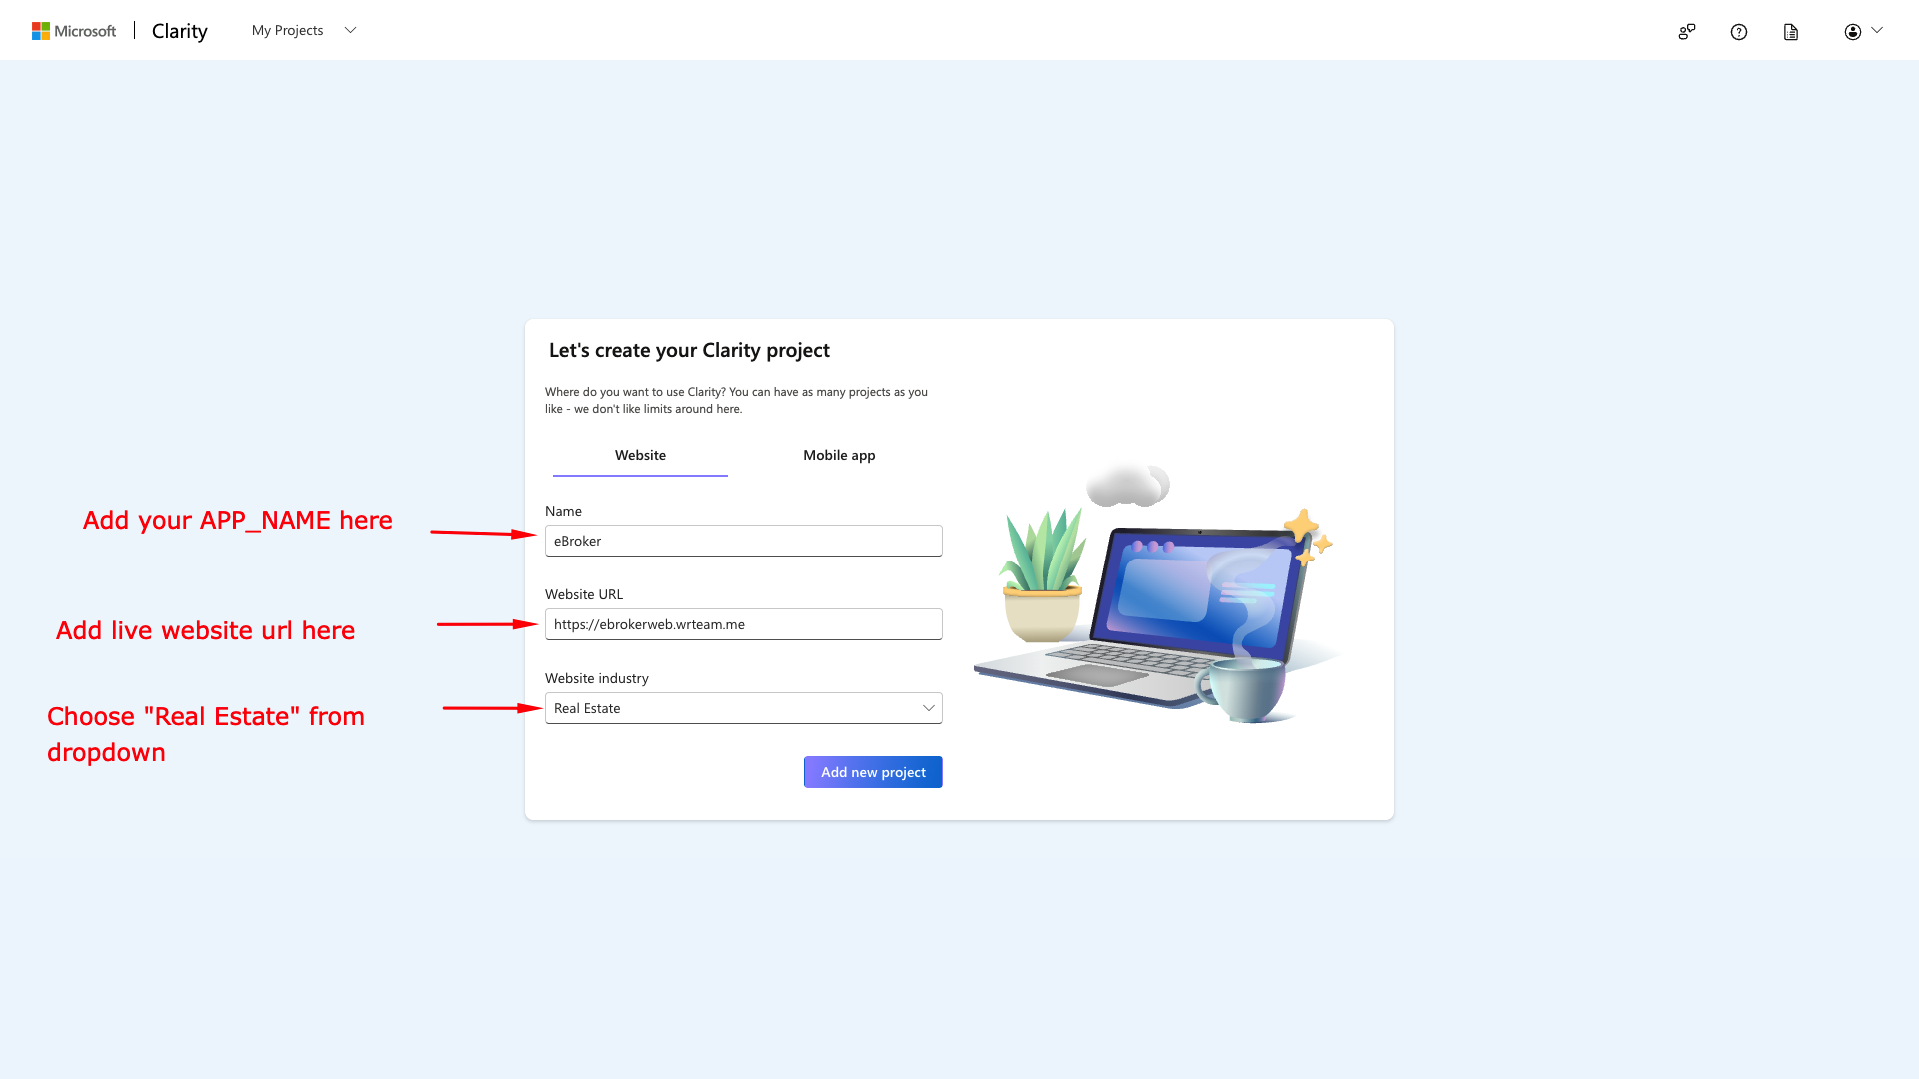
- Select the Website tab
- Enter your app name
- Enter your live website URL
- Select Real Estate from the Website industry dropdown
- Click Add new project
Getting the Tracking Code
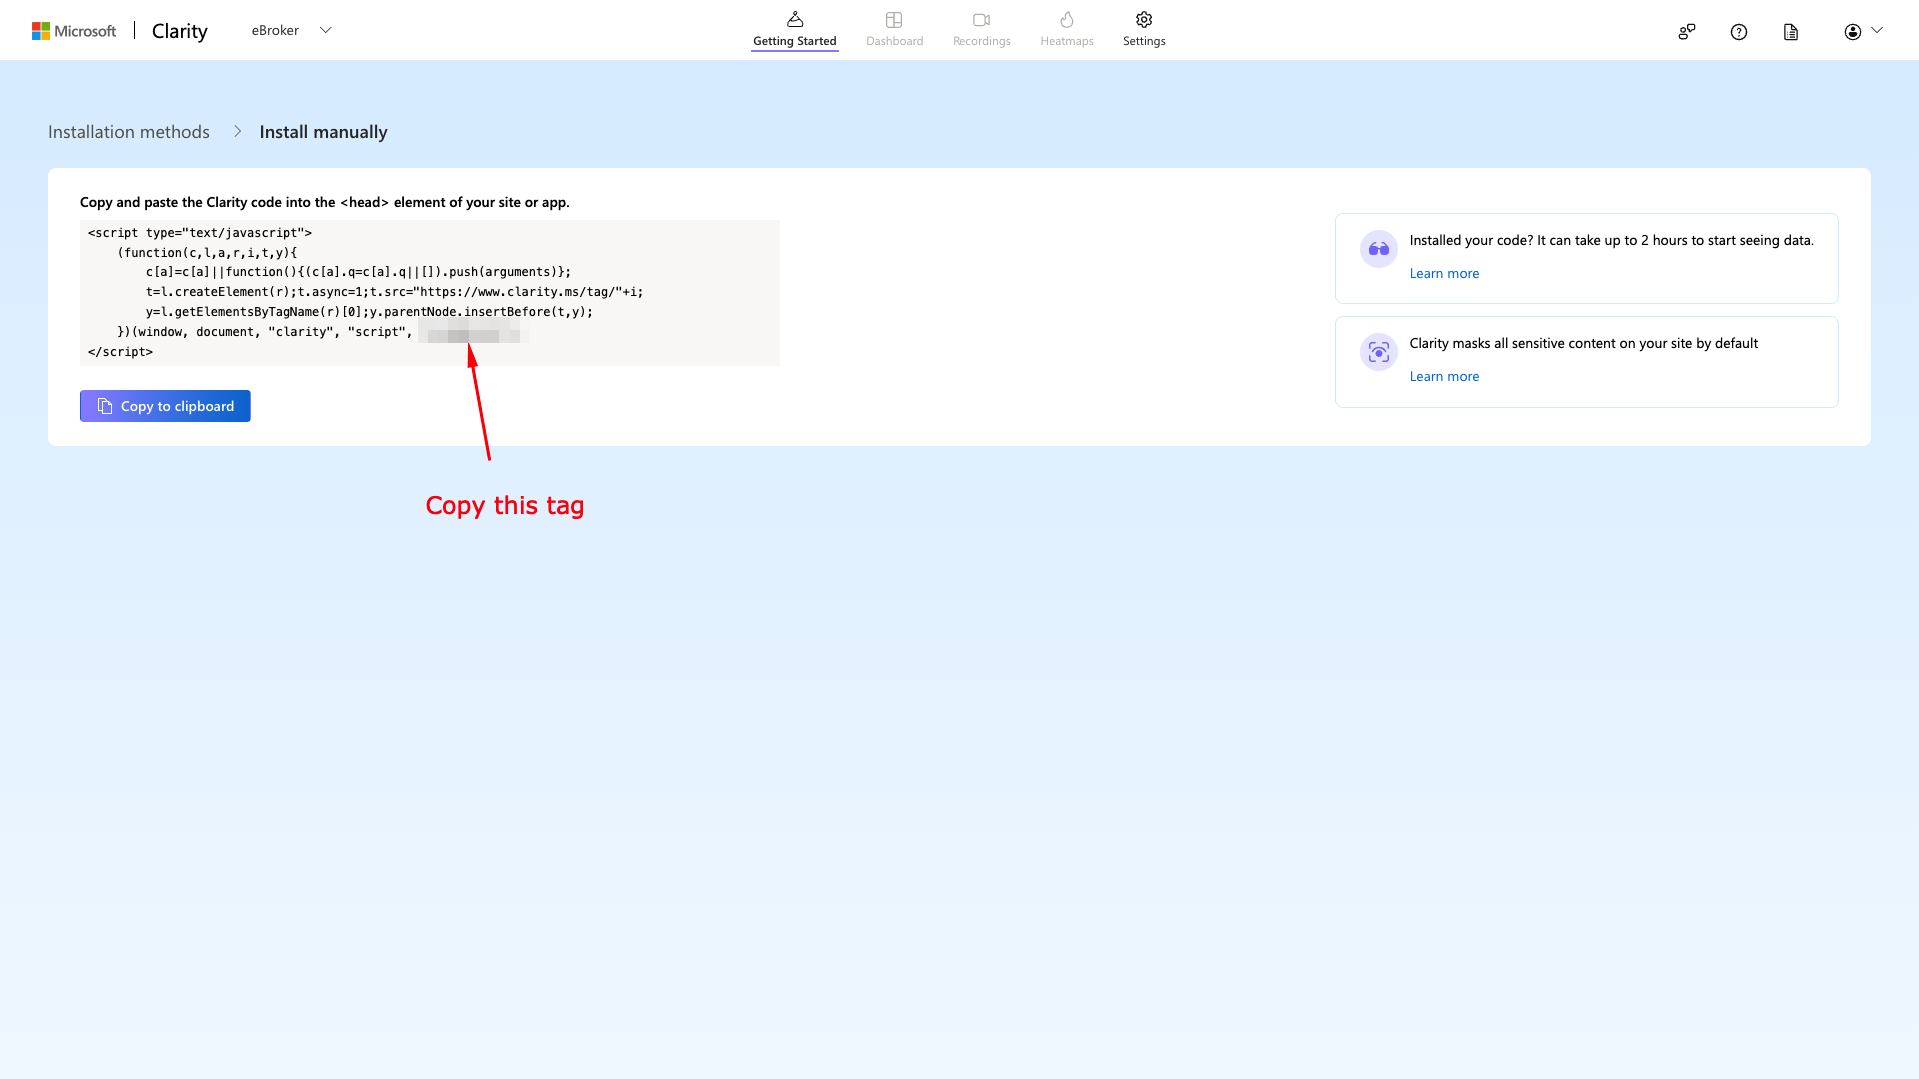
- On the Almost there! screen, choose Install manually and click Get tracking code
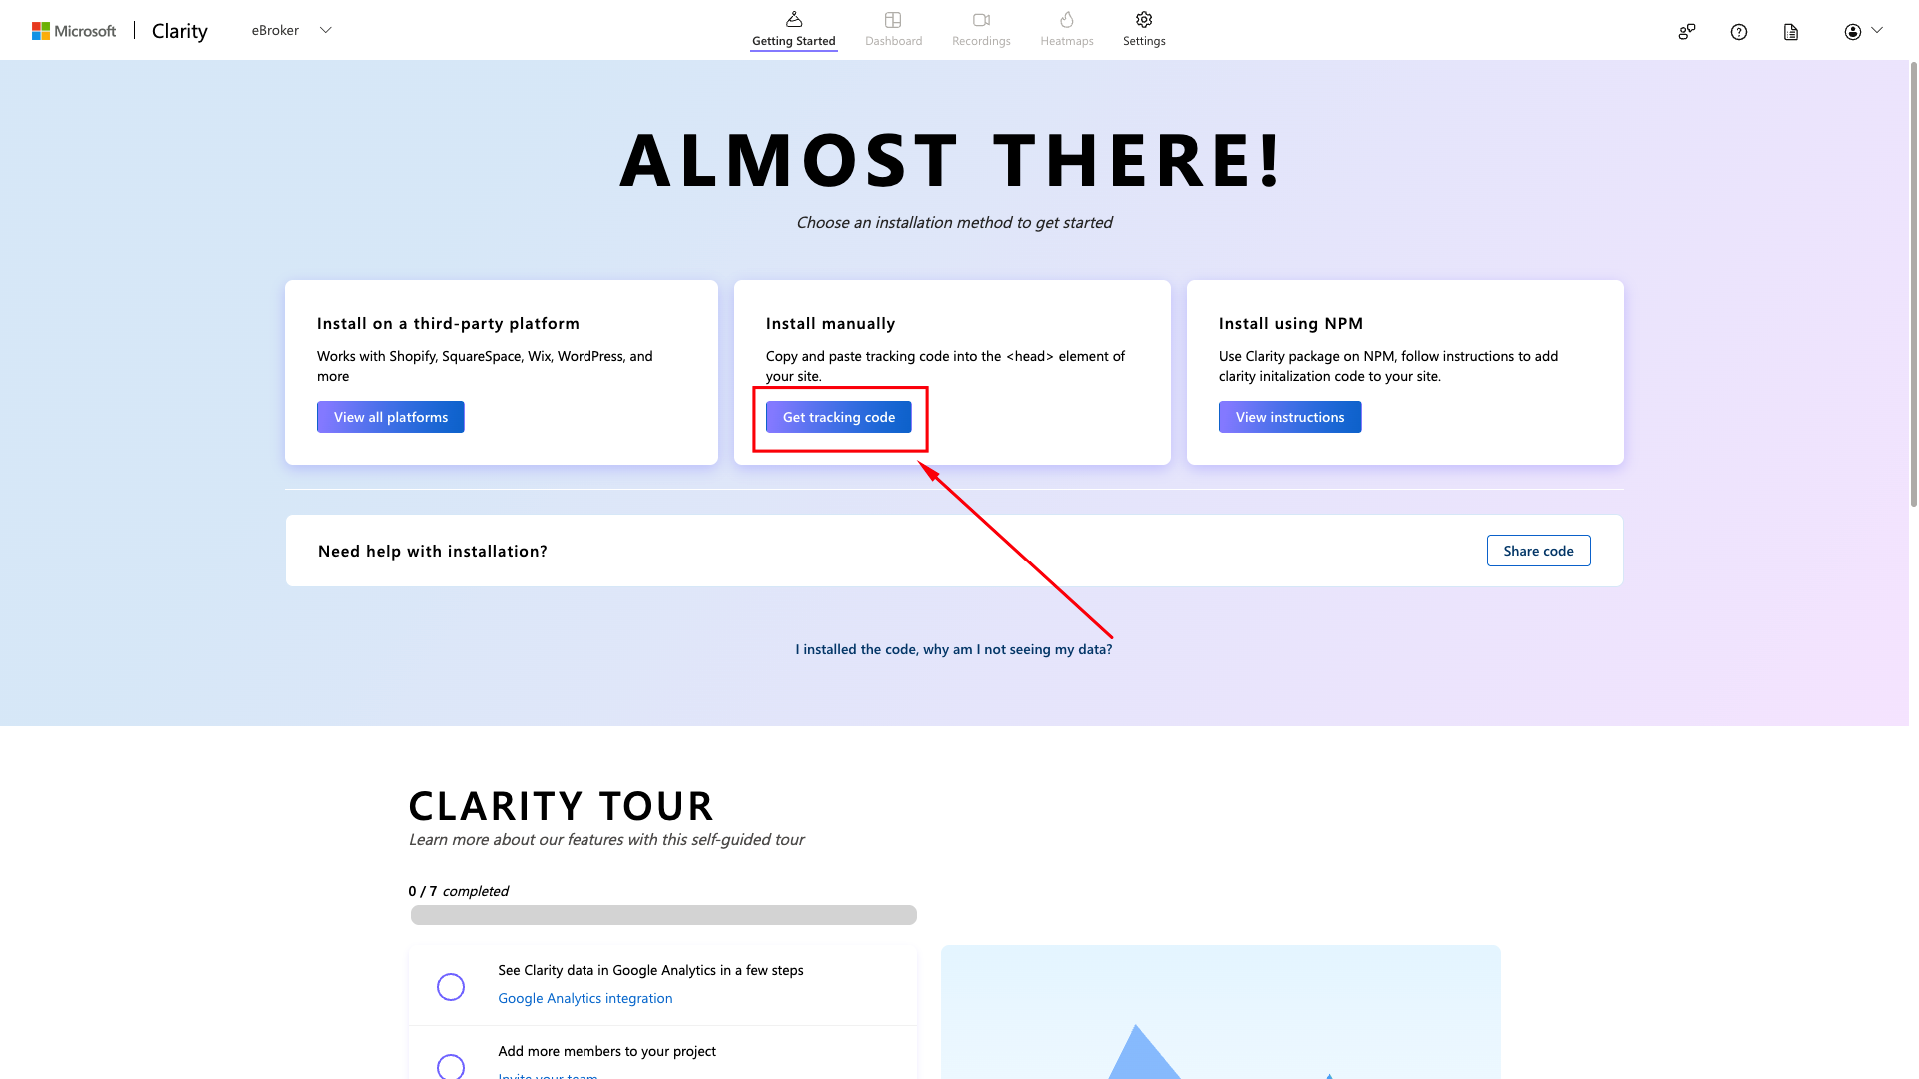
- Copy the tracking code shown
Adding the Clarity Project ID to Your Website
- Open the
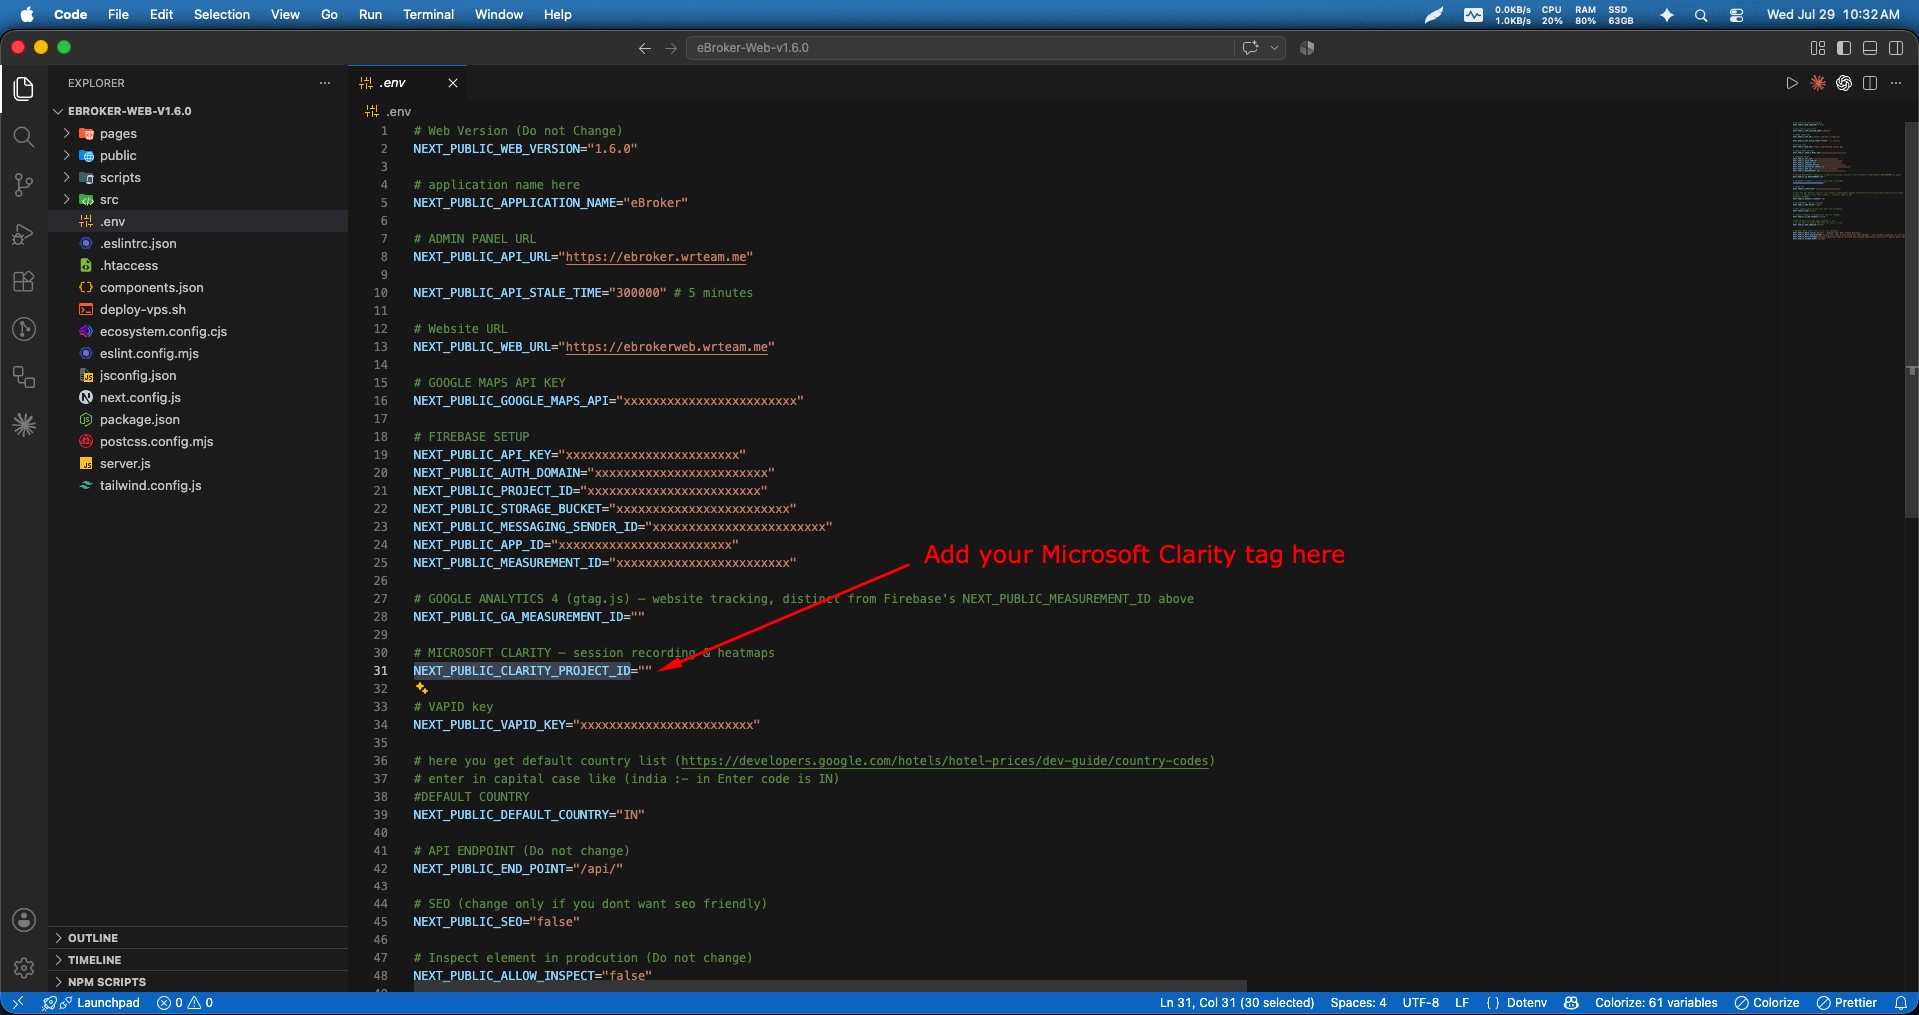
.envfile in your project's root directory - Add your Clarity project ID (from the tracking code, the value passed after
"clarity", "script",) to theNEXT_PUBLIC_CLARITY_PROJECT_IDvariable
# MICROSOFT CLARITY — session recording & heatmaps
NEXT_PUBLIC_CLARITY_PROJECT_ID=""
Building and Deploying
- Run the appropriate build command based on your
NEXT_PUBLIC_SEOvalue in the.envfile (see Running the Project) - Upload the generated files to your server
- Return to Microsoft Clarity and check the Getting Started page — it can take up to 2 hours after installation for session data to start appearing
Best Practices
- Clarity masks all sensitive content (such as input fields) on your site by default
- Give it a couple of hours after deployment before troubleshooting missing data
- Use session recordings and heatmaps together to identify friction points in the user journey