Manage Languages
Add new languages, switch the default language, and configure the in-app fallback used when the language API can't be reached.
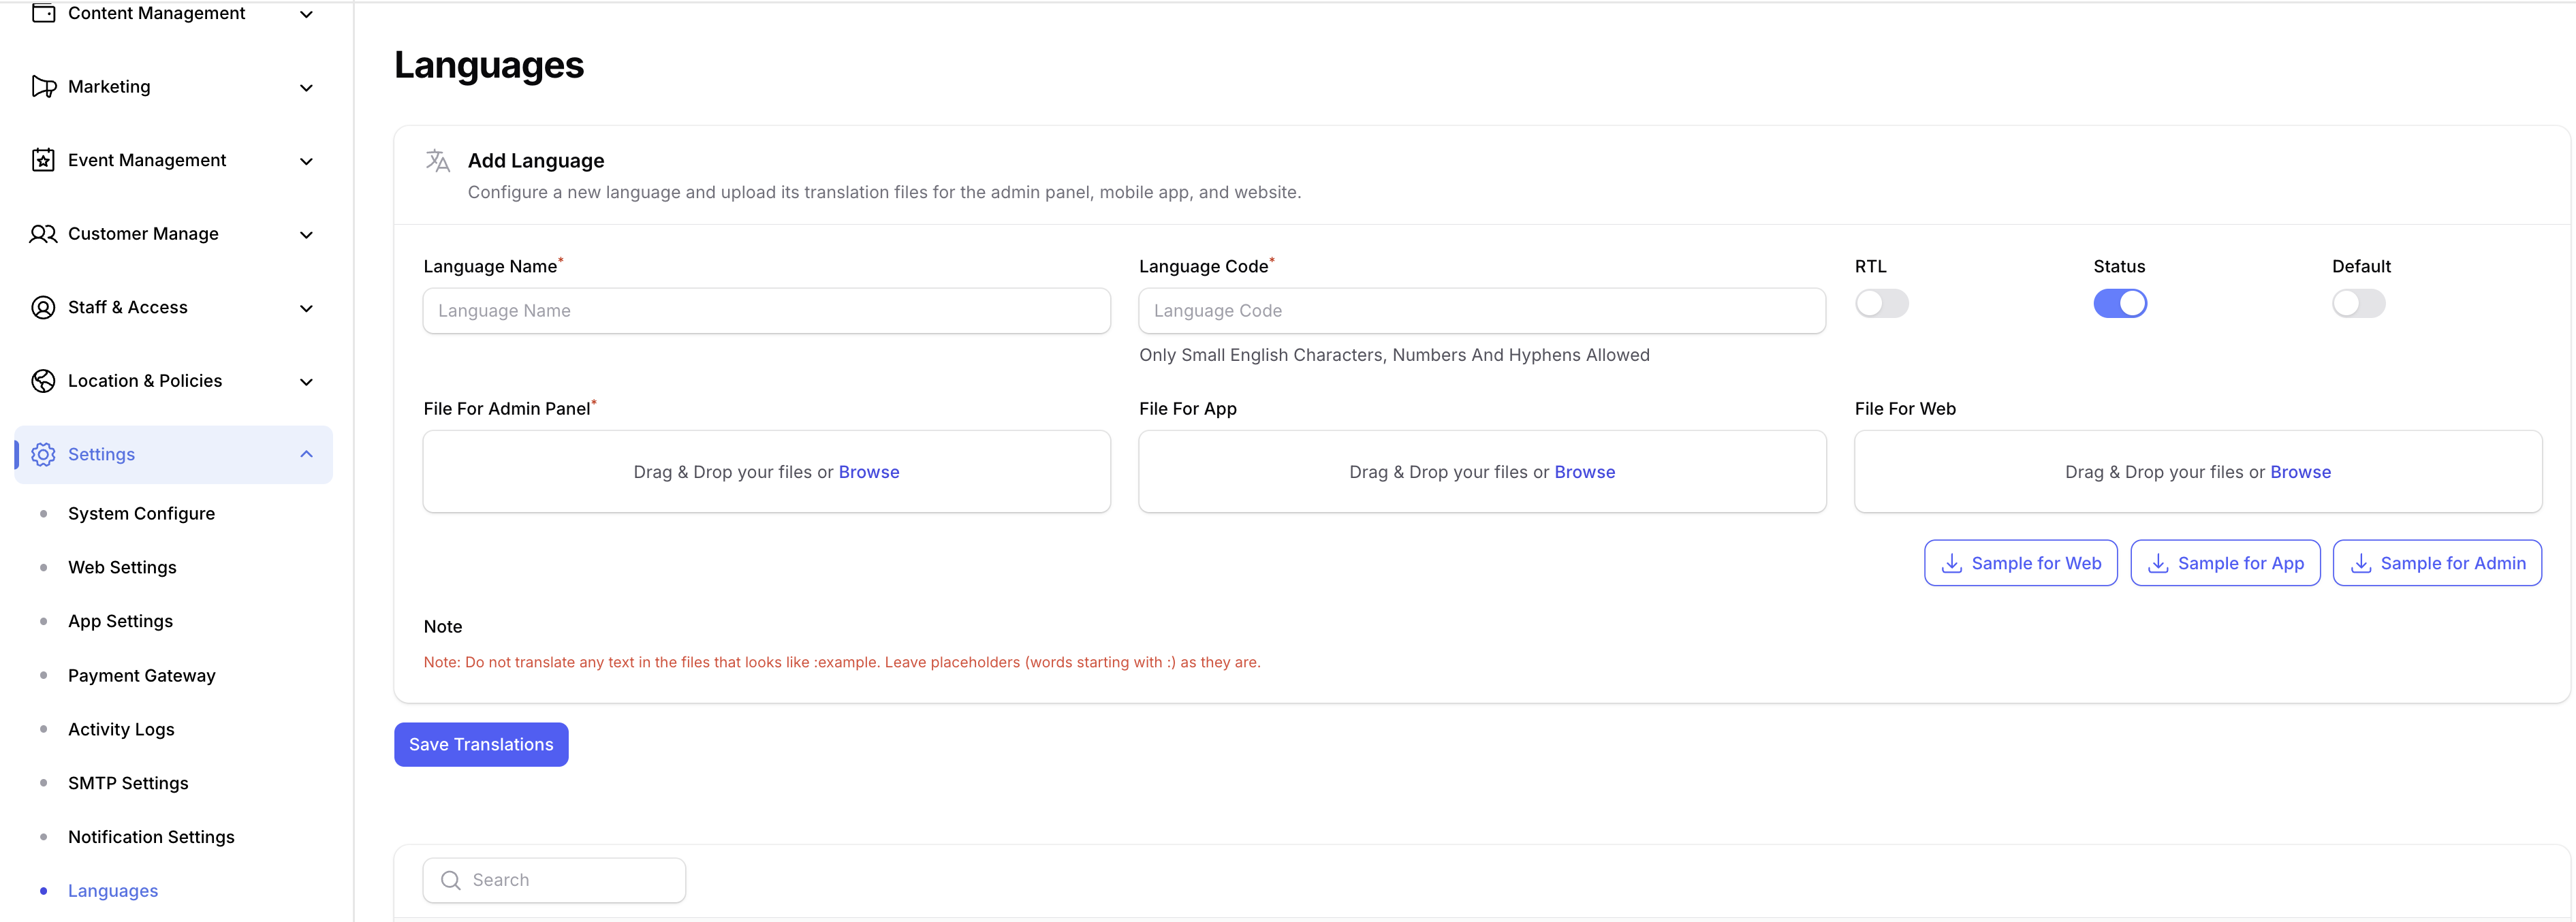
1. Add a New Language
- Log in to the your Admin Panel.
- Navigate to Settings → Languages.
- Download the sample translation file for each platform (App, Web, Admin Panel) from the form.
- Open the downloaded file and translate only the values in the
key: valuepairs. Do not change the keys — the web looks them up by key, so any change will break the lookup. - Once translated, return to the Add Language form, fill in the language name and code, upload the translated file(s), then save.
warning
Edit only the right-hand side of each key: value pair. Changing, removing, or adding keys will cause missing strings in the web.
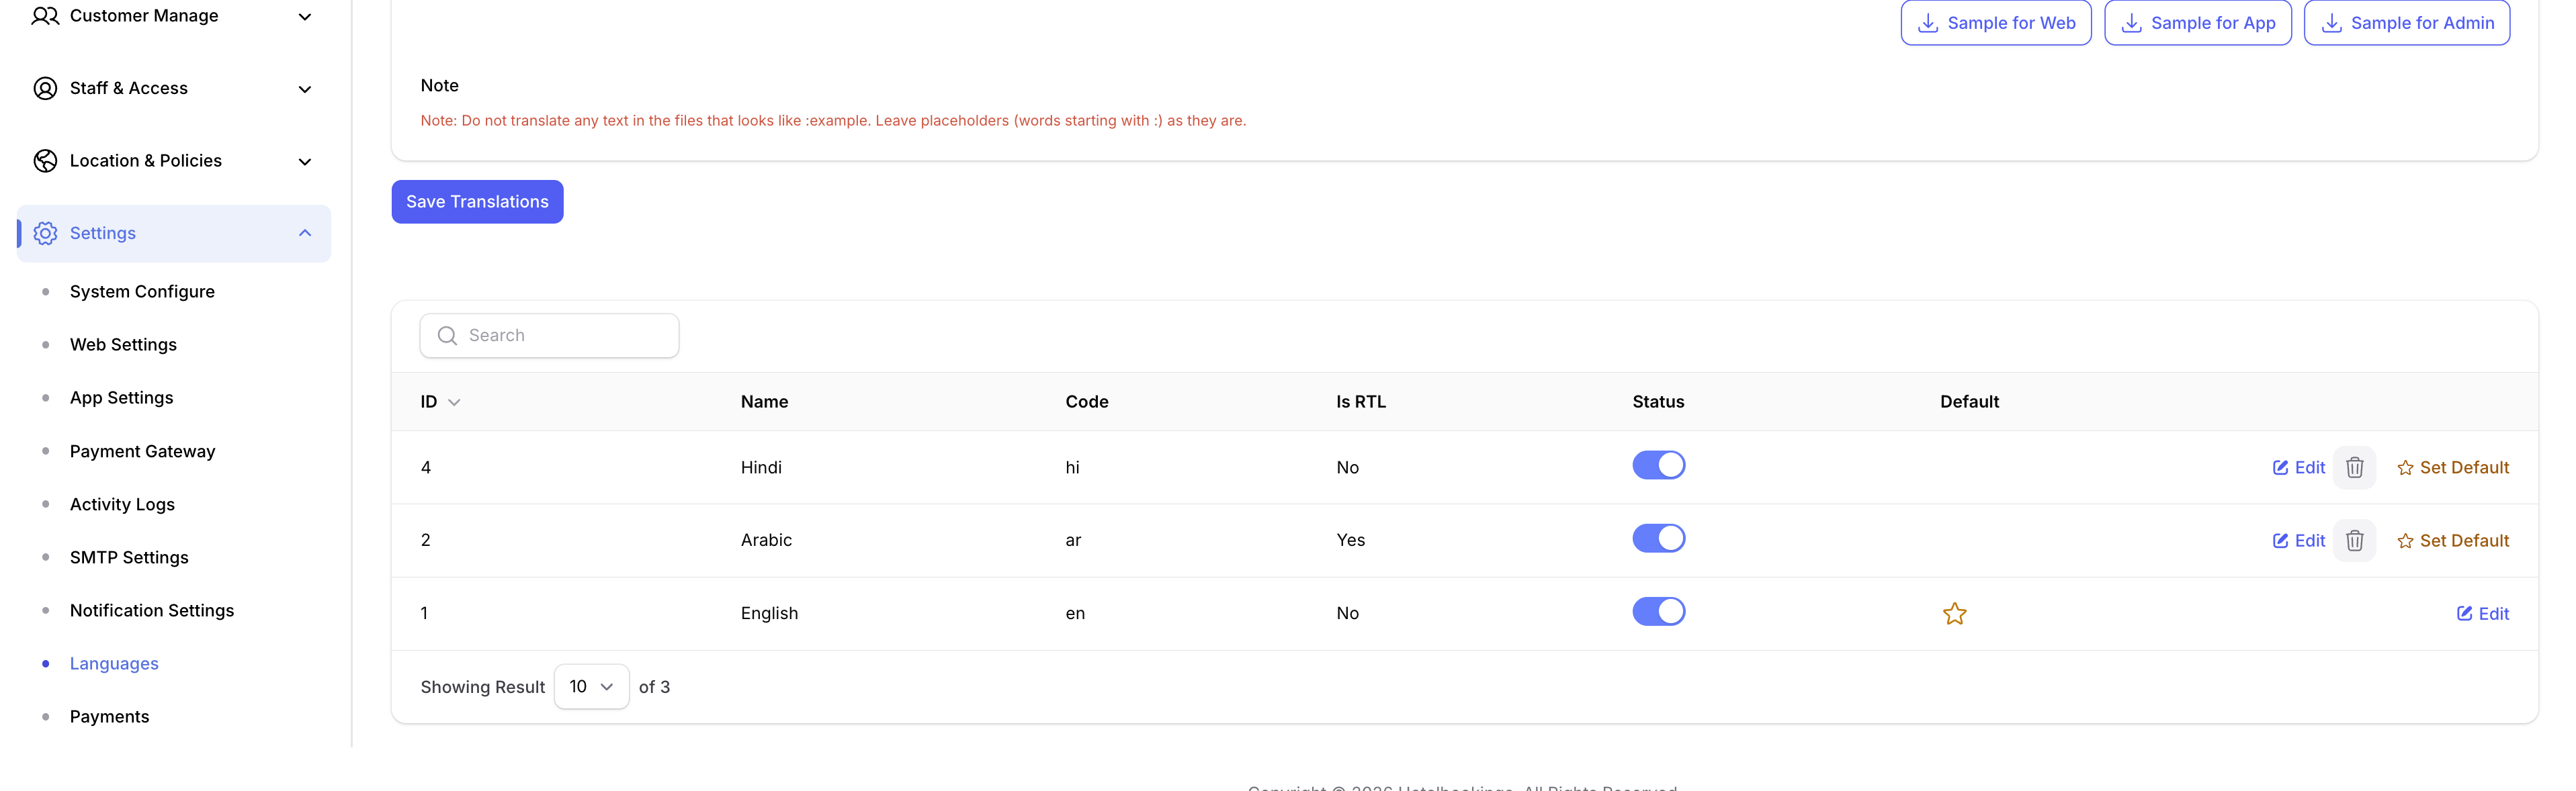
2. Change the Default Language
- Stay on the Settings → Languages tab.
- Scroll to the language list below the form.
- Find the language you want as default and click the Set Default button next to it.
3. Fallback Default in App Code
As a safety net, a default language code is hardcoded in the web file. This value is only used when the settings API call fails (e.g., no internet on first launch).
- Open
src/app/page.tsx. - Update the default language constant to the language code you want as fallback.