Shipping Order Flow
1. Seller Panel Overview
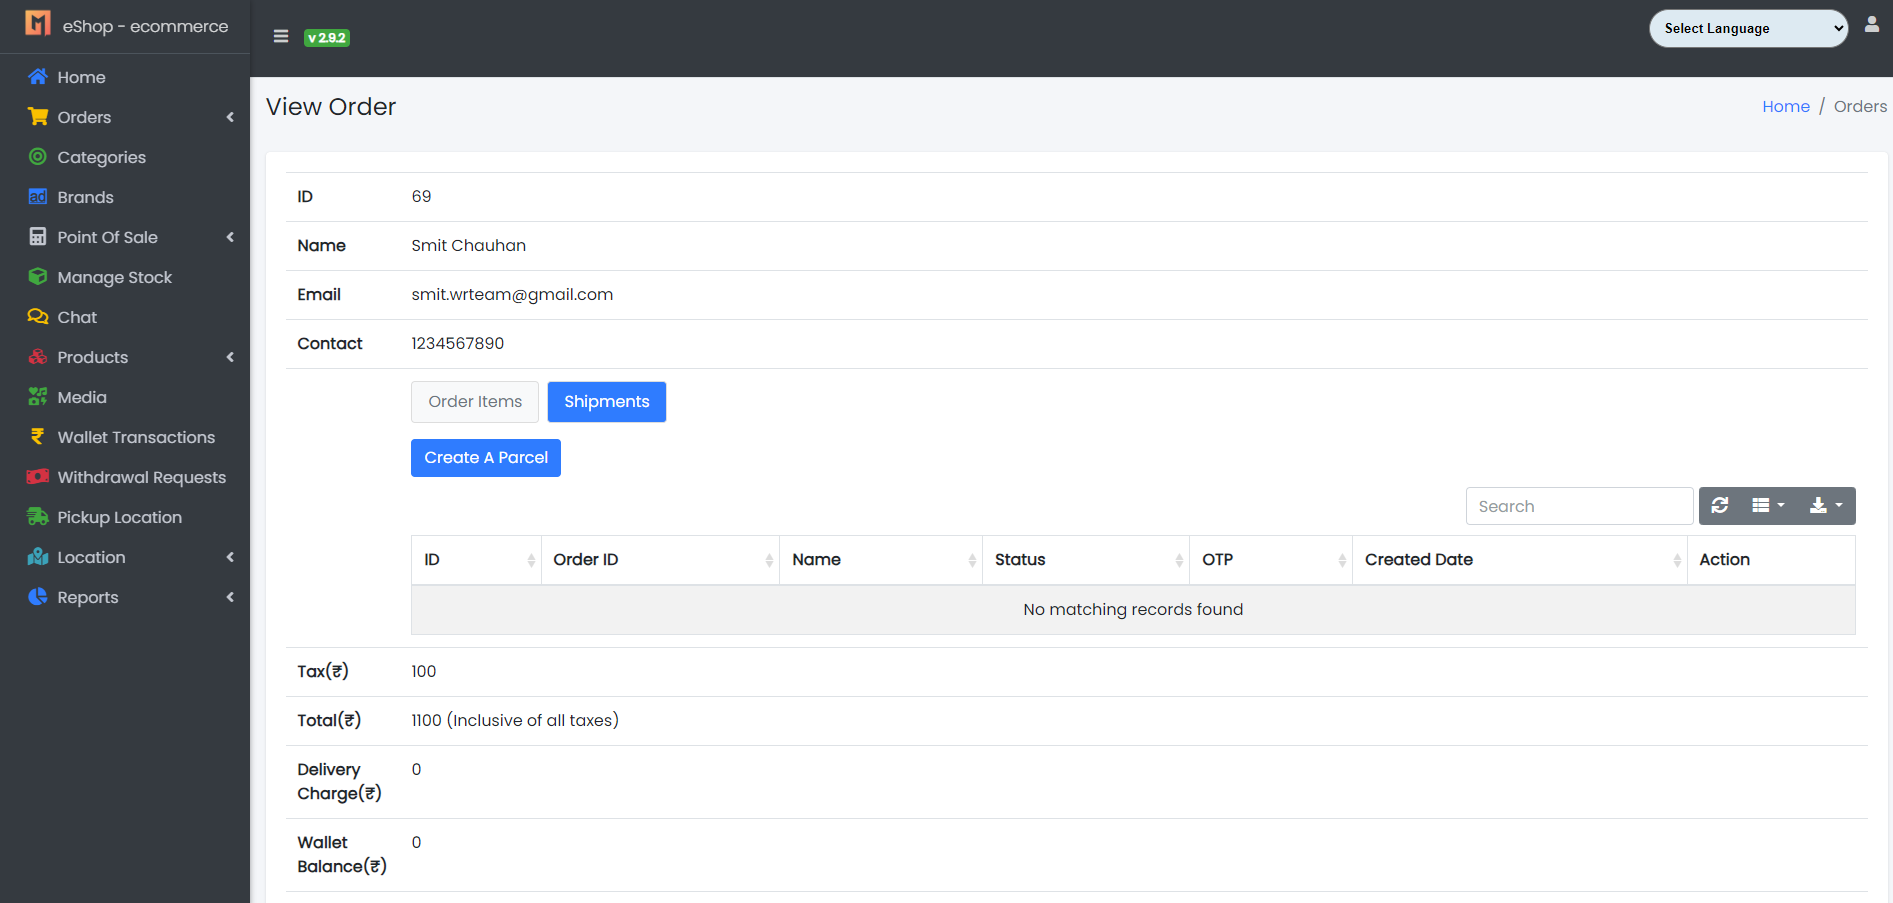
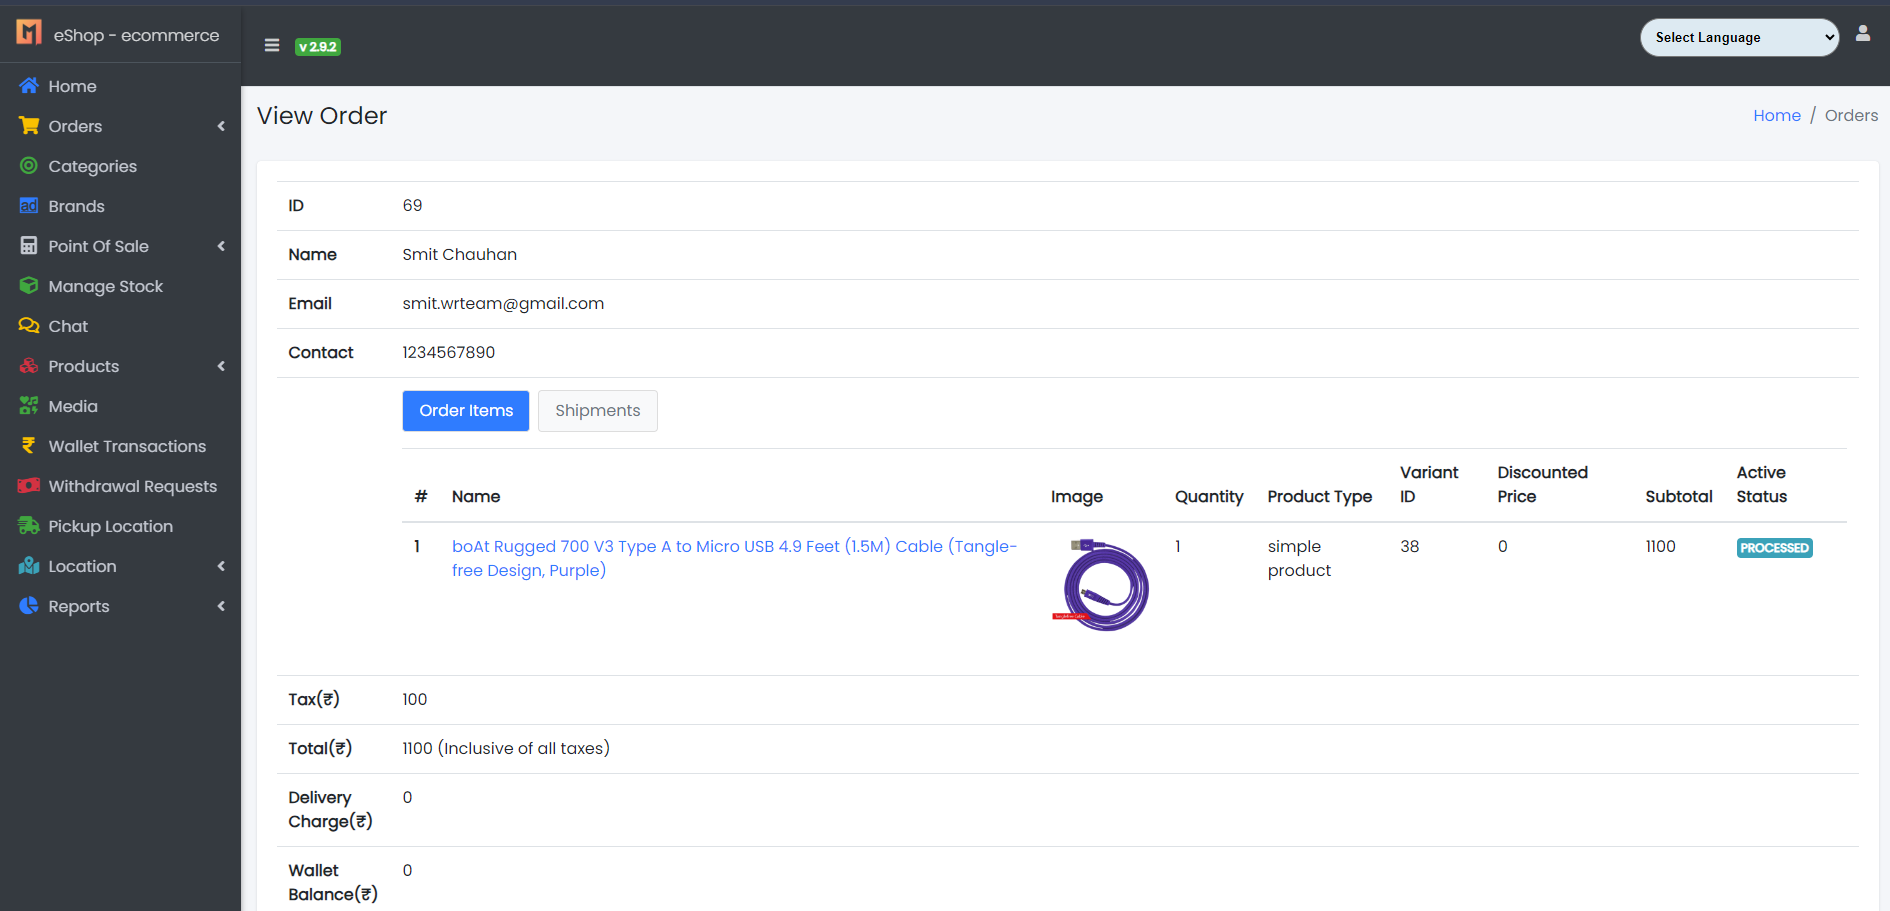
- In the Seller Panel, you’ll notice two tabs: Order Items and Shipments.
- In the Order Items tab, you’ll see all the items for your orders.
- In the Shipments tab, you’ll find a "Create a Parcel" button and the Created Parcels List.
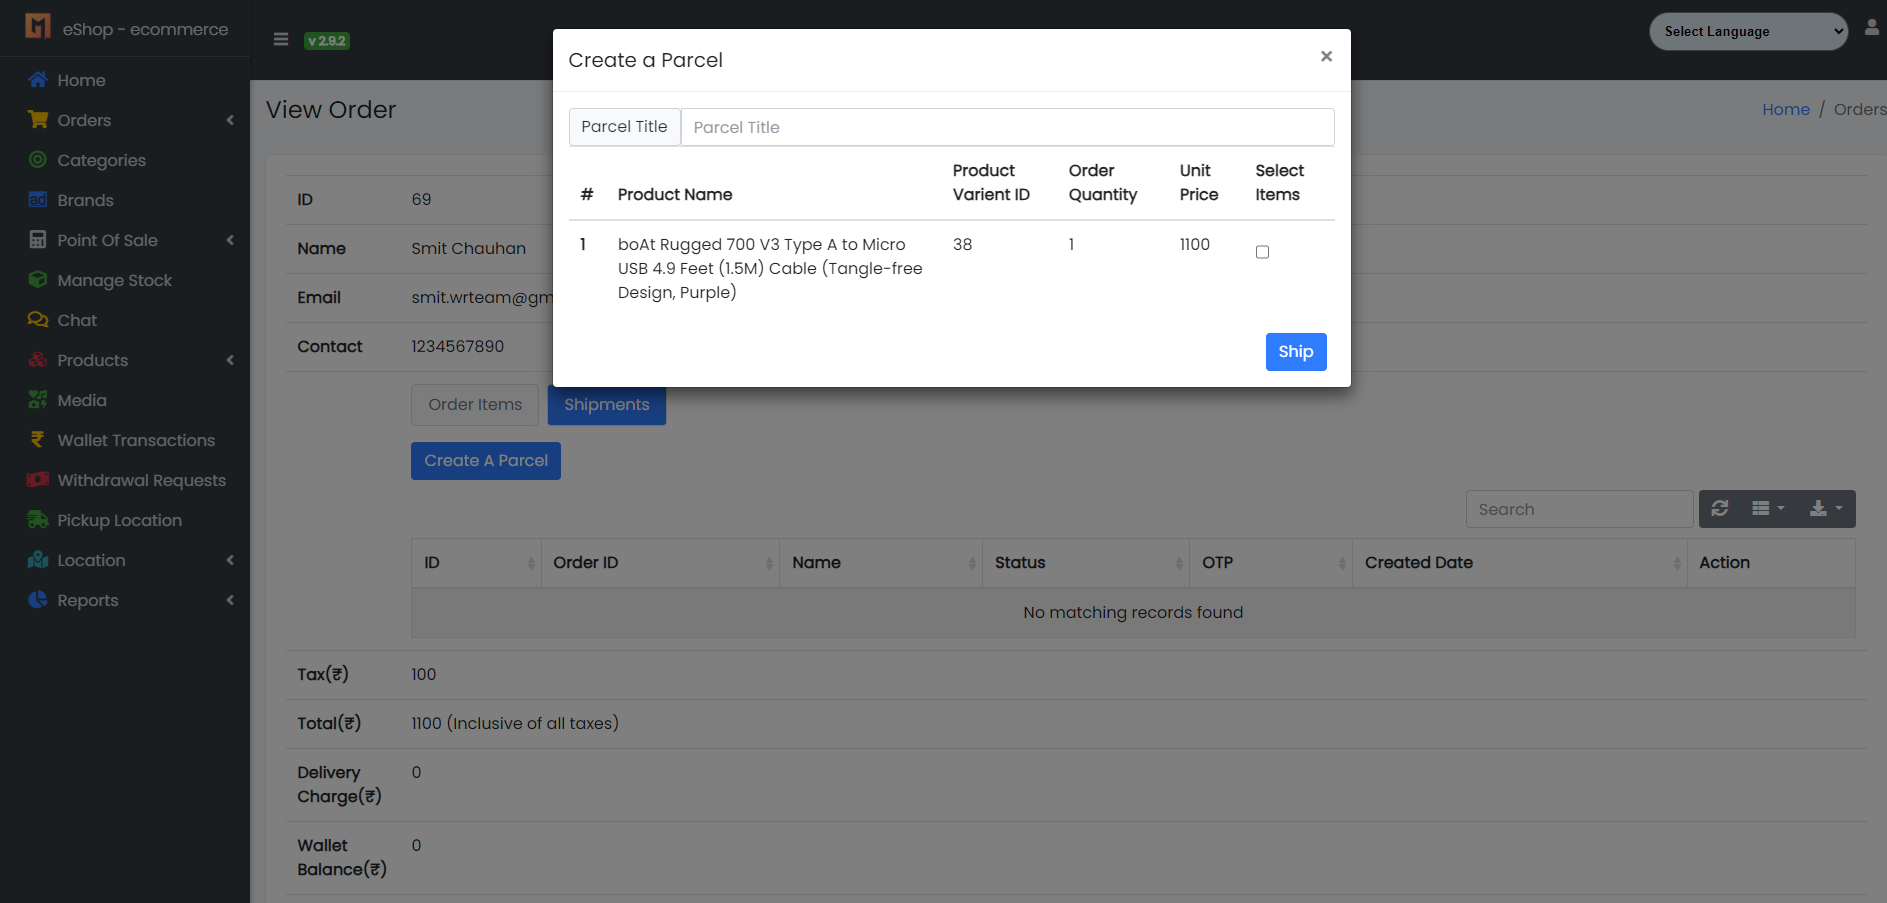
2. Creating a Parcel
To ship an order, click on the Create a Parcel button. You’ll be able to select the items you want to ship and then create the parcel.
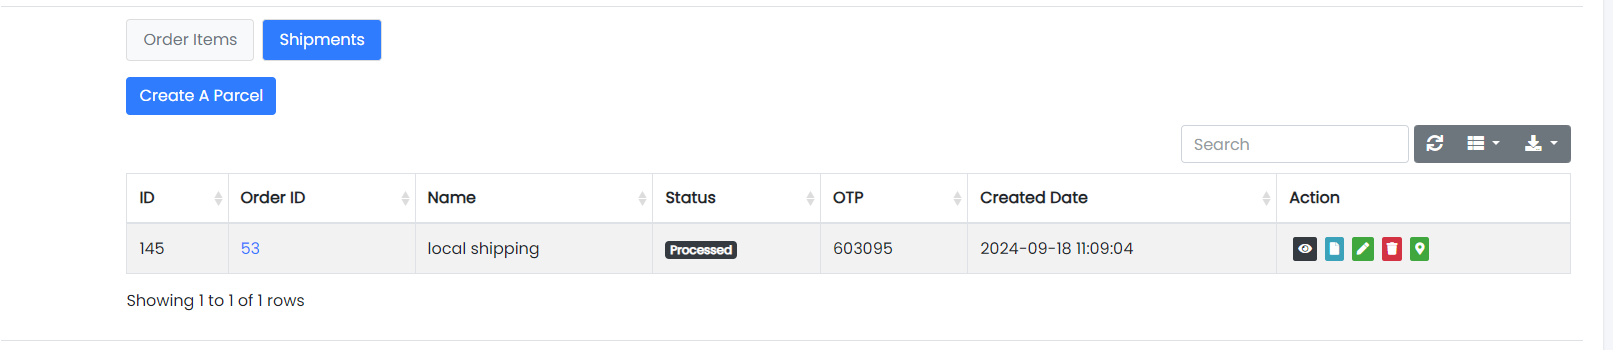
3. Managing Parcels
Once a parcel is created, it will appear in a list with four action buttons:
- View: See the items inside the parcel.
- Invoice: View or download the invoice for the parcel.
- Update Status: Open a window to update the shipping status.
- Delete: You can delete a parcel, but only if it hasn't been shipped yet.
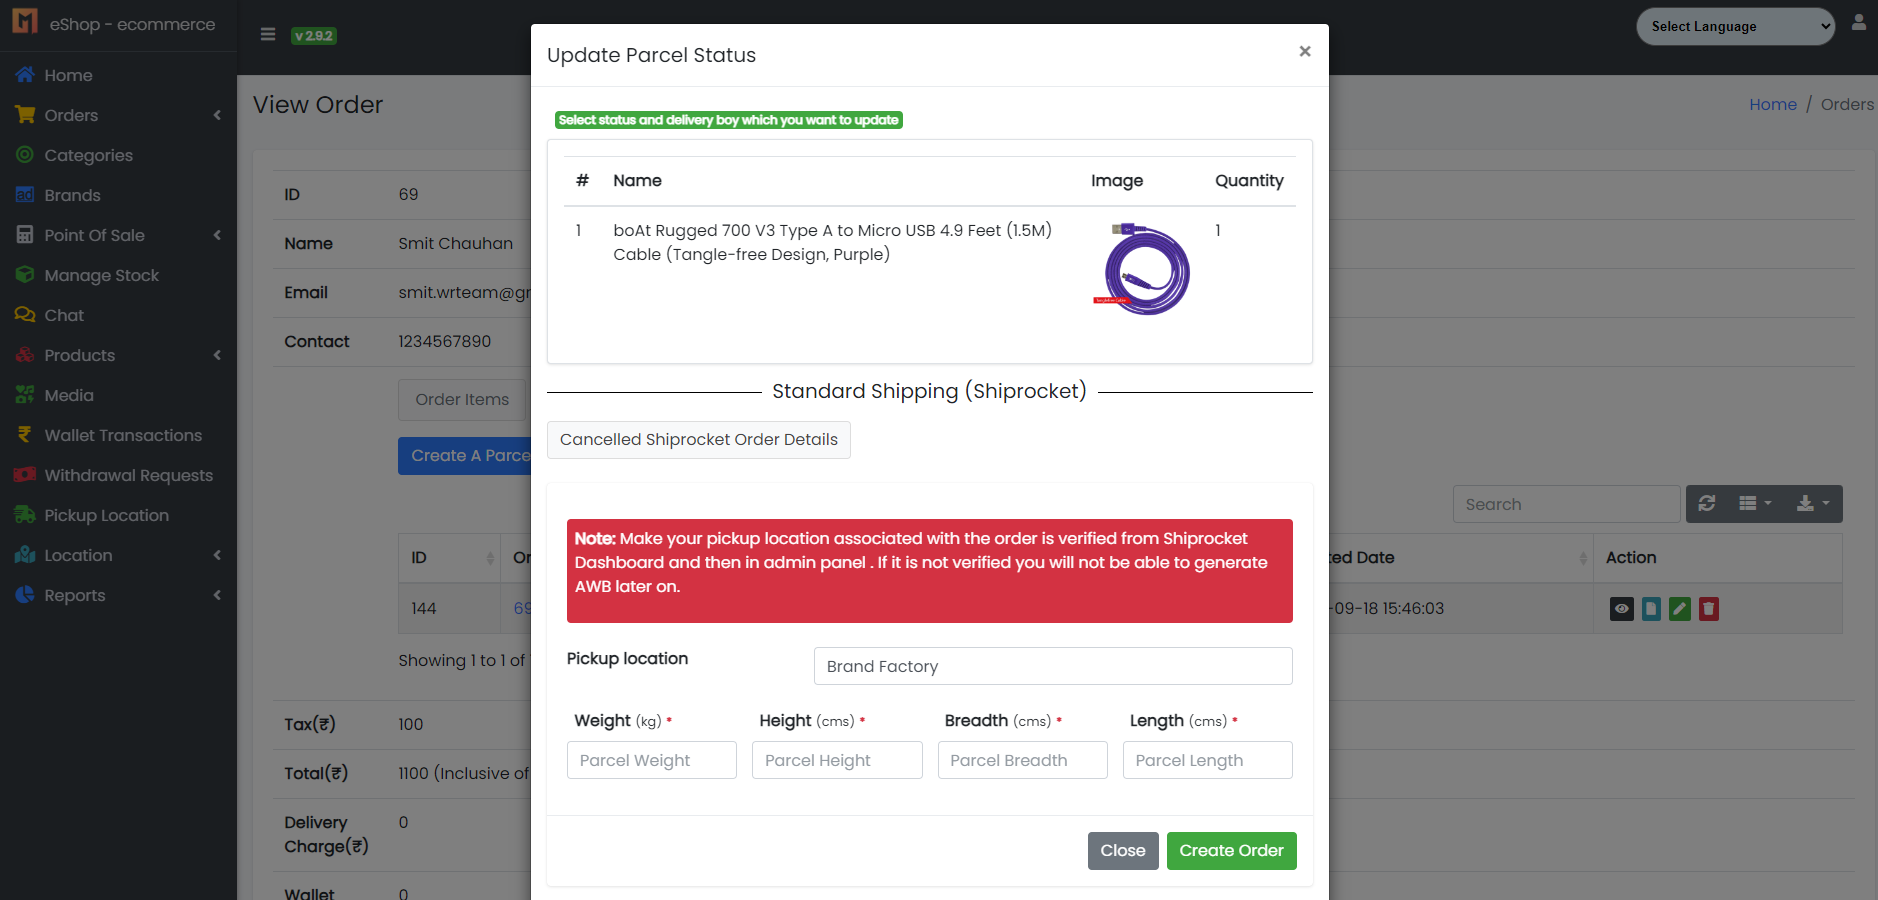
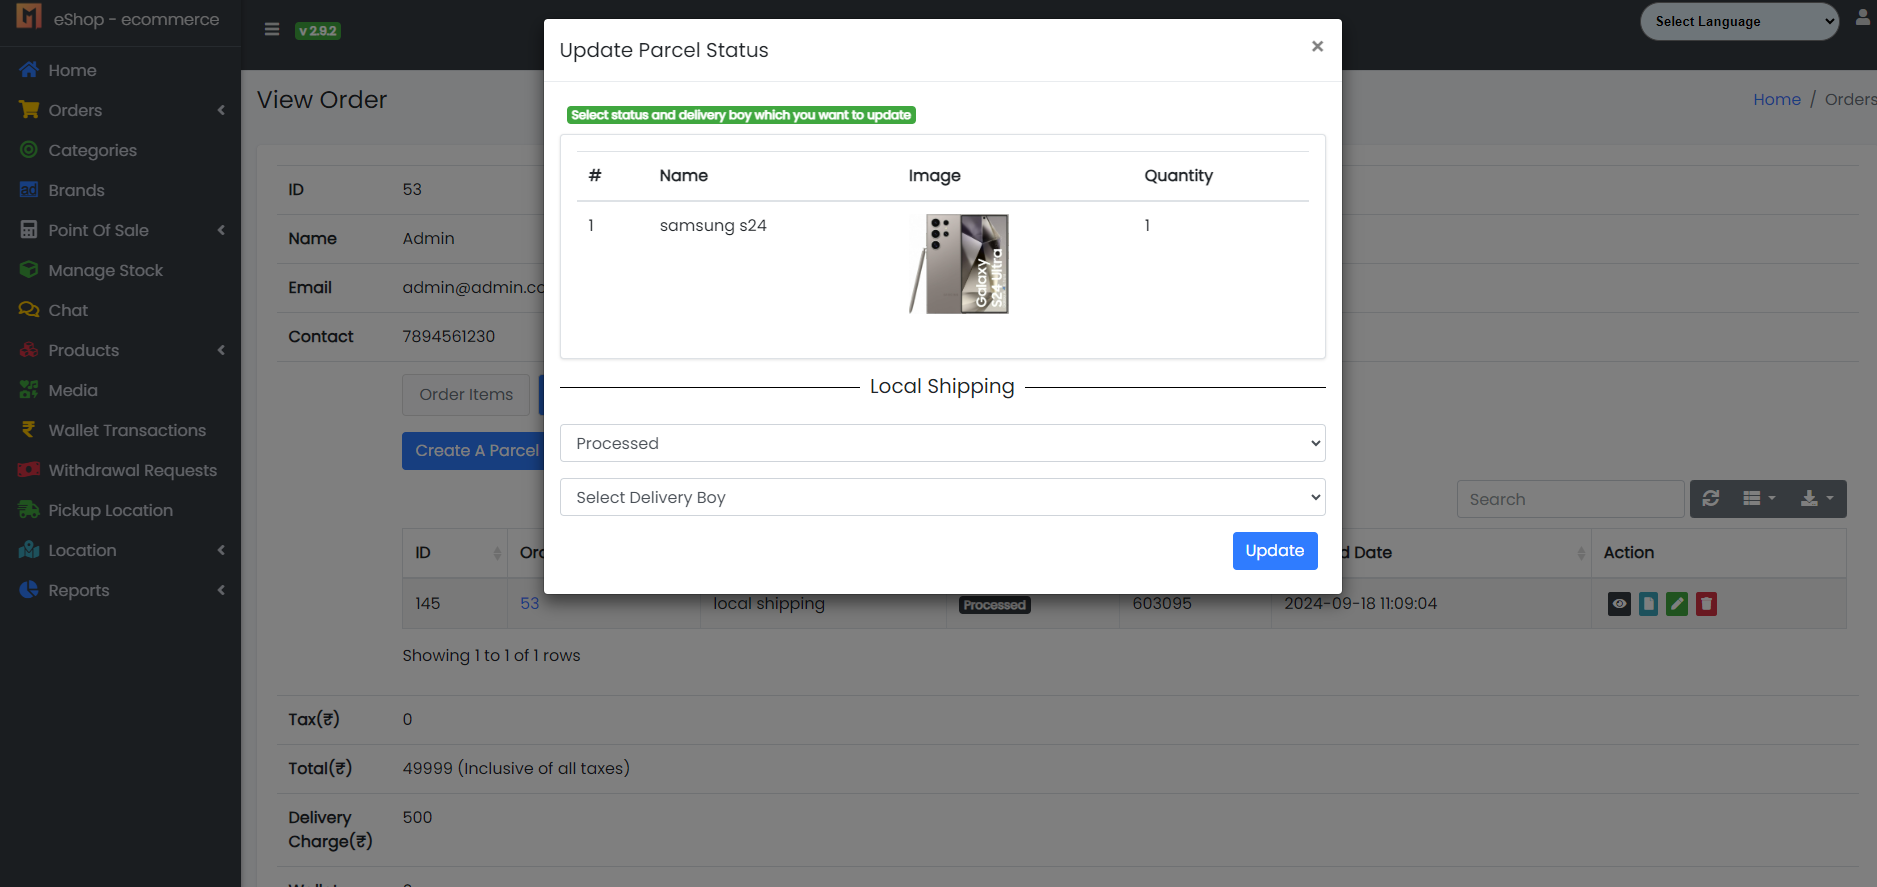
4. Updating Shipping Status
When you click Update Status, a window will open with two options:
-
Local Shipping: Select the delivery person and update the status.
-
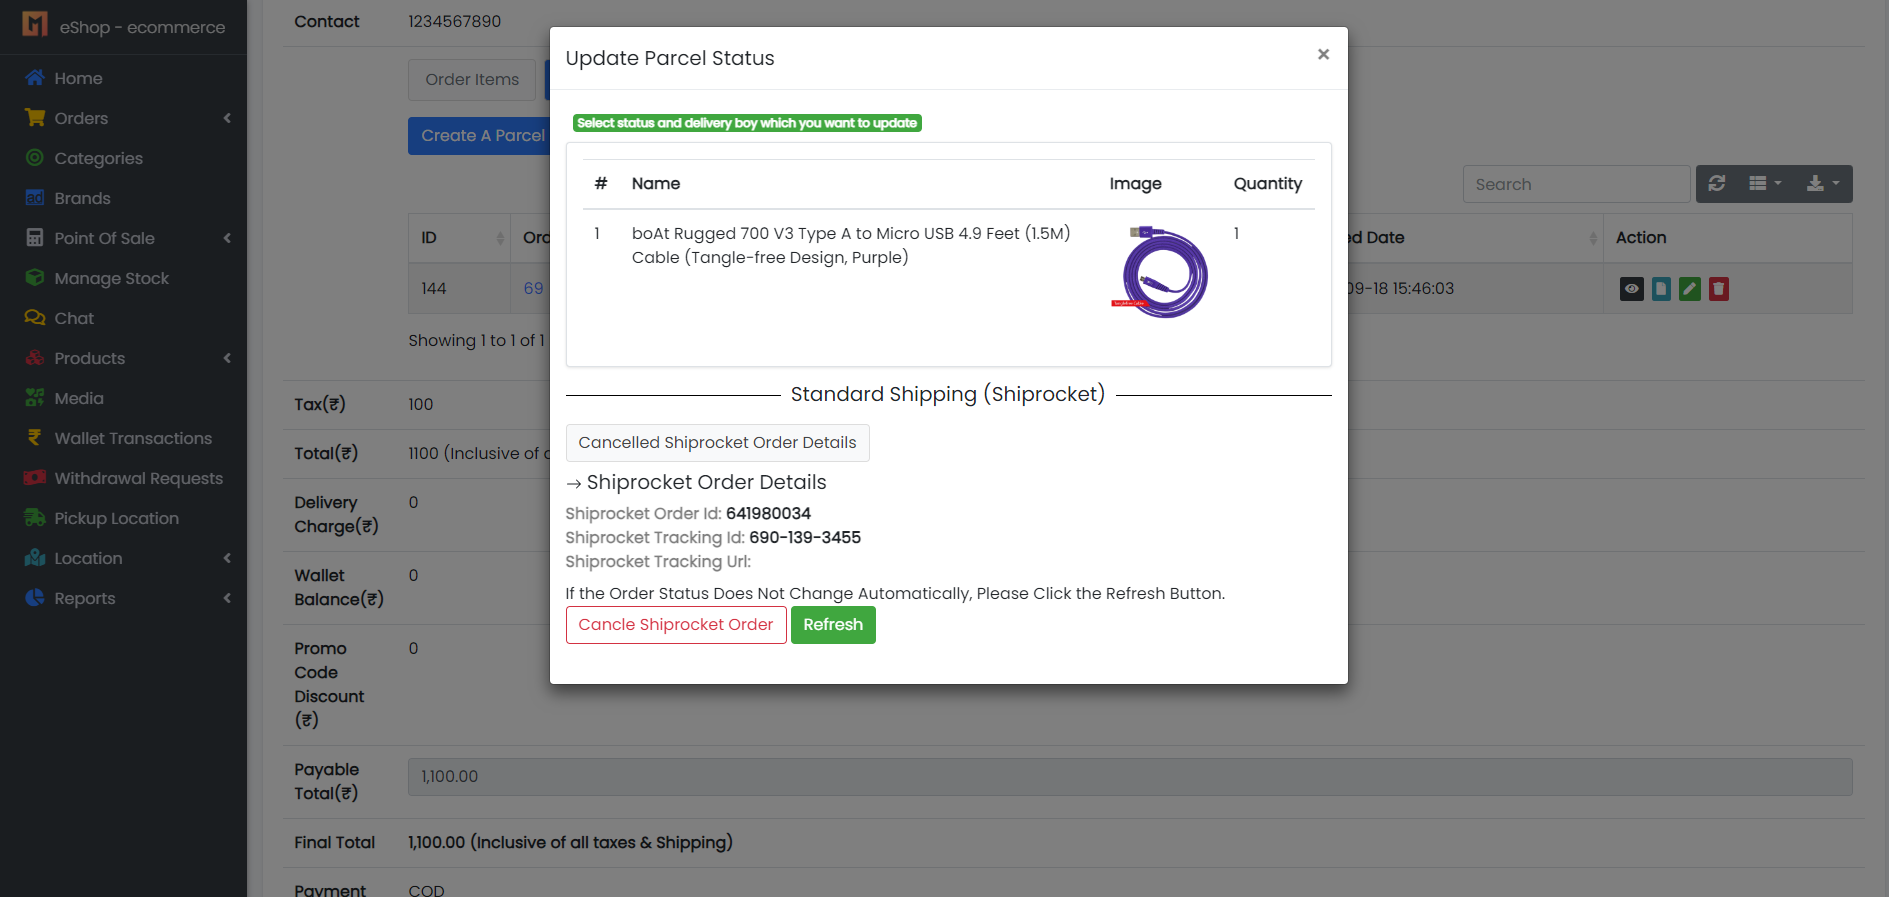
Shiprocket Orders: First, create a Shiprocket parcel with the required details. Once created, Shiprocket parcel details will appear in the status update tab. Below this, you’ll see two buttons:
- Cancel Shiprocket Parcel: Lets you cancel the Shiprocket parcel if needed.
- Refresh: Refresh the status if it doesn't update automatically.
Note: The status will usually update on its own, but clicking "Refresh" will manually update it to reflect the current parcel status.
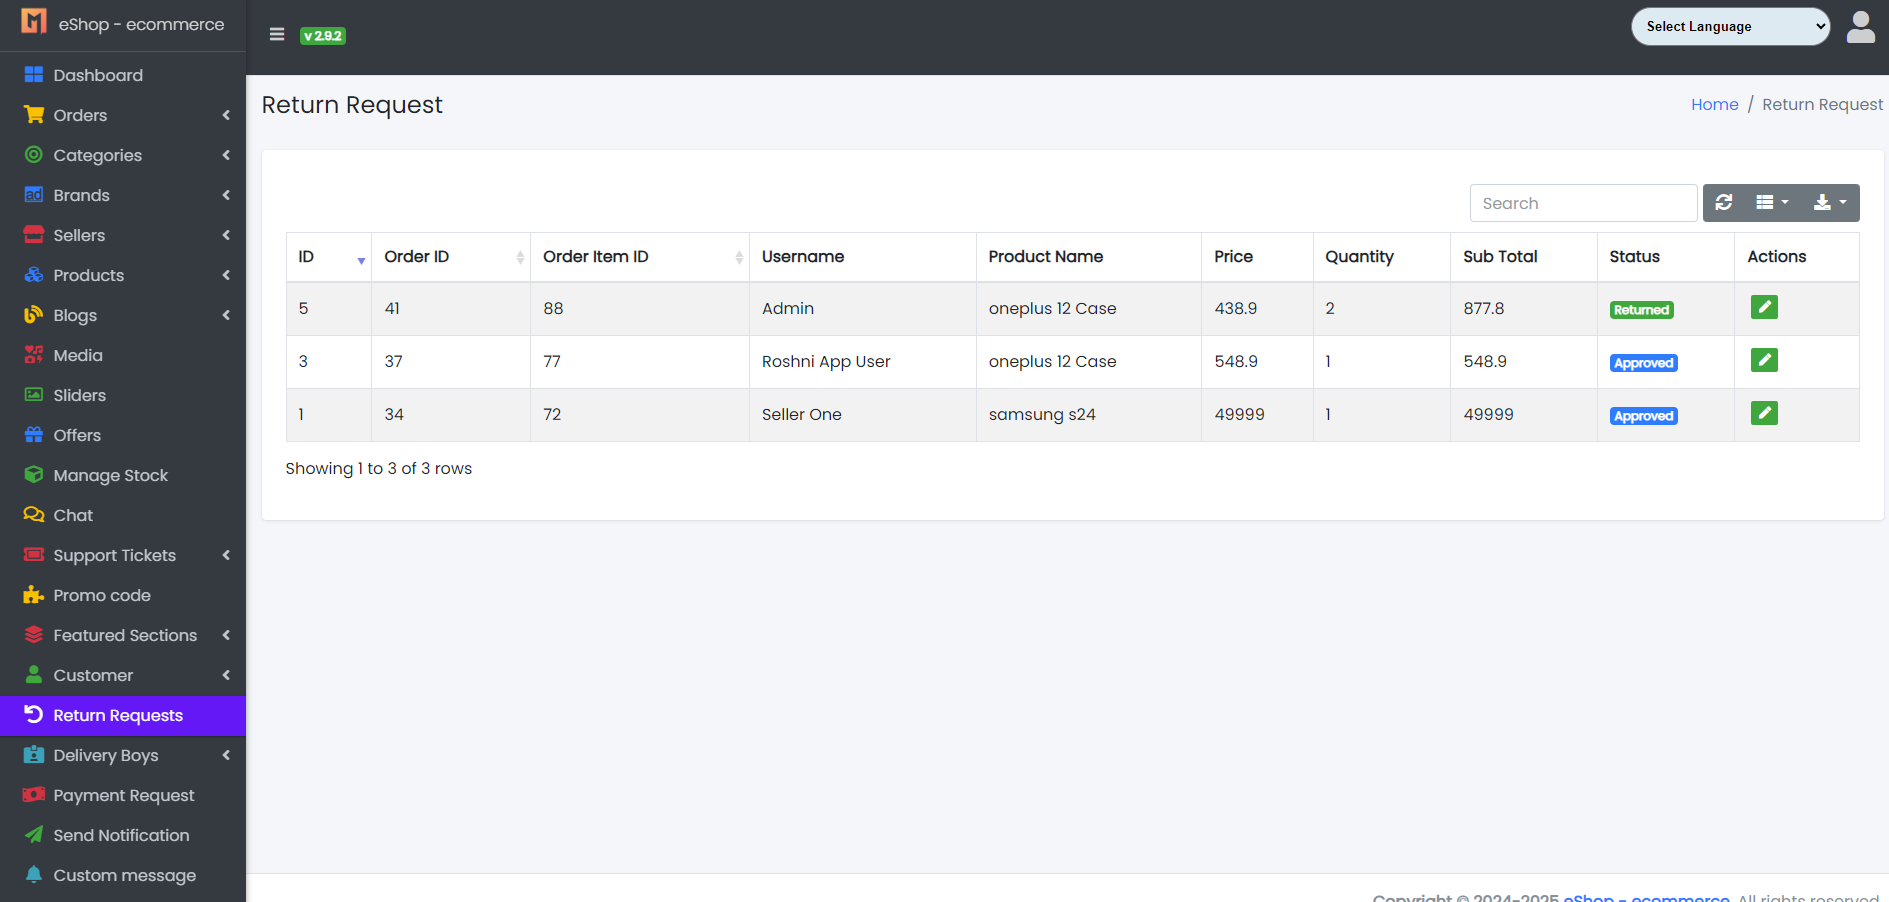
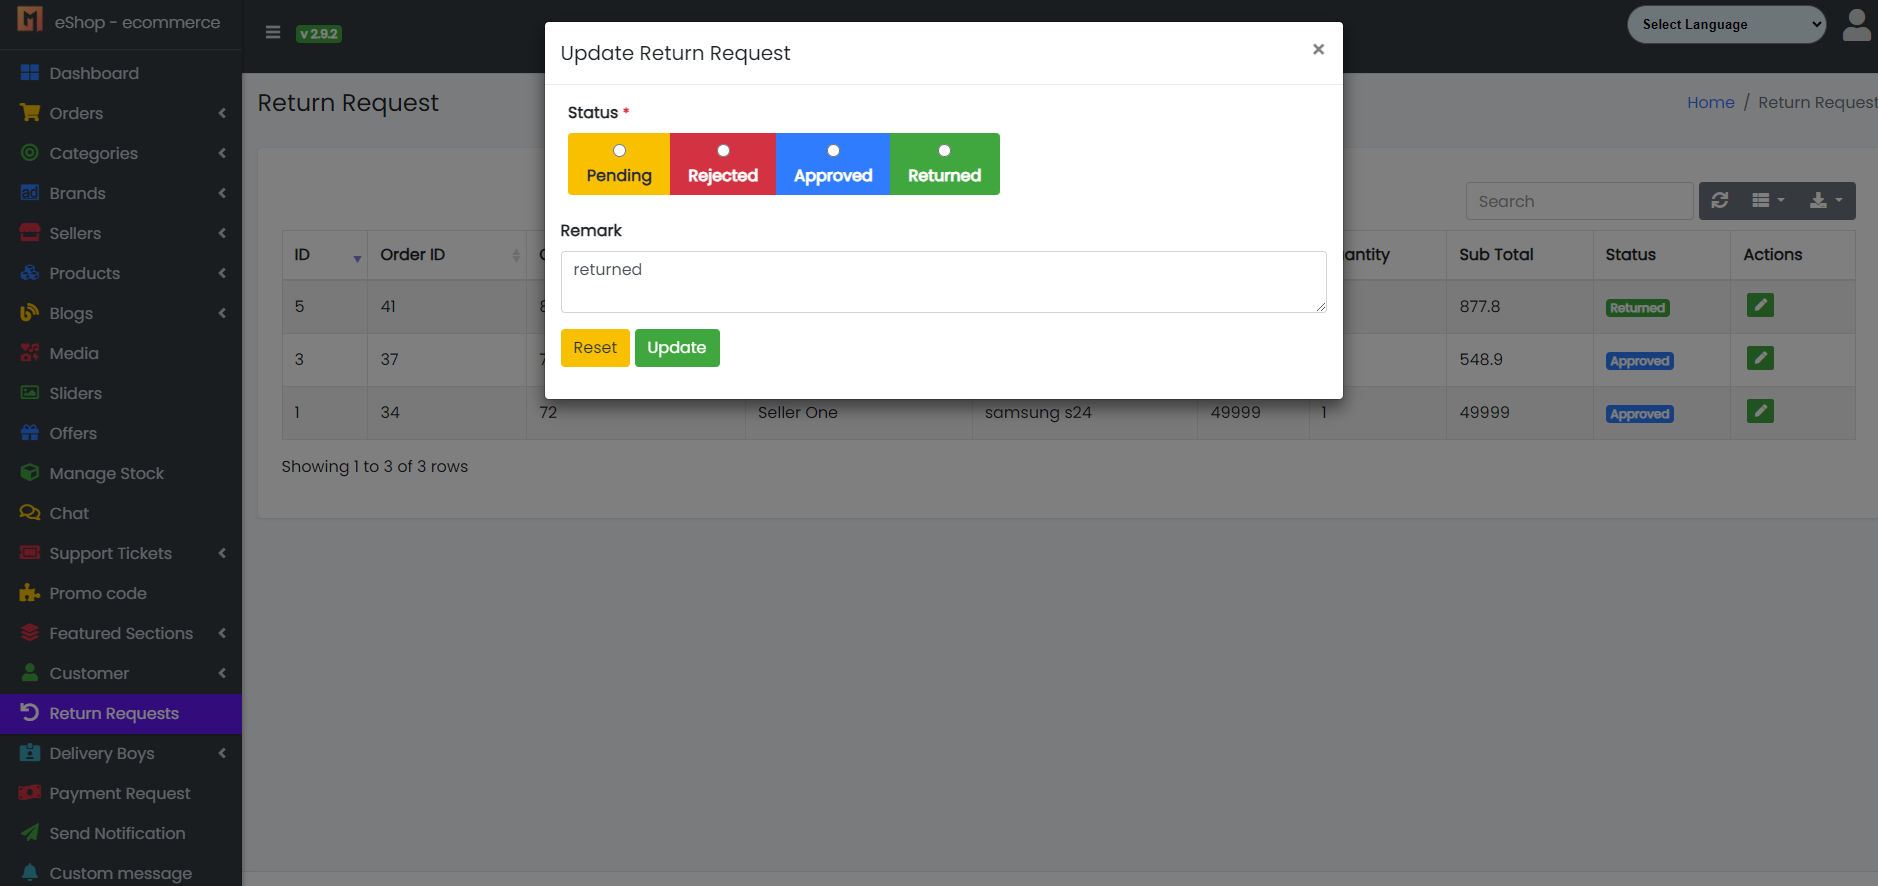
5. Return Process
The return process remains the same as before:
- Currently, the method for managing return parcels is manual.
- When a customer requests a return, the admin will receive the request, accept it, and mark the item as returned once the parcel is received.
- Note: Sellers cannot update the status for returns.