API Key Settings
Correct Google Maps API key configuration is required for all maps, location search, and address suggestions to work in the admin panel, app, and web.
What you will set up
- Enable required Google APIs for maps and location.
- Create / edit API keys with the right application restrictions.
- Restrict APIs and IPs so keys are safe.
- Copy keys into eDemand configuration.
Use the table below as a quick reference:
| Key type | Used by | Typical restrictions |
|---|---|---|
| Browser (frontend) | Web + Admin + Firebase | HTTP referrers (domains), selected Maps APIs |
| Server (backend) | Backend calls to Maps APIs | IP address of server (IPv4 + IPv6), selected Maps APIs |
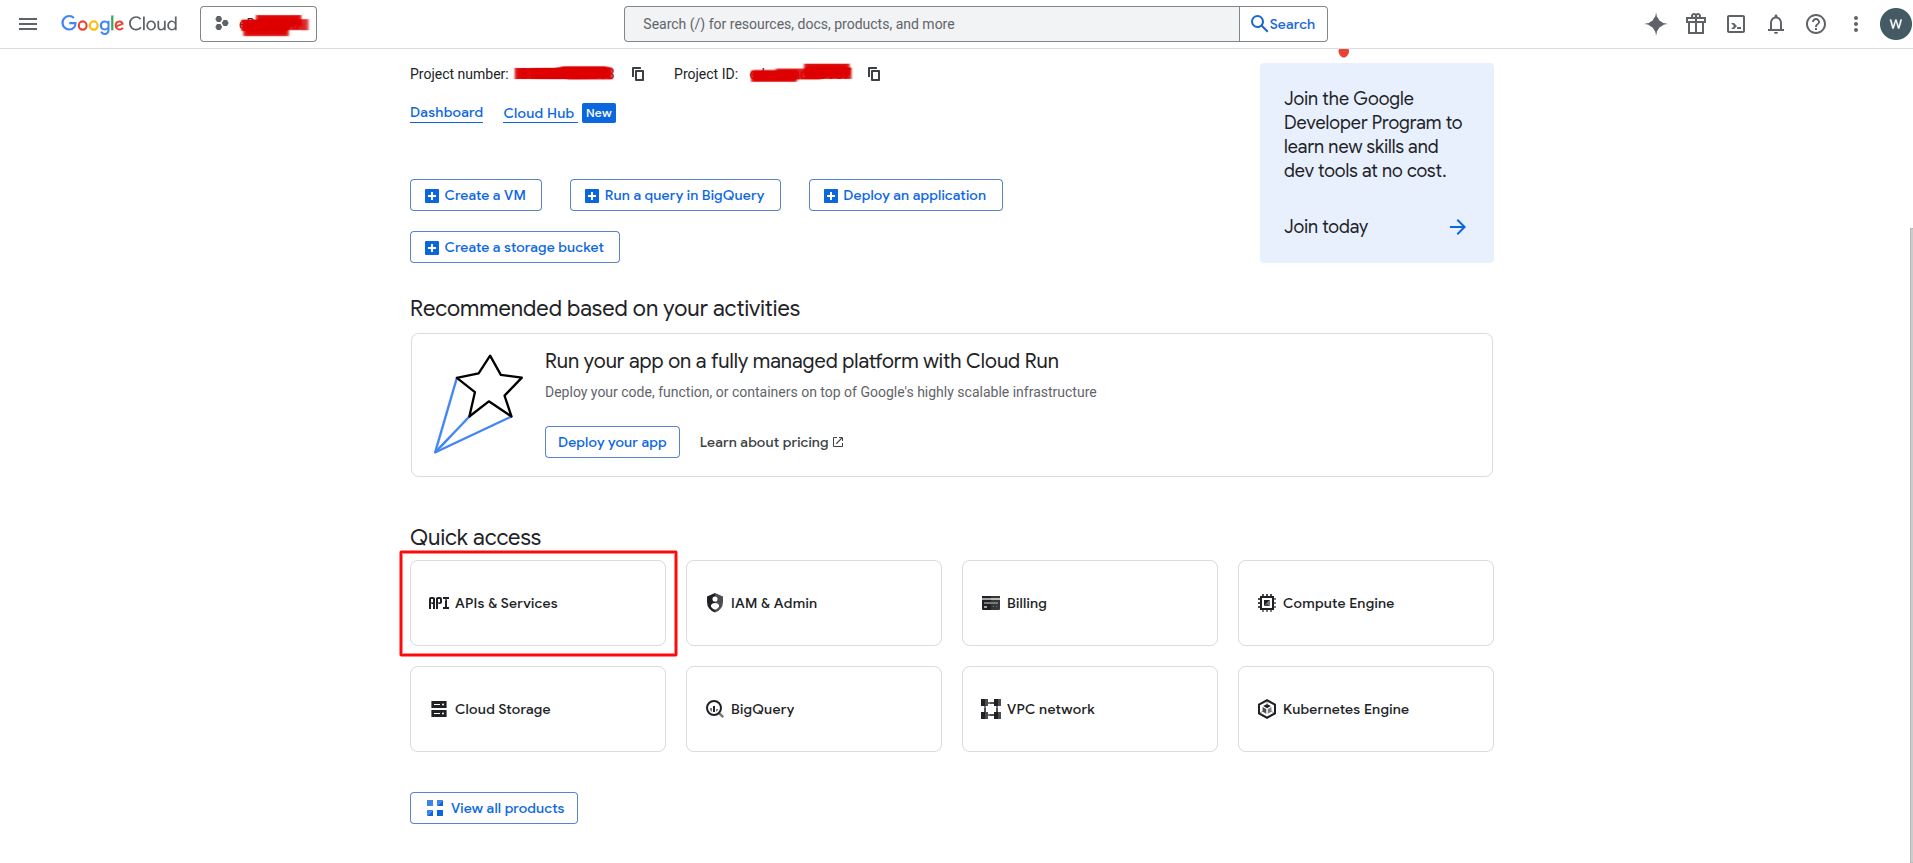
Step 1: Open Google Cloud Console
-
Go to the Google Cloud Platform / Google Developer Console.
-
Select the project used for your eDemand deployment.
-
Open APIs & Services.
Step 2: Enable Required APIs
In the Enabled APIs & Services section, click Enable APIs and services and enable at least the following:
-
Maps Javascript API
-
Places API
-
Geocoding API
-
Geolocation API
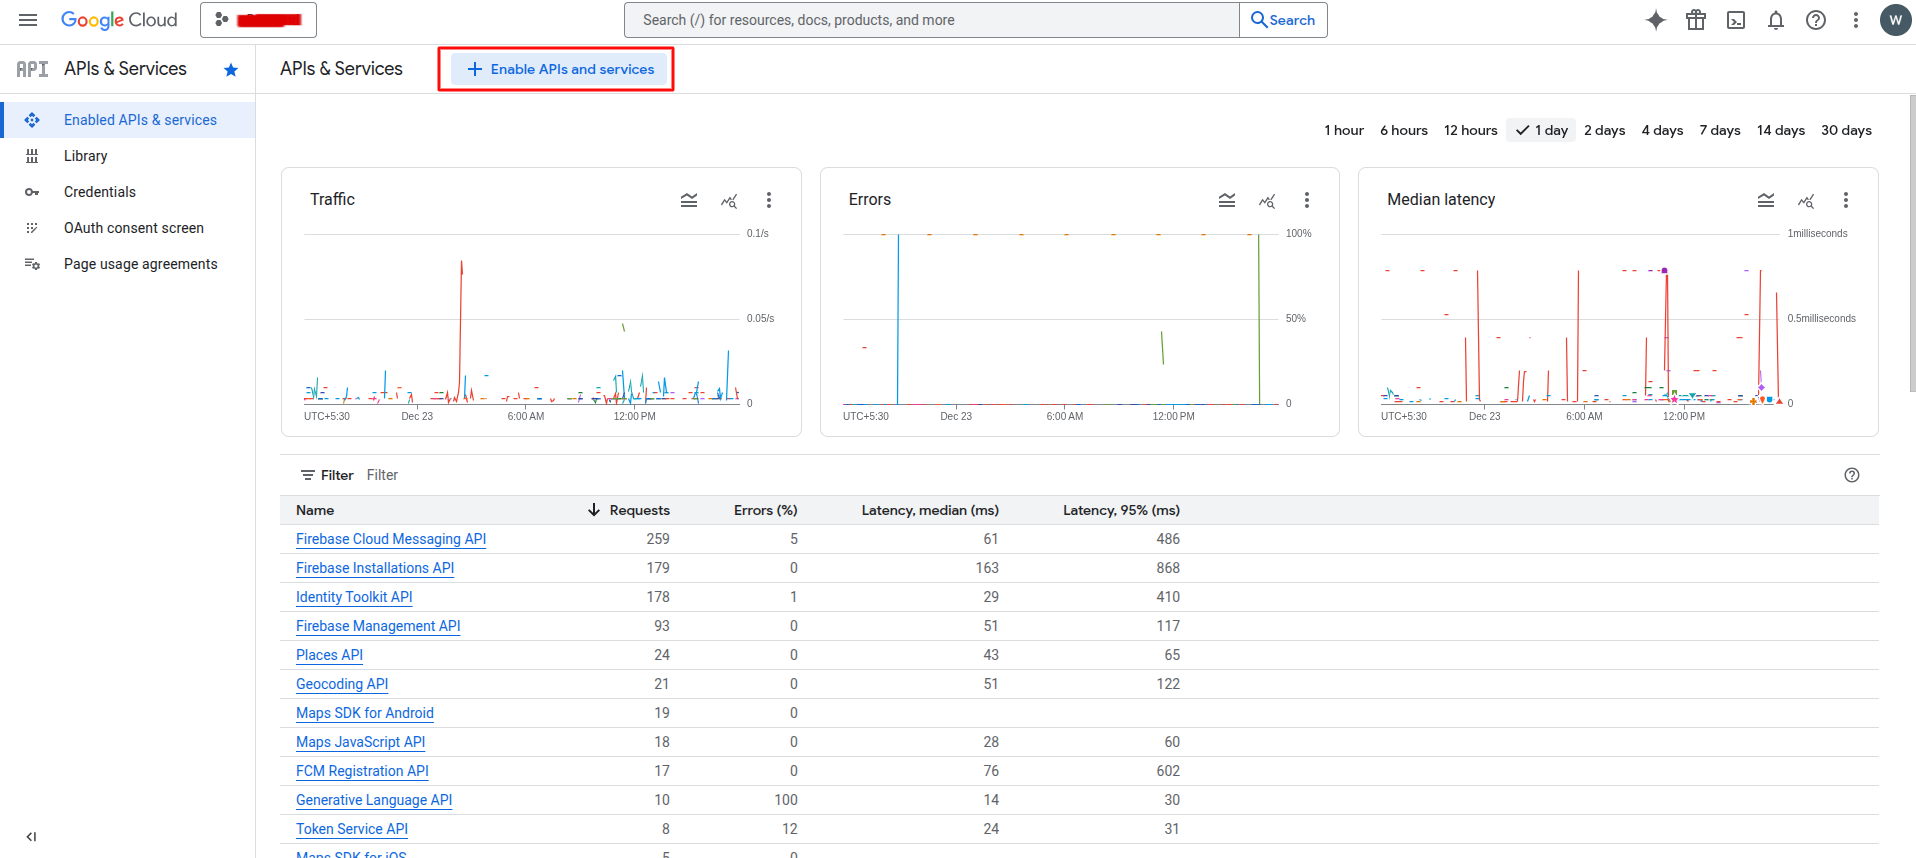
If any of these are missing, search for them by name and click Enable.
Step 3: Configure Browser (Frontend) Key
-
In the sidebar, go to the Credentials page to view and manage API keys.
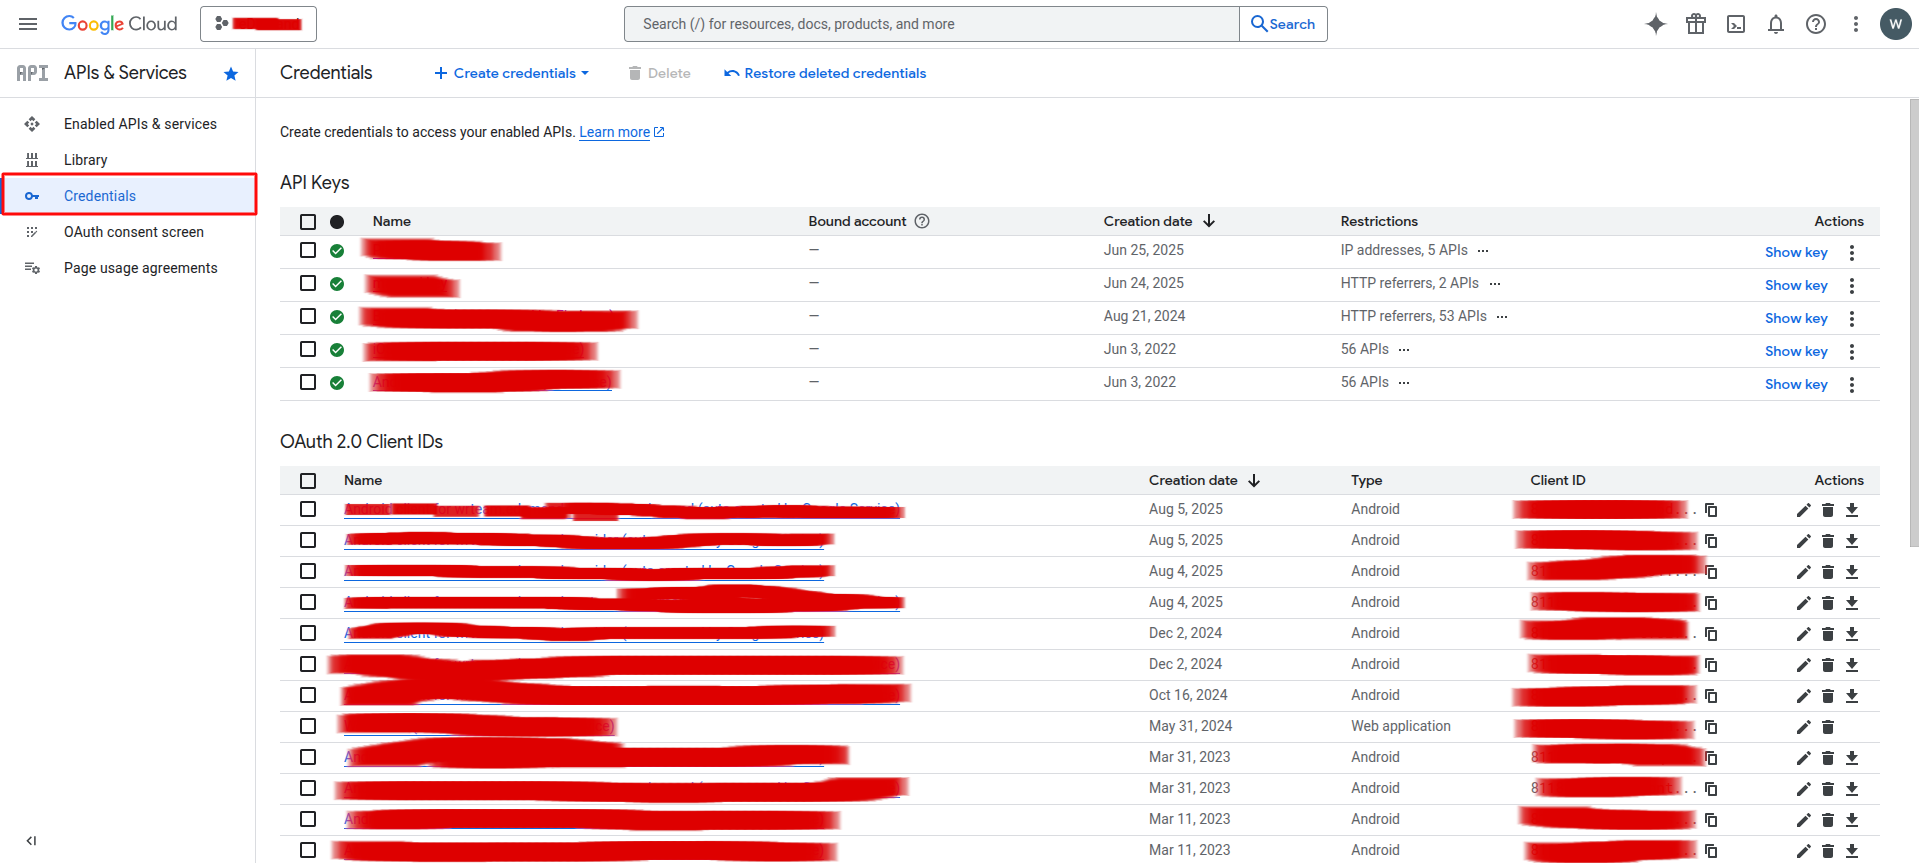
-
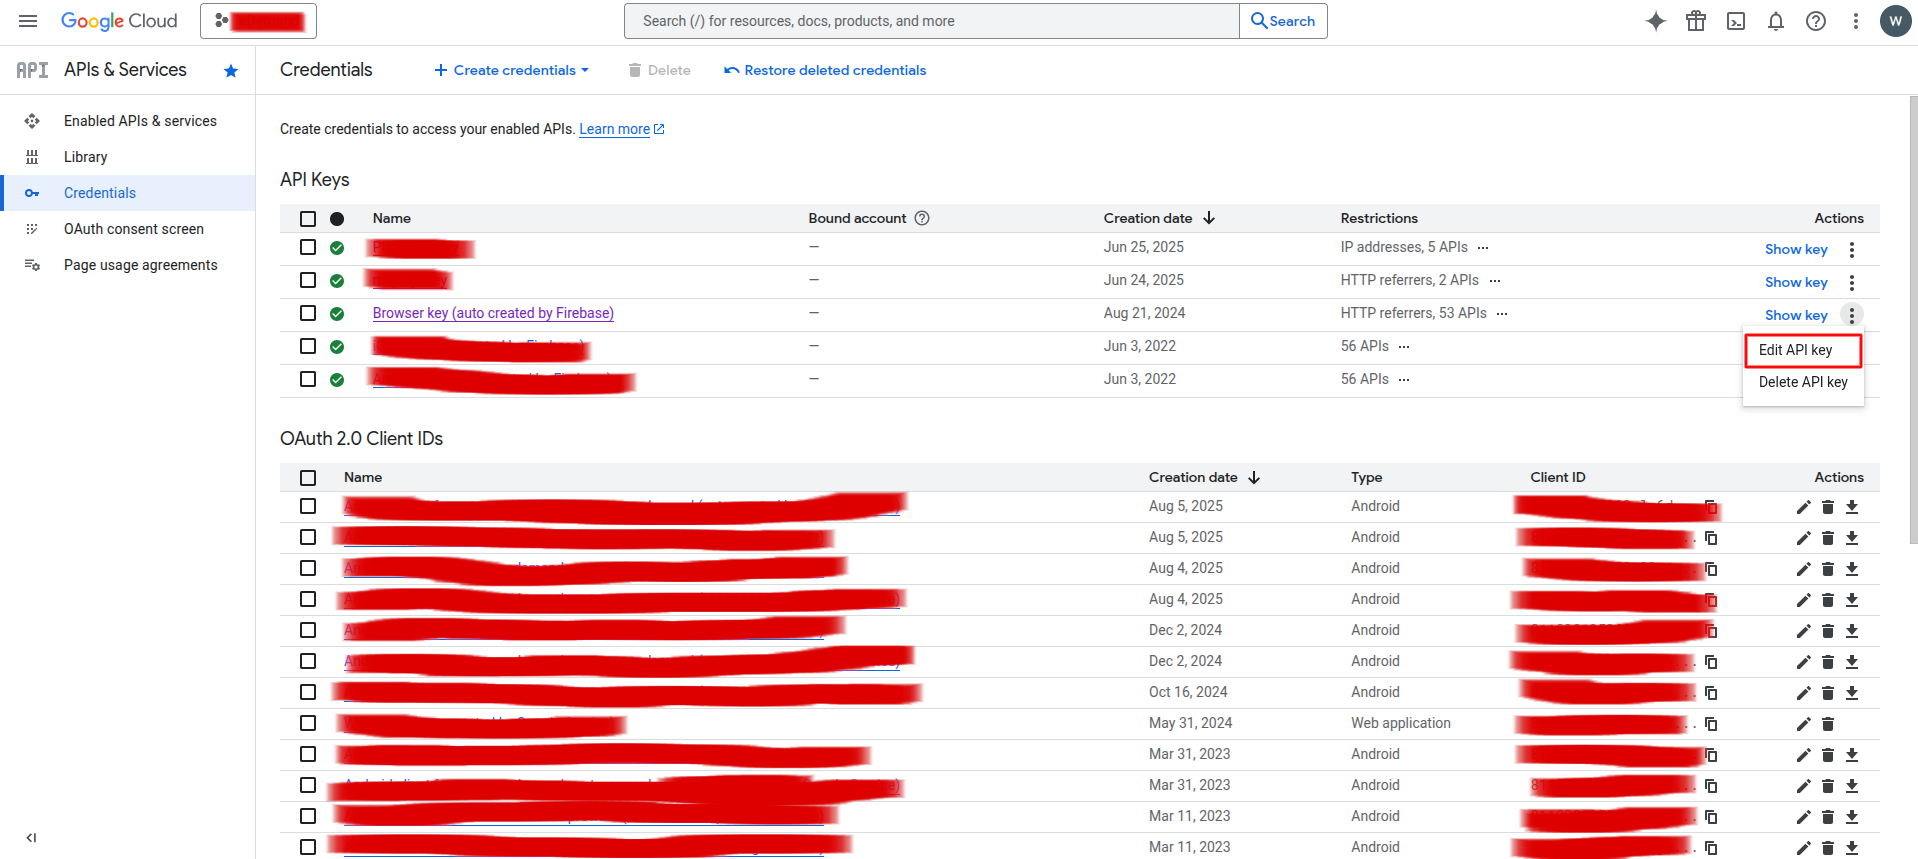
Find your existing browser key (or create one if needed) and click Edit.
-
Under Application restrictions:
- Choose HTTP referrers (web sites).
- Add URL patterns like:
https://your-domain.com/*https://admin.your-domain.com/*https://your-firebase-auth-domain/*
The Firebase Auth domain comes from your Firebase project settings.
You can find it in the Firebase Console -> Project Settings -> General section, inside the web app configuration as the authDomain field (for example: your-project-id.firebaseapp.com).
You must add this exact Auth domain under the HTTP referrer restrictions above; if it is missing, the Firebase-based login functionality will not work. Ensure that the https:// portion is there before the firebase Auth domain
-
Under API restrictions, select Restrict key, then allow only:
- Maps Javascript API
- Geocoding API
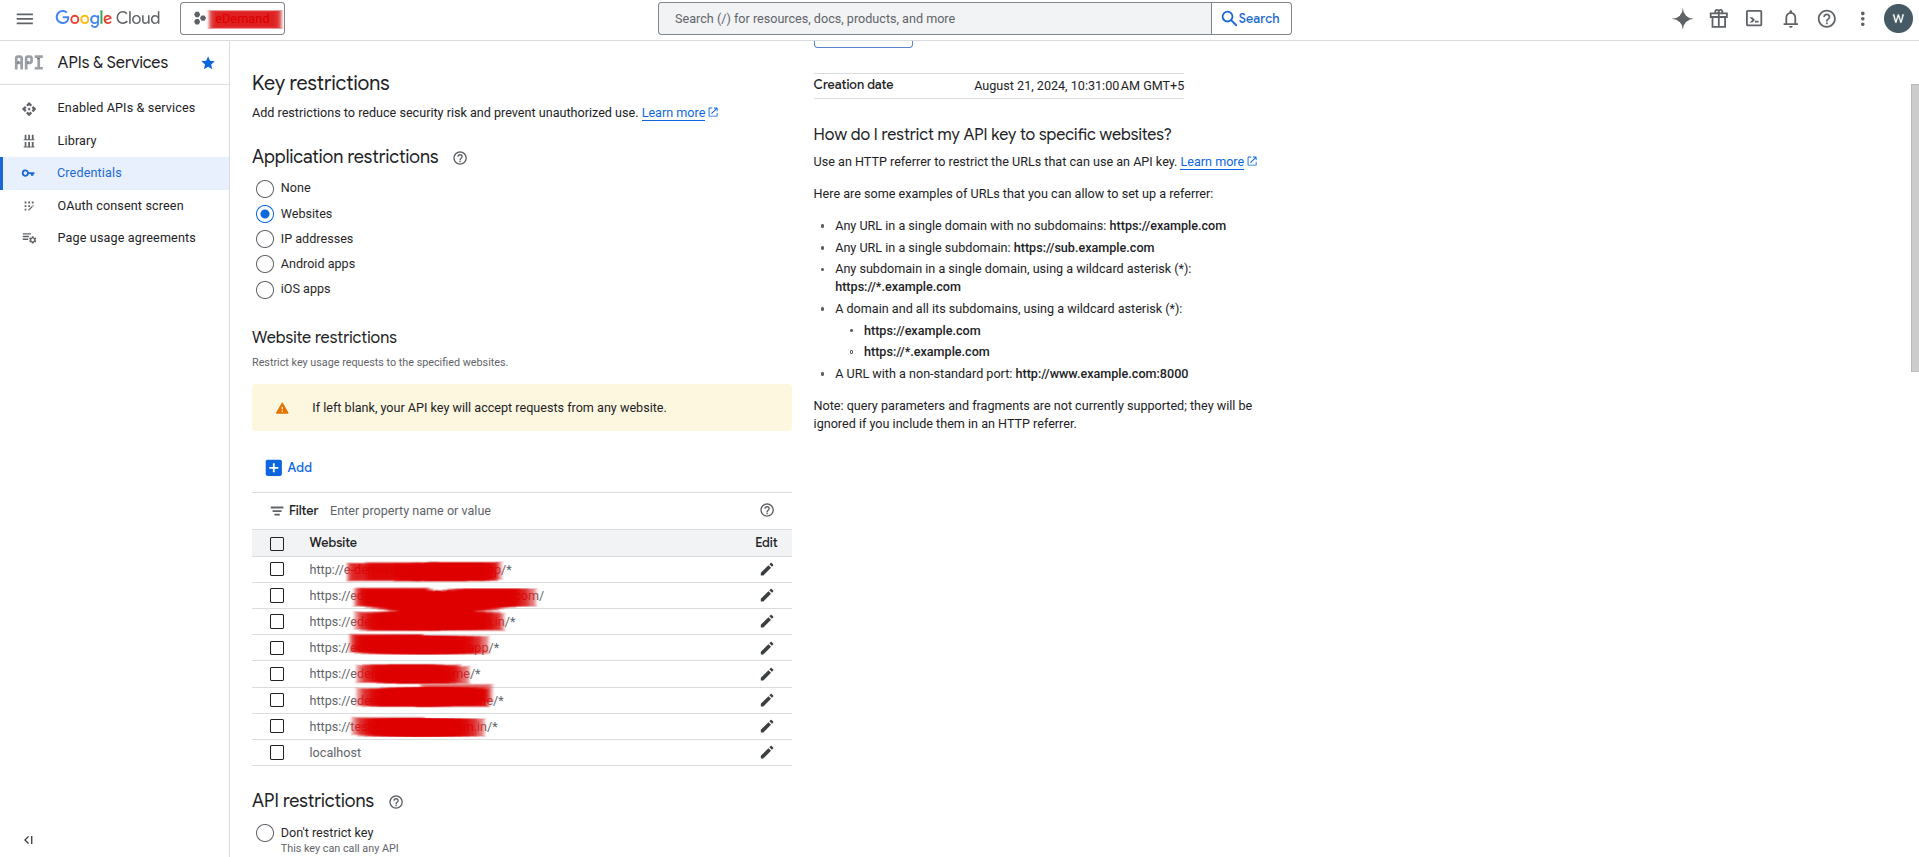
Click Save to apply the changes.
Step 4: Configure Server (Backend) Key
If needed, create an additional key for server-side usage:
-
On the Credentials page, click Create credentials -> API key.
-
Give the key a clear name such as
edemand-backend-maps. -
Under Application restrictions, choose IP addresses and:
- Add the IPv4 address of your server.
- Add the IPv6 address if available (recommended).
-
Under API restrictions, allow:
- Places API
- Geocoding API
- Geolocation API
- (Optionally) Maps Javascript API if needed on the server.

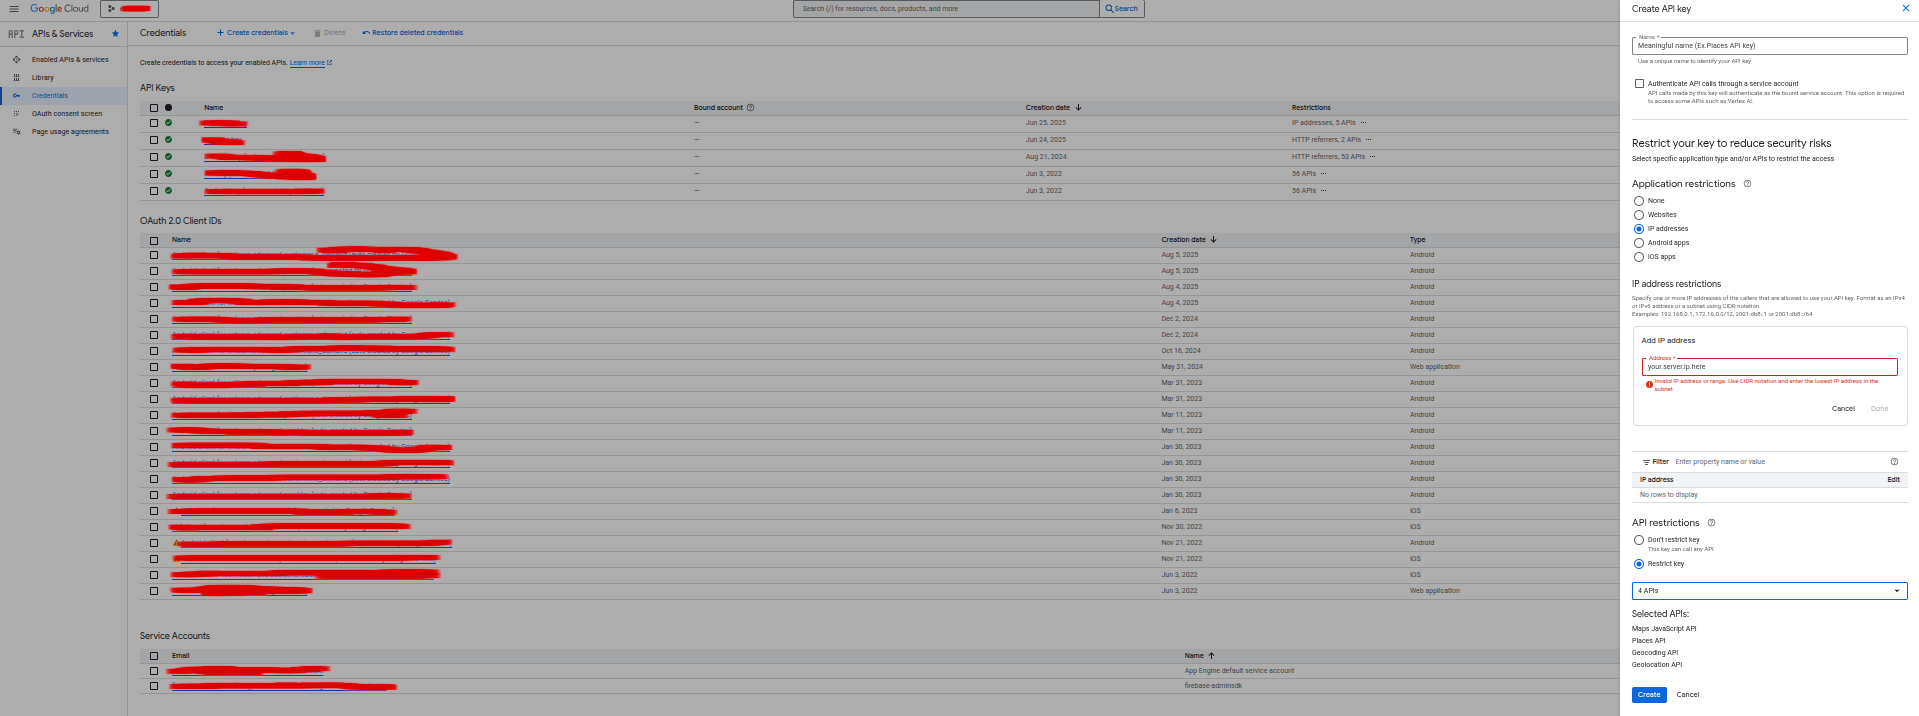
Google may require both IPv4 and IPv6 addresses in IP restrictions. Always add the IPv6 address for more reliable verification.
Step 5: Update eDemand Configuration
After you finish configuring and saving these keys:
- Copy the browser key and server key values.
- Paste them into the corresponding fields in your eDemand configuration (see Installation and Configure eDemand guides).
- Save the configuration and test:
- Open the web and admin panel map pages.
- Try searching for an address and placing a pin on the map.
If maps or autocomplete do not work, re-check:
- That all required APIs are enabled.
- That the correct domains / IPs are added under restrictions.
- That you are using the right key in the right place (browser vs server).