How to set Notification
How to set Notification
For ios your need to perform below given step:
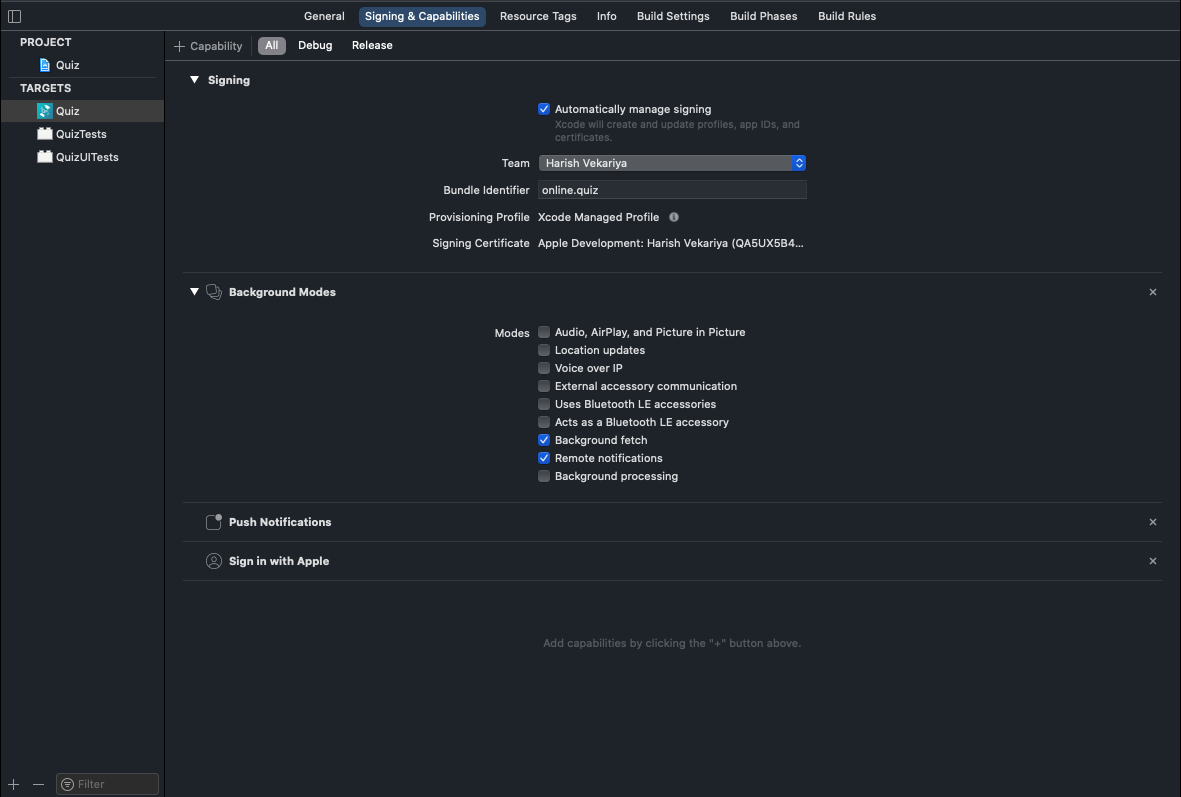
- In Xcode, open the project.
- In the Project Navigator (the left-hand menu), select the project icon that represents your app.
- In the top-left corner of the right-hand pane in Xcode, select your app's target.
- Navigate to the Capabilities tab.
- Enable Push Notifications.
- Check Remote Notifications and Background Fetch from Enabling Background Modes.
- APNs (Apple's Push Notification service) currently supports two types of connections: token-based (.p8) and certificate-based (.p12). You can follow either one of them
For Token-based (.p8)
- Log in to the Apple Developer Portal.
- Navigate to Certificates, IDs & Profiles > Identifiers > App IDs and click the App ID associated with your app.
- On the screen for your App ID, check Capabilities > Push Notifications.
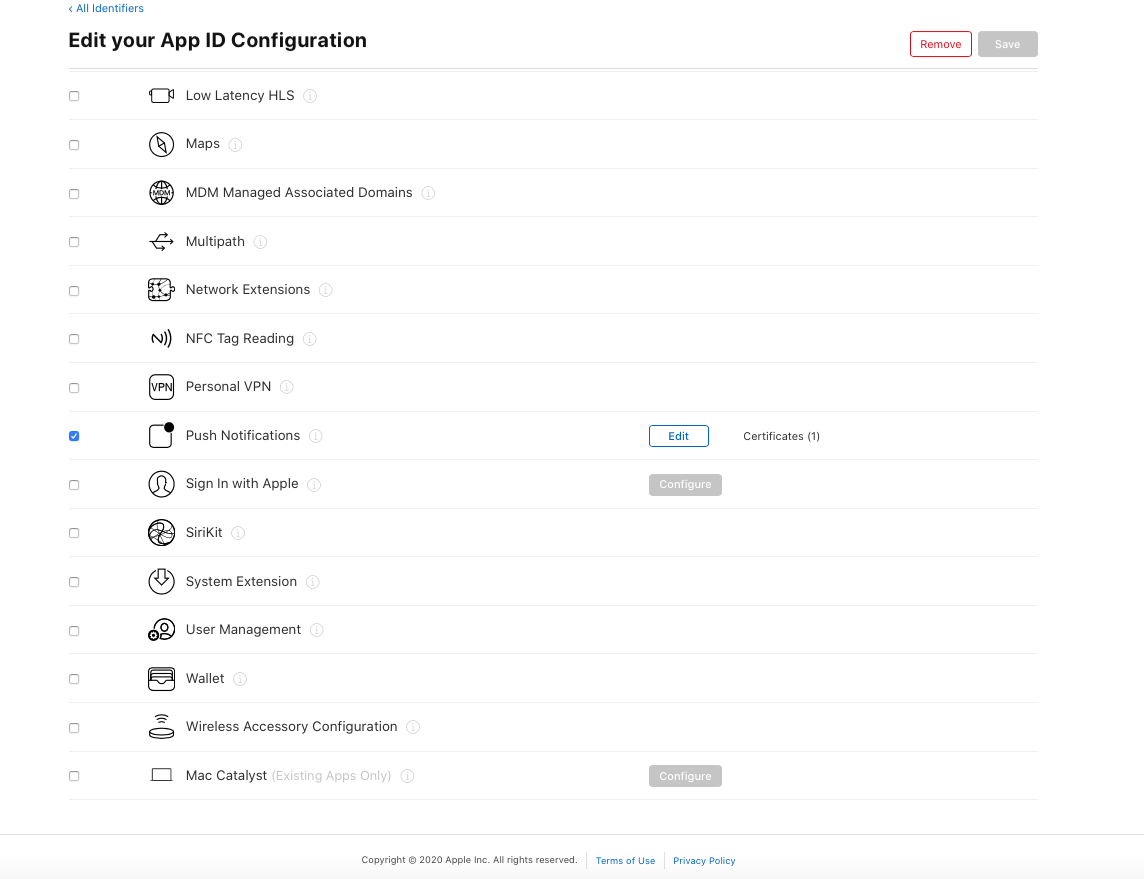
- Select App ID in next page & click continue.
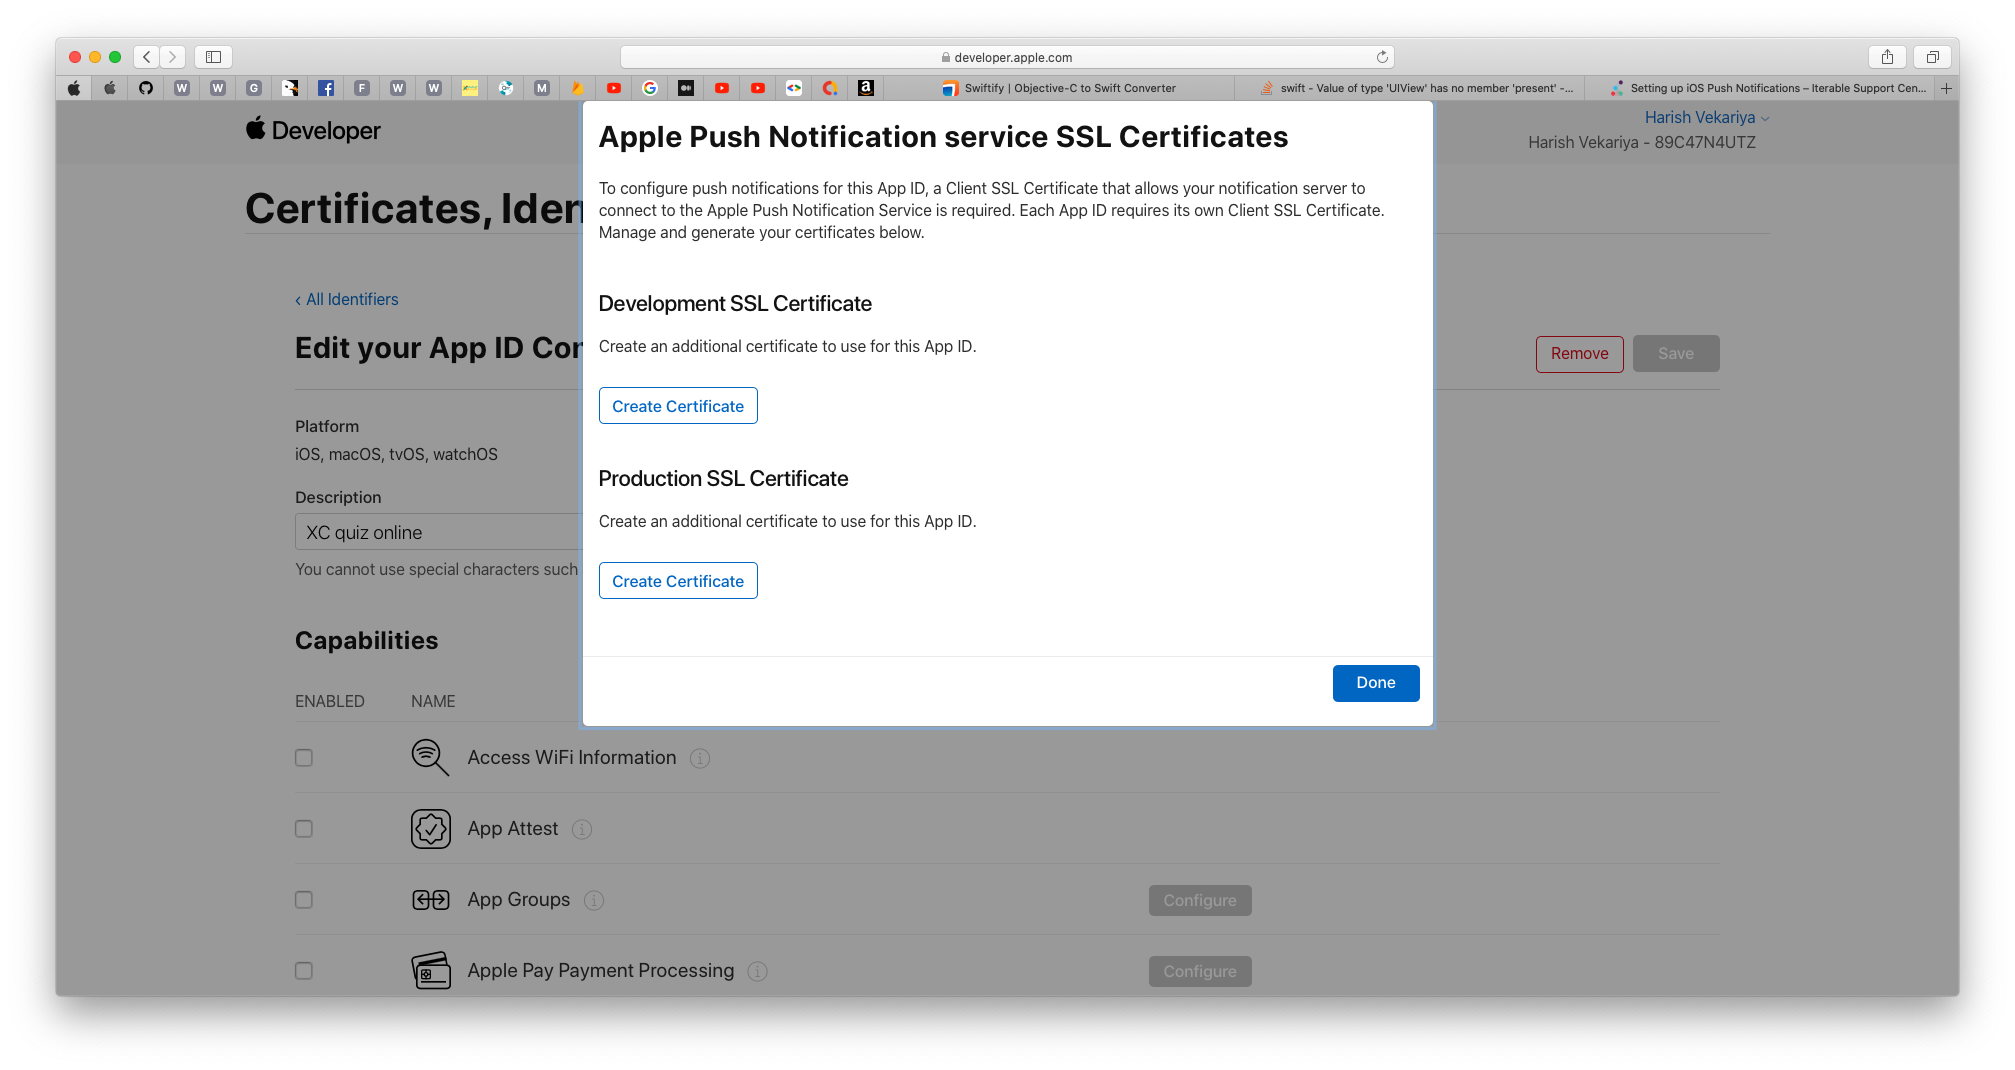
- And then create Development SSL Certificate & Production SSL Certificate by adding CSR certificate. Follow Apple's Create a certificate signing request instructions.
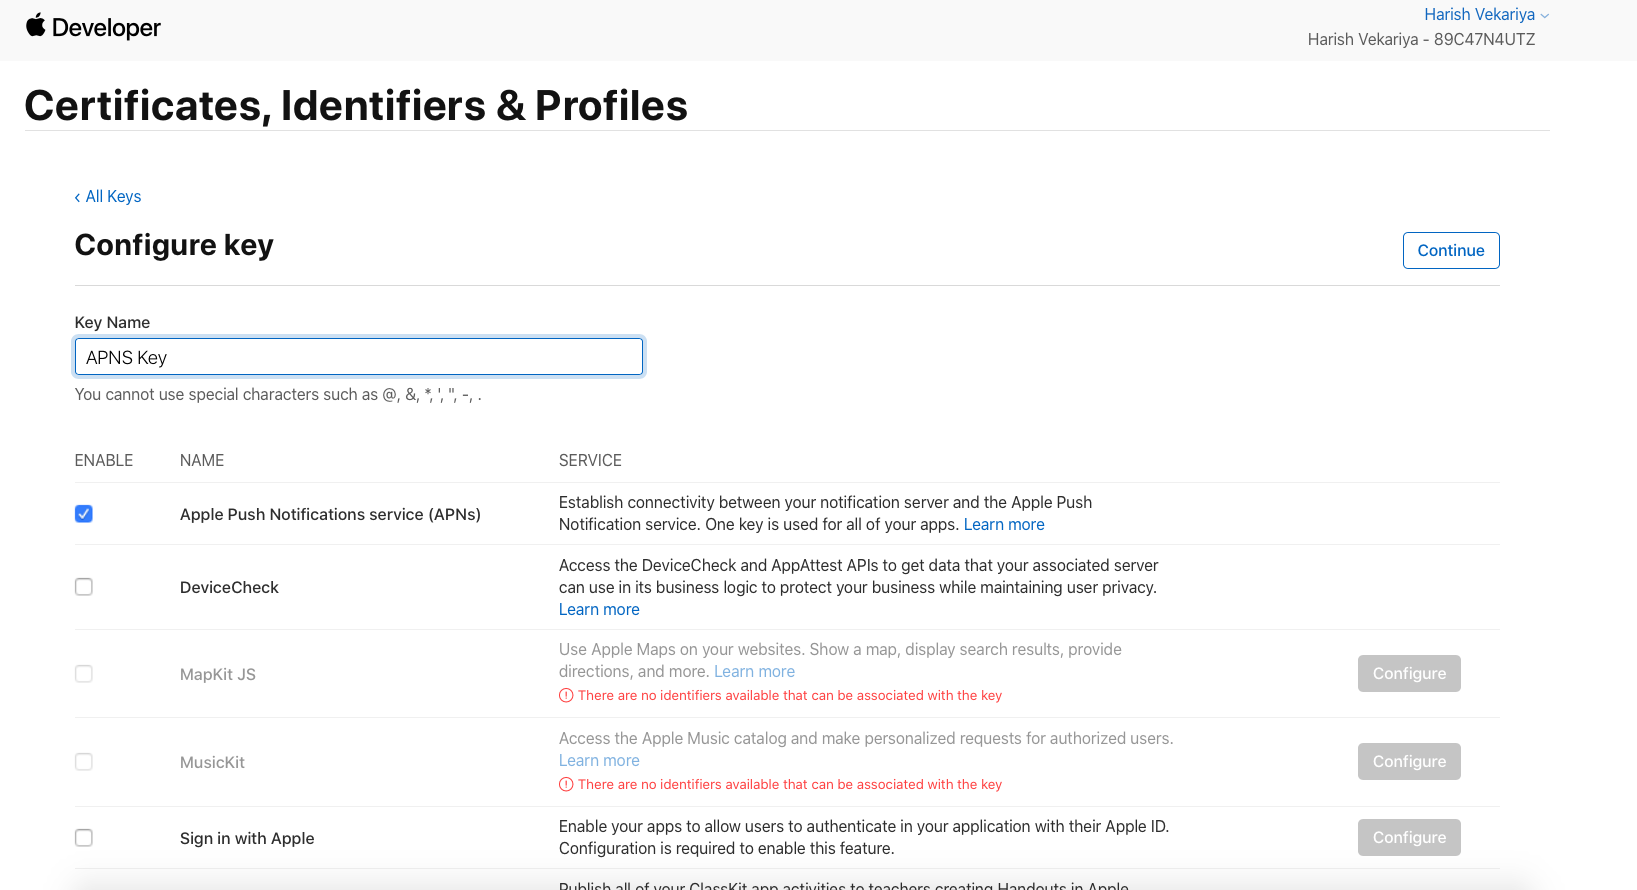
- Navigate to Certificates, IDs & Profiles > Keys Section and add a Universal key for Notifications, which you can use for more than one apps as well.
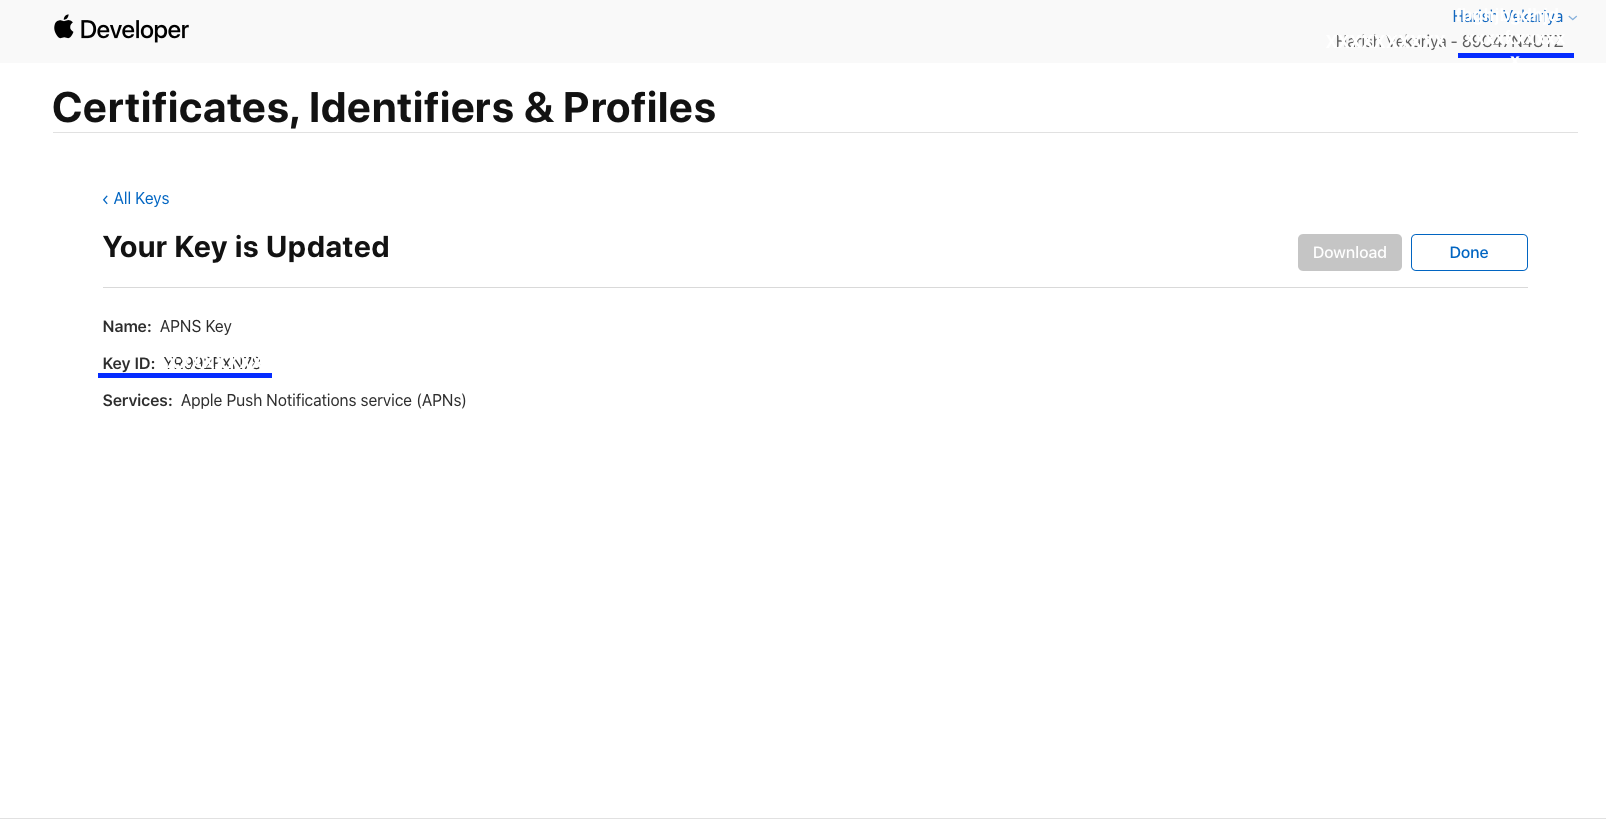
- Just save and Download & keep it safe, as it will be downloaded only once.
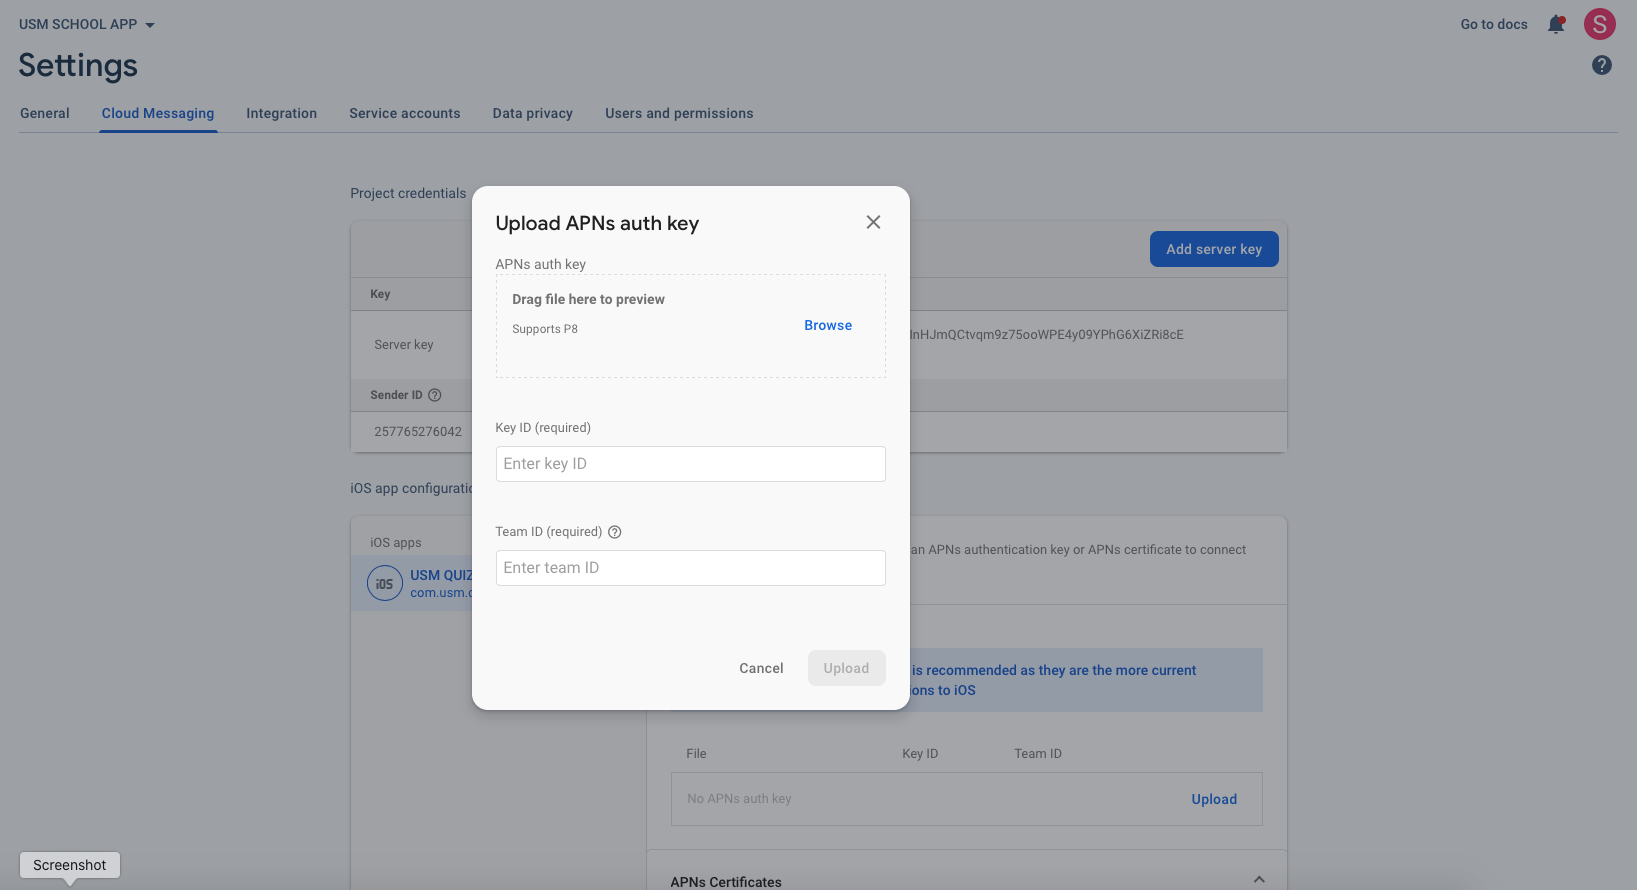
- Then go to Firebase and add this .p8 file along with Your Key ID and Team ID.
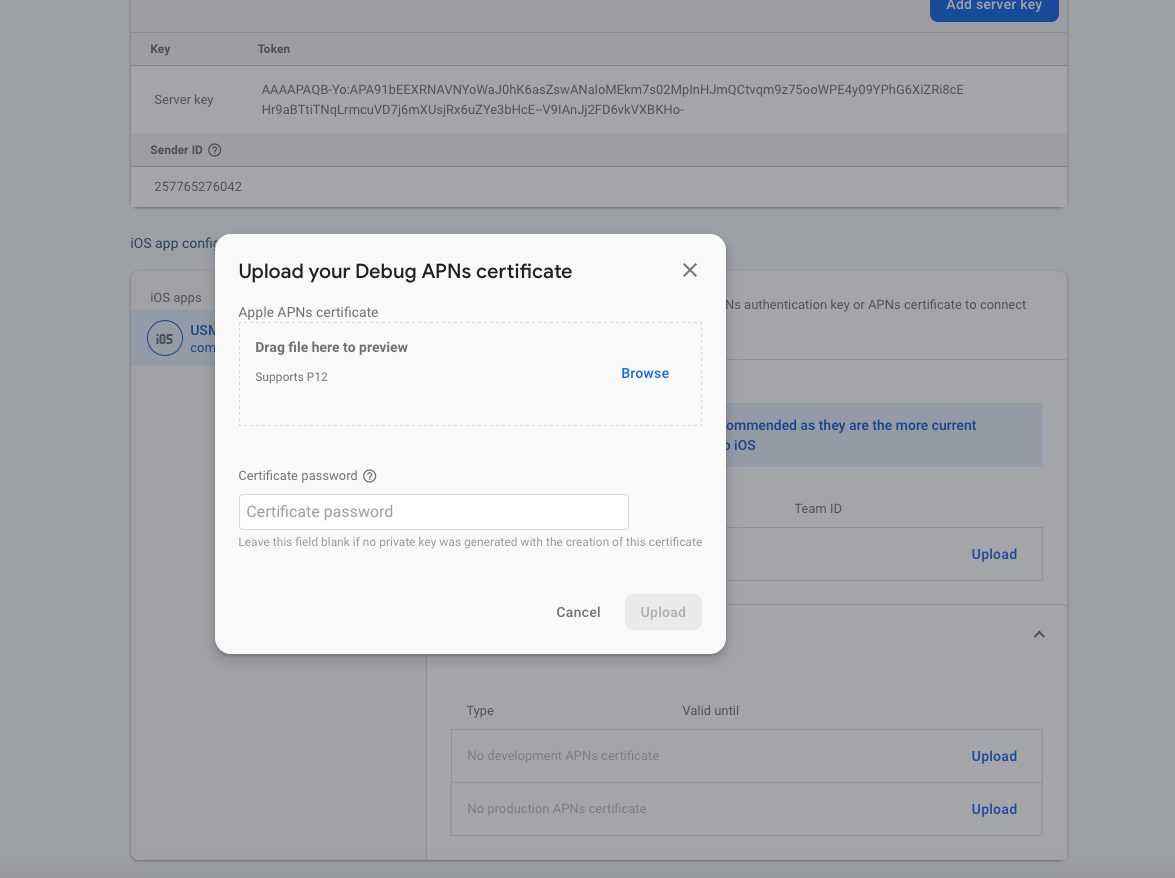
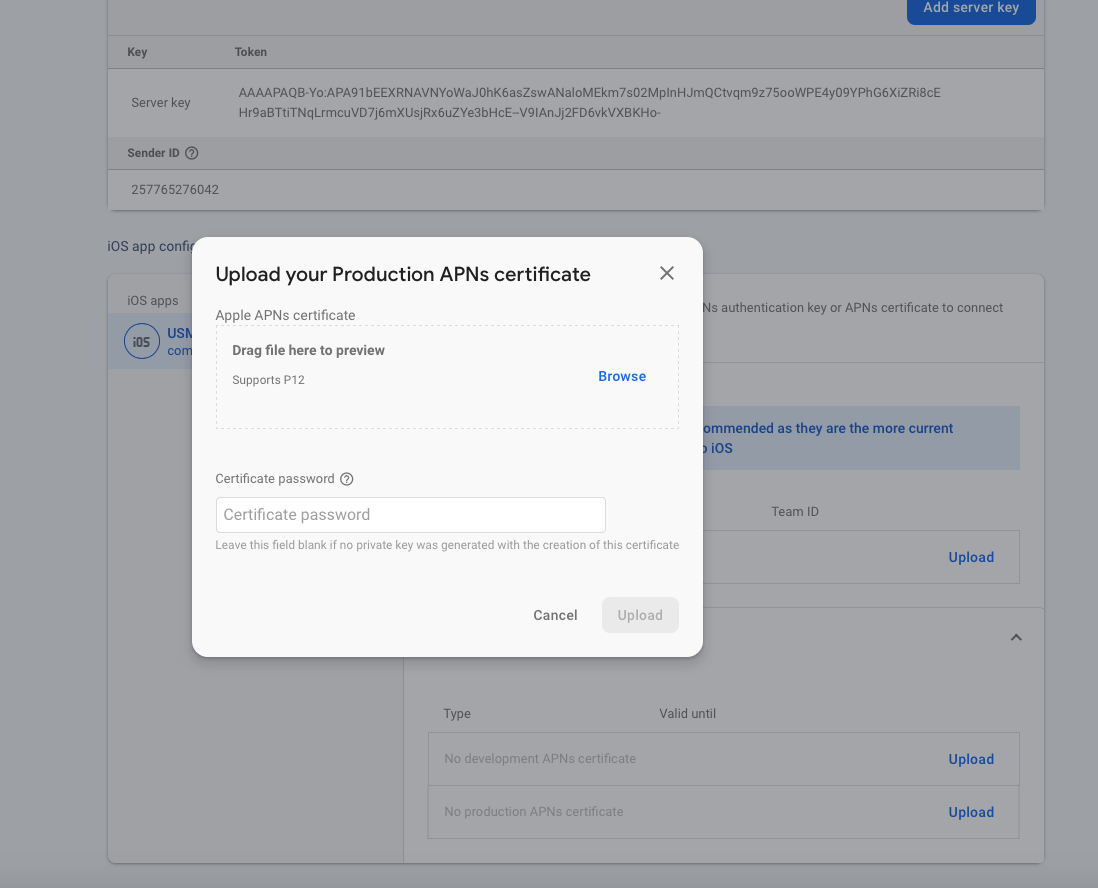
FOR certificate-based (.p12)
- Log in to the Apple Developer Portal.
- Navigate to Certificates, IDs & Profiles > Provisioning Profiles.
- Click the provisioning profile you'd like to edit.
- Edit the provisioning profile as necessary, and click Save.
- Click Download, and double-click the downloaded provisioning profile to install it.
- Make sure your Xcode project is configured to use the provisioning profile as necessary. Next, export the downloaded certificate (.cer file) as a .p12 file that can be uploaded to firebase:
- On your Mac, double-click the .cer file to open it in Keychain Access.
- In Keychain Access, in the lower-left corner, select Category > Certificates.
- Select the certificate to export.
- Choose File > Export Items.
- Enter a name in the Save As field.
- Accept the default .p12 file format and click Save. Respond to the prompts, and enter a password for the file if necessary.
- Keep track of this file, since you'll upload it to firebase in a later step.