Media Management
The Media Management system provides a centralized location to upload, organize, and manage all images and documents used throughout your eShop platform. This includes product images, banners, promotional graphics, and other media files.
- Centralized storage for all media files
- Easy access to uploaded images and documents
- Quick insertion into forms and content
- Efficient organization with searchable media library
- Reusable assets across multiple pages and products
Overview
Media Management allows you to:
- Upload images and documents in various formats
- View all uploaded media in a organized table
- Search for specific files quickly
- Copy image URLs to clipboard for easy use
- Delete unused or outdated media
- Insert media into forms, products, and content areas
Uploading Media
Upload Interface
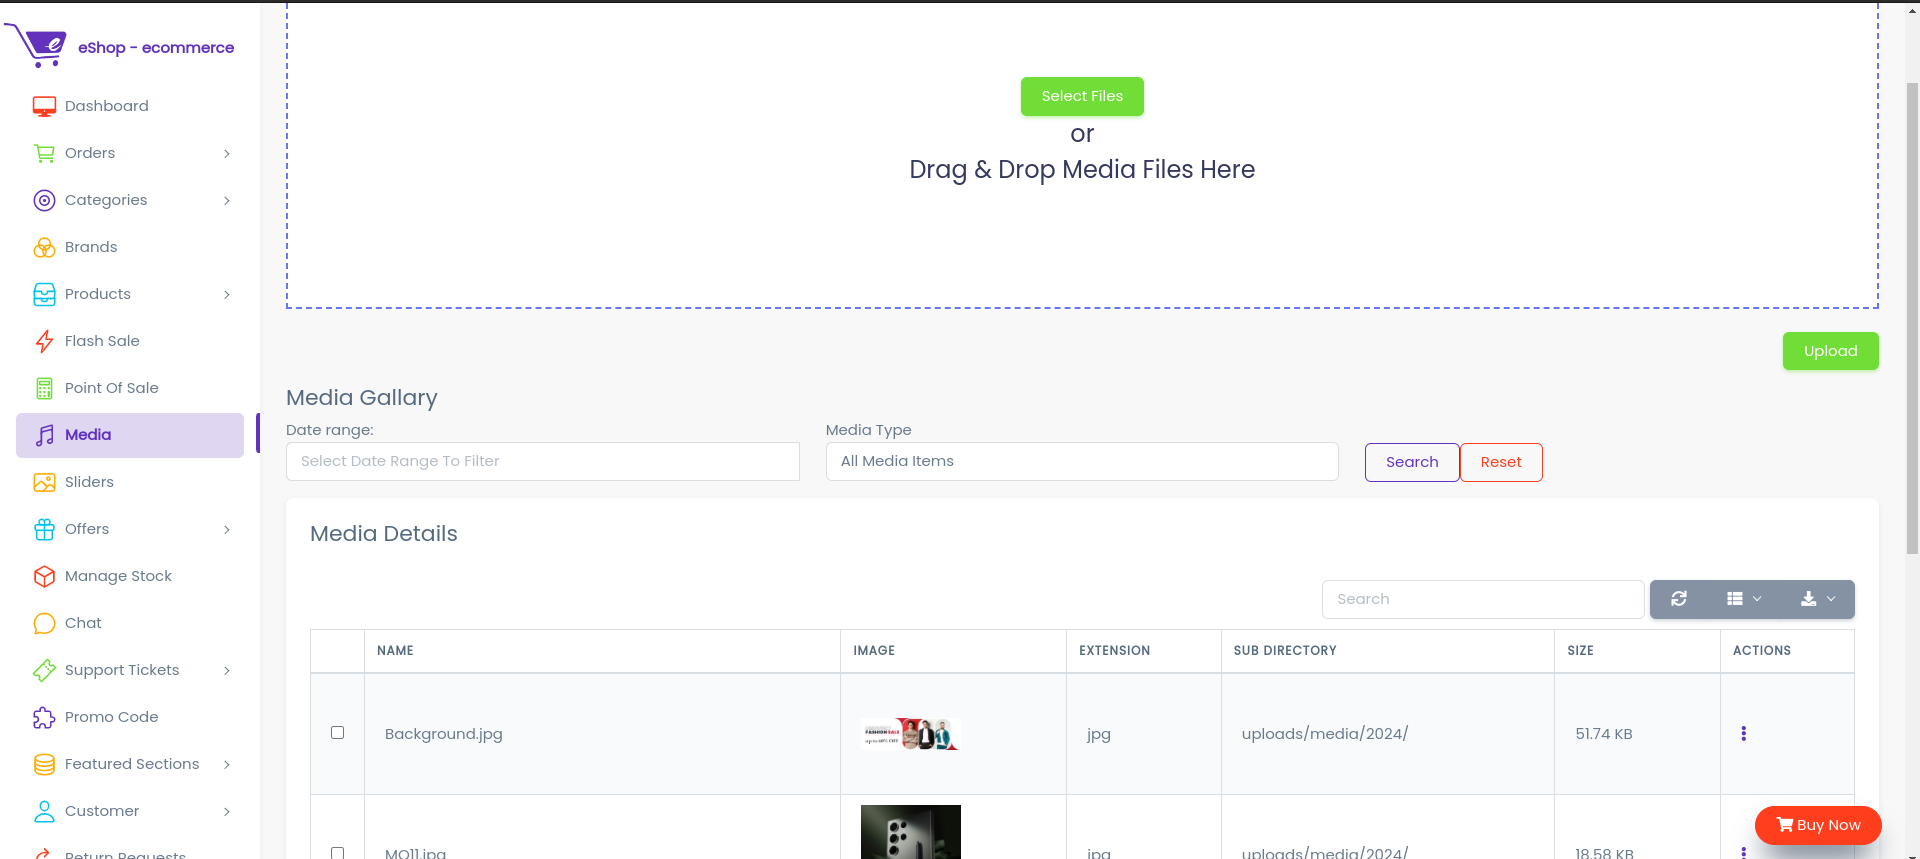
How to Upload Files
- Navigate to Media Management from the admin panel
- Click the "Upload" or "Add Media" button
- Select files from your computer:
- Images: JPG, PNG, GIF, WebP, SVG
- Documents: PDF, DOC, DOCX (if supported)
- Click "Upload" to add files to the media library
- Wait for upload confirmation
Images: JPG, JPEG, PNG, GIF, WebP, SVG
Documents: PDF, DOC, DOCX (check system configuration)
Media Library
Viewing Uploaded Media
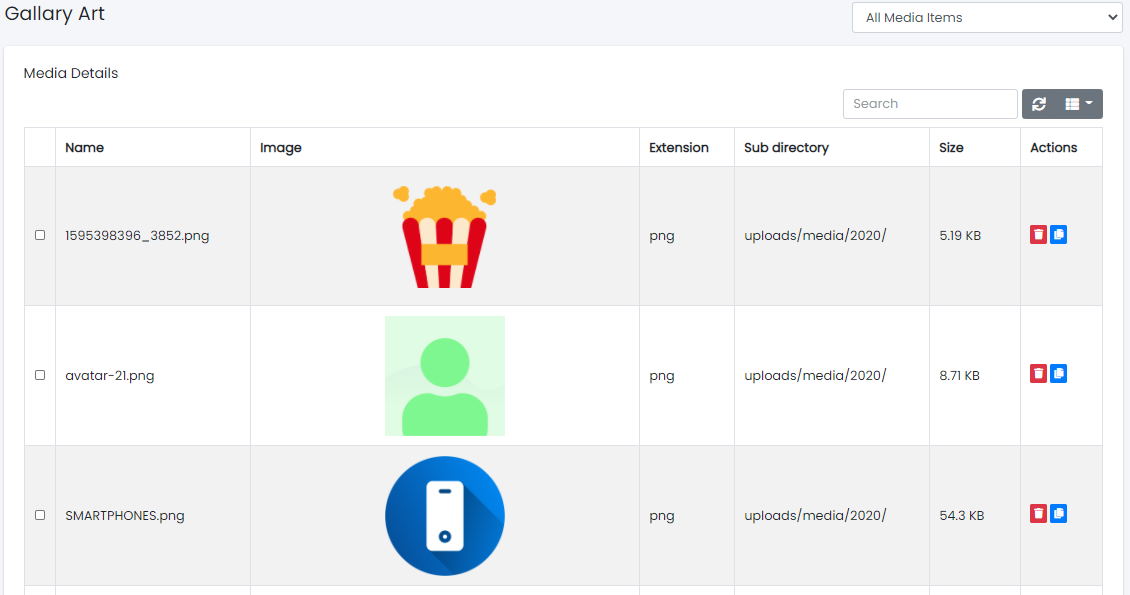
The media library displays all uploaded files in a table format with the following information:
Table Columns:
- Preview: Thumbnail of the image/file
- File Name: Name of the uploaded file
- File Type: Format (JPG, PNG, PDF, etc.)
- Upload Date: When the file was added
- File Size: Size of the file
- Actions: Quick action buttons
Media Actions
Each media file has action buttons for quick management:
Delete Media 
- Purpose: Remove unwanted or outdated files
- How to use: Click the delete icon next to the file
- Confirmation: System will ask for confirmation before deletion
- Warning: Deletion is permanent and cannot be undone
Before deleting media, ensure it's not being used in active products, banners, or pages. Deleting in-use media may cause broken images on your website.
Copy to Clipboard 
- Purpose: Copy the image URL for external use
- How to use: Click the clipboard icon
- Result: Image URL is copied to clipboard
- Use case: Paste URL in external editors, emails, or documentation
Searching Media
- Use the search bar to find specific files
- Search by file name, type, or upload date
- Filter results by file type (images, documents)
Organizing Media
Best Practices:
- Use consistent naming conventions
- Delete unused files regularly
- Keep file sizes optimized
- Organize by category or purpose (e.g.,
banner-,product-,promo-)
Adding Images to Forms
Many forms throughout the admin panel require images (products, offers, banners, etc.). Here's how to add images using the media library.
Upload Button in Forms

Where you'll see this button:
- Product creation/edit forms
- Offer and promotion forms
- Banner management
- Category images
- Brand logos
- Flash sale banners
Step-by-Step Process
Step 1: Click Upload Button
Look for the "Upload Image" button in the form where an image is required.
Step 2: Media Library Modal Opens
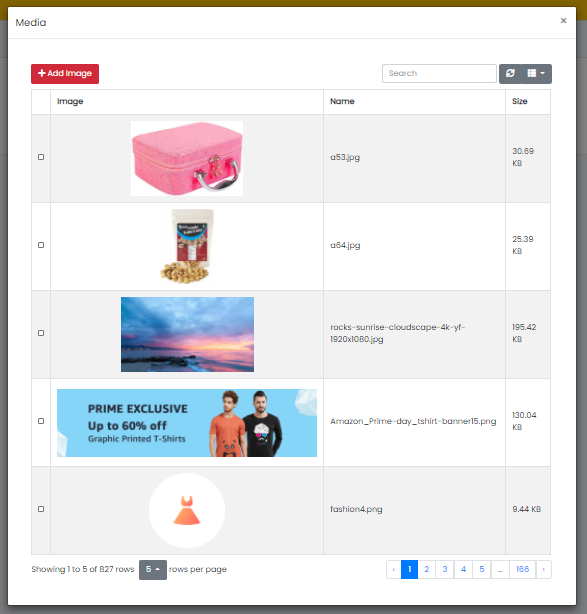
A dialog box will appear showing your media library with all uploaded images.
Modal Features:
- Browse: View all available images
- Search: Find specific images quickly
- Upload New: Add new images directly from this modal
- Select: Choose the image you want to use
Step 3: Select Image
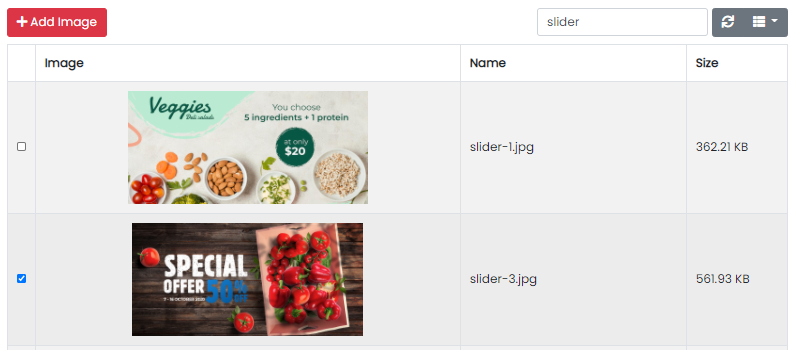
- Click on the image you want to use
- The selected image will be highlighted
- Click "Add Image" or "Select" button to confirm
Step 4: Image Added to Form

The selected image now appears in the form field.
What you can do:
- Preview: See the selected image
- Change: Click upload button again to select a different image
- Remove: Delete the image from this field (doesn't delete from media library)