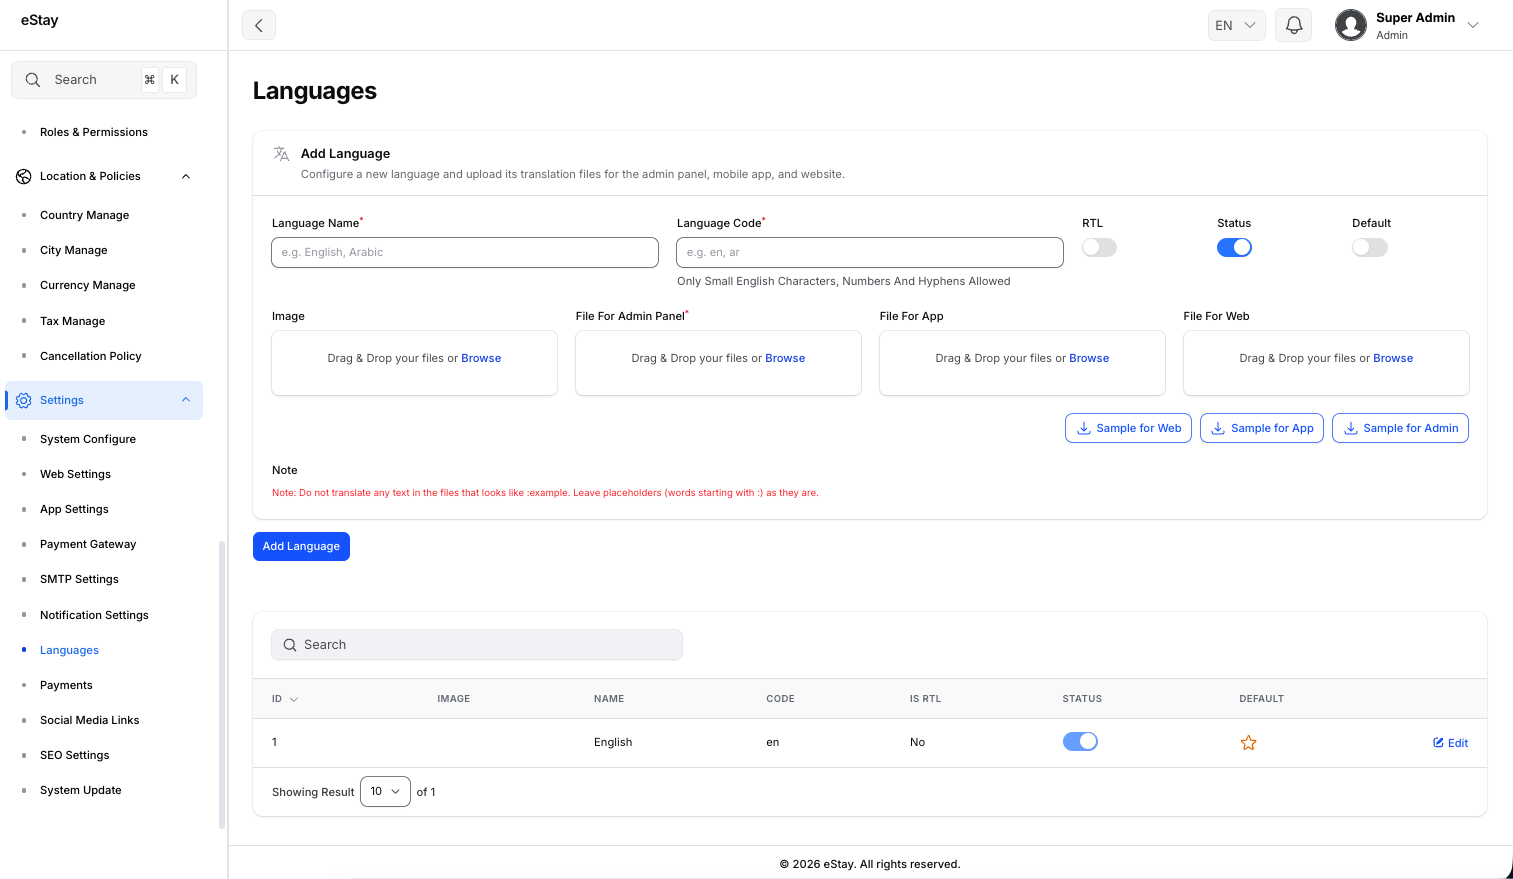
Manage Languages
The Languages page lets you add and manage the languages your platform is available in. Each language has its own translation files for the three parts of the system — the Admin Panel, the Mobile App, and the Website — so every audience sees text in their chosen language.
You can also mark a language as Right-to-Left (RTL) (for Arabic, Hebrew, etc.), set one language as the default, enable or disable a language, and replace its translations at any time.
In your admin dashboard, go to Settings > Languages using the left sidebar. This is a global setting — the country and property switchers are hidden here.
How Translations Work
A language is made up of three translation files, each a simple JSON file of "key": "translated text" pairs:
| File | Controls the text shown in… |
|---|---|
| Admin Panel | The admin dashboard (this back-office). |
| App | The customer mobile app. |
| Web | The customer-facing website. |
You don't write these files from scratch. The page gives you sample files to download (one per area). Open the sample, translate the right-hand side of each line into your new language, and upload it back.
Step 1: Navigate to Languages
In your admin dashboard, go to Settings > Languages.
You'll see the Add Language form at the top and a table of existing languages below it.
Step 2: Download the Sample Translation Files
In the Add Language section, click the sample buttons to download the starter files:
- Sample for Admin
- Sample for App
- Sample for Web
Each downloads a .json file containing all the text keys in English.
Some values contain placeholders that start with a colon, like :name, :count, or :example. These are filled in automatically by the system (e.g. a customer's name). Leave every :word exactly as it is — only translate the normal words around them. Translating a placeholder will break that message.
Step 3: Translate the Files
Open each downloaded .json file in a text editor and translate only the values (the text on the right of the colon), keeping the keys (on the left) unchanged.
Example — translating to French:
{
  "welcome": "Bienvenue",
  "hello_name": "Bonjour :name"
}
- ✅
"welcome"(the key) stays the same. - ✅
"Welcome"was translated to"Bienvenue". - ✅
:namewas left untouched.
- The file must be valid JSON.
- It must be a flat list of
"key": "value"pairs — no nested groups. - Every value must be text (a string).
- Maximum file size: 5 MB each.
Step 4: Fill in the Language Details
Back in the Add Language form, complete the fields:
| Field | Description |
|---|---|
| Language Name | The display name, e.g. English, Arabic. |
| Language Code | A short unique code, e.g. en, ar, pt-br. Use lowercase letters, numbers, and hyphens only. This must be unique. |
| RTL | Turn on for right-to-left languages (Arabic, Hebrew, Urdu, etc.). Leave off for left-to-right languages. |
| Status | On = the language is available for use. Off = hidden. (On by default.) |
| Default | Turn on to make this the default language for the platform. |
| Image | Upload a flag/icon image for the language (shown in language pickers). |
The code maps directly to the folder that stores this language's translations (resources/lang/{code}). Choose it carefully — changing it later can disconnect the language from its translation files.
Step 5: Upload the Translation Files
In the same form, upload the files you translated:
| Upload | Required? |
|---|---|
| File For Admin Panel | Required |
| File For App | Optional |
| File For Web | Optional |
Only the Admin Panel file is required to create a language. You can add the App and Web files now, or upload them later via Edit.
Step 6: Save
Click the Add / Save button. The platform validates each uploaded file and, if everything is correct, creates the language and stores its translations. The new language then appears in the table below.
If a file has an error (invalid JSON, a nested structure, or a non-text value), you'll see a clear error message telling you which file and what to fix.
The Languages Table
Below the form, every language is listed with:
| Column | Description |
|---|---|
| ID | The internal identifier. |
| Image | The flag/icon you uploaded. |
| Name | The language's display name. |
| Code | The language code. |
| Is RTL | Whether it's a right-to-left language. |
| Status | A toggle to enable/disable the language instantly. |
| Default | A ⭐ star marks the current default language. |
Editing a Language
Click the Edit icon (pencil) next to a language to change its name, code, image, RTL setting, status, or default flag.
The edit form also lets you override translations by uploading new files — these are all optional, so upload only the area(s) you want to update:
- Override Admin Translations (Optional)
- Override App Translations (Optional)
- Override Web Translations (Optional)
Uploading a translation file replaces the existing file for that area and language with the one you upload. Make sure your uploaded file is complete (start from the current sample so nothing is missing).
Setting the Default Language
Click Set Default on any non-default language to make it the platform default. The previous default automatically becomes a normal language.
- The default language must stay active — its Status toggle is locked on and cannot be disabled.
- You cannot un-set a default directly. To change it, use Set Default on a different language instead.
- The default language cannot be deleted.
Deleting a Language
Click the Delete icon (trash) next to a language and confirm.
The delete option is only available when:
- The language is not the default, and
- There is more than one language in the system (you can't delete the last one).
If you delete the language you're currently viewing the panel in, the platform automatically switches you back to the default language.
Quick Workflow Summary
- Download the Sample files (Admin / App / Web).
- Translate the values only — leave keys and
:placeholdersuntouched. - Enter the name, code, RTL/status/default, and a flag image.
- Upload the translated files (Admin required; App & Web optional).
- Save — the language is live.
- Use Edit to update translations later, Set Default to switch the default, or Delete to remove one.