Marketing Notifications
The Notifications page (under Marketing) is where you send messages to your customers — push notifications to the mobile app, emails, or both. You can send immediately or schedule for later, target everyone or a specific city, and track how each message performed.
This page sends notifications. It's different from Notification Settings, which only configures the Firebase connection that makes push delivery possible. You need Firebase set up there before push notifications will reach the app.
Notifications are sent and listed for your currently selected country. Switch the country from the topbar to work with another country.
Step 1: Open Notifications
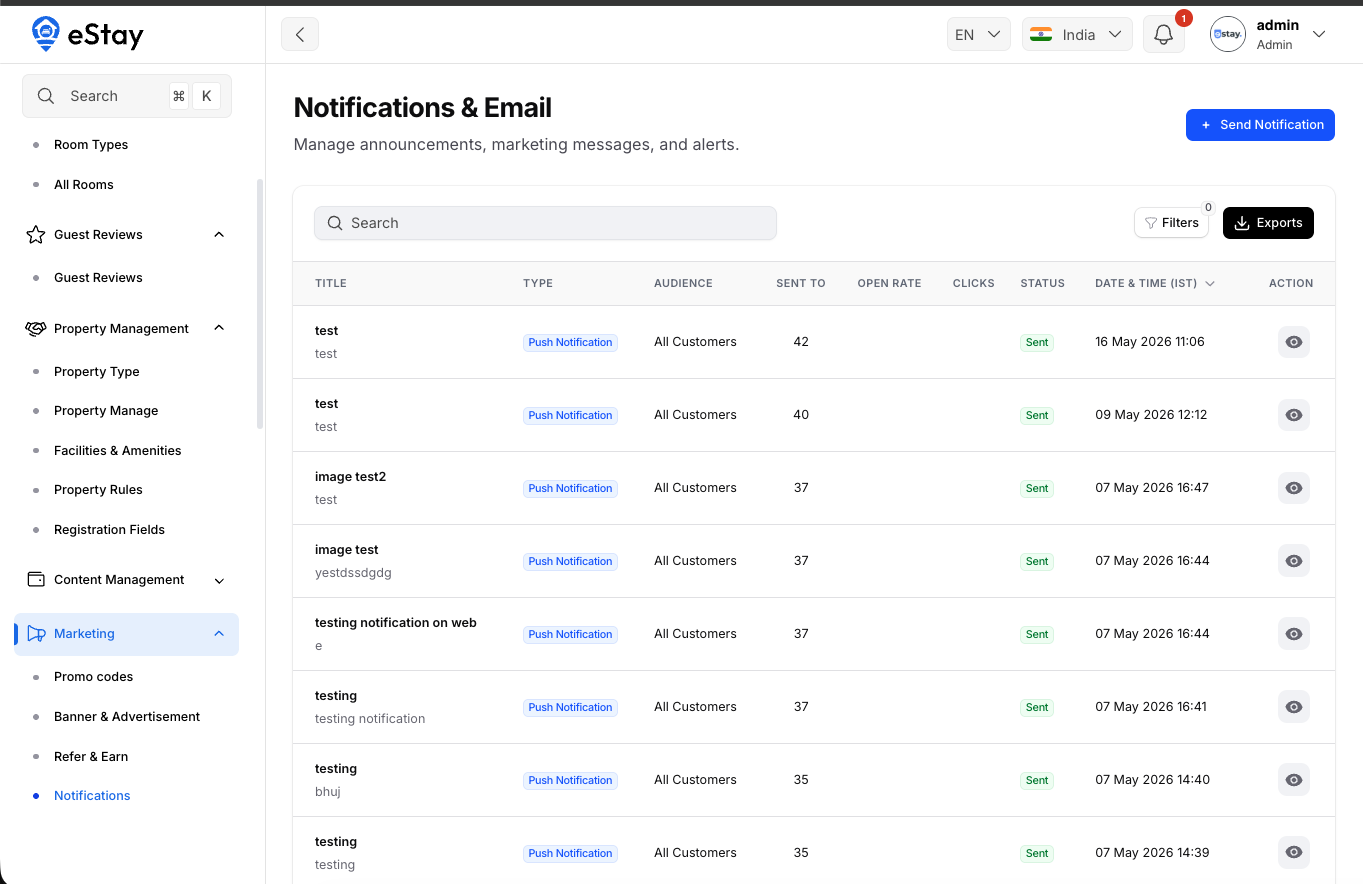
In your admin dashboard, go to Marketing > Notifications. You'll see all past and scheduled messages.
Step 2: Send a Notification
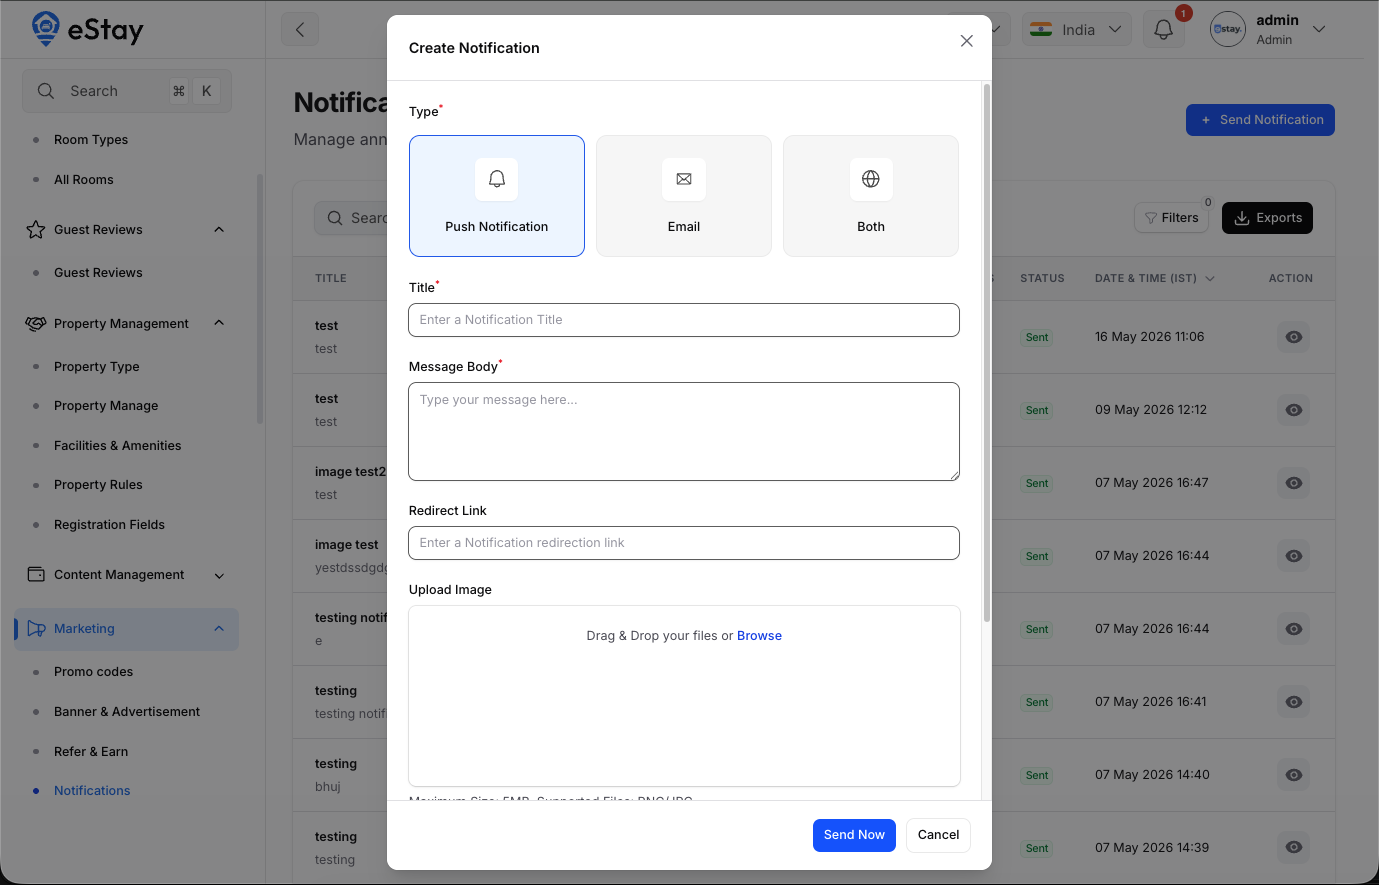
Click Send Notification and fill in the form.
| Field | Description |
|---|---|
| Type | Choose Push Notification, Email, or Both. |
| Notification Title | The headline. Required, max 255 characters. |
| Message Body | The main text. Required, max 2,000 characters. |
| Redirect Link | (Optional) A URL the customer is taken to when they tap the notification. |
| Upload Image | (Optional) A banner image. JPG or PNG, max 5 MB. |
| Audience | All customers, or City-Based (then pick a city). |
| Select City | (City-Based only) The city whose customers will receive it. |
| Schedule for Later | Off = send now. On = pick a future date & time. |
Send now vs. schedule
- Send Now — leave "Schedule for Later" off and click Send Now. The message is queued for immediate delivery.
- Schedule — turn on Schedule for Later, pick a date/time, and save. It will send automatically at that time.
Notifications are placed on a queue and delivered by the platform's background worker. For them to actually go out — whether sent now or scheduled — the server's cron jobs must be running. See Cron Jobs Setup. For push specifically, Firebase must also be configured in Notification Settings; for email, your SMTP / Mail settings must be set.
Understanding the List
| Column | Description |
|---|---|
| Title | The title and a short preview of the message. |
| Type | Push, Email, or Both. |
| Audience | All customers, or City-Based (with the city name). |
| Sent To | How many recipients it was delivered to. |
| Open Rate | Percentage of recipients who opened it. |
| Clicks | How many tapped the message/redirect. |
| Status | Processing (sending now), Scheduled (queued for later), or Sent. |
| Date & Time | When it's scheduled / was sent (in your timezone). |
You can search by title, filter by type and status, and export the list.
Viewing & Managing
| Action | What it does |
|---|---|
| View (eye) | Opens the full message — type, status, audience, body, image, redirect link, and (for sent messages) the Sent To / Open Rate / Clicks stats. |
| Delete (trash) | Available only for Scheduled messages — cancels them before they send. Already-sent messages can't be deleted. |
Only scheduled notifications can be cancelled. Once a message has started sending or has been sent, it stays in the history as a record.