Notification Settings
The Notification Settings page connects your platform to Firebase Cloud Messaging (FCM), the service that delivers push notifications to your customers' mobile app. Once configured, the platform can send booking confirmations, reminders, refund updates, and marketing notifications straight to users' devices.
This is a global setting — it applies to your whole platform, not a single country. The country and property switchers in the topbar are hidden on this page.
What You'll Need
Before you begin, create (or open) a project in the Firebase Console and have these two things ready:
- Your Firebase Project ID.
- A Service Account JSON key file downloaded from your Firebase project.
Push notifications to the mobile app are sent through Firebase Cloud Messaging. Without valid Firebase credentials here, the app cannot receive push notifications — in-app and other notifications still work, but device push delivery will not.
Step 1: Navigate to Notification Settings
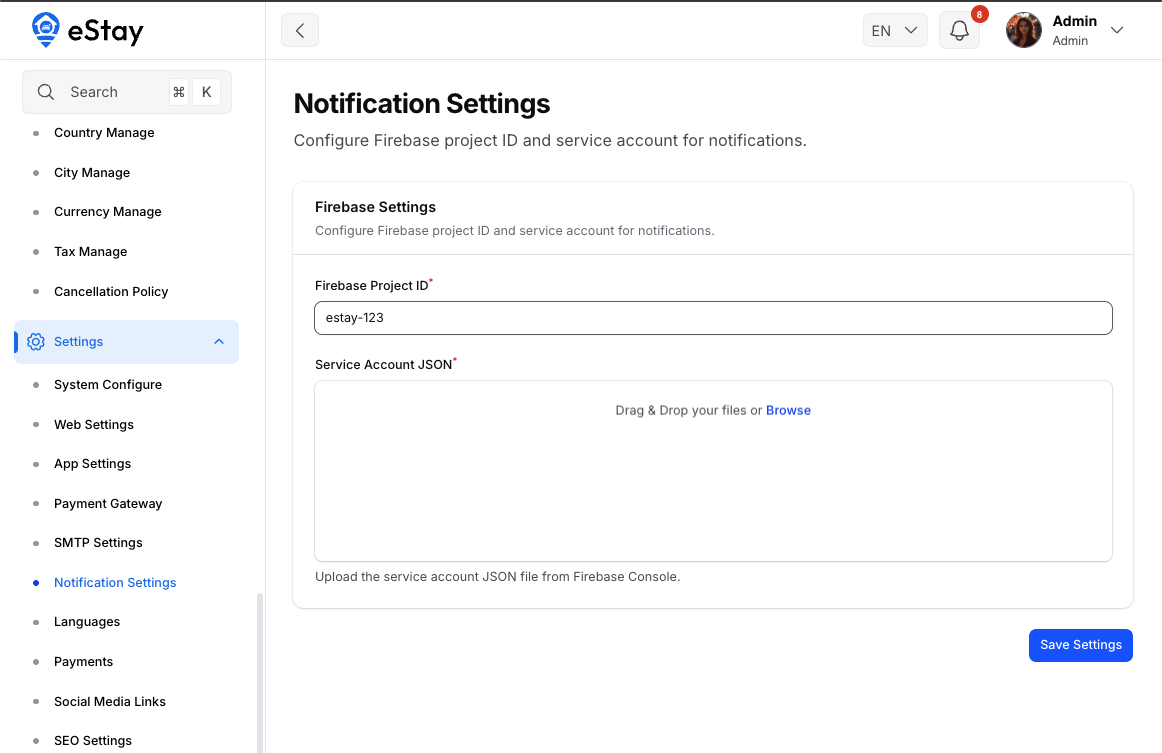
In your admin dashboard, navigate to Settings > Notification Settings using the left sidebar.
You'll see the Firebase Settings tab, which contains everything needed to enable push notifications.
Step 2: Get Your Firebase Project ID
- Open the Firebase Console and select your project.
- Click the gear icon → Project settings.
- On the General tab, copy the Project ID (for example,
my-app-12345).
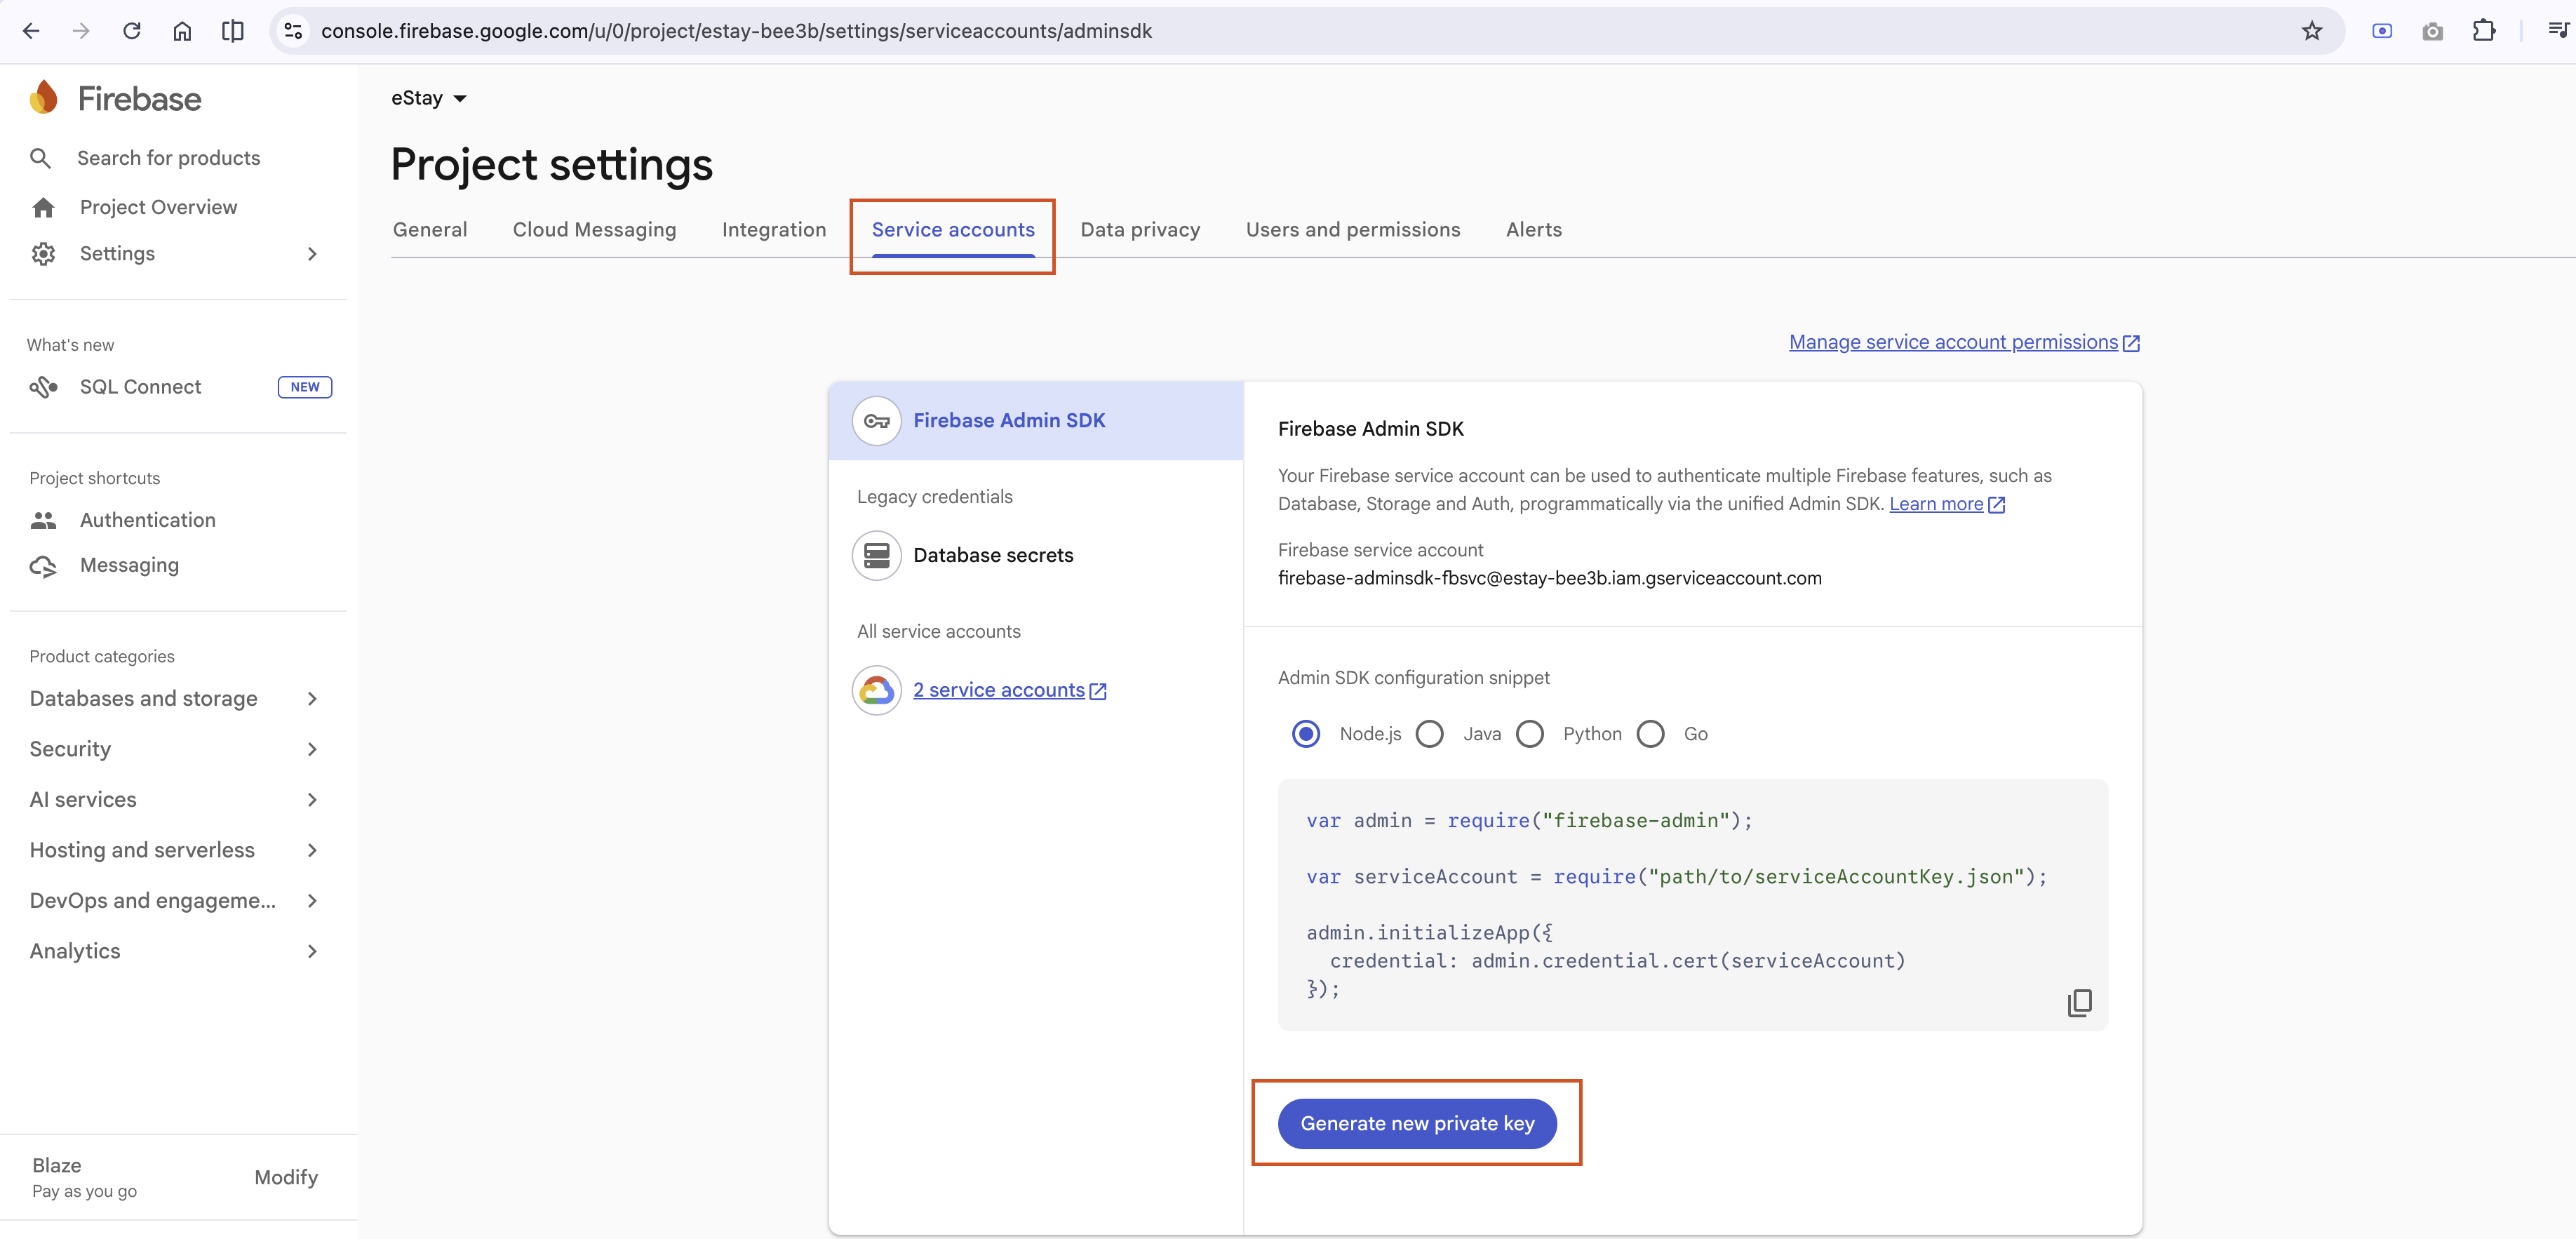
Step 3: Download the Service Account JSON
- In Project settings, open the Service accounts tab.
- Click Generate new private key, then confirm.
- A
.jsonfile will download to your computer. Keep this file safe — it grants permission to send notifications on behalf of your project.
The service account JSON is a secret credential. Never share it publicly or commit it to a code repository. If it is ever exposed, revoke it in Firebase and generate a new one.
Step 4: Fill in the Settings
Back on the Notification Settings page, complete the Firebase Settings form:
| Field | Description | Required |
|---|---|---|
| Firebase Project ID | The Project ID you copied in Step 2 (e.g. your-project-id). | Yes |
| Service Account JSON | Upload the .json file you downloaded in Step 3. Only .json files up to 1 MB are accepted. | Yes |
Step 5: Save
Click Save. Your Firebase credentials are stored securely and push notifications are enabled immediately — no server restart is required.
The uploaded service account file is stored privately on the server (not in a public folder), and the platform automatically refreshes its credentials as soon as you save.
Updating or Replacing Credentials
To switch to a different Firebase project, or to replace a leaked key:
- Return to Settings > Notification Settings.
- Enter the new Project ID and/or upload a new Service Account JSON.
- Click Save.
The new credentials take effect right away.
The Project ID and the Service Account JSON must belong to the same Firebase project. Mixing credentials from two different projects will cause push notifications to fail.
Troubleshooting
| Problem | Likely Cause & Fix |
|---|---|
| Push notifications aren't arriving on the app | Confirm the Project ID and Service Account JSON are from the same project, and that the JSON was generated under Service accounts. Re-save the settings. |
| "Upload failed" or file rejected | The file must be a valid .json file and under 1 MB. Re-download it from Firebase if needed. |
| Notifications stopped after changing Firebase projects | Make sure you updated both the Project ID and the JSON, then saved. |
Push notifications also depend on customers' notification preferences and the app having registered a device token. This page only configures the connection to Firebase — what gets sent is controlled elsewhere in the admin panel (e.g. Marketing Notifications).