Other Pages
This section covers the management of supplementary content pages in the eStay admin panel: Banners, FAQs, Blogs, and How It Works.
Banners
Banners are promotional images displayed on the home screen of the app and web frontend.
Navigate to the Banners section in the admin sidebar.
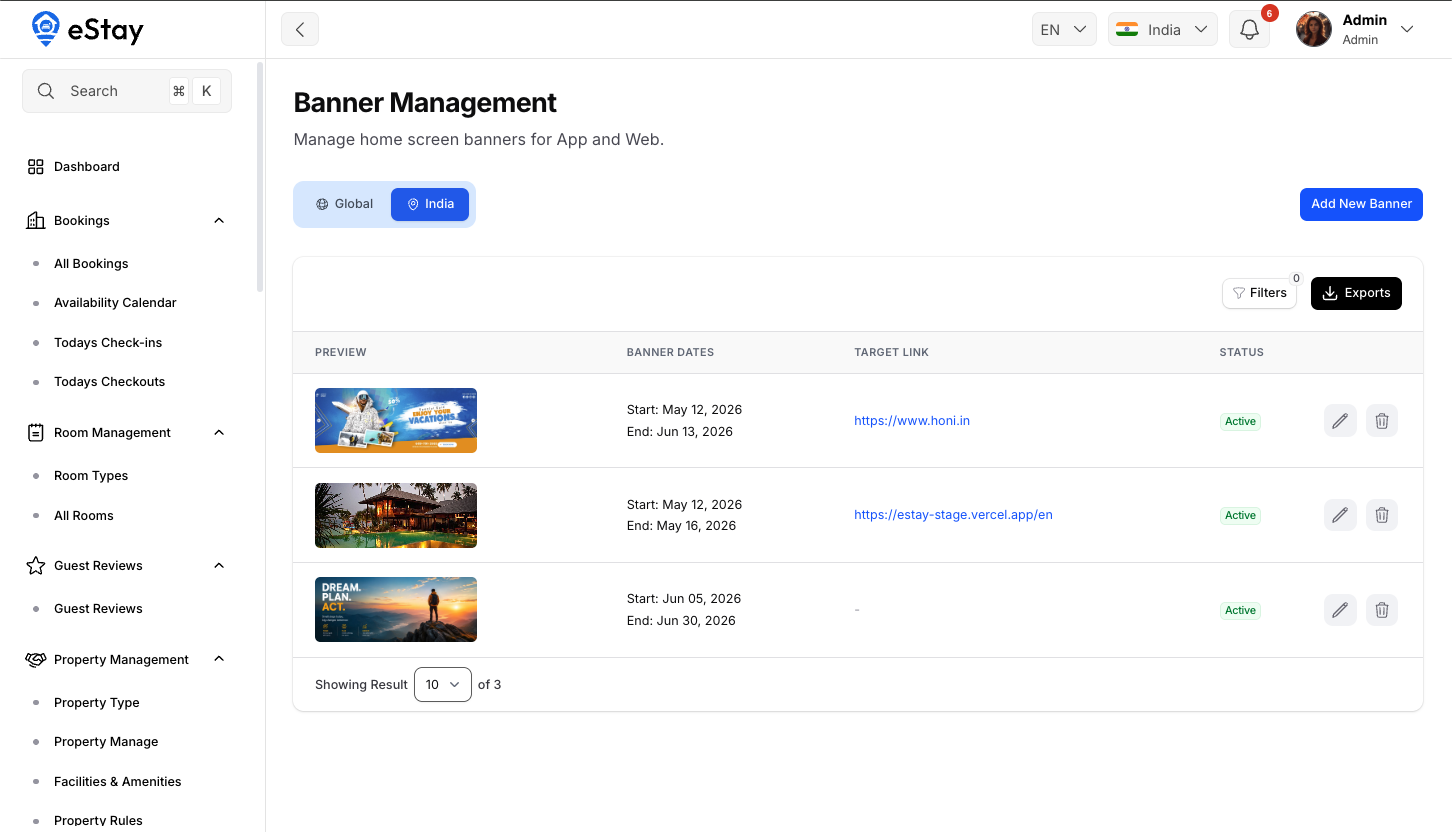
Managing Banners
| Field | Description |
|---|---|
| Banner Image | Upload the banner image (recommended: 1200×400px) |
| Link / URL | Optional URL to open when the banner is tapped |
| Display Order | Controls the order banners appear in the carousel |
| Status | Enable or disable the banner |
Steps to add a banner
- Go to Banners in the sidebar.
- Click Add Banner.
- Upload a banner image.
- Set an optional link URL.
- Set the display order.
- Toggle status to Active.
- Click Save.
Banners are displayed as a horizontal carousel. Lower order numbers appear first.
FAQs
FAQs are organized into topics (categories). Each topic contains one or more question-and-answer pairs.
Navigate to the FAQs section in the admin sidebar.
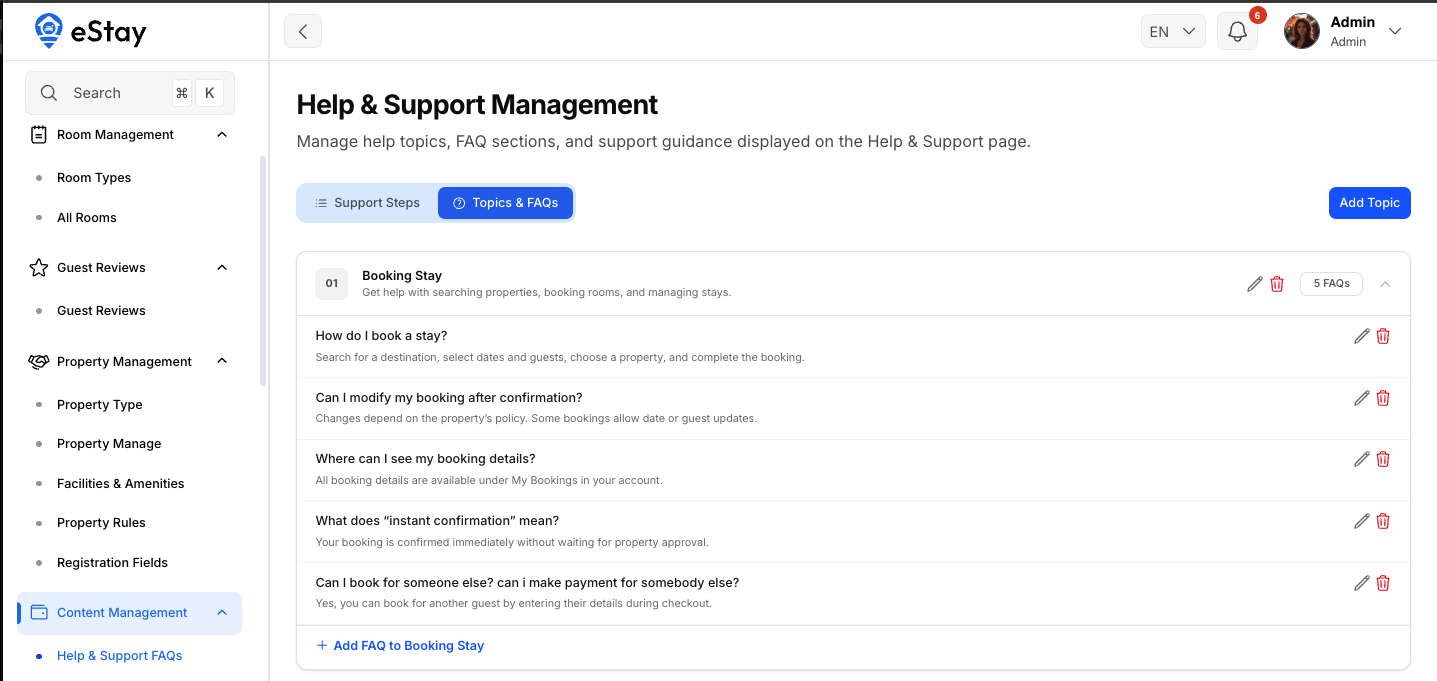
Managing FAQ Topics
- Go to FAQs in the sidebar.
- Click Add Topic to create a new category (e.g., "Booking", "Payments").
- Enter the topic name and save.
Managing FAQ Items
- Open an existing topic.
- Click Add FAQ.
- Enter the Question and Answer.
- Toggle status to Active.
- Click Save.
Disabled FAQ items are hidden from the app and web frontend. Topics with no active FAQs are also hidden.
Blogs
The blog section lets you publish articles and news for your users.
Navigate to the Blogs section in the admin sidebar.
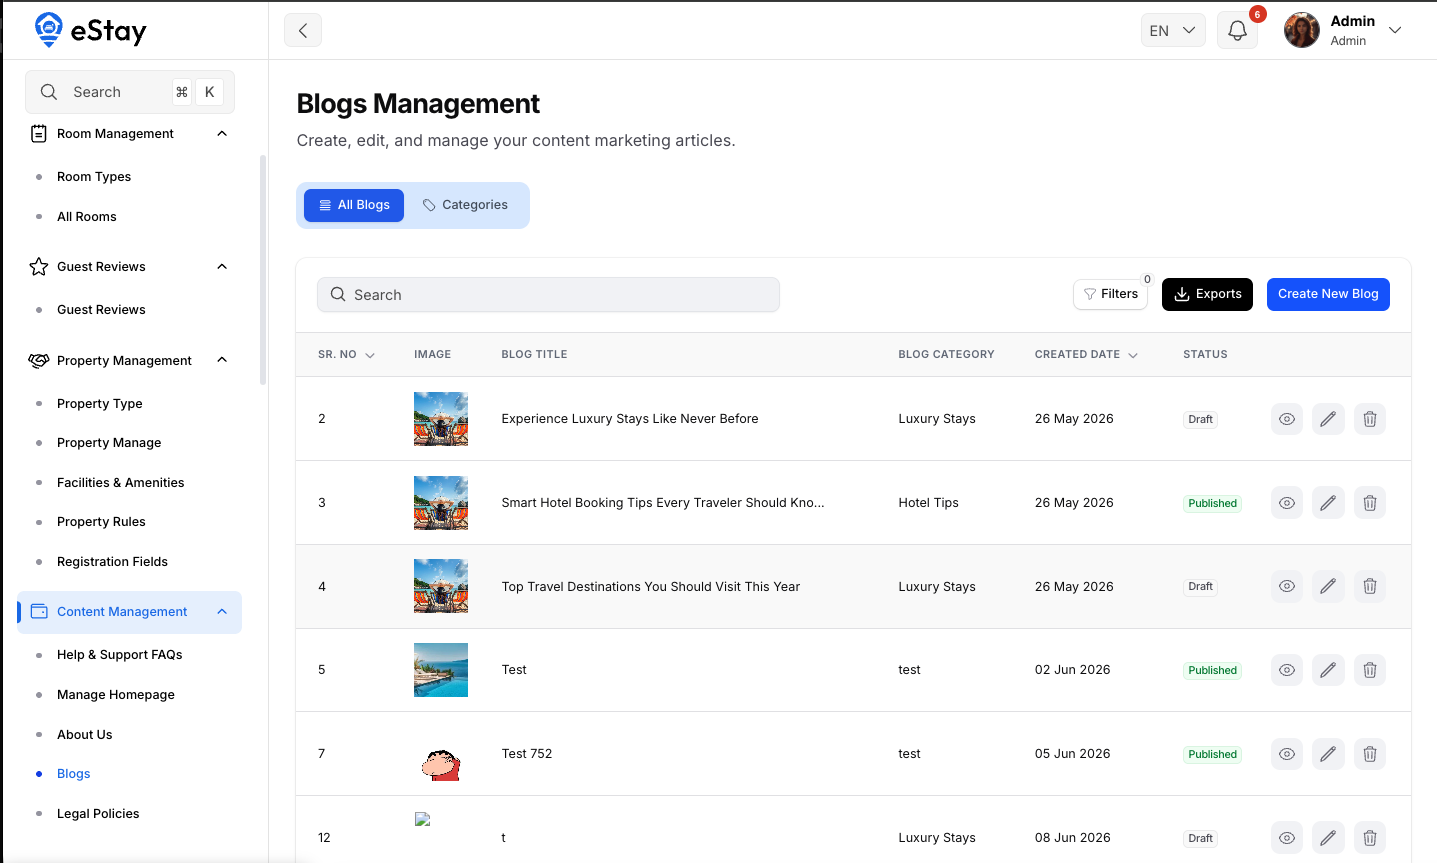
Blog Categories
Before creating blog posts, set up at least one category.
- Go to Blogs → Categories.
- Click Add Category.
- Enter the category name.
- Click Save.
Creating a Blog Post
- Go to Blogs and click Add Blog.
- Select a Category.
- Enter the blog Title.
- Upload a Thumbnail / Cover Image.
- Write the content using the rich text editor.
- Set the status to Published or Draft.
- Click Save.
| Field | Description |
|---|---|
| Title | Blog post headline |
| Category | Assign to a blog category |
| Thumbnail | Cover image shown in listing |
| Content | Full blog body (supports rich text / HTML) |
| Status | Published (visible) or Draft (hidden) |
How It Works
The How It Works section explains your platform's process to new users. It is displayed as a step-by-step guide in the app and on the web.
Navigate to the How It Works section in the admin sidebar.
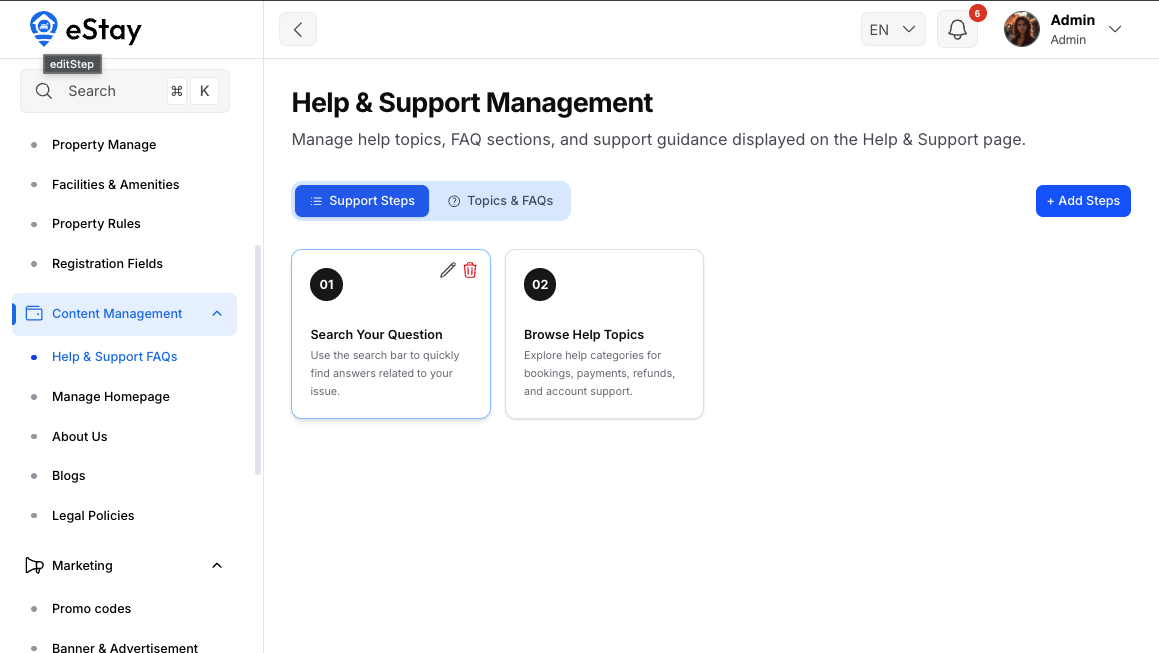
Managing Steps
- Go to Help and Supports FAQs in the sidebar, under Support Steps:
- Click Add Step.
- Enter the Title and Description for the step.
- Upload or select an Icon.
- Set the Display Order.
- Click Save.
| Field | Description |
|---|---|
| Icon | Visual icon representing the step |
| Title | Short step heading |
| Description | Brief explanation of the step |
| Display Order | Controls the sequence of steps shown |
Steps are displayed in ascending order. Keep descriptions concise — one or two sentences per step works best.